
The fastest way to darken patio slabs temporarily is to wet them down and apply a mineral oil wipe or a wet-look enhancer spray, which works on concrete, brick, and most natural stone within minutes. What Is Oxygen Bleach? (sodium percarbonate overview and caveats) notes that Oxygen‑bleach (sodium percarbonate) is an effective alkaline oxidizer for biological stains and organic soiling on many masonry surfaces and is safer for some substrates than sodium hypochlorite; but alkaline residues (soda ash) can affect carbonate stones and manufacturers caution testing on calcareous stone. For a longer-lasting result, a penetrating sealer (silane-siloxane or impregnating sealer) deepens color for 3 to 5 years without changing the surface texture, and for concrete specifically, an acid stain or water-based dye stain gives a permanent color shift. The right approach depends on your slab material, how porous it is, and whether you want something reversible (important for renters) or a full restoration.
How to Darken Patio Slabs: Temporary and Permanent Methods

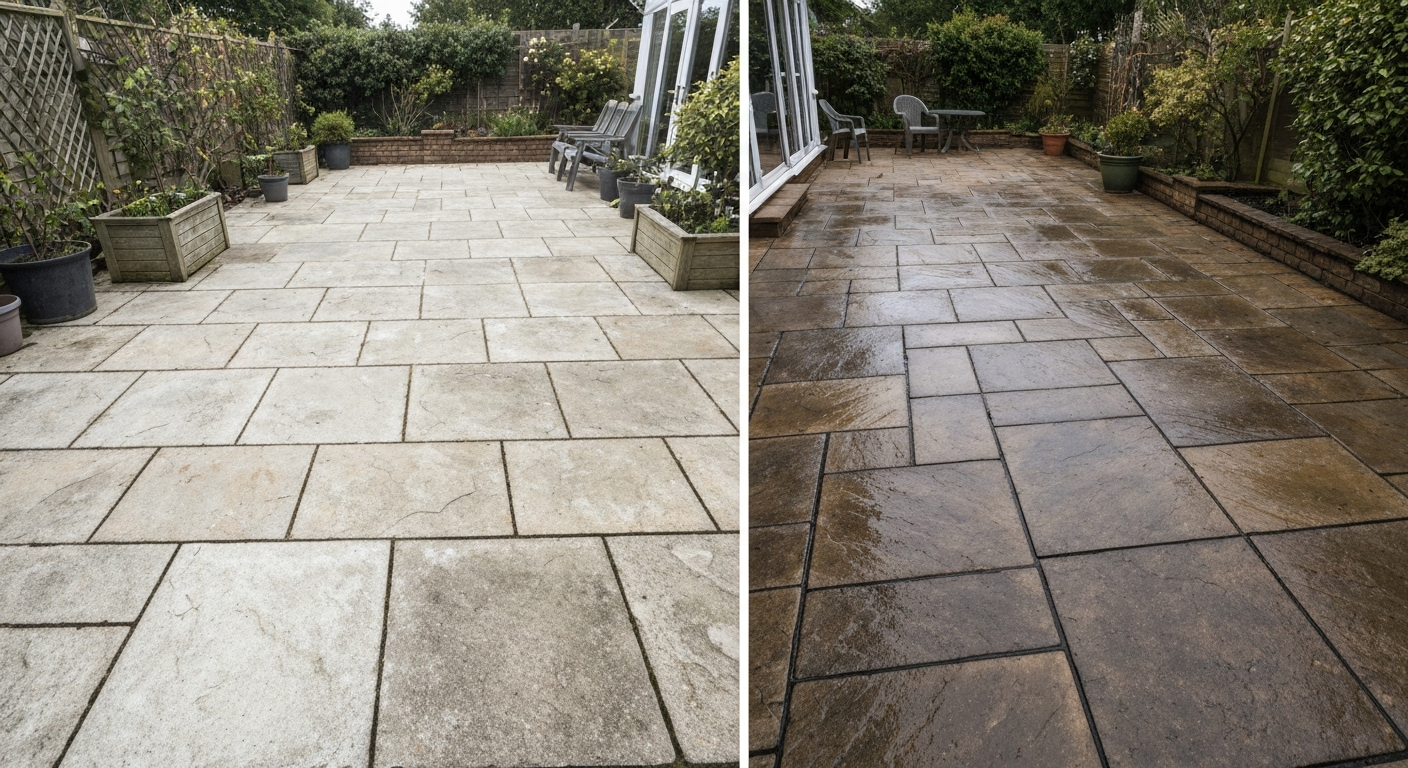
Best options at a glance, by material and goal
| Slab Type | Temporary | Semi-Permanent (1–5 yrs) | Permanent / Long-Term |
|---|---|---|---|
| Concrete pavers/slabs | Wet-look enhancer spray | Penetrating silane-siloxane sealer | Acid stain or water-based dye + sealer |
| Brick | Mineral oil wipe | Impregnating sealer | Pigmented masonry sealer |
| Natural stone (sandstone, granite, slate) | Wet-look enhancer spray | Penetrating stone sealer | Water-based dye stain + sealer |
| Travertine / Limestone | Water or mineral oil test | pH-neutral penetrating sealer ONLY | No acid stain — use water-based dye with caution |
| Flagstone (mixed mineral) | Wet-look enhancer spray | Penetrating impregnating sealer | Water-based dye + sealer (test patch essential) |
| Clay pavers / Engineering brick | Mineral oil wipe | Impregnating sealer | Pigmented masonry sealer |
The single most important rule you'll see repeated throughout this article: never use acid-based products (muriatic acid, acid stains, strong acid efflorescence removers) on calcareous stones, travertine, limestone, and marble. They will etch and pit the surface permanently. Everything else depends on how well you prep, and prep starts with knowing exactly what you're working with.
Know your slabs before you touch a product
Concrete slabs and concrete pavers are man-made from cement, aggregate, and water. They're fairly porous, hold stains easily, and respond well to acid stains, dye stains, and most sealers. Brick (both clay and concrete-based) is fired or pressed, generally more absorbent than dense stone, and takes impregnating sealers and pigmented coatings well. Natural stone pavers like sandstone, slate, and granite vary wildly, sandstone is very porous, granite is dense and barely absorbs anything. Flagstone is a catch-all term for flat, naturally split stone; it could be limestone (calcareous, acid-sensitive) or quartzite (acid-tolerant), so identification matters. Travertine and limestone are calcareous stones, they react with any acid, including mild ones, so they need special handling at every stage.
Quick porosity test you can do right now
Drip a few drops of plain water onto a clean, dry section of your slab. If it soaks in within 30 seconds, the surface is porous and will accept penetrating sealers and stains readily. If it beads up and sits for a minute or more, either there's an existing sealer on the slab or the stone is naturally dense (common with granite and some engineered pavers). A sealed or dense surface needs to be stripped or etched lightly before any new darkening product will bond, otherwise you'll get patchy, peeling results.
Checking the condition of existing sealers
If you see cloudy, white, or peeling patches on the slab surface, there's a failing film-forming sealer (acrylic or urethane) already present. You'll need to strip it fully before applying anything new, applying a darkening product over a failing sealer just traps the problem and the new coat will peel too. A chemical stripper rated for acrylic sealers or a light mechanical grind (for concrete) is the fix here.
Why slabs fade and lighten over time
UV exposure is the biggest culprit. Sunlight breaks down pigment in concrete and the natural iron oxides in clay brick and stone over years, washing out the rich dark tones you originally had. But there are several other mechanisms worth knowing about because they affect which darkening method will actually work.
- Wear and surface abrasion: Foot traffic, furniture dragging, and grit grinding away the surface layer exposes fresh, lighter mineral below. No sealer fixes mechanical wear — you need to address the surface condition first.
- Efflorescence: Soluble salts migrate through masonry with moisture and crystallize on the surface as white powdery deposits. Water carries salts up, then evaporates and leaves them behind. A darkening sealer applied over active efflorescence will fail within weeks.
- Biological growth: Moss, algae, lichen, and mold leave grey-green or black discoloration. When removed, the surface beneath often looks lighter than surrounding areas because the biological material was masking the stone.
- Weathering and leaching: Rainwater leaches calcium and other minerals from the surface layer of concrete and calcareous stone, gradually lightening and softening it.
- Aggressive cleaning: Using very high pressure, strong bleach concentrations, or acid washes too frequently strips surface material and opens pores, accelerating the lightening cycle.
- Loss of previous sealer: A penetrating sealer that has expired (typically every 3–5 years) no longer darkens the surface or protects pigment from UV, so colors appear flat and washed out.
Safety, PPE, and why a test patch is non-negotiable
I'll be direct: some of the products involved in darkening and cleaning patios can seriously injure you or permanently damage your slabs if used carelessly. Muriatic acid (hydrochloric acid) is the most hazardous common option. Its IDLH (immediately dangerous to life and health) concentration is around 50 ppm, and even brief splashes cause chemical burns. Bleach (sodium hypochlorite at 5–9%) is much lower risk but still irritates eyes and airways and should never be mixed with ammonia-based cleaners. Penetrating sealers and stains are generally safer but still require ventilation and skin protection.
PPE by product type
| Product | Gloves | Eye Protection | Respiratory | Other |
|---|---|---|---|---|
| Muriatic acid / acid cleaners | Neoprene or butyl rubber | Chemical splash goggles + full face shield | NIOSH acid-gas respirator if indoors or poorly ventilated | Acid-resistant apron; work outdoors always |
| Sodium hypochlorite (bleach) | Nitrile or rubber | Safety glasses | Not usually needed outdoors; N95 in enclosed spaces | Keep diluted; never mix with ammonia |
| Penetrating sealers / stains | Nitrile disposable | Safety glasses | Half-mask respirator with organic vapor cartridges for solvent-based products | Keep away from plants; solvent-based are flammable |
| Oxygen bleach (sodium percarbonate) | Nitrile | Safety glasses | Generally not needed outdoors | pH neutral rinse recommended |
| Wet-look enhancer sprays | Nitrile | Safety glasses | Organic vapor cartridge if solvent-based | Check product TDS for flammability |
A test patch is not optional, it's the difference between a successful result and an irreversible mistake. Patio slabs vary enormously even within the same material category. A concrete paver from one manufacturer can react completely differently to a stain than one from another. Natural stone from different quarries has different mineral compositions. Even the same slab can have inconsistent porosity across its surface. Testing first costs you nothing except 24 hours of patience.
How to run a proper test patch
- Choose a low-visibility area: under a planter, in a corner behind furniture, or on a spare slab if you have one. Avoid a central, high-traffic spot.
- Clean the test area the same way you'll clean the whole patio — if you plan to pressure-wash, do that first on the test patch and let it dry fully (at least 24 hours for concrete, 48 hours for dense stone).
- Apply the darkening product to a section roughly 30 x 30 cm (about 12 x 12 in). Use the same technique, coverage rate, and number of coats you'll use on the full job.
- Wait the full cure or dwell time listed on the product label before evaluating. For sealers this is often 24–48 hours; for stains it may be 4–8 hours. Don't judge it while it's still wet.
- Evaluate: Does the color look even? Is it darker than you wanted or not dark enough? Does it look patchy? Is there any whitening, cloudiness, or lifting? Check for slip by wetting the area and walking on it.
- If the test patch looks good, proceed with the full application. If there's a problem — uneven color, cloudiness, no penetration — stop and diagnose before going further.
Preparing the area before any treatment
Good prep is what separates a result that lasts from one that fails in a season. Move all furniture, pots, and decorations off the patio completely, not just shifted to one side. Wet-look enhancers and sealers will bond to anything they contact, including the feet of your garden chairs. Cover the base of adjacent walls, raised beds, and any plants directly bordering the patio with plastic sheeting. Most sealers and stains are harmful to plants, and even 'natural' products like mineral oil can disrupt soil biology if they pool around roots.
Sweep off all loose debris, leaves, grit, and any sand that has accumulated on the surface. Pay attention to joints between pavers, remove any loose material but try to preserve the jointing sand if it's intact (more on this below). If you have polymeric sand in the joints, note that before pressure-washing, since that will change your technique.
Clean first, darken second, always
Applying any darkening product to a dirty, stained, or efflorescence-covered slab is one of the most common mistakes I see. Sealers and stains bond to the slab surface, so whatever is sitting on that surface gets sealed in, grease stains, algae residue, salt deposits. These create uneven absorption, patchy color, and dramatically shortened product life. The cleaning workflow below applies to all materials; specific chemical choices vary by slab type. For step-by-step instructions on preparing and cleaning paver patios before sealing, see our guide on how to clean pavers patio.
Cleaning workflow overview
- Remove biological growth (moss, algae, lichen) first. For concrete and brick, a diluted bleach solution (about half a cup of bleach per gallon of water, per CDC guidance) applied and left for 15–20 minutes, then scrubbed and rinsed, is effective on hard non-porous surfaces. For travertine and limestone, use an oxygen bleach (sodium percarbonate) solution instead — bleach won't etch calcareous stone, but strong concentrations can affect grout and leave residue, so oxygen bleach is a safer choice on these materials.
- Address efflorescence. White powdery deposits on concrete and brick can be removed with a commercial efflorescence remover or a diluted phosphoric-acid cleaner (NOT on calcareous stone). Products like heavy-duty concrete cleaners (diluted 1:6 to 1:8 depending on the substrate, per manufacturer guidance) dissolve mineral salts. Scrub with a stiff nylon brush, rinse thoroughly. For travertine or limestone, use only a pH-neutral cleaner and mechanical scrubbing.
- Treat rust stains. For most masonry, a phosphoric-acid-based rust cleaner or an oxalic acid poultice works well. A poultice (powder mixed to a paste, applied to the stain, covered with plastic, and left for 24 hours) limits chemical contact and increases effectiveness compared to a bulk wash. On calcareous stones, test first — oxalic acid can leach calcium from travertine and marble, so minimal contact time and thorough rinsing are critical.
- Degrease oil or grease spots with a pH-neutral degreaser or a poultice of baking soda and dish soap left for an hour before scrubbing.
- Final rinse the entire surface thoroughly and allow to dry completely before any darkening treatment. Minimum 24 hours for concrete pavers; 48 hours for dense or thick stone in overcast conditions.
Pressure-washing: when to use it and how to avoid damage
Pressure-washing is the most efficient way to clean a patio before darkening, but the wrong technique will damage joints, erode mortar, pit brick faces, and strip polymeric sand from between pavers. The settings that matter most are pressure (psi), nozzle angle, and stand-off distance, and these vary by material.
| Material | Recommended Pressure | Nozzle Angle | Stand-off Distance | Key Caution |
|---|---|---|---|---|
| Concrete pavers / slabs | 1,400–1,800 psi | 30° | 45–60 cm (18–24 in) | Use surface-cleaner attachment where possible; avoid blasting joints directly |
| Brick | 500–1,200 psi | 25–40° | 30–45 cm (12–18 in) | Never use 0° or 15° tips; pressures above 1,500 psi erode mortar and pit brick faces |
| Natural stone (slate, sandstone) | 800–1,200 psi | 25–40° | 30–45 cm (12–18 in) | Sandstone is soft — start at the low end and increase only if needed |
| Travertine / Limestone | 500–800 psi | 40° | 45–60 cm (18–24 in) | Low pressure only; avoid sustained contact on filled travertine voids |
| Flagstone | 800–1,200 psi | 30–40° | 30–45 cm (12–18 in) | Identify stone type first — limestone flagstone needs low pressure as above |
If your pavers have polymeric sand in the joints, pressure-washing will displace it. Work at the lower end of the pressure range, hold the wand at an angle parallel to the joint rather than directly over it, and accept that you'll likely need to re-sand after cleaning. If you're planning to re-sand anyway (which is good practice before sealing), pressure-wash more freely then top up with fresh polymeric sand once the surface is clean and dry. Standard kiln-dried jointing sand will also wash out at higher pressures, so the same care applies.
If you don't have a pressure washer, a stiff deck brush, a garden hose with a jet nozzle, and the appropriate cleaning solution handles most jobs adequately, it just takes more physical effort. For a simple, eco-friendly method using household vinegar, see our guide on how to clean patio pavers with vinegar. I've cleaned a 40 sq metre patio entirely by hand before, and while it took most of a day, the result before sealing was just as clean as a machine job. For techniques on cleaning pavers while preserving existing jointing sand, see how to clean patio pavers without removing sand. Renters especially shouldn't feel locked out of a good result here.
Temporary darkening: quick wins that last days to weeks
If you want to see what your patio would look like darker before committing to a sealer, or if you're a renter who can't make permanent changes, these options are genuinely useful. They're also good for a quick refresh before a garden event.
- Water: Simply wetting the surface shows you the 'wet look' baseline. It's free, non-committal, and useful as a visual test. Obviously it dries off within an hour.
- Mineral oil: Apply a thin coat with a lint-free cloth, buff lightly, and let it soak in. It deepens color noticeably on concrete, sandstone, and brick. It lasts a few weeks outdoors before weathering away. It's food-safe, pet-safe once dry, and fully reversible. Don't use it on travertine if the voids are filled with grout — oil can stain the filler.
- Wet-look enhancer sprays: These are usually a light acrylic or silicone emulsion in a spray can or pump bottle. They give a darker, slightly glossy appearance and last 4–8 weeks outdoors with regular foot traffic. They're a stepping stone to understanding what a full sealer application would look like.
Semi-permanent darkening: penetrating sealers (3–5 years)
Penetrating or impregnating sealers are my go-to recommendation for most homeowners. They soak into the pore structure of the slab, repel water and oil, and deepen the natural color of the stone or concrete without forming a surface film. For a step-by-step guide on how to restore color to patio pavers, see the detailed restoration guide. Because there's no film, there's nothing to peel, cloud, or trap moisture underneath. They don't make the surface look plastic or artificial, they don't significantly reduce slip resistance (though always test when wet), and they're breathable, which matters for slabs laid on sand or over a sub-base that sees moisture movement.
Types of penetrating sealer and which to choose
| Sealer Type | Best For | Color Effect | Durability | Notes |
|---|---|---|---|---|
| Silane-siloxane blend | Concrete, brick, pavers | Slight darkening, near-natural finish | 3–5 years | Best breathability; good for damp or frost-prone climates |
| Impregnating silicone/fluoropolymer | Natural stone, flagstone | Moderate darkening, enhances natural tone | 3–5 years | Good chemical resistance; check compatibility with calcareous stone |
| Lithium silicate densifier | Concrete only | Minimal color change; strengthens surface | 5+ years (bonds permanently) | Not a color enhancer — use if surface is soft or dusting |
| Color-enhancing impregnating sealer | All stone, brick, pavers | Noticeably deeper, richer color | 2–4 years | Specifically formulated to darken; test for uniformity on variable stone |
Application is straightforward: clean and fully dry surface, apply sealer with a low-pressure pump sprayer or roller in a thin, even coat, work in sections of about 5–10 sq metres, allow to absorb for 5–10 minutes (check the product label), then apply a second thin coat if the first has fully absorbed. Wipe off any excess before it dries, pooled sealer dries milky and is very difficult to remove. Coverage is typically 5–10 sq metres per litre for porous surfaces, up to 15 sq metres for dense stone.
Film-forming sealers: gloss, depth, and the trade-offs
Acrylic and polyurethane topical sealers form a film on top of the slab and give the strongest wet-look darkening effect. For step-by-step tips on achieving and maintaining that glossy, wet-look finish, see our guide on how to make patio pavers shine. Coverage is typically 9–37 sq metres per litre depending on texture and product. They look great initially and offer good stain resistance. The downsides are real though: film-forming sealers can become slippery when wet (add an anti-slip additive to the sealer for outdoor use), they reduce breathability and can trap moisture if applied to slabs that aren't fully cured or dry, they will eventually peel or flake and will need stripping before reapplication, and they give an artificial sheen that not everyone likes on natural stone. On travertine and limestone, breathability is especially important, a non-breathable film sealer over calcareous stone in a wet climate is asking for delamination and spalling.
Permanent darkening: stains and color hardeners for concrete
Concrete stains permanently change the color of concrete by reacting with or penetrating deep into the slab. They don't work on natural stone or brick in the same way. There are two main types.
Acid stains (reactive stains)
Traditional acid stains contain hydrochloric acid and metallic salts that react chemically with the lime and calcium in concrete to produce permanent, variegated color. The result looks organic and mottled rather than painted, it's one of the best-looking concrete finishes available. The color deepens and becomes permanent once the reaction occurs and the surface is neutralized and sealed. Results depend heavily on the concrete's chemistry, porosity, and surface history, which is exactly why the test patch matters. A 10-year-old concrete slab and a brand-new one will stain differently even with the same product. Acid stains require full PPE (see the table above), outdoor use or strong ventilation, and a baking-soda-and-water neutralization step before rinsing and sealing. They cannot be used on travertine, limestone, or any calcareous stone.
Water-based dye stains
Water-based dye stains penetrate and color concrete pores without a chemical reaction, so they give more uniform, controllable color than acid stains. The color range is broader and application is easier. The downside is they're more susceptible to UV fade and surface wear without a good sealer on top. A quality penetrating sealer or film-forming sealer applied after the stain is cured protects the color significantly. Water-based stains can also be used cautiously on some natural stones, but test first, on travertine, stick to pH-neutral formulations and apply very sparingly, as dyes can bleed unevenly into the natural voids.
Darkening jointing sand and refreshing paver joints
Faded, grey-looking jointing sand between pavers draws the eye and makes the whole patio look washed out, even if the paver surfaces themselves look decent. Refreshing the joints with fresh polymeric sand (which comes in brown, tan, grey, and charcoal options) can visually darken the overall patio appearance significantly without touching the pavers themselves. If your current jointing sand is loose, washed out, or cracked, sweep it out, clean the joints, and apply new polymeric sand per the manufacturer's instructions, compact it, mist with water to activate the polymer binders, and allow to set. This is also a good time to re-sand before sealing, which is best practice for paver maintenance anyway.
Step-by-step application for penetrating sealer (the most common job)
- Complete all cleaning steps and allow the surface to dry fully: 24 hours minimum for concrete in warm weather, 48 hours for dense stone or in cooler, overcast conditions.
- Check weather: do not apply sealers if rain is forecast within 24 hours, if temperatures are below 5°C (41°F) or above 35°C (95°F), or in direct hot sun (solvents evaporate too fast, causing streaks).
- Put on nitrile gloves and safety glasses. If using a solvent-based sealer, add an organic vapor respirator.
- Pour sealer into a pump sprayer (for large areas) or a tray with a short-nap roller (4–6 mm nap). Don't use a foam roller — it creates bubbles.
- Apply the first coat in a thin, even pass. Work in manageable sections of about 5–10 sq metres. Don't let the sealer puddle.
- Allow to absorb for 5–10 minutes. If the sealer is still visibly wet on the surface after 10 minutes, the pores are saturated — wipe up the excess with a clean cloth before it dries.
- Apply a second thin coat if needed, working perpendicular to the first. Most penetrating sealers need two coats on porous surfaces.
- Allow to cure fully before foot traffic: typically 4–6 hours for light foot traffic, 24–48 hours for full cure. Check the product label.
- Evaluate the result the following day on a dry surface. The color should be evenly deepened, with no whitish patches, streaks, or pooled areas.
Material-specific do's and don'ts
| Material | Do | Don't |
|---|---|---|
| Concrete pavers/slabs | Use acid stains, water-based stains, penetrating or film-forming sealers | Apply acid stain without neutralizing and sealing afterwards |
| Brick | Use impregnating sealer or pigmented masonry sealer; clean with diluted bleach for mold | Use high-pressure washing (over 1,500 psi) or zero-degree nozzles near mortar joints |
| Sandstone / Slate | Use color-enhancing penetrating sealer; test patch for porosity variation | Use strong acid cleaners — sandstone is acid-sensitive and soft |
| Travertine / Limestone | Use pH-neutral cleaners, oxygen bleach for bio growth, and dedicated stone sealers | Use muriatic acid, acid stains, strong efflorescence removers, or high bleach concentrations |
| Flagstone (quartzite/schist) | Use penetrating sealer; water-based stain with test patch | Assume it's acid-tolerant — identify stone type first |
| Flagstone (limestone type) | Treat as travertine/limestone above | Use any acid-based product whatsoever |
Renter-friendly and reversible options
If you're renting, the goal is improvement without commitment. Mineral oil wipe-overs and wet-look enhancer sprays are your friends, both wear off naturally without leaving permanent changes. A penetrating silane-siloxane sealer is also a reasonable option since it doesn't form a surface film and doesn't alter the stone permanently. It will wear off over 3–5 years. What to avoid as a renter: acid stains (permanent chemical reaction), pigmented film-forming sealers (can be very hard to remove), and color hardeners mixed into the surface. If your landlord is happy with the patio looking better, a penetrating sealer is usually a defensible improvement. When in doubt, stick to mineral oil or a wet-look spray and use the test-patch approach on a hidden spot first.
Troubleshooting common problems after darkening
- Patchy or uneven color after sealing: Usually caused by uneven porosity, residual contamination (grease, previous sealer), or applying the sealer too thickly in some areas. Strip the affected areas with sealer remover, re-clean, and re-apply in thinner coats.
- White haze or cloudiness on the surface: Sealer has dried before penetrating, or moisture was trapped underneath. Solvent-based sealer removers can often lift this on concrete. On natural stone, consult the sealer manufacturer's guidance before using solvents.
- Color faded back within a few months: Either the surface wasn't clean enough before application, the sealer was applied over a damp surface, or the product was too thin for the porosity level. Re-clean, dry fully, and apply a color-enhancing impregnating sealer with a higher solids content.
- Surface became slippery after sealing: Add an anti-slip grit additive to the next coat of sealer, or apply a matte-finish penetrating sealer rather than a film-forming one.
- Efflorescence reappeared under the sealer: Active water migration was not resolved before sealing. The sealer needs to be removed, the source of moisture investigated (drainage, sub-base saturation), and the efflorescence treated before re-sealing.
Maintenance to keep darkened slabs looking good
Penetrating sealers typically last 3–5 years before the color-deepening effect fades noticeably. Film-forming sealers last 1–3 years depending on traffic and UV exposure. Annual light cleaning with a pH-neutral cleaner and a stiff brush keeps biological growth and grime from building up and extends time between major re-sealing jobs. Avoid using strong bleach solutions routinely, they accelerate the breakdown of sealers and, on calcareous stone, slowly etch the surface. For general annual maintenance, a diluted oxygen bleach solution (sodium percarbonate) applied, scrubbed, and rinsed does the job with far less collateral damage. Re-sealing is a straightforward repeat of the original application process once the surface is clean and dry.
DIY vs. hiring a professional: cost and complexity
Most darkening work, cleaning, applying penetrating sealers, refreshing jointing sand, is well within DIY reach. You need basic equipment (stiff brush, pump sprayer or roller, pressure washer or hose), the ability to follow product instructions, and patience with drying times. The cost of a penetrating sealer for a typical 30–50 sq metre patio runs roughly 30–80 pounds or dollars in materials, depending on product and coverage rate. A professional application of the same sealer typically runs 200–500 for the same area, which reflects labour and the contractor's equipment and expertise rather than any fundamentally different product.
Where a professional genuinely earns their fee: acid staining large concrete areas (the neutralization, timing, and sealing process is unforgiving on big areas), stripping and re-sealing film-forming sealers that have failed badly, dealing with severe efflorescence linked to a drainage or structural problem, and working on high-value natural stone like polished travertine where a mistake is very expensive to fix. If you're uncertain about your stone type, have significant existing damage, or are working with a stone sealer that specifies professional application, the consultation cost is worth it.
When darkening alone isn't the answer
If your slabs are physically damaged, cracked, spalled, badly pitted, or have deep scratches through the surface, darkening will highlight those defects rather than hide them. Surface repairs (filling cracks with matching mortar or filler, grinding down raised edges) should come before any darkening or sealing work. Similarly, if your pavers are faded due to a combination of staining, biological growth, and lost sealer, you might find that a thorough clean alone restores a surprising amount of depth and color, which is worth checking before spending on stains or premium sealers. The broader process of making old slabs look genuinely new again goes beyond darkening alone and touches on all of these elements together.
FAQ
Quick answer: how can I darken patio slabs safely and effectively?
Decide between temporary darkening (water, mineral oil, wet-look enhancer) and longer-term options (penetrating sealers, pigmented sealers, concrete stains, color hardeners). Always test on a small inconspicuous area first. Clean and prep the surface to remove dirt, mold, grease, rust, and efflorescence using substrate-appropriate cleaners and low-pressure washing. For permanent color change use reactive acid stains for concrete or oxide/pigmented products for pavers/brick; for deepening color without changing it use penetrating or film-forming wet-look sealers. Follow PPE and safety guidance for chemical use and protect adjacent vegetation and metal fixtures.
Why do patio slabs lighten or lose color over time?
UV exposure, weathering, abrasion (foot/foot traffic and snow removal), efflorescence (salt migration), biological growth (moss/algae), staining and chemical leaching all reduce apparent color. Porous materials also collect dirt in surface pores and oxidize, which makes them appear paler. In pavers, joint sand washout exposes lighter base material; in calcareous stones (travertine/limestone) surface dissolution and salt movement can lighten and etch.
How should I prepare and clean different slab materials before darkening?
Start with dry, cool conditions and test a small patch. General steps: sweep/brush loose debris, pre-treat visible stains (grease, rust, mold), then clean. Use low-pressure power wash settings suitable to material (see material specifics). Rinse and let fully dry before applying any sealer or stain. For sensitive stone (travertine, limestone, marble) avoid acids and use pH-neutral stone cleaners. For concrete and pavers stronger alkaline cleaners or oxygen bleach can be used. Remove efflorescence with specialized removers or mild acid/Poultice only after testing.
Pressure-washing guidance — what pressures and techniques are safe by material?
Interlocking concrete pavers: ~1,400–1,800 psi with a 30° nozzle and 18–24 in (45–60 cm) distance is typical for heavy cleaning; use surface-cleaner attachments and avoid sand washout. Brick walls/pavers: keep 500–1,200 psi, wide‑fan tips (25–40°) at 12–18 in distance to avoid eroding mortar or pitting brick. Calcareous or soft stone (travertine, flagstone) require very low pressure or no pressure wash — use gentle brushing and pH-neutral cleaners. Always start low and increase only if needed; protect joints and edges.
What cleaners work for common problems: mold/mildew, grease, rust, efflorescence?
Mold/mildew: dilute household bleach (for hard non‑porous) or oxygen bleach (sodium percarbonate) for many masonry surfaces; rinse. Grease/oil: alkaline degreasers or concentrated trisodium phosphate (TSP) substitutes, followed by pressure rinse. Rust/iron stains: poultices with oxalic acid or chelating agents, or phosphate-based rust removers; test first and limit contact on calcareous stones. Efflorescence: remove salts mechanically and with specialized efflorescence removers; stop moisture source to prevent return. For all, use products formulated for masonry and test small areas.
Are vinegar or other household acids safe for cleaning patio slabs?
Avoid undiluted vinegar or strong acids on calcareous stones (travertine, limestone, marble) — they etch and dissolve carbonate minerals. Mild vinegar solutions can sometimes help light organic grime on durable concrete or brick but are generally less effective than oxygen bleach or masonry cleaners. For serious mineral deposits, use purpose-made efflorescence or rust removers and test first.
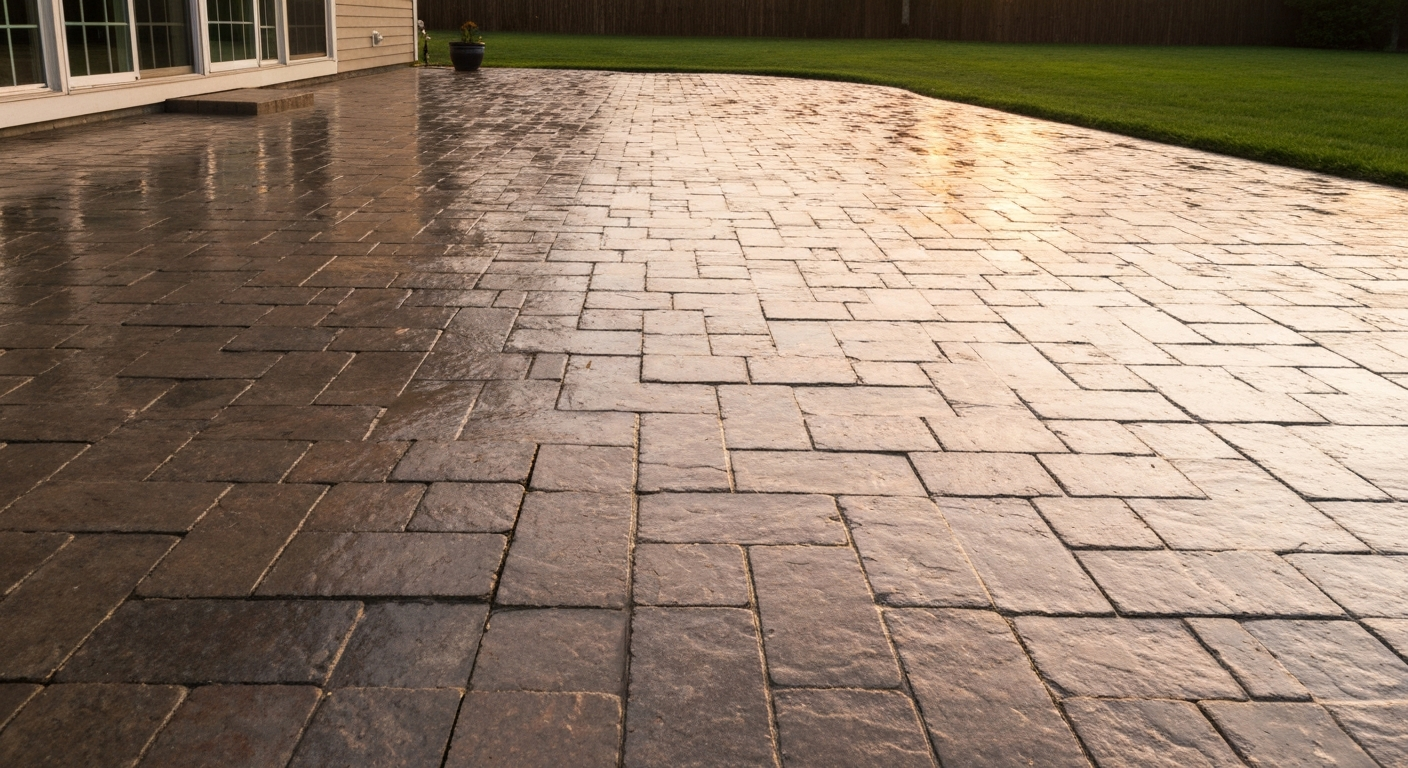
Learn how to make patio pavers shine: step-by-step cleaning, stain removal, color restoration, sealing tips.
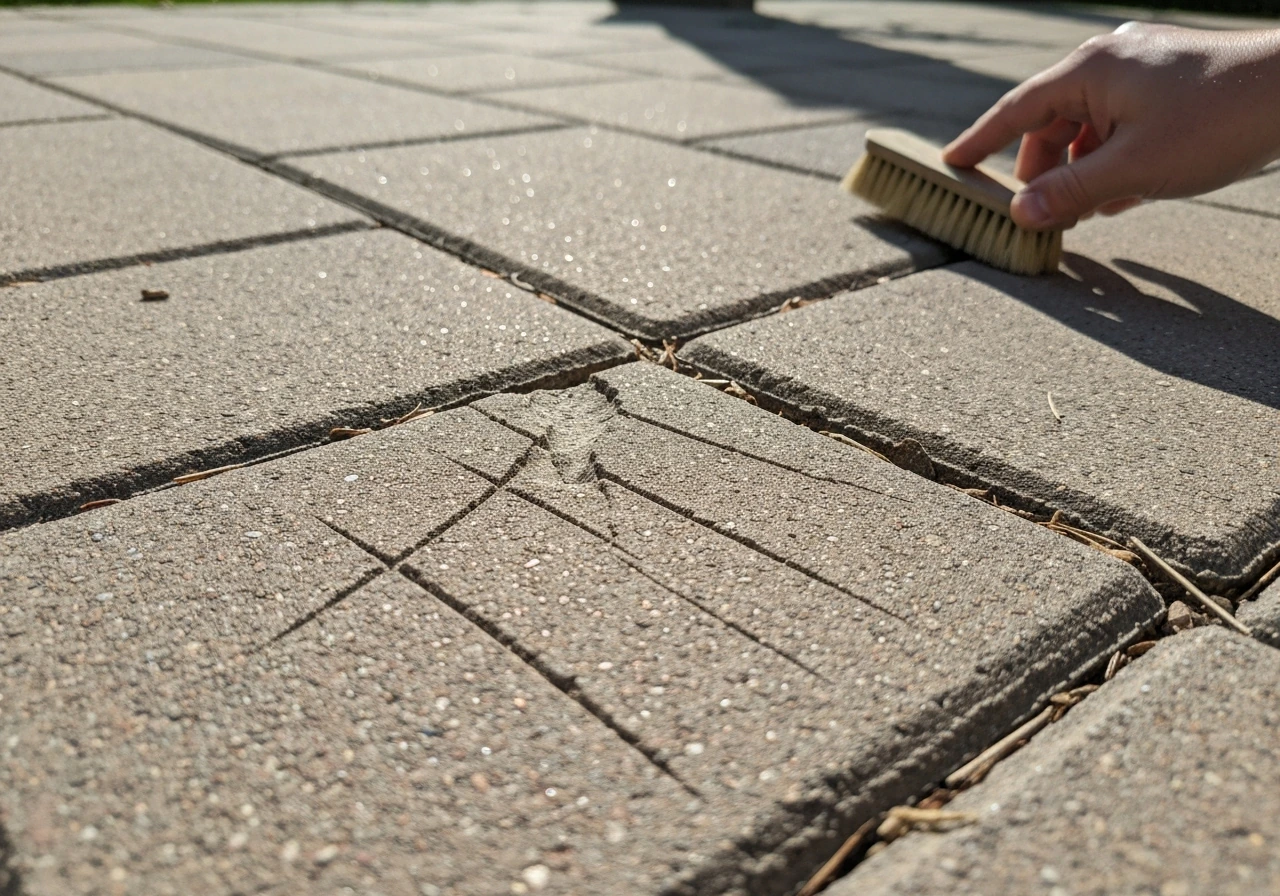
Step-by-step fixes for surface scuffs or gouges on concrete, brick, or natural patio pavers with safe methods and decisi
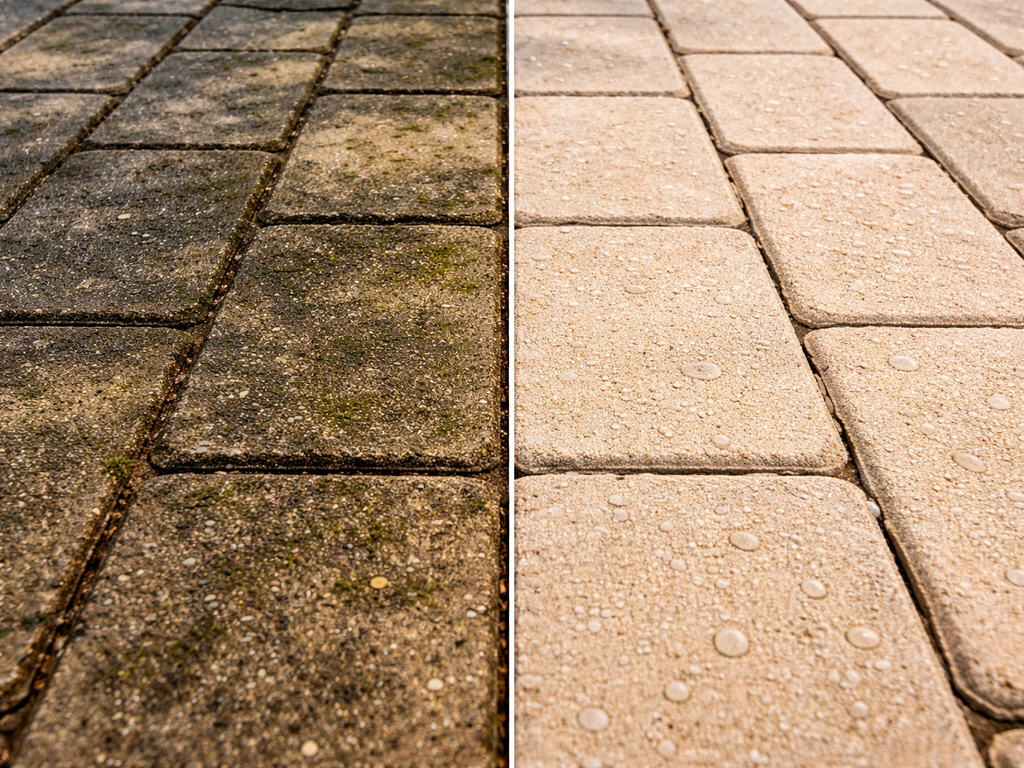
Safe, step-by-step vinegar method to clean concrete, brick or some stone pavers, plus when to avoid it and how to rinse