You can clean patio pavers thoroughly without washing out the joint sand, but it comes down to three things: low pressure, the right angle, and choosing a cleaning method that does the work chemically rather than mechanically. The sand in your joints is more vulnerable than most people realize, and a single pass with a pressure washer held too close or aimed straight down can undo what took days to install. The good news is that once you understand what type of sand is in your joints and how to protect it, most cleaning jobs are completely manageable with tools you already own.
How to Clean Patio Pavers Without Removing Sand

Dylan Hale
13 May 2026
Quick diagnosis: what kind of sand is in your joints?
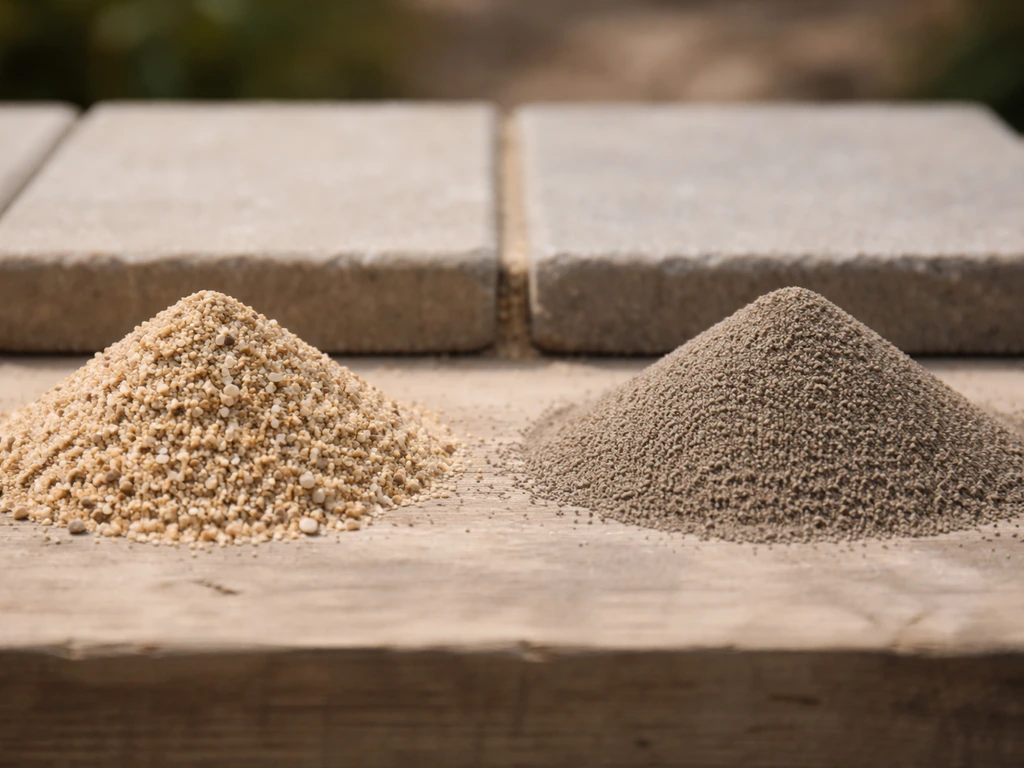
Before you pick up a hose or a scrub brush, it helps to know what you're working with. There are two main types of joint sand, and they respond very differently to water and cleaning products.
Regular kiln-dried or builder's sand is the loose stuff that gets swept into joints during installation. It holds pavers in place but has no binder, so it can wash out fairly easily with a strong stream of water. If you run a finger along your joints and the sand crumbles and shifts freely, that's what you've got.
Polymeric jointing sand is a different beast entirely. Products like QUIKRETE HardScapes Polymeric Jointing Sand, Techniseal SMARTSAND, and Sakrete PermaSand are polymer-modified sands that are activated with water after installation, then cure into a semi-rigid bond that locks the joints. When it's set correctly, polymeric sand resists washout much better than regular sand. You can usually tell by feel: run your finger along a joint and it should feel firm, almost like dried grout. It won't crumble or shift.
Why does this matter? Because polymeric sand that has already cured can handle more moisture than loose sand, but it's still not bulletproof. A direct high-pressure stream can chip it out. And if your polymeric sand is old, cracked, or was never fully activated, it behaves more like loose sand and needs to be treated as such. Either way, the safest cleaning approach keeps pressure low and angle oblique.
Safe cleaning options that won't disturb your joints
The golden rule here is: let your cleaning solution do the heavy lifting, not the water pressure. Chemical dwell time breaks down mold, stains, and grime so you need far less mechanical force to rinse it away. Here are your main options, from gentlest to strongest.
Dish soap and warm water
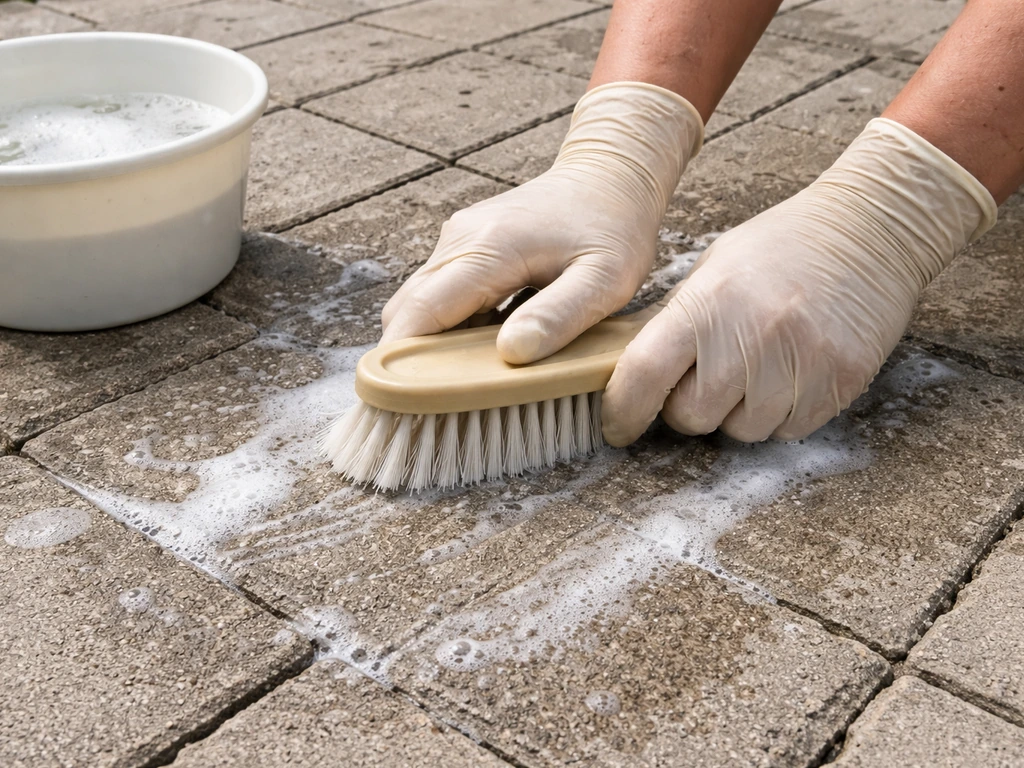
This is your starting point for lightly soiled pavers and fresh stains. A few squirts of dish soap in a bucket of warm water, scrubbed in with a stiff-bristle brush, handles surface grime, light grease, and general discoloration without any risk to joint sand. It's safe on every paver material including travertine, flagstone, and brick. Rinse with a low-pressure hose (more on technique below). I always start here before reaching for anything stronger.
White vinegar solution
White vinegar diluted with equal parts water is a solid all-purpose cleaner for organic staining, mild efflorescence, and general grime. It's a good choice if you have pets or kids, or if you're environmentally conscious about runoff. Apply it directly to dry pavers, let it sit for 15 to 20 minutes, then scrub and rinse gently. One honest caveat: don't use vinegar on natural stone like travertine, limestone, or marble. The acidity etches the surface. It's fine on concrete pavers and most brick.
Dilute bleach solution
For mold, mildew, algae, and heavy organic buildup, a bleach solution is highly effective. The standard safe ratio is 1 part bleach to 10 parts water for most cases. Unilock's own stain guidance recommends this exact ratio for mildew and algae in shaded areas. For tougher cases, you can go stronger, but I wouldn't exceed a 50/50 mix, and even then you'll want to rinse thoroughly afterward.
Always wear gloves and eye protection, keep kids and pets off the area until fully dry, and avoid letting bleach runoff into garden beds or storm drains. Bleach works on concrete pavers and brick. Use it cautiously on colored or dyed pavers as it can fade pigment. Avoid it entirely on unsealed natural stone.
Purpose-made paver cleaners
Products specifically formulated for pavers are worth the investment if you're dealing with a large area or persistent staining. They're pH-balanced for paver surfaces and often contain surfactants that lift staining without requiring aggressive rinsing. Follow the label dwell times carefully, typically 10 to 20 minutes.
Dealing with mold, mildew, and algae
Mold, mildew, and algae are among the most common complaints on shaded or damp patios, and they're also the scenario where people are most tempted to blast everything with a pressure washer. Resist that urge. Here's what actually works:
- Start dry: sweep the patio thoroughly to remove loose debris and surface buildup. This matters more than most people think because it lets your cleaning solution penetrate rather than fighting through leaf litter.
- Mix your solution: 1 part bleach to 10 parts water in a garden sprayer or bucket. For light mildew, you can try a 1:1 white vinegar and water mix first if you'd prefer to avoid bleach.
- Apply generously: soak the affected area and let the solution dwell for 15 to 20 minutes. You should see the green or black discoloration lighten visibly during this time.
- Scrub with a stiff brush: a long-handled deck brush works well here. Scrub in circular motions rather than straight lines to avoid directing debris into the joints.
- Rinse carefully (see the technique section below): use a low-pressure fan spray held at an angle. Don't point the nozzle straight down into the joints.
- Let dry fully before assessing: algae residue looks worse when wet. Give the pavers 24 hours to dry before deciding whether a second pass is needed.
For natural stone like flagstone or travertine, skip bleach and use a purpose-made stone-safe cleaner or plain warm soapy water. Bleach can discolor some natural stone and degrade unsealed surfaces over time. If you're looking at restorative options after cleaning, the related topic of how to restore color to patio pavers goes deeper on that front. If you want deeper color from the start, learn how to darken patio slabs without harming the joint sand.
Removing stains without washing out the sand
The key with stain removal is targeted, low-water treatment. You want to concentrate your chemical on the stain itself and scrub it out, rather than using water volume to flush it away. If your pavers are scratched rather than stained, use the right scratch-removal approach so you improve the surface without pulling sand from the joints how to get scratches out of patio pavers. Here's how to handle the most common types:
Grease and oil
Blot up as much fresh grease as possible first with an old cloth or paper towel. Then apply a generous squirt of undiluted dish soap directly onto the stain, let it sit for 10 minutes, and scrub with a stiff brush using minimal water. The idea is to emulsify the grease with soap, not flush it. Rinse with a low-pressure stream.
For older, set-in grease stains, a dedicated degreaser or baking soda paste (baking soda mixed to a thick paste with a small amount of dish soap and water) applied overnight gives better results. This low-water approach is specifically recommended because rinsing a greasy area with a lot of water pressure pushes the grease deeper into the paver surface and is far more likely to dislodge joint sand.
Rust stains
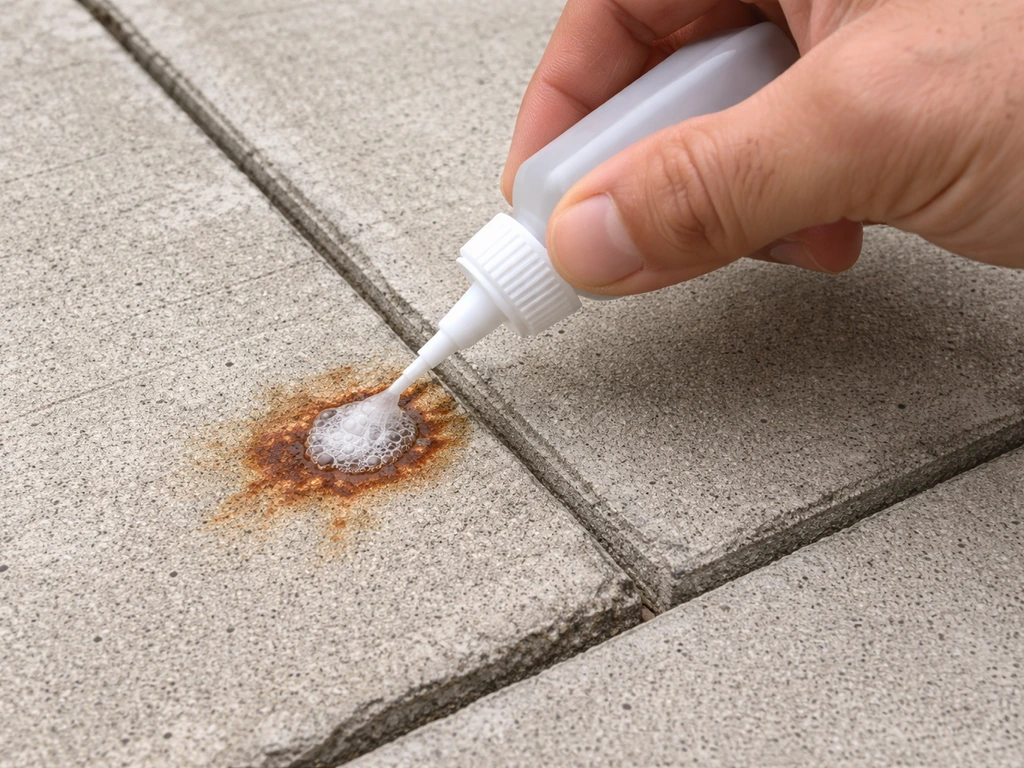
Rust stains come from metal furniture legs, fertilizer, or iron-rich water and they're some of the trickiest to remove without the right product. Oxalic acid-based rust removers (available at hardware stores) work well on concrete pavers. Apply to the dry stain, let it dwell per the product instructions (usually 5 to 10 minutes), scrub gently, and rinse carefully. Avoid using muriatic acid on pavers unless you're very experienced: it's effective but aggressive, and it can damage paver surfaces, eat at joint sand, and alter paver color if not diluted and neutralized correctly. On natural stone, use only stone-safe rust removers, never acid-based products.
Tannin stains (leaves, berries, wood)
Tannin staining from fallen leaves, fruit, or wooden furniture tends to be brown or dark orange. An oxygen-based cleaner (like OxiClean, mixed to label directions) applied directly to the stain and left for 20 to 30 minutes works well on concrete and brick pavers. For natural stone, warm soapy water and a lot of scrubbing is safer. Bleach solution can also lift tannin staining from concrete pavers effectively.
| Stain Type | Best Treatment | Safe For | Avoid On |
|---|---|---|---|
| Mold/Mildew/Algae | 1:10 bleach/water or vinegar solution | Concrete pavers, brick | Unsealed natural stone, travertine |
| Grease/Oil | Dish soap paste, low water, scrub | All paver types | Nothing specific, but use minimal water |
| Rust | Oxalic acid rust remover | Concrete pavers, brick | Natural stone (use stone-safe remover) |
| Tannins (leaves, berries) | Oxygen cleaner or bleach solution | Concrete pavers, brick | Natural stone (use warm soapy water) |
| General grime | Dish soap + warm water or vinegar | All paver types | Vinegar on travertine/limestone/marble |
Tools, techniques, and managing water safely
If you're using a pressure washer
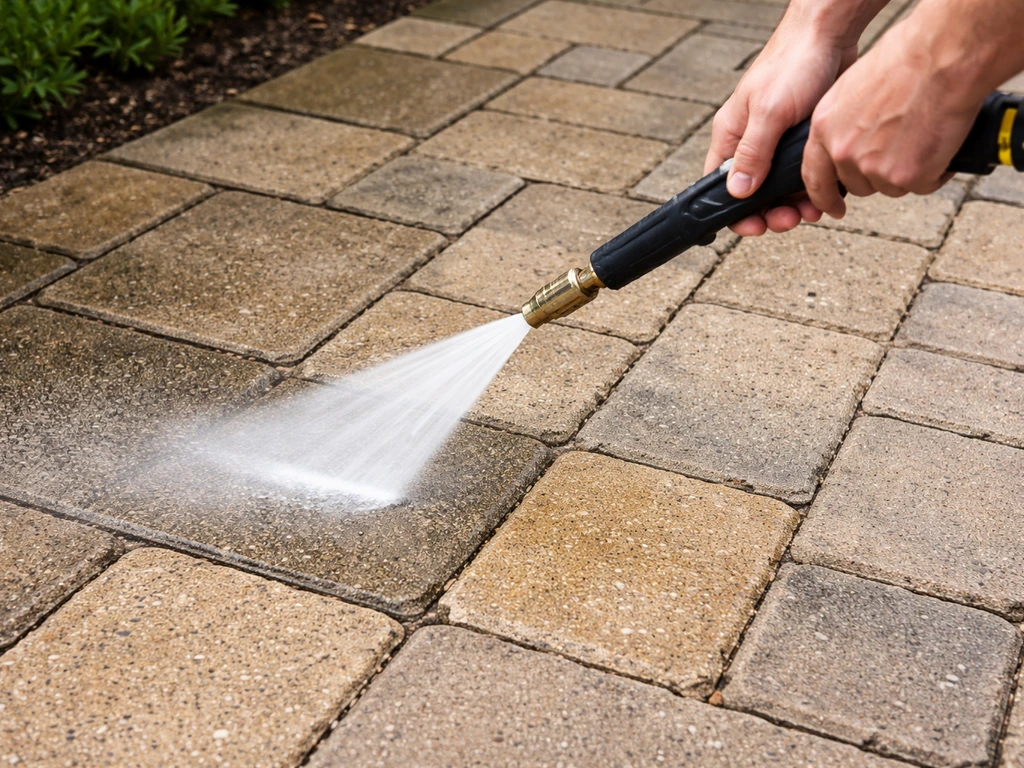
A pressure washer can be used safely on pavers with joint sand, but the technique matters enormously. The biggest mistakes are using too narrow a nozzle, holding the wand too close, and aiming straight down. Here's what actually protects the joints: If you want the full step-by-step process from prep to rinsing, see how to clean pavers patio for a complete guide.
- Use a wide fan-tip nozzle (25-degree or 40-degree), never a zero-degree pencil jet
- Hold the wand at knee height and keep the nozzle at least 12 inches from the surface
- Aim at no more than a 30 to 45-degree angle to the surface, never perpendicular
- Keep the pressure setting low, typically 1200 to 1500 PSI for most pavers; go lower (under 1000 PSI) for natural stone and older brick
- Move continuously in smooth strokes parallel to the paver joints rather than across them
- Avoid lingering in one spot
The angled approach is key. When you aim a jet at a joint from above at 90 degrees, you're driving water directly into the sand. At a low angle, you're shearing surface grime without excavating the joint. Even with perfect technique, you may lose the top 1 to 2 centimeters of jointing sand after pressure washing, which is normal and easy to address afterward.
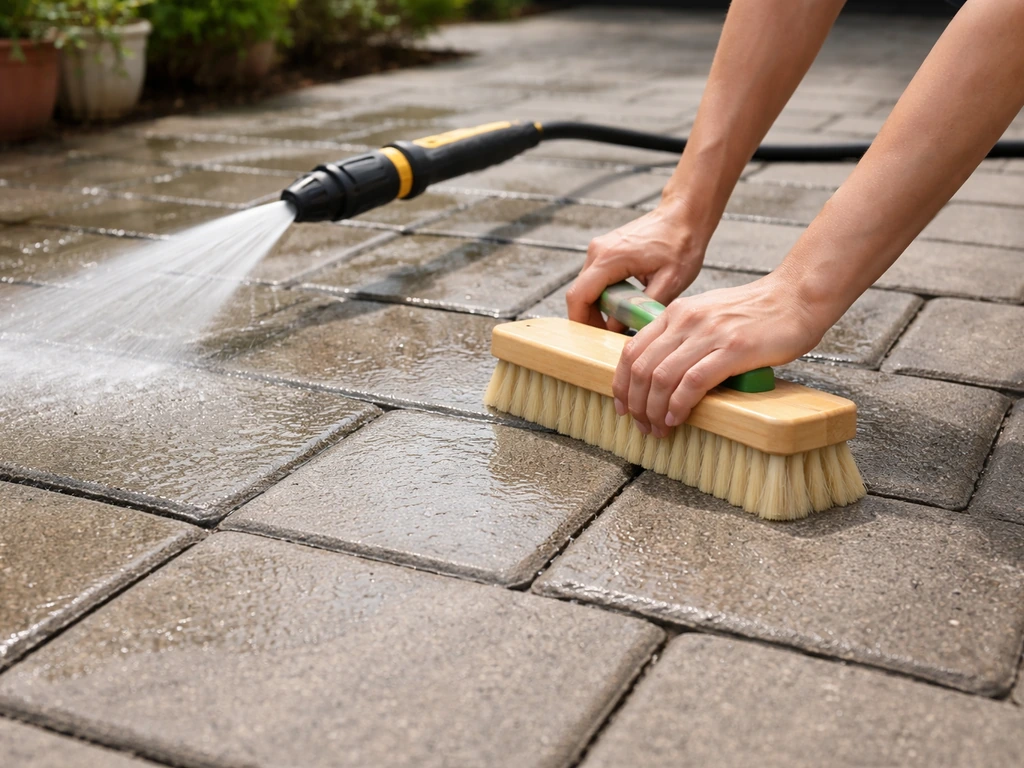
If you don't have a pressure washer (or prefer not to use one)
Honestly, for most patio cleaning jobs, you don't need one. A stiff-bristle deck brush, a bucket, your cleaning solution of choice, and a garden hose with an adjustable nozzle set to a flat fan spray will do the job. This is the approach I'd recommend for anyone with loose sand in their joints, older pavers, or pavers that have already lost significant joint material. The manual approach is slower but it gives you full control over where the water goes. Apply your cleaning solution, let it dwell, scrub in sections, and rinse each section before moving to the next so you're not flooding the whole patio at once.
Managing water runoff
Always rinse in the direction of natural drainage, away from garden beds and your home's foundation. If you're using bleach, consider neutralizing runoff with a baking soda solution before it reaches planted areas. Rinse in small sections rather than flooding the whole patio: less water on the surface at any one time means less risk of joint erosion.
Rinsing, drying, and restoring joints after cleaning
How to rinse without pulling sand
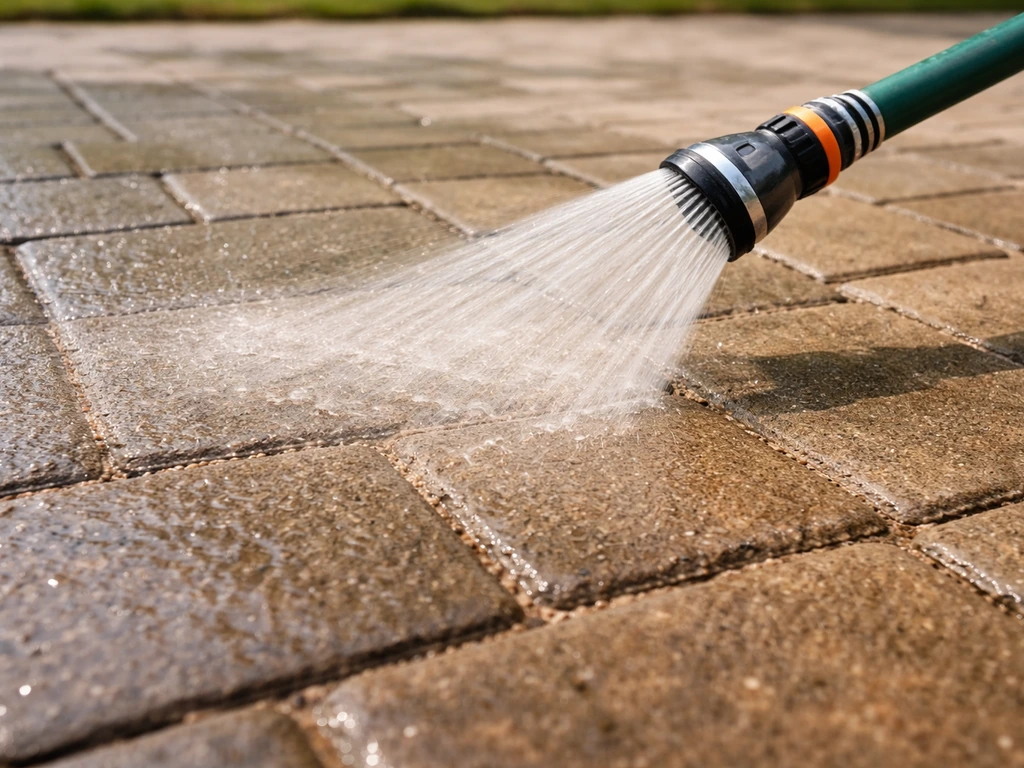
Use a garden hose with a fan-spray nozzle rather than a jet. Hold it at a low angle, roughly 30 to 45 degrees to the surface, and keep the stream moving. Work in sections, rinsing from the highest point of your patio to the lowest so you're not pushing dirty water back over clean areas. One rinse pass is usually enough if you let your cleaning solution do its job during the dwell time.
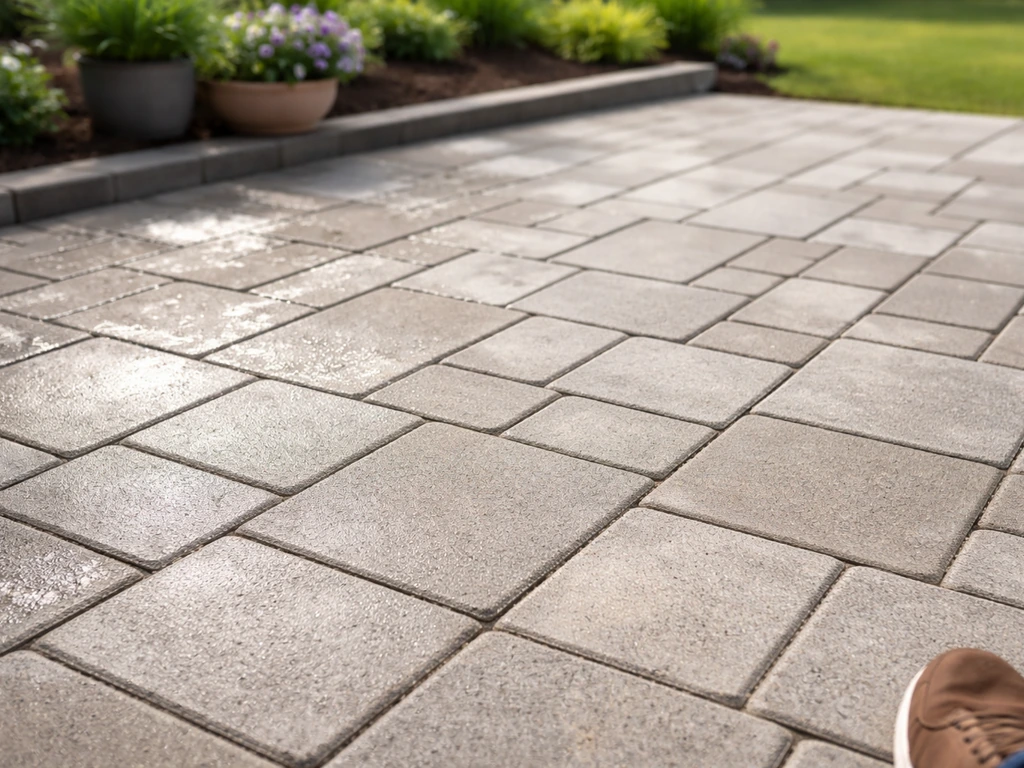
Drying time
Let pavers dry for at least 24 hours before assessing the results of your cleaning. Colors and stains look very different wet versus dry, and you may think you have a problem that simply isn't there once everything dries out. If you're planning to re-sand or apply a sealer, 48 hours is better, and 72 hours is ideal in humid climates.
Re-sanding joints after cleaning
Even careful cleaning will sometimes displace some joint sand, especially from the top of the joints. Once your pavers are fully dry, sweep them and look at the joints. If you can see gaps or voids, refill them. For regular sand, sweep kiln-dried sand across the surface, work it into the joints with a broom, and then compact it by walking across the pavers. Blow off or sweep excess sand from the paver faces.
If you have polymeric sand joints that need repair, you'll want to remove any remaining loose or crumbling material from the joint first, then refill with fresh polymeric sand like QUIKRETE HardScapes, Techniseal SMARTSAND, or similar. Sweep the sand in, tamp it down, sweep off the excess, and then activate it with a gentle misting of water (not a stream). The product instructions will specify the exact activation process, but the general principle is a controlled mist, not a direct flow. Polybind's own product warning is blunt about this: do not allow polymeric sand to wash out of the joint, meaning you should activate with care and minimal water volume. Let the repaired joints cure for 24 hours before traffic.
When to consider joint stabilization products
If your joints keep losing sand every time you clean, or if you have older regular sand joints that have never held well, a joint stabilizer or polymeric sand might be the right long-term fix. These products lock the sand particles together without fully hardening, so joints stay intact through future cleaning and weather. They're applied over existing jointing sand, worked in, and activated with water. It's a worthwhile upgrade if you're tired of re-sanding every season.
If making old pavers look new overall is also a goal, that's a project that pairs well with re-sanding. If you want the whole patio to look refreshed after you clean and re-sand, you can use these same principles as part of a full plan for how to make old patio slabs look new.
Preventing buildup without wrecking your joints
The less your patio accumulates grime, mold, and debris in the first place, the less aggressive cleaning it will ever need. A few simple habits make a big difference:
- Sweep your patio regularly (weekly if you have heavy tree cover) to prevent organic debris from breaking down on the surface and feeding mold and algae
- Move furniture and planters occasionally so shaded, damp spots don't become permanent algae colonies
- Rinse the patio lightly with a garden hose after heavy pollen seasons or storms, using a fan spray at a low angle
- Trim overhanging trees or shrubs to increase sunlight and airflow, which slows biological growth significantly
- Seal your pavers every two to three years with a penetrating sealer appropriate for your paver material; a good sealer makes surfaces far easier to clean and reduces how deeply stains can penetrate
- Check joint sand levels in spring and after any intense pressure washing, and top up before gaps become large enough to let weeds establish
Sealing is particularly effective at preventing the staining and discoloration that prompts heavy cleaning in the first place. Once your pavers are clean and joints are restored, applying a sealer essentially protects both surfaces. If you want to enhance the appearance at the same time, there are sealers that add a wet look or sheen, which connects to the broader question of how to make patio pavers shine or how to darken patio slabs for a richer appearance. Either way, the sequence is always: clean first, re-sand second, seal third.
The bottom line is that cleaning pavers without losing joint sand is about discipline in technique, not specialized equipment. Let your cleaning solution work, keep your water pressure low and angled, rinse in sections, and you'll come out the other side with clean pavers and joints that are still intact.
FAQ
How can I tell if I have regular sand or polymeric sand before I clean?
Do a gentle, dry “finger test” in a joint, if the surface isn’t already wet. Regular sand will feel loose, crumble, or shift easily. Polymer sand should feel firm, grout-like, and resist crumbling. If the joint area already has cracks or gaps, treat it like regular sand because it likely is not fully cured or activated.
Can I use a pressure washer if I absolutely need one, but want to minimize sand loss?
Yes, but keep it controlled: use a wide fan tip, keep the nozzle farther back than you think (so pressure drops before the stream hits the joint), and never aim straight down into the joint. Use short passes at an oblique angle (about 30 to 45 degrees) and rinse quickly. Even with good technique, expect some erosion of the top layer of joint sand, then plan to top up afterward.
Is it safe to use a stiff brush with any cleaning chemical?
Mostly, but match the chemical to the paver surface. Bleach and vinegar can be harsh on certain stones and finishes, and aggressive scrubbing on soft or dusty pavers can loosen joint material. If you’re using vinegar, skip it on travertine, limestone, and marble, and if you’re using bleach, avoid colored or dyed pavers unless you do a small test patch first.
What’s the safest way to rinse so I don’t wash grout or joint sand out?
Rinse in small sections, starting from the highest point so runoff flows away from the area you just cleaned. Use a flat fan spray on a low setting, keep the stream moving, and avoid soaking the joints all at once. If you see sand disappearing during rinsing, stop, switch to gentler rinsing, and let the section dry before continuing.
How long should I wait before re-sanding or sealing after I clean?
If you can, wait 48 hours before re-sanding or sealing, 72 hours is safer in humid weather. The goal is full dryness so you do not trap moisture under polymeric sand or sealers. Also reassess after drying, since stains often look different wet versus dry.
Do I need to remove weeds or moss manually before using cleaners?
Yes, whenever feasible. Pull or scrape loose growth first so your cleaner can reach the surface and joints without being constantly diluted by debris. After that, apply your solution with a dwell time, then scrub gently and rinse in sections. This reduces the amount of water and agitation you need later, which helps protect joint sand.
What should I do if my joints start to look empty after cleaning?
Let everything dry, then sweep and inspect the joints. If you see gaps or voids, top up. For regular sand, sweep in kiln-dried sand and compact it by walking across, then remove excess from the paver faces. For polymeric sand, remove crumbling material, refill, sweep in, tamp lightly, remove excess, and activate with a controlled mist rather than a direct stream.
Can I use dish soap for heavy mold or algae?
Dish soap helps with surface grime and light stains, but it usually is not enough for active mildew, algae, or deep organic buildup. For those issues, use an appropriate disinfecting cleaner, typically a properly diluted bleach solution, then scrub and rinse thoroughly while keeping runoff away from landscaping and drains.
What’s the biggest mistake people make that causes joint sand to wash out?
Using direct, downward jets or holding the nozzle too close to the joints. Even “low pressure” can be damaging if aimed into the joint opening. Another common issue is flooding the whole patio at once, which keeps the joints saturated longer than necessary. Work section-by-section and rinse right after the dwell time.
Can I clean pavers without using any chemicals at all?
You can start with warm water and a stiff brush for surface dirt, but organic stains and mildew often require chemistry to break down growth and pigments. If you avoid chemicals, you’ll usually need more mechanical effort, which increases the risk of loosening joint sand. A practical compromise is using mild soap for general cleaning, then targeted treatment only where staining or growth appears.
Is it okay to seal right after cleaning and re-sanding?
Wait until the pavers and joints are fully cured, generally at least 48 hours after cleaning and re-sanding. If you seal too early, trapped moisture can lead to uneven curing and reduced performance. Also ensure polymeric joints were activated correctly (mist, not flow), since improper activation can cause premature joint breakdown.
Next Articles
How to Clean Pavers Patio Step-by-Step Best Methods
Step-by-step methods to clean pavers patios, remove stains, and protect joint sand for concrete pavers.

How to Remove Thompson’s Patio Sealer Step by Step
Step-by-step removal of Thompson’s patio sealer on concrete, brick, pavers, and stone, with safety, tests, and cleanup.
Can You Remove Patio Sealer? How to Strip It Safely
Learn if you can remove patio sealer and how to strip it safely by type, material, and method.