Mold and mildew on a stone patio comes off with a diluted bleach solution (1 cup of household bleach per gallon of water), a stiff brush, and about 15 minutes of dwell time before rinsing. That's the core answer. But stone is more sensitive than concrete, and getting the method wrong can etch the surface, strip sealant, or leave you with a bigger mess than you started with. This guide walks you through the whole process safely, from identifying what you're actually looking at to keeping it from coming back next season.
How to Clean Mold Off a Stone Patio Without Damage

Dylan Hale
16 Jun 2026
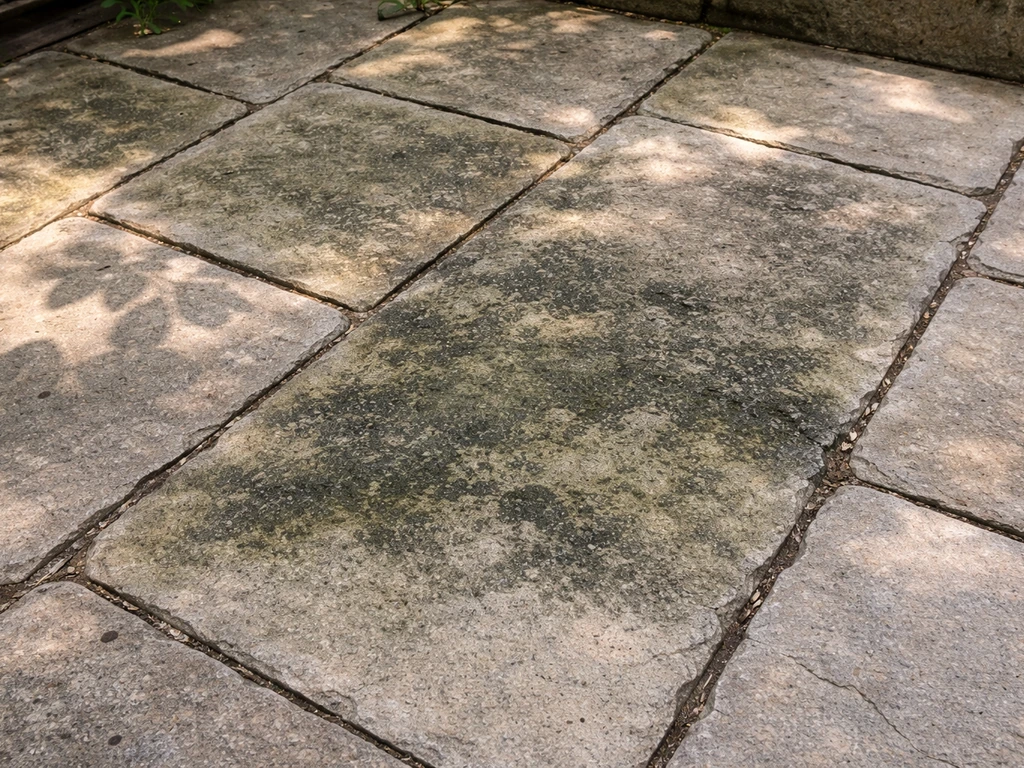
What you're actually looking at: mold, mildew, algae, or something else?
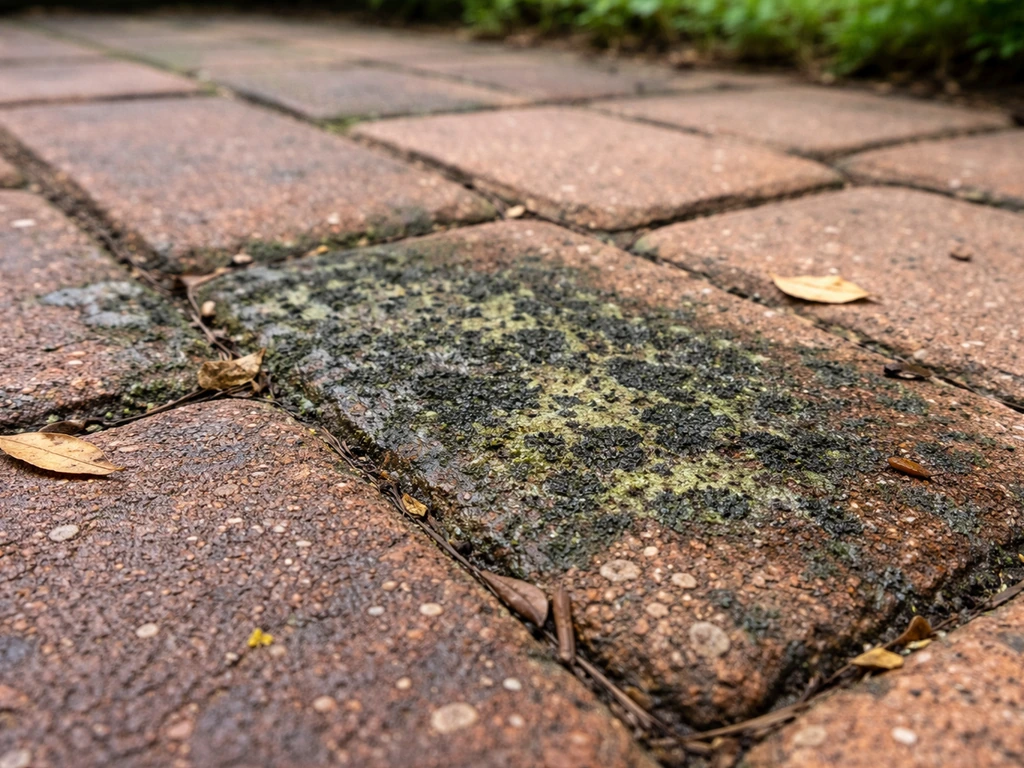
Before you grab a bucket and start scrubbing, take a close look at what's growing on your stone. Not everything dark or greenish is mold, and treating the wrong thing with the wrong product wastes time and can damage your patio.
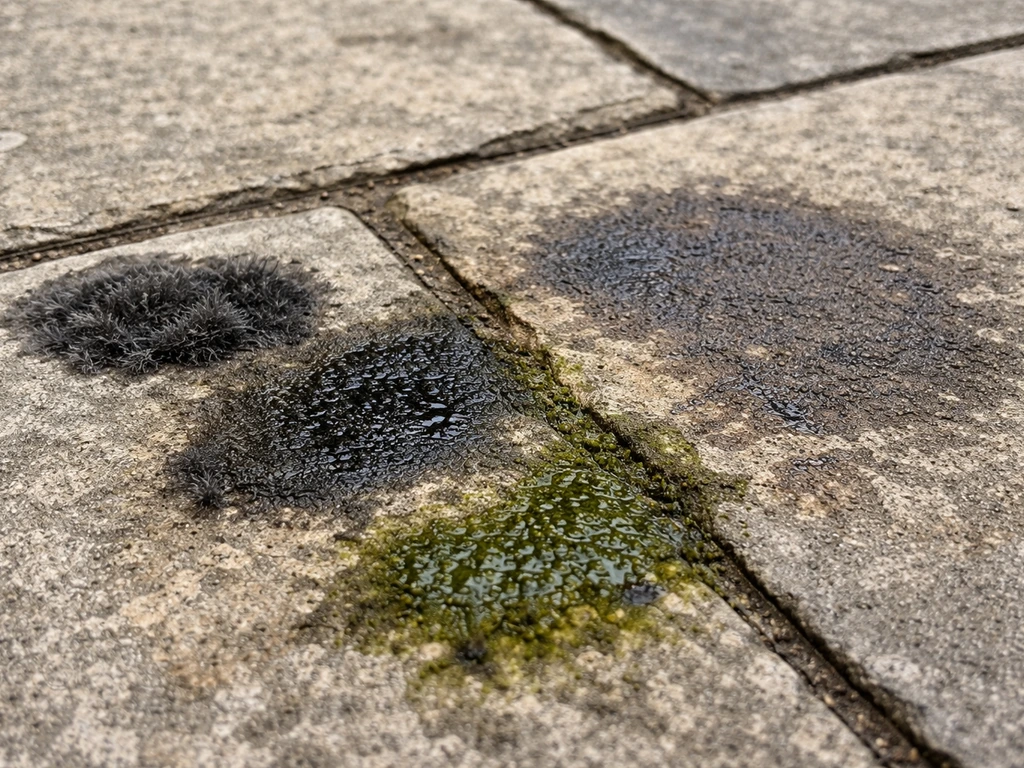
- Mold: usually fuzzy or slimy in texture, often black, gray, or dark green. Grows in patches, especially in shaded or damp corners.
- Mildew: a surface-level fungal growth, typically flat and powdery, ranging from white to gray to light green. Easier to remove than mold.
- Algae: slippery and film-like underfoot, often bright green or dark greenish-black. Very common on stone near planters, irrigation lines, or pooled water.
- Lichens: crusty or leafy in appearance, grayish-green or yellowish. They grip into the stone surface and are the hardest biological growth to remove.
- Efflorescence: white, chalky, powdery residue that appears when salts in the stone or subbase migrate to the surface as water evaporates. This is NOT mold. Wet it and it'll dissolve or brush away like a mineral powder. Mold won't.
The quick DIY test: wet the area with plain water. If the white or chalky residue softens and wipes off like minerals, it's likely efflorescence, not biological growth. If the dark staining stays, gets slimy when wet, or has any fuzzy texture, you're dealing with mold, mildew, or algae. All three respond to the cleaning methods below.
Why is it growing in the first place? Stone patios in shaded spots, near irrigation heads, under overhanging trees, or in areas where water pools after rain are prime targets. Organic debris like leaves, soil, and pollen settles into the pores and joints of natural stone, giving mold and algae exactly what they need to root in. Biological growth on masonry isn't just an aesthetic problem either. Over time, it can cause pitting and surface degradation, especially on calcareous stones like limestone and travertine. The sooner you deal with it, the less damage you're preventing.
Before you start: safety and protecting what's nearby
This step only takes ten minutes but it matters. Cleaning solutions strong enough to kill mold can burn skin, irritate eyes, and harm plants or lawn if they run off unchecked. PROSOCO also emphasizes controlling chemical exposure and runoff, using the lowest potentially adverse concentration and proper wetting and rinsing to reduce substrate damage risk strong cleaning solutions can harm plants and irritate eyes if runoff isn't controlled.
- Gear up: wear rubber gloves, safety glasses, and old clothes you don't mind bleaching. If you're working in an enclosed or poorly ventilated space, add a basic respirator mask.
- Clear the patio: move all furniture, planters, grills, and decorations off the surface. You want full access and you don't want bleach splashing onto cushions or metal frames.
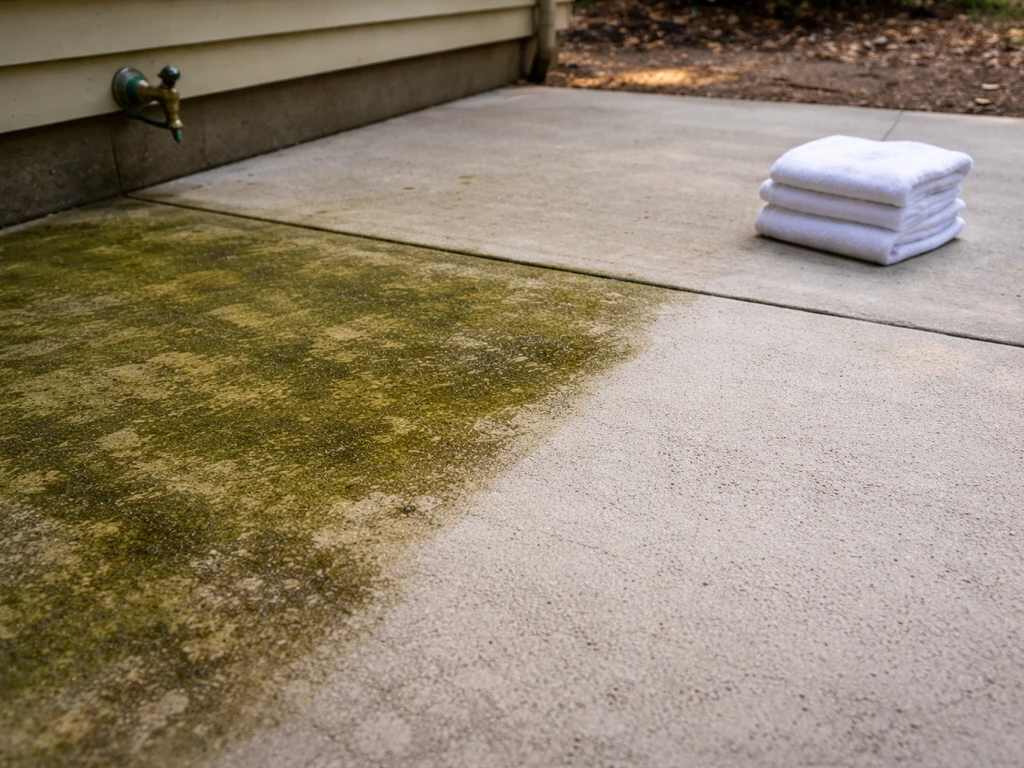
- Protect nearby plants and grass: wet down any grass, garden beds, or shrubs bordering the patio with plain water before you start. This dilutes any cleaner that runs off and reduces the chance of chemical burn. For very close or delicate plants, lay old towels or plastic sheeting along the edges.
- Pre-wet the stone: before applying any cleaning solution, rinse the entire surface with plain water. This prevents dry stone from absorbing too much cleaner too quickly, which can cause uneven results or discoloration.
- Work in the shade or on a cloudy day if possible: direct sun causes cleaning solutions to evaporate before they've had time to work, and it makes residue harder to rinse off completely.
Start here: manual scrubbing (the gentler approach)
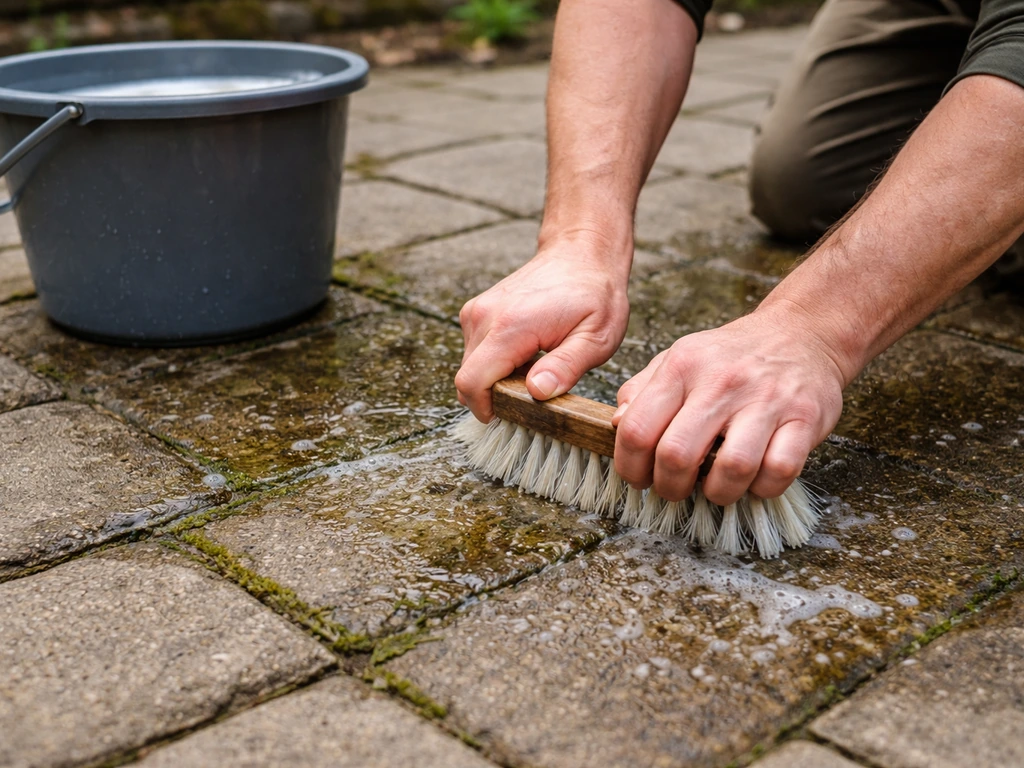
I always recommend starting with manual scrubbing rather than going straight to a pressure washer or strong chemicals. For light to moderate mold and mildew, it's often all you need, and it gives you control over exactly how much pressure you're applying to the stone surface and joints.
- Sweep or blow off loose debris: get leaves, dirt, and organic material off the surface first. Scrubbing over a layer of debris just moves it around.
- Mix your cleaning solution (see the cleaner section below for full options).
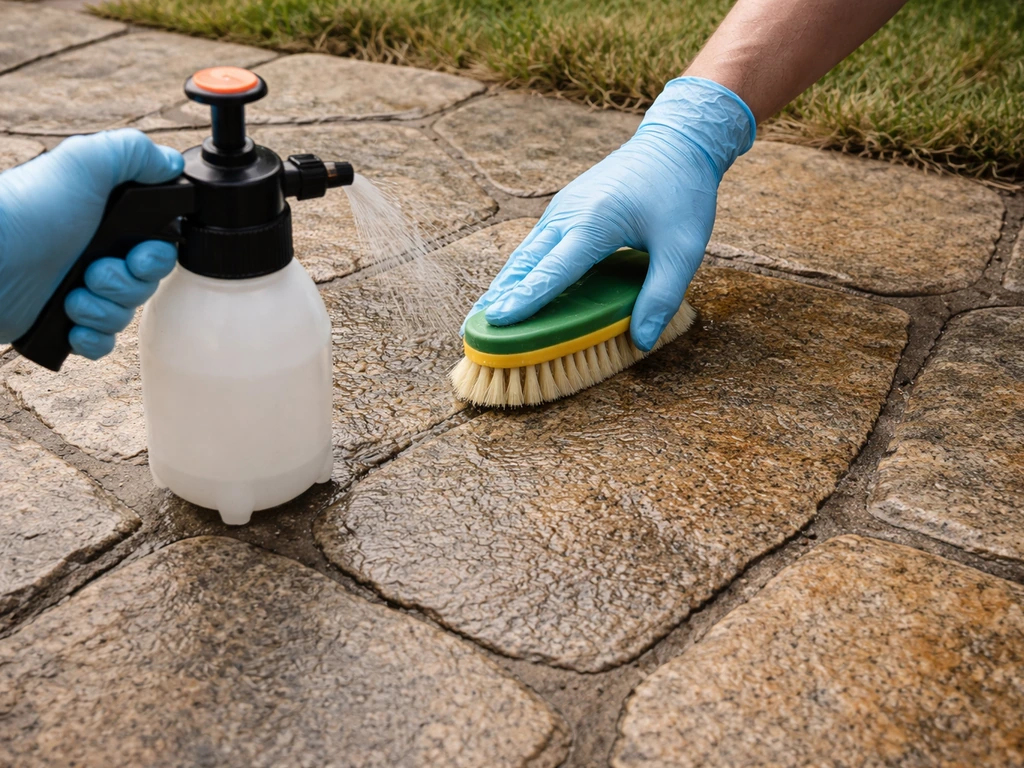
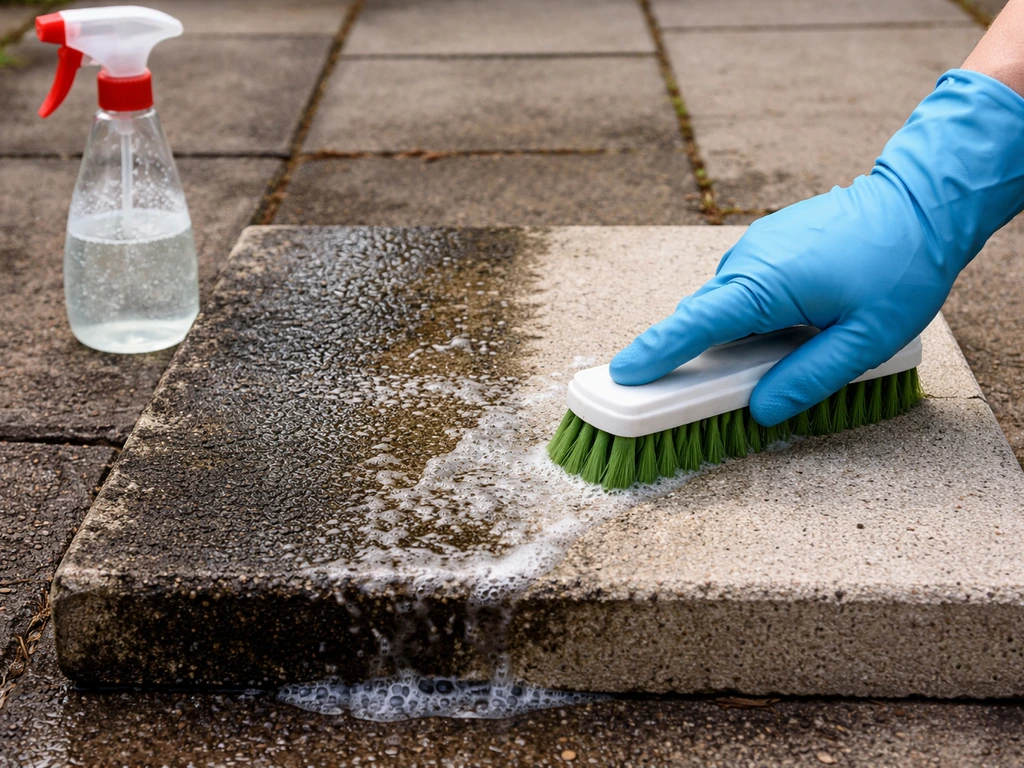
- Apply the solution to a manageable section (about 4–6 square feet at a time) and let it sit for 10–15 minutes. Don't let it dry out. If it starts to dry, mist it lightly with water.
- Scrub with a stiff-bristled brush, a long-handled deck brush, or an old broom that's dedicated to outdoor use. Use firm, circular motions on heavily affected spots. For grout lines or joints, a smaller handheld brush gives you more precision.
- Rinse thoroughly with a garden hose on a strong setting, directing the runoff away from plants. Rinse longer than you think you need to. Cleaner left on stone dulls the surface and attracts dirt faster.
- Check your results. Light mildew often comes off in one pass. Heavier black mold may need a second application.
Which cleaner should you use on stone?
This is where stone patios differ from concrete. You can't just throw whatever cleaner you have at natural stone without knowing what type of stone you're working with. The wrong acid, for example, will etch limestone, marble, or travertine in seconds. Here's a clear breakdown of your options.
Diluted bleach or sodium hypochlorite (most effective for most people)
For most flagstone, granite-based stone, and silica-based natural stone patios, a diluted household bleach solution is the most effective and accessible option. The CDC-recommended ratio is 1 cup of household bleach per 1 gallon of water. Clorox's outdoor guidance also suggests a slightly milder mix: about one-third of a cup per gallon, which is worth starting with on lighter growth or if you're uncertain about your stone type. Always make a fresh batch each time, as diluted bleach loses effectiveness as it sits.
Apply it, let it dwell for 10–15 minutes (keeping the surface wet the whole time), then scrub and rinse. This approach kills mold and mildew at the root rather than just scrubbing off the visible surface layer, which is why it outperforms plain dish soap for stubborn growth.
White vinegar (gentler, but not for all stone types)
Undiluted white vinegar applied and left to soak for 30–60 minutes before scrubbing works reasonably well on light mildew and algae. It's a good choice if you have pets or kids who use the patio frequently and you want to avoid bleach residue. However, and this is a firm warning: do NOT use vinegar on travertine, limestone, marble, or any calcareous stone. Vinegar is an acid, and it will etch the surface, leaving permanent dull marks. The same caution applies to lemon juice or any other acidic DIY cleaner. If you know your patio is flagstone made from sandstone, slate, or a siliceous stone, vinegar is lower risk. If you're unsure of your stone type, skip vinegar and use the diluted bleach option instead.
Dish soap and water (for very light surface mildew)
A bucket of warm water with a few squirts of dish soap plus vigorous scrubbing can handle fresh, light mildew that hasn't had time to really take hold. It won't kill spores the way bleach does, but it's completely safe on all stone types and has zero runoff risk for nearby plants. Think of this as your first-pass option for minor seasonal buildup, not for the dark, established mold that's been growing for months. CDC bleach disinfection guidance includes a step to clean visibly dirty surfaces first with soap or detergent before disinfecting with diluted household bleach.
Specialist biocidal cleaners (best for persistent or recurring growth)
If you're dealing with recurring mold despite regular cleaning, a masonry-specific biological stain remover is worth the upgrade. Products like PROSOCO ReVive are formulated specifically to remove mold, mildew, algae, and atmospheric staining from stone, masonry, and brick without the etching or bleaching risk you get from general-purpose cleaners. Follow the manufacturer's dwell time and dilution instructions exactly. These are especially useful for historic or decorative stone where you want to be more conservative with chemistry.
| Cleaner | Best for | Safe on limestone/travertine? | Effectiveness on heavy mold | Plant-safe runoff? |
|---|---|---|---|---|
| Diluted bleach (1 cup per gallon) | Most flagstone and siliceous stone | Use with caution, test first | High | Rinse carefully, pre-wet plants |
| White vinegar (undiluted) | Sandstone, slate, light mildew only | No — will etch | Moderate | Yes |
| Dish soap and water | All stone, light/fresh mildew | Yes | Low | Yes |
| Specialist biocidal cleaner (e.g., PROSOCO ReVive) | All stone, persistent/recurring growth | Yes (check label) | High | Check product label |
Quick decision path: if your patio has light mildew and you're not sure what type of stone it is, start with dish soap and water. If that doesn't shift it, move to diluted bleach (and confirm your stone isn't limestone or travertine first). If you have a porous calcareous stone and want to stay away from bleach, go with a specialist biocidal product. Save vinegar for when you know your stone type is acid-safe.
Pressure washing stone: settings and technique that won't wreck it
Pressure washing speeds things up significantly, but stone is far more sensitive to high pressure than concrete. Get this wrong and you'll blast out mortar joints, pit the stone surface, or force water into cracks that then freeze and expand later. Done right, it's a great tool.
For natural stone like flagstone, keep pressure in the low range: 100–400 PSI is the guideline for masonry stone cleaning according to masonry preservation guidance, and most natural stone patios should stay at the lower end of that range. For harder stone like granite-based flagstone, you can push toward 1,500–2,000 PSI, but I'd treat 2,000 PSI as a maximum and stay well under it for softer stones or any patio with sand-set joints.
- Use a wide fan-tip nozzle: a 40-degree tip spreads the force over a wider area and dramatically reduces surface damage risk. Avoid zero-degree or 15-degree tips on stone entirely.
- Keep the nozzle at least 12 inches from the surface. With softer flagstone or sand joints, I'd go 18 inches. The farther back you hold it, the less concentrated the impact.
- Direct the spray perpendicular to the surface (straight down), not at an angle toward grout lines or joints. Angled spray cuts into joints and can dislodge mortar or sand fill.
- Move in smooth, overlapping passes rather than holding the stream in one spot.
- Always do a test patch in an inconspicuous corner first. Hold the nozzle at your planned distance and pressure for 10–15 seconds, then check for any surface damage before proceeding.
- Pre-treat with your cleaning solution, let it dwell, then pressure wash to rinse rather than relying on pressure alone to do the cleaning. The pressure is most useful for the rinse phase, not the kill phase.
If you're renting equipment and not sure what PSI you need, ask for an electric pressure washer in the 1,200–1,500 PSI range rather than a gas unit. They're easier to control and more than sufficient for stone patio cleaning. If you’re cleaning a concrete patio instead, the best approach and dwell time can be different, so follow a concrete-focused guide for how to remove mold from concrete patio masonry stone cleaning. Pressure washing is also a great option if you don't want to spend time on manual scrubbing, though for patios near delicate plantings, manual cleaning gives you more control over where the runoff goes. The approach differs somewhat from cleaning concrete or paver patios, where you can generally tolerate higher pressure settings.
When the mold won't budge: escalating for stubborn stains
You've scrubbed, you've let the bleach dwell, and there's still a dark stain staring back at you. Here's how to troubleshoot before you reach for something harsher.
Try a second pass before escalating
A lot of deep black or green mold staining is actually a two-pass job. Apply the bleach solution again, extend the dwell time to 20 minutes (keeping it wet), and scrub more aggressively. A brass-bristled brush works well for stubborn patches on harder stone. For softer stone, stick to nylon bristles to avoid scratching.
What about muriatic acid?
Muriatic acid (hydrochloric acid) comes up a lot in outdoor cleaning discussions, and it's worth addressing directly: for stone patios, it is often the wrong tool. Muriatic acid is suitable for silica-based stones like certain sandstones and some granites, but it is completely off-limits for carbonate stones including marble, limestone, calcareous travertine, and calcareous sandstone. It will dissolve the surface. Even for acid-tolerant stone, strong alkaline or acidic cleaners can degrade grout sealers and leave dull marks on polished surfaces. If you're considering muriatic acid, confirm your stone type with certainty, dilute it heavily (typically 1 part acid to 10 parts water as a starting point), and test in an inconspicuous area. Honestly, for most residential stone patios, you'll never need to go there. A specialist biocidal cleaner or a repeated bleach treatment will handle the vast majority of situations more safely.
Stains that might not be mold at all
If cleaning isn't shifting a stain, step back and reconsider what you're looking at. Rust stains from metal furniture legs, mineral deposits from hard water irrigation, or tannin stains from wet leaves look similar to mold at a glance but don't respond to bleach. Green staining near downspouts could be copper or mineral runoff rather than algae. If multiple bleach treatments haven't moved a stain, you may be fighting the wrong battle. A different targeted cleaner matched to the actual stain type will be more effective than more of the same approach.
Keeping mold from coming back
Cleaning mold off your patio without fixing the conditions that caused it means you'll be cleaning it again in three months. Mold prevention is moisture management. Moisture control is the key part of how to get mould off patio slabs without it coming back quickly Moisture management. Here's what actually makes a difference. If you want step-by-step details on removing mold from brick patio surfaces, use the same mildew-killing approach and dwell time, then focus on moisture control so it does not return. Concrete patios have their own do's and don'ts, including the best cleaners and dwell times for stubborn green mold. If you want step-by-step instructions for each situation, see our full guide on how to get rid of mold on patio. To remove mold from patio pavers thoroughly, focus on the right cleaner and moisture control so it does not return quickly.
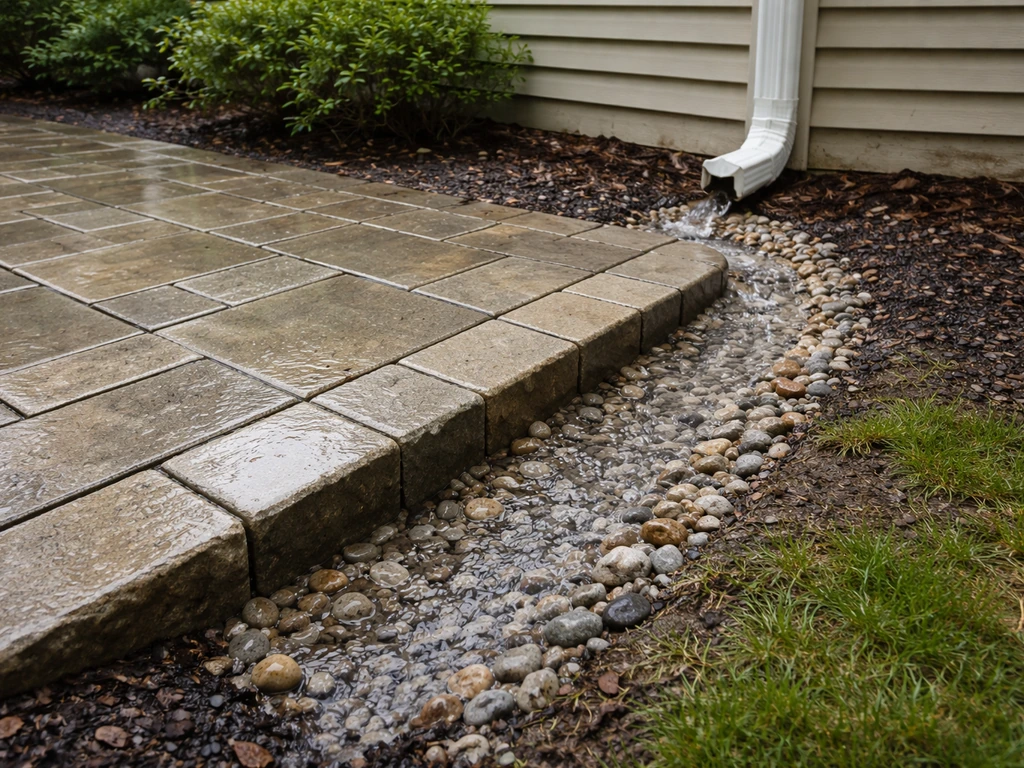
- Fix drainage problems first: if water pools on or near your patio after rain, that's the root cause. Regrading the surrounding soil, adding drainage channels, or adjusting downspout extensions to direct water away from the patio area makes a bigger long-term difference than any cleaner.
- Trim back overhanging trees and shrubs: shade and leaf debris are major contributors. Improving airflow and sun exposure to the patio surface helps it dry faster after rain.
- Adjust irrigation spray patterns: irrigation overspray landing on stone is one of the most common and overlooked drivers of algae and mold. Walk your system when it's running and redirect heads that are hitting the patio.
- Seal your stone: a good penetrating stone sealer applied after cleaning reduces the porosity of the surface and makes it harder for mold and algae to take hold. Reapply every 2–3 years depending on traffic and weather exposure. Always clean thoroughly before sealing.
- Do a quick maintenance clean every spring and fall: a light scrub with diluted bleach or a hose-down with a garden-hose-pressure spray before growth establishes itself takes 20 minutes and prevents the heavy-duty cleaning job.
- Keep furniture and planters lifted: pot feet and furniture pads that raise items slightly off the stone surface reduce the trapped moisture that forms under flat-bottomed objects sitting on stone.
One last thing worth knowing: if you're dealing with recurring mold specifically in the joints between flagstones, the issue is often organic material packed into the gaps feeding the growth from below the surface. Clearing out joints, re-sanding with a polymeric sand that has a mold-resistant additive, and sealing after can break the cycle for good. Stone patios take a little more care than concrete or pavers, but they respond well to the right approach and they'll look great for decades when maintained properly.
FAQ
Can I use bleach on sealed stone patio surfaces, and will it damage the sealant?
You can use diluted bleach on most sealed natural stone, but it may dull or strip some sealers if it sits too long or you over-apply. Keep dwell time to 10 to 15 minutes (or your tested extension), keep the surface evenly wet, and rinse thoroughly. If the patio is recently sealed or you do not know the sealer type, test the bleach mix in a hidden spot and wait for the area to dry to check for dulling.
Is it safe to clean mold off a stone patio with bleach if plants are nearby?
Rinse-off runoff matters more than whether bleach is “safe.” Pre-wet surrounding plants and lawn to reduce absorption, work in calm weather, and direct rinse water away from beds when possible. If you see plant stress after a test area, switch to dish soap for light growth or a masonry-specific biocidal product that is designed for controlled use.
How do I tell if the dark staining is mold versus efflorescence or mineral deposits before using cleaners?
Wet the spot and watch how it behaves. If a white or chalky residue softens and wipes off like salts, it is likely efflorescence. If the area stays dark, gets slimy when wet, or has any fuzzy texture, treat it as biological growth. If repeated bleach treatments do not change the stain at all, the culprit may be rust, hard water minerals, tannins, or metal runoff.
What should I do if mold returns quickly after I clean it?
If it reappears within a few weeks to a few months, the issue is usually recurring moisture, not leftover spores. Improve drainage, clear debris from shaded areas, and address pooling near irrigation heads or downspouts. For joint growth, remove packed organic material and consider re-sanding with a polymeric sand that includes a mold-resistant additive, then seal after cleaning and full dry time.
Can I combine vinegar and bleach in the same cleaning session if I do not get results?
Do not mix vinegar and bleach (or apply one immediately after the other). The reaction can create dangerous fumes. If you want to switch methods, rinse thoroughly, let the area dry completely, and then use only one cleaner type per session after a full rinse.
What brush should I use on stone, and will brass or steel damage it?
Nylon bristles are the safer choice for softer or more porous stones and for textured surfaces. Brass bristles can help with stubborn patches on harder stone, but they can still scratch delicate finishes or softer flagstone. Avoid wire or stiff metal brushes on polished or easily scratched stones, and always scrub in a controlled, consistent motion rather than aggressive point pressure.
How long should bleach dwell time be if the mold is heavy or deeply stained?
For most cases, use 10 to 15 minutes with the surface kept wet. If staining remains, a two-pass approach is often more effective than one long soak, reapply with dwell extended to about 20 minutes and scrub again. If you need repeated long dwell times to see improvement, reassess whether the stain is actually biological growth.
Do I have to use a pressure washer, or can I avoid it entirely?
You can avoid it for safety on stone. Manual scrubbing plus the right dwell time is often enough for light to moderate growth. If you still choose a pressure washer, keep it at the low end for masonry stone, and avoid blasting mortar joints or forcing water deep into cracks. Manual cleaning gives better control over runoff direction, especially near plantings.
What PSI should I use on a stone patio if I rent a pressure washer?
For most natural stone and masonry, stay toward the lower end of the typical masonry cleaning range (around 100 to 400 PSI). If your stone is known to be much harder, you can go higher, but treat the high end as a maximum (around 1,500 to 2,000 PSI) and use caution. When in doubt, choose an electric unit in the 1,200 to 1,500 PSI range for better controllability.
Can I use dish soap and water only, and will it kill mold spores?
Dish soap and warm water can lift light mildew and surface grime, but it is not as reliable at killing growth the way bleach or a biocidal remover is. Use it as a first pass for minor seasonal buildup. If the growth is established, dark, or returns quickly, the more targeted biocide approach is usually necessary.
Is muriatic acid ever appropriate for stone patio mold removal?
Typically it is a poor choice because it can dissolve or etch stone and damage grout and sealers. It is off-limits for carbonate stones like limestone, travertine, marble, and calcareous sandstone. Even on acid-tolerant stone, it should only be considered with confirmed stone type, heavy dilution, and a test patch, but most residential patios do not need it if you use repeated biocide cleaning and moisture control.
Should I seal the patio after cleaning to prevent mold, and when can I do it?
Sealing can help slow re-soiling and moisture uptake, but only after the stone is fully dry and the biological growth is removed. If you seal too soon, trapped moisture can keep the problem going. After cleaning, allow ample drying time, then apply the appropriate sealer formulated for your stone type and use-case, and avoid sealing if you still see active growth.
Next Articles
How to Get Mold Off Brick Patio: Step-by-Step Clean
Step-by-step guide to remove mold from a brick patio using safe cleaners, bleach dilution, vinegar options, and pressure
How to Get Green Mold Off a Concrete Patio Safely
Step-by-step removal of green mold or algae from concrete patios, with safe bleach or vinegar options and prevention tip
How to Get Mould Off Patio Slabs Safely and Effectively
Step-by-step how to get mould off patio slabs safely with vinegar or bleach, plus pressure-wash tips, prevention, and ma