Mix 1 cup of household bleach with 1 gallon of water, wet the pavers, apply the solution, let it sit for 10 to 15 minutes, scrub with a stiff brush, and rinse thoroughly. That's the core method that works on the vast majority of mold and mildew cases on concrete, brick, and stone pavers. If you'd rather skip the bleach, white vinegar straight from the bottle is a slower but genuinely effective alternative. Either way, the clean-up itself is only half the job, if you don't fix the moisture problem underneath, the mold will be back within weeks.
How to Remove Mold From Patio Pavers Step by Step Guide

Dylan Hale
17 May 2026

What you're actually looking at out there
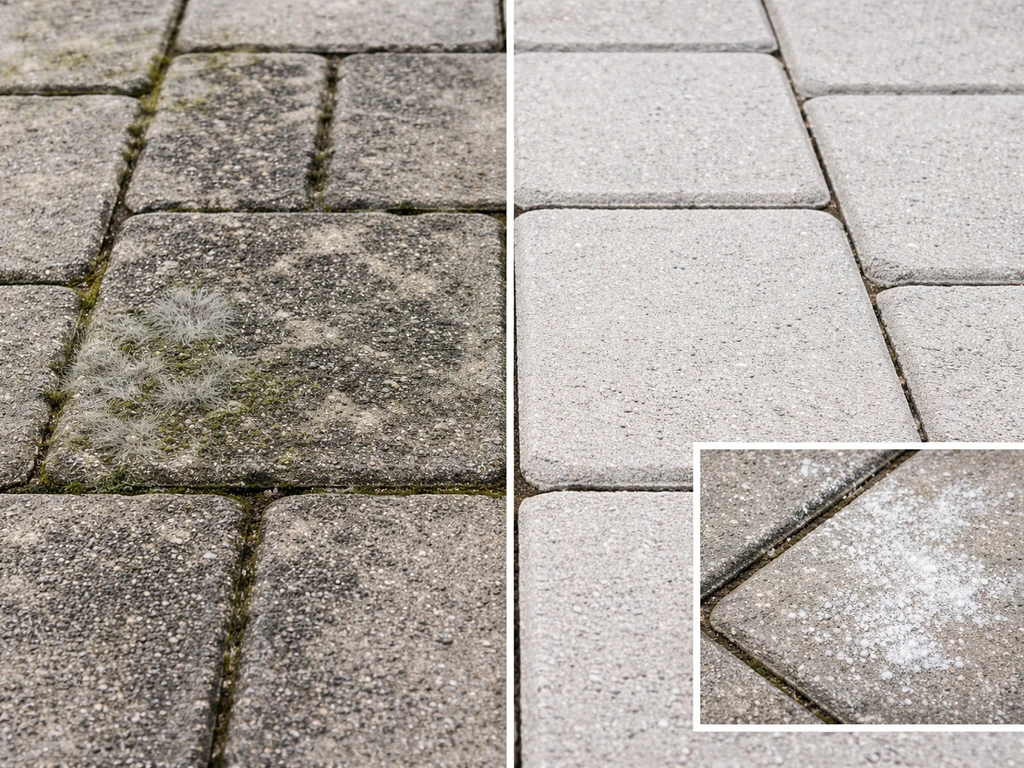
Before you grab a brush, it helps to know what you're dealing with. True mold on pavers shows up as dark green, black, or grey fuzzy patches, often in the grout lines or low-lying areas where water pools. Mildew tends to look flatter and more powdery, usually white or light grey. What most people call 'black mold' on pavers is typically a dark-pigmented mold or algae colony, it looks alarming but it responds to the same cleaning methods.
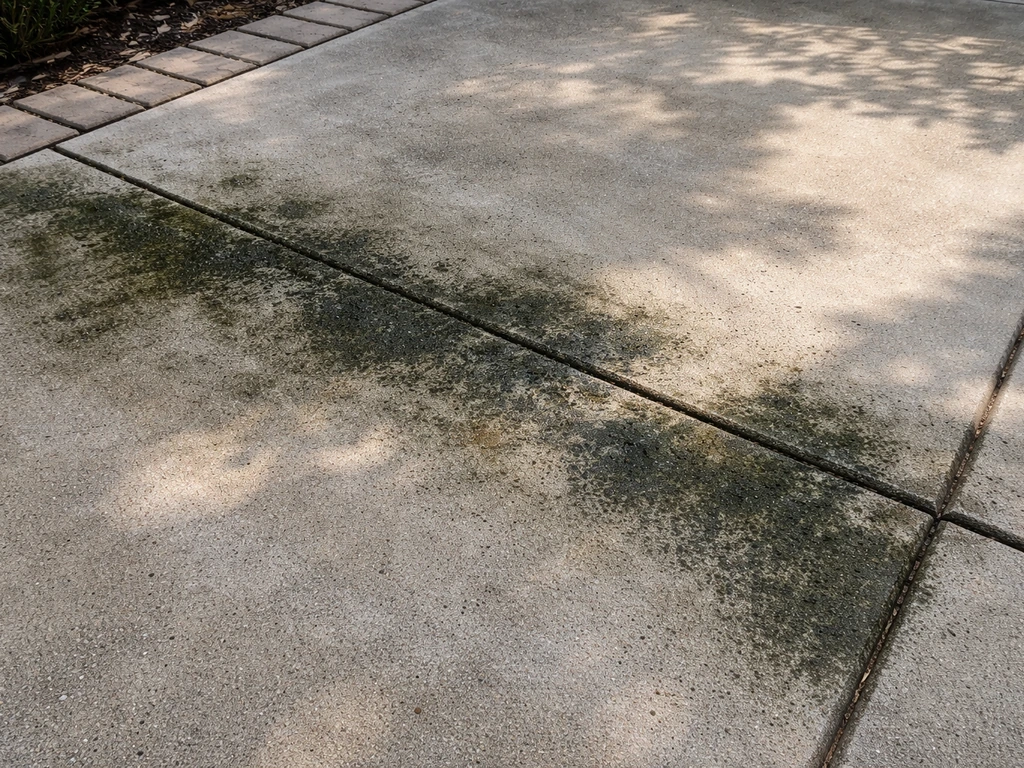
You might also see a green film across the whole surface, which is usually algae rather than mold.
If you spot green mold on your concrete patio, start by identifying whether it's algae or true mold, then use the appropriate cleaning method described above green film across the whole surface. All of these thrive in the same conditions: shade, poor air circulation, and excess moisture.
One thing worth distinguishing is efflorescence, the white chalky or crystalline deposits that sometimes appear on pavers. That's not mold at all. It's salts and minerals being pulled to the surface by moisture movement, and it doesn't respond to bleach or scrubbing the same way. If what you're seeing is purely white and powdery, that's a different problem. This guide focuses specifically on the dark, organic growth: mold, mildew, and algae.
Mold spores are everywhere in the air. They only become a problem when they land somewhere with enough moisture to grow. Pavers that sit in shade, collect rainwater in low spots, or have poor drainage underneath are prime targets. Shady areas with poor air circulation accelerate the problem significantly, which is why you often see the worst growth on the north-facing side of a patio or under overhanging trees.
Get set up safely before you start
Cleaning mold isn't dangerous if you're sensible about it, but you do need basic protection. Mold spores become airborne when you disturb them, so avoid stirring them up more than necessary, especially don't use a leaf blower or dry-brush the area first.
Here's what to wear and set up before you start:
- Gloves: rubber or nitrile work gloves to protect your skin from both the mold and the cleaning solution
- Eye protection: safety glasses or non-vented goggles, especially if you're pressure washing or scrubbing vigorously
- Respirator: at minimum an N95 mask; OSHA recommends at least a half-face respirator with an N-, R-, or P-95 filter for mold clean-up tasks
- Old clothes: bleach solution will ruin fabric if it splashes
- Protect nearby plants: wet them down thoroughly before you start, and rinse them again afterward — diluted bleach runoff won't kill them if they're pre-soaked and you rinse quickly
- Manage runoff: try not to let bleach solution drain directly into garden beds or storm drains; work in sections and rinse into a drain if possible
- Never mix bleach with any other cleaning product, especially anything containing ammonia — the combination creates toxic vapors
Work on a dry, overcast day if you can. Bright sun causes bleach solutions to evaporate before they have time to work, and wind can carry spray onto plants or into your face.
Manual cleaning: the bucket and brush method

This is the method that works for renters, people without pressure washers, or anyone dealing with a smaller area. It takes more elbow grease but gives you more control, which is actually an advantage on natural stone pavers where high-pressure water can cause damage. If you want the cleanest results on a stone patio, you can match this manual approach to the exact stone type and mold level you have how to clean mold off a stone patio.
- Wet the entire affected area with plain water first. This helps the cleaning solution penetrate and prevents it from soaking too quickly into dry paver material.
- Mix your cleaning solution (see options below) in a bucket or garden sprayer.
- Apply the solution generously across the moldy areas. Don't be stingy — you want full coverage.
- Let it dwell for 10 to 15 minutes. Don't let it dry out; if the surface starts to dry in the sun, mist it lightly with water.
- Scrub with a stiff-bristled brush. A long-handled deck brush saves your back on large areas. For grout lines, a smaller handheld brush or an old grout brush gets into the joints.
- Rinse thoroughly with a garden hose on full pressure, working the water away from plant beds.
- Check the results. Stubborn staining may need a second application and another round of scrubbing.
- Let the pavers dry fully — ideally 24 to 48 hours before any sealing or follow-up treatment.
For heavy mold buildup, I've found it helps to do a rough scrub first with plain water to remove the loose surface growth, then apply the cleaning solution to what's left. You get better contact with the actual staining underneath.
Using bleach to kill mold on pavers
Bleach (sodium hypochlorite) is the most effective solution for killing mold and lifting the dark staining it leaves behind. It works on concrete pavers, brick, and most manufactured stone pavers. Use it carefully on natural stone like travertine or limestone, those are more sensitive to pH and bleach can etch or discolor them over time. For natural stone pavers, the gentler options in the next section are a safer bet.
Dilution and dwell time
The CDC's recommended dilution for visible mold is 1 cup of household liquid bleach per 1 gallon of water. That's the sweet spot, strong enough to be effective, diluted enough to be manageable. Don't be tempted to go stronger thinking it'll work faster; it won't meaningfully improve results and it creates more risk for your plants and skin.
- Mix 1 cup of standard household bleach (5 to 6% sodium hypochlorite) into 1 gallon of water in a bucket or garden sprayer
- Pre-wet the paver surface with plain water
- Apply the bleach solution and let it sit for 10 to 15 minutes — this is the 'dwell time' that gives the solution time to penetrate and kill the mold
- Don't let it dry on the surface; if it starts to dry, add a little more solution
- Scrub with a stiff brush, working the solution into the surface and grout lines
- Rinse very thoroughly with a garden hose — bleach residue left on pavers can cause long-term surface damage
- Rinse any nearby plants that may have gotten overspray
Always follow the directions on your specific bleach bottle too, since concentrations can vary between products. Never mix your bleach solution with any other cleaner, detergent, or product, especially anything containing ammonia. The EPA and CDC both flag this explicitly because the combination produces toxic vapors.
Gentler alternatives: vinegar and non-bleach options
If you have pets that use the patio, natural stone pavers that could be damaged by bleach, or you'd simply rather avoid harsh chemicals, white vinegar is a practical alternative. It won't work as fast and it won't fully disinfect the surface the way bleach does, but it does genuinely break down mold and mildew, especially on lighter infestations.
Apply undiluted white vinegar directly to the affected area using a spray bottle or garden sprayer. Let it sit for at least 30 minutes to an hour, longer dwell time compensates for the gentler chemistry. Scrub thoroughly and rinse well. The smell fades quickly once it's dry. For stubborn spots, a second application the following day often finishes the job.
Baking soda is another option worth knowing about. Make a paste with water and apply it to the stained areas, let it sit, then scrub. It's mildly abrasive and works reasonably well on surface mildew, though it's less effective against deep or established mold. It's particularly safe for all paver types including sensitive natural stone.
There are also commercial patio mold and algae cleaners that use oxygen-based or enzymatic formulas instead of chlorine bleach. These are worth the investment if you're dealing with natural stone like travertine or flagstone, where bleach sensitivity is a real concern. Check that the product is specifically rated safe for your paver material before using it.
| Method | Best for | Effectiveness | Safety for plants/stone | Dwell time |
|---|---|---|---|---|
| Bleach solution (1 cup per gallon) | Concrete, brick, manufactured pavers | High — kills mold and lifts staining | Moderate — rinse plants well; avoid on natural stone | 10–15 minutes |
| White vinegar (undiluted) | All paver types including natural stone | Moderate — works well on lighter growth | High — safe for plants and stone surfaces | 30–60 minutes |
| Baking soda paste | Surface mildew, light staining | Low to moderate | Very high — gentle on all surfaces | 15–30 minutes |
| Commercial oxygen-based cleaner | Natural stone, travertine, flagstone | Moderate to high depending on product | High if product is rated for stone | Per product label |
Pressure washing: how to do it without causing damage
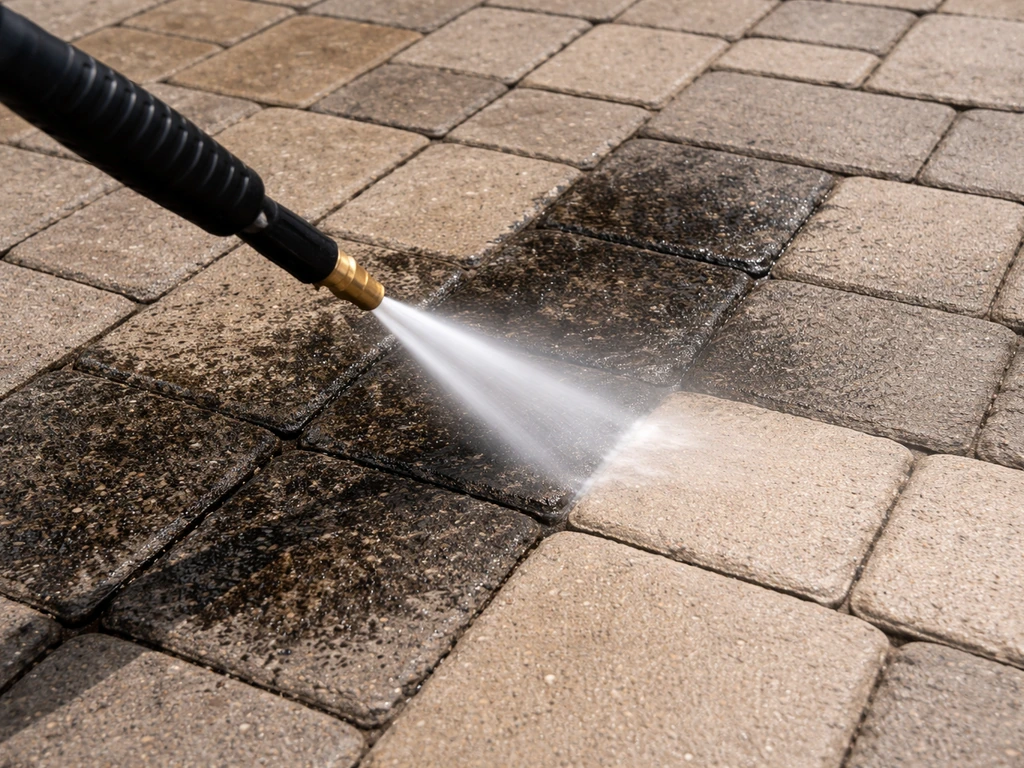
A pressure washer speeds up the process significantly and is genuinely satisfying for large areas, but you can cause real damage if you use it wrong. Two main risks: scarring or eroding the paver surface with too much pressure, and blasting joint sand out of the gaps between pavers, which destabilizes the whole installation.
Keep pressure at or below 1500 psi for most patio pavers. Higher settings, especially the rotating zero-degree nozzle, can scar concrete surfaces and deeply erode softer stone. Use a wide-angle nozzle of at least 25 degrees. Keep the nozzle about 18 inches from the surface and use consistent, sweeping passes rather than focusing on one spot.
The most effective approach combines both methods: apply your cleaning solution first, let it dwell, then use the pressure washer to rinse and scrub simultaneously. The cleaning solution does the chemical work; the pressure does the mechanical work. This is easier on the surface than trying to blast off mold with pressure alone.
One important note about spores: pressure washing can aerosolize mold spores and send them across your patio, potentially spreading growth to areas that were previously clean. This is why wearing your respirator during pressure washing is especially important, and why it's worth pre-treating with solution first to kill the mold before you blast it. Work with the spray moving away from clean areas when possible.
After pressure washing, check the joints between your pavers. If you've lost polymeric sand from the gaps, those need to be refilled and compacted before rain gets in and starts undermining the base. Also, don't apply any sealer until the pavers are completely dry, ideally wait at least 24 to 48 hours.
Stopping mold from coming back
Here's the honest truth: if the conditions that caused the mold are still there, the mold will come back. The EPA is clear on this, cleaning removes the mold, but moisture is what drives it, and you have to address the moisture to get lasting results.
Fix the drainage first
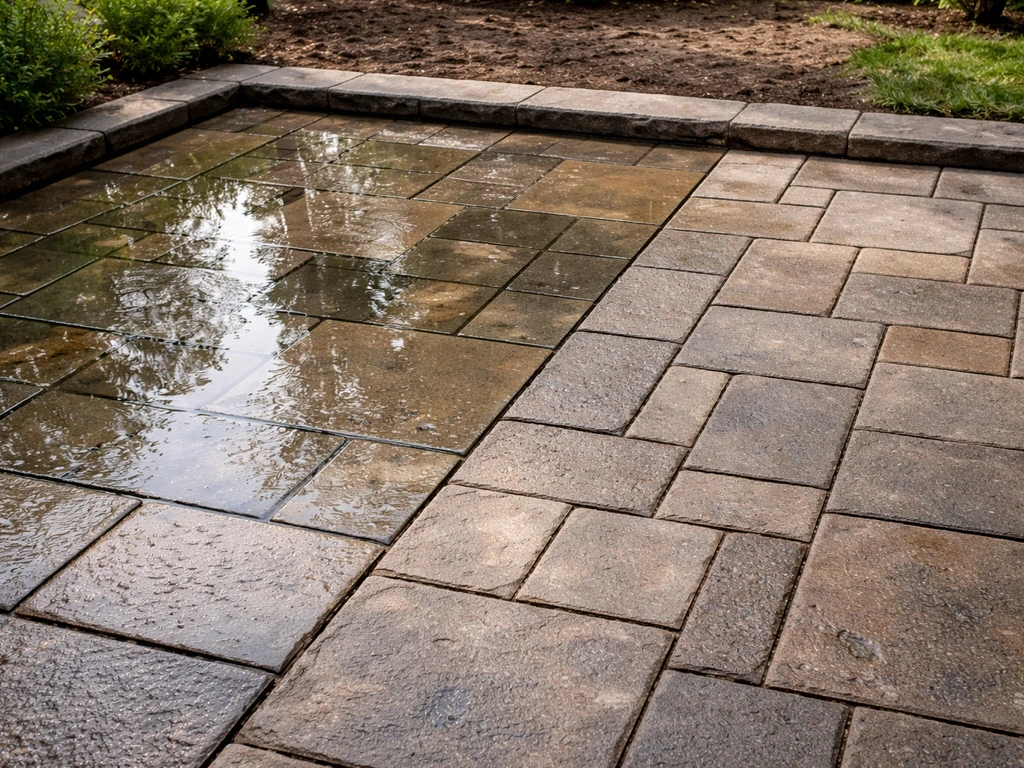
Standing water is the number one cause of patio mold. Walk out after a rain and look for puddles sitting on or next to the pavers. If water pools for more than a couple of hours, you have a drainage issue worth solving. Sometimes it's as simple as adjusting a downspout or clearing a blocked drain. In other cases the patio itself may not have enough slope, it should ideally fall away from the house at about 1 to 2 percent grade. If you have low spots, having them professionally re-leveled is worth the cost compared to cleaning mold every season.
Improve light and airflow
Mold and algae grow faster in shade with poor air circulation. If you have large shrubs or trees overhanging your patio, trimming them back to let in more sun and airflow makes a real difference. This won't always be possible depending on your layout, but even partial improvement helps. The RHS specifically links faster algae growth to shady areas with poor air circulation, same principle applies to mold.
Set up a simple maintenance routine
- Sweep the pavers regularly to remove leaves and organic debris — decomposing material is food for mold
- Rinse the patio with a hose after windy weather or heavy leaf drop
- Do a light cleaning pass with diluted vinegar or a commercial patio cleaner once or twice a year, in spring and fall
- After cleaning and full drying, apply a penetrating paver sealer — it doesn't make pavers mold-proof but it reduces the porosity that lets moisture and spores get established
- After heavy rain, check for standing water and sweep it away if possible
- Address wet or damp spots within 24 to 48 hours when you can — the EPA notes that materials dried within that window are much less likely to develop mold
If your patio is made of concrete, brick, or other specific materials, the prevention principles are the same but the cleaning methods can differ slightly in strength and frequency. The approach for concrete pavers can be a bit more aggressive than for natural stone, for example. The core logic, clean it, dry it, drain it, seal it, applies across all of them. If you are dealing with patio slabs specifically, use the same mold-killing and scrubbing steps, then switch to a maintenance routine so it does not return how to get mould off patio slabs.
One final thing: once you've done the work and the pavers look good again, take a photo. It's genuinely useful to have a before-and-after reference point so you can spot early mold growth next season before it gets established, and catch it when it's still easy to clean with a quick vinegar spray and a brush rather than a full day's project.
FAQ
How can I tell if what I’m seeing is efflorescence, not mold, on patio pavers?
If the white powdery deposits look like chalk crystals and do not smear into a wet stain, it is likely efflorescence rather than mold. In that case, skip bleach and scrubbing for mold and instead remove loose crystals with a stiff brush once the area is dry, then address the moisture source causing salt movement.
What should I use on travertine or limestone pavers so I don’t damage them?
Yes. Bleach solutions can discolor or etch natural stone over time, especially travertine and limestone. For these, use oxygen-based or enzymatic cleaners that are explicitly rated safe for your stone type, or use vinegar/baking soda first for lighter growth before risking chlorine.
Do I need to rinse after using bleach or vinegar, and when can I seal the pavers?
Rinse is important for both safety and performance. After bleaching, rinse thoroughly, then let the surface dry completely before walking on it or applying any sealer, ideally waiting 24 to 48 hours so remaining moisture and diluted chemicals do not get trapped.
What if it might rain the next day after I clean the pavers?
If rain is likely soon, prioritize what you can control. Avoid sealing until completely dry, and plan to pre-treat and clean right before a stretch of dry weather. If you must clean during a wet forecast, focus on removing surface growth and keep runoff from re-wetting the cleaned area until it dries.
Is it safe to use a leaf blower or dry brush to knock off mold before cleaning?
Start by removing loose growth gently. For smaller sections, pre-wet lightly, then scrub and rinse, keeping the motion minimal. If you pressure wash, you should pre-treat with your solution first and wear a respirator, because pressure washing can aerosolize spores and make the problem spread.
How do I protect pets and nearby plants when removing mold from pavers?
For pets and for plants, use the lowest-risk option first: rinse the patio before treatment if possible, then apply cleaner carefully so it does not run into beds. After the dwell time, thoroughly rinse and allow to dry; this reduces both chemical residue and leftover organic matter that can re-grow.
My pavers still have dark stains after the first cleaning. Should I make the bleach stronger?
For established staining, do not increase bleach strength. Instead, extend contact time within safe limits, apply the solution to thoroughly pre-wet pavers, scrub after dwell, and if needed repeat the process the next day. Stronger mixtures usually add risk without better results.
Why did mold come back so fast after I cleaned, and what should I check in the joints?
If polymeric sand in the joints got washed out or is breaking down, mold will return quickly because moisture can enter the base. After cleaning, check and refill joints with polymeric sand as needed, then compact and let it set fully before expecting strong resistance to regrowth.
What are the best ways to stop patio mold from coming back, based on how water behaves?
If the area stays wet longer than a couple of hours after rain, cleaning will only be temporary. Walk the patio after storms, look for puddles, and adjust downspouts, clear drains, and improve slope (often 1 to 2 percent away from the house). If low spots persist, professional re-leveling is more cost-effective than repeated cleanups.
Can I prevent mold by sealing pavers, and when is the right time to do it?
Yes, but only if you treat it like prevention rather than immediate cleanup. After cleaning and complete drying, apply a sealer appropriate for your paver material, and make sure the surface is free of remaining mold residue. Do not apply sealer while damp, because trapped moisture can restart growth.
Next Articles
How to Remove Mold from a Concrete Patio Safely
Step-by-step ways to remove mold from a concrete patio, using safe scrubbing, pressure washing, proper cleaners, rinse,

How to Remove Thompson’s Patio Sealer Step by Step
Step-by-step removal of Thompson’s patio sealer on concrete, brick, pavers, and stone, with safety, tests, and cleanup.
Can You Remove Patio Sealer? How to Strip It Safely
Learn if you can remove patio sealer and how to strip it safely by type, material, and method.