Clean the patio thoroughly, let it dry completely, then roll on a sealer designed for stamped concrete. That's the whole job in one sentence. The detail is in doing each of those steps right, because stamped concrete is more textured and more sensitive to trapped moisture than plain flatwork, and a bad sealing job looks far worse on a decorative surface than on plain gray concrete. I'll walk you through everything: figuring out what you're dealing with, cleaning it properly (including the nastier stains), prepping for sealing, picking the right sealer, and applying it so it actually holds up.
How to Clean and Seal a Stamped Concrete Patio

Dylan Hale
14 Jun 2026
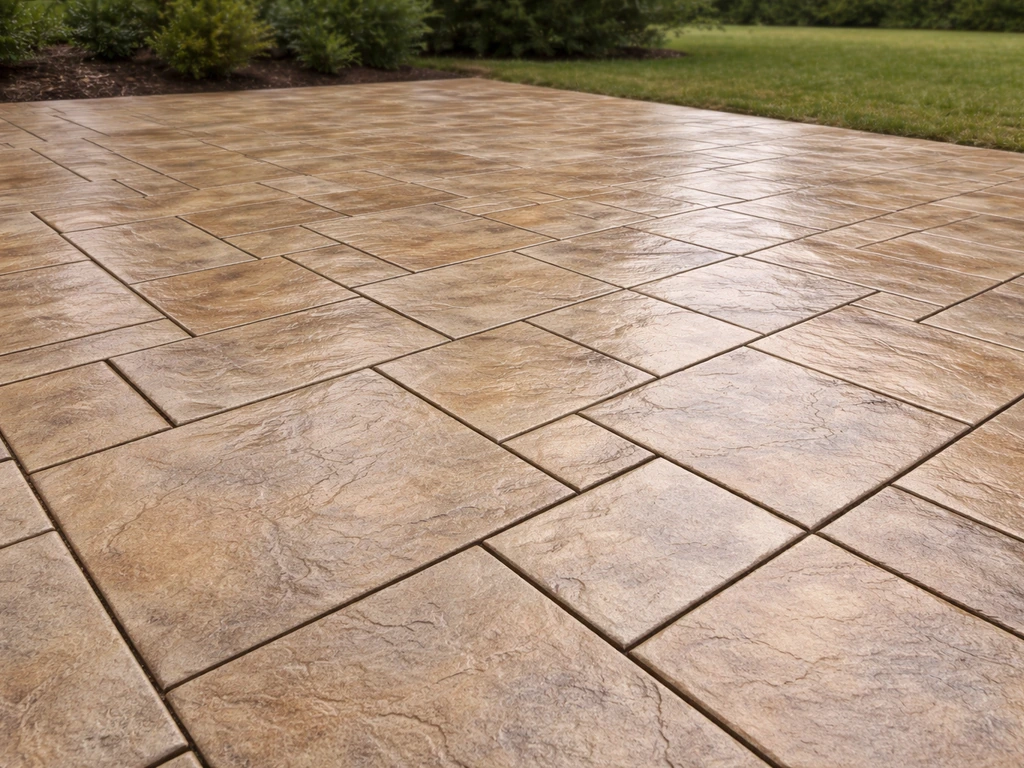
Identify your patio condition and stain types first
Before you grab a hose or a bucket, walk the whole patio and make a mental inventory. What you're dealing with changes what you use and how hard you'll need to work. I split it into three categories.
- General grime, dirt, and pollen: This is the baseline most patios have. It looks dull and dirty but it's the easiest to remove. A good scrub or low-pressure rinse handles it.
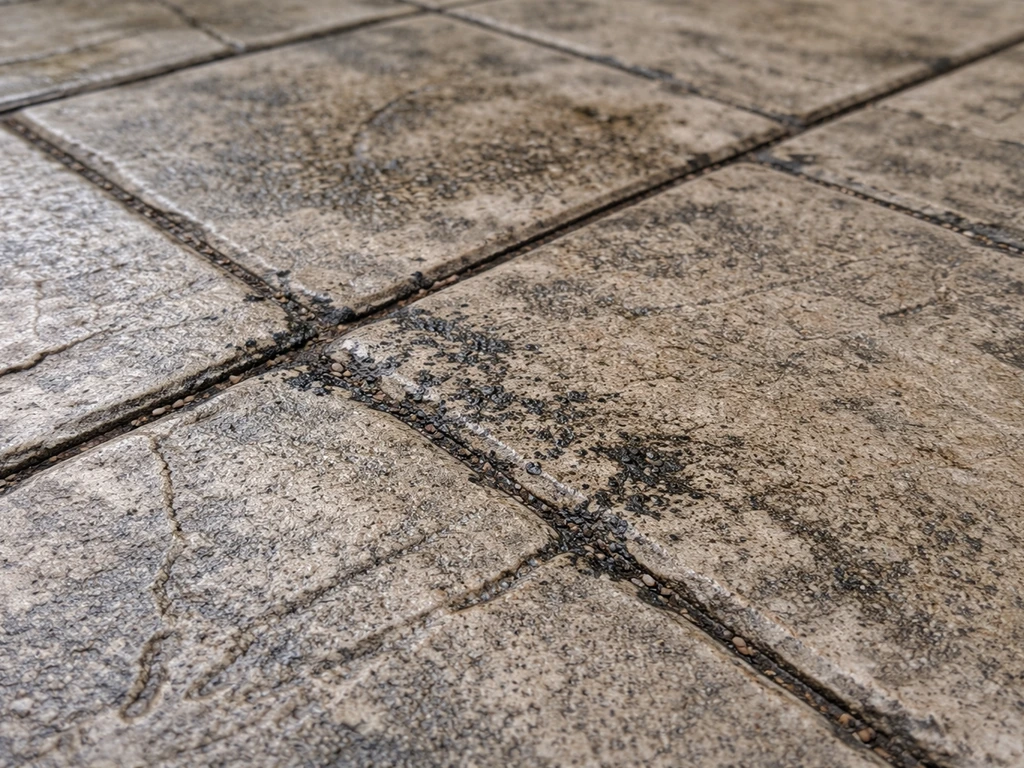
- Mold, mildew, and algae: These show up as green or black patches, especially in shaded areas or low spots in the stamped pattern where water sits. You need a bleach or sodium hypochlorite solution to actually kill the spores, not just move them around.
- Rust stains: Orange-brown streaks usually from patio furniture, planters, or metal fixtures. Bleach won't touch rust. You need an oxalic acid cleaner or a rust-specific product.
- Release powder residue: If your patio is newer or was recently restamped, you may have powdery release agent still sitting in the texture. This needs a dedicated cleaner or a carefully diluted muriatic acid wash.
- Grease and oil: From grills, cooking, or vehicles. Use a degreaser first before anything else, or the oil will just spread.
- Old, peeling sealer: If the existing sealer is flaking, you'll need to strip it before resealing. That's its own process covered in the guide on how to remove sealer from a stamped concrete patio.
Also check for cracks, spalling, or areas where the stamped texture has worn. Seal those after cleaning but before broad sealer application, using a concrete crack filler matched to your surface color. Sealer won't fix structural problems; it just locks them in.
Pressure washing vs. manual scrubbing: which one to use
Both methods work. Pressure washing is faster, manual scrubbing is safer for the surface and better for heavy stain dwell time. If you have a pressure washer, use it at low pressure. If you don't, a stiff deck brush and some elbow grease will absolutely get the job done.
Pressure washing stamped concrete
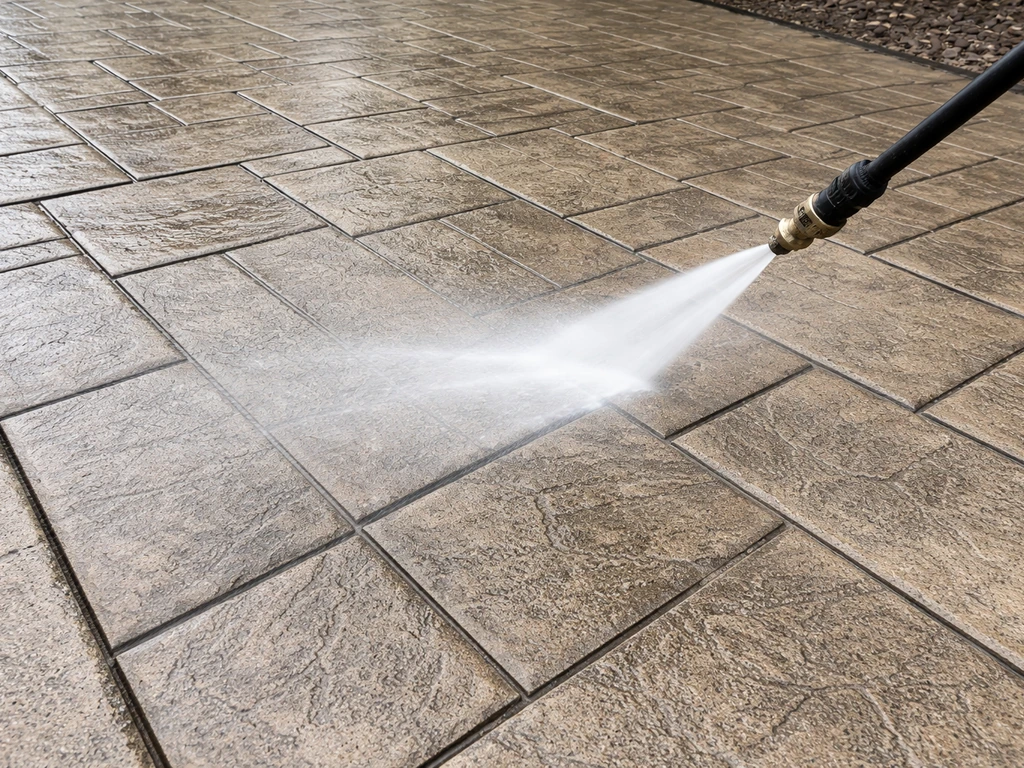
The key rule for stamped concrete is keeping the pressure under 1,500 PSI and never holding the nozzle in one spot. Stamped concrete has fine texture details, impressed lines, and sometimes a tinted release layer that high pressure will strip or etch unevenly. Use a 25-degree or 40-degree fan nozzle, not a zero-degree pinpoint tip. Keep the wand moving constantly in sweeping passes, and stay about 12 to 18 inches from the surface. I've seen people blast out the color release in patches by stopping the wand too long, and it's not easy to fix.
For mold, mildew, or algae, apply your cleaning solution first, let it dwell for the required contact time, then rinse with the pressure washer. Don't just pressure wash without a cleaner and expect the mold to be gone. You're just spraying spores around unless you've killed them first.
Manual scrubbing
For people without a pressure washer, this works just as well for most patio situations. Mix your cleaning solution in a bucket, pour or spray it onto a wet section of the patio, let it dwell, then scrub with a stiff-bristle brush or deck brush. Work in sections of about 4 to 6 square feet so the solution doesn't dry on the surface before you scrub. Rinse thoroughly with a garden hose on full pressure. It takes longer, but you have more control over dwell time and you're much less likely to damage the texture.
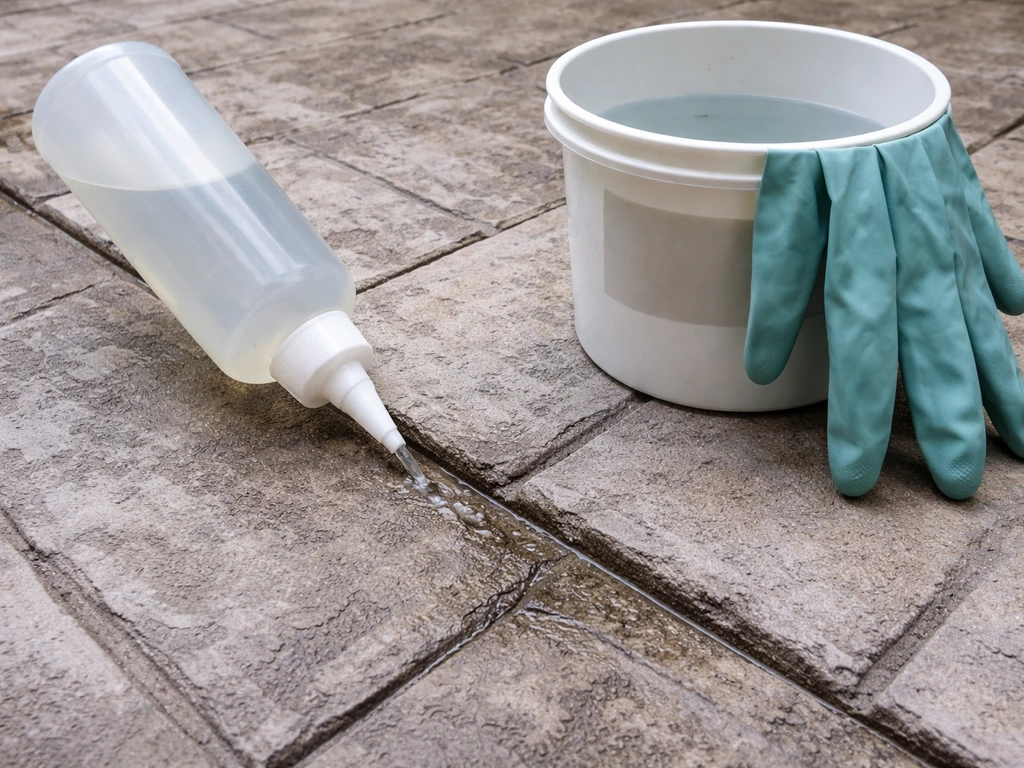
Using cleaning chemicals safely and effectively
Here's where people get into trouble by grabbing whatever's under the sink and going to town. The chemical you use depends on the stain, and a few of these products can cause real problems if used wrong. I'll go through each one.
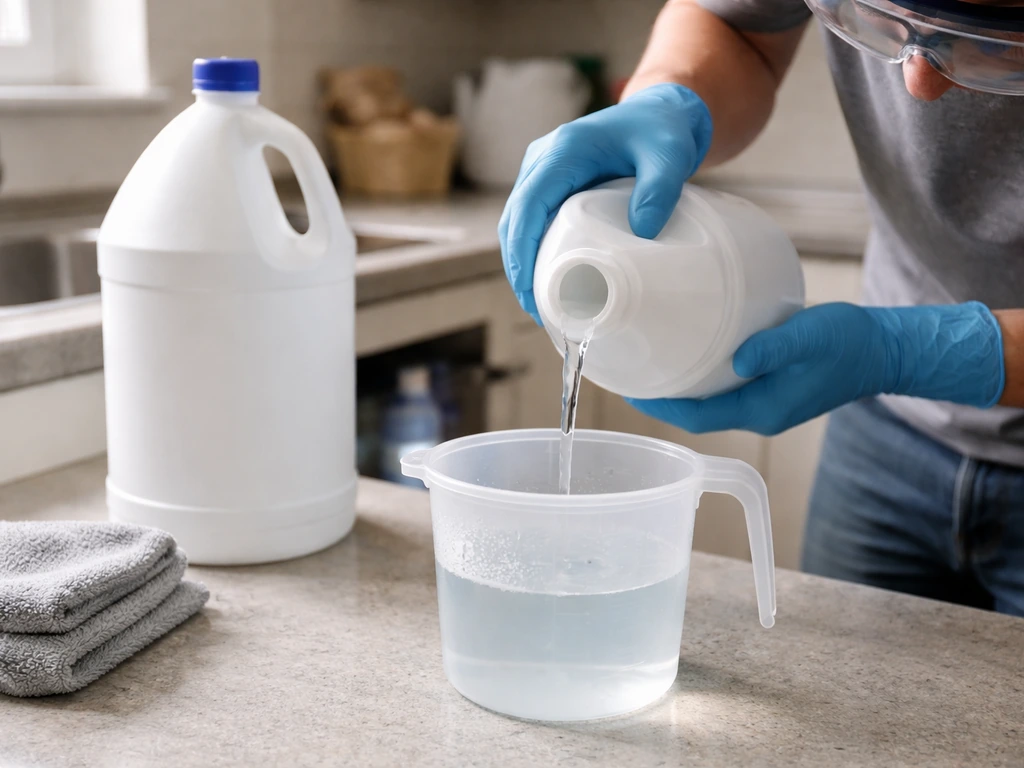
Bleach and sodium hypochlorite (for mold, mildew, algae)
Standard household bleach is about 5.25% sodium hypochlorite. For patio mold and mildew, dilute it to roughly 1 part bleach to 10 parts water. That gets you into the effective range for killing organic growth. Let it sit for at least 10 to 15 minutes before scrubbing so the hypochlorite actually has time to work. The CDC is clear that contact time matters; bleach that sits for 30 seconds and gets rinsed off is not doing its job on embedded mold. Rinse completely after scrubbing. Keep bleach solution off nearby plants and grass, and don't mix it with muriatic acid or any other acid-based cleaner. The combination creates toxic chlorine gas.
Muriatic acid (for release powder residue and stubborn mineral deposits)
Muriatic acid is a strong hydrochloric acid solution (typically around 31%) and it's the right tool for removing release powder that's still bonded into the stamped texture. The ASCC Decorative Concrete Council guidance recommends getting 75% or more of the release powder off the surface before sealing, and they suggest a dilution of 15 to 20 parts water to 1 part muriatic acid for stamped concrete. That's a weaker dilution than what you'd use for etching plain concrete (which is often 10:1), and that's intentional. Always add acid to water, never the other way around. Use plastic containers, not metal. Wear gloves, eye protection, and a respirator. Work outdoors only.
After the acid has worked for 15 to 30 minutes, neutralize it with baking soda sprinkled directly onto the wet surface before rinsing. Don't let the surface dry before you rinse, because the salt residue from the acid reaction will cause adhesion problems with the sealer later. Rinse thoroughly until the baking soda fizzing stops completely. Do not mix muriatic acid with bleach at any point.
Specialized cleaner/neutralizers (like Brickform Neutra Clean)
If you're not comfortable using muriatic acid, there are products specifically formulated for prepping stamped and colored concrete for sealing. Brickform's Neutra Clean, for example, is designed to loosen residues and release powders from imprinted concrete and then neutralize the surface, all in one step. The dilution is 4 oz of cleaner in 1 gallon of water (a 32:1 ratio). These products are significantly safer to handle than muriatic acid and leave the surface at the right pH for sealer adhesion. Worth using if this is your first time doing this job.
Vinegar (gentle option for light organic growth)
White vinegar at full strength or diluted 1:1 with water is a reasonable choice for light mildew or general grime if you have pets or kids and want to avoid harsher chemicals. It's slower and less effective on heavy mold than bleach, but it works fine for surface-level growth. Let it dwell 10 to 20 minutes, scrub, and rinse. Don't use vinegar right before applying sealer without rinsing extremely well; residual acidity can affect sealer bonding if the pH isn't neutral.
Getting the surface ready to seal
This stage is where most DIY sealing jobs go wrong. If you skip any of these steps, you'll trap moisture under the sealer, which turns it white or cloudy, and then you've got a much bigger problem than you started with.
- Rinse thoroughly: After all cleaning and chemical treatments, rinse the entire surface with clean water until there's no chemical residue, no fizzing, and the water runs clear. With muriatic acid, this step is non-negotiable.
- Neutralize if you used acid: Baking soda on the wet surface, let it fizz, then rinse again. This brings the pH back to neutral and prevents adhesion failure.
- Check for standing water in the stamp pattern: Low spots in the stamped texture trap water. After rinsing, look at the patio from a low angle. Any pooled water needs to be squeegeed or blown out before drying.
- Let it dry completely: This is the hardest part if you're eager to get the sealer down. After pressure washing or heavy cleaning, concrete needs significantly more drying time than you think, sometimes several days depending on the weather. Concrete Network specifically calls out that moisture-free conditions are essential, especially in those textured low spots. A moisture meter is the most reliable tool here. If you don't have one, the plastic sheet test works: tape a 12-inch square of plastic sheeting to the patio for an hour. If moisture beads under it, the concrete is not ready.
- Protect surrounding surfaces: Tape off or cover any adjacent walls, brick borders, plants, and furniture before sealing. Sealer overspray is difficult to remove from unintended surfaces.
The ASCC best-practices guidance is explicit that if you suspect excessive moisture, you simply don't apply the sealer. Wait another day. A cloudy, failed sealer job takes far more time and money to fix than waiting an extra 24 hours.
Choosing the right sealer for stamped concrete
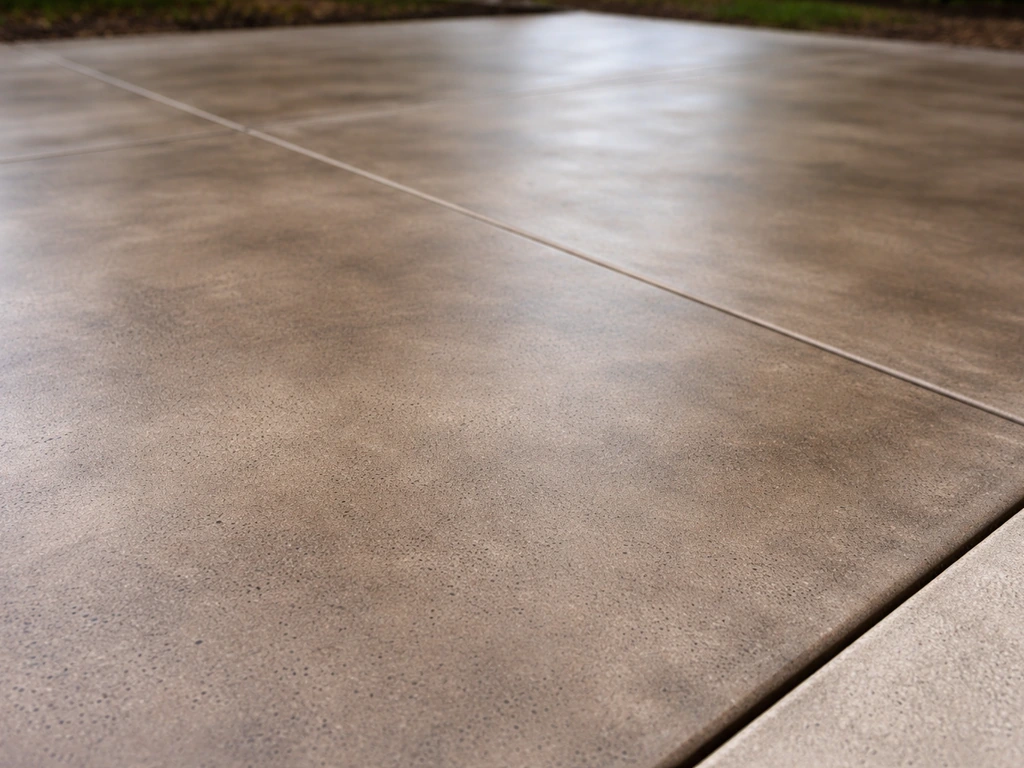
Stamped concrete has two needs that plain concrete doesn't: the sealer has to get into the texture without pooling in the low spots, and it has to enhance or at least not wash out the color and pattern. That narrows your choices a bit.
Acrylic sealers (the most common choice for stamped concrete)
Solvent-based acrylic sealers are the go-to for stamped concrete in most situations. They enhance color well, provide a wet look or high-gloss finish that complements the decorative nature of the surface, and they penetrate into the texture without bridging over it and trapping air. Water-based acrylics are also available and are easier to clean up and lower in VOCs, but they typically give less color enhancement and less gloss. Southern Stain and Seal's Stamp Seal Gloss, for example, covers 200 to 250 square feet per gallon on stamped concrete, and you can add a matte finish additive if you want to dial back the gloss level.
Penetrating silane/siloxane sealers
If your stamped concrete already has a lot of existing sealer buildup and you want protection without adding more film, a penetrating sealer like Brickform's Gem-Guard SB (a solvent-based silane/siloxane blend) soaks into the concrete rather than sitting on top. It won't enhance color or add gloss, but it repels water and chloride intrusion effectively. Coverage is 250 to 350 square feet per gallon. These are a good choice if you're more interested in protection than aesthetics, or if you're in a freeze-thaw climate where a thick film sealer can delaminate.
Sealer comparison at a glance
| Sealer Type | Finish | Color Enhancement | Coverage (per gallon) | Best For |
|---|---|---|---|---|
| Solvent-based acrylic | High gloss or satin | Strong | 200–250 sq ft | Most stamped concrete; color-enhanced patios |
| Water-based acrylic | Satin to low gloss | Moderate | 200–400 sq ft | Low-VOC preference; less aggressive sheen |
| Penetrating silane/siloxane | Natural/no sheen | None | 250–350 sq ft | Protection without film; older or heavily sealed surfaces |
| High-gloss concrete sealer (film-forming) | Very high gloss | Strong | 200–400 sq ft | Decorative showpiece patios; high-traffic areas |
One compatibility note: if you're resealing over an existing sealer, make sure the new product is compatible with what's already there. Solvent-based sealers can dissolve certain water-based films, which causes bubbling and peeling. When in doubt, test in a small inconspicuous area first. If old sealer is visibly peeling or delaminating, remove it first before applying anything new.
How to apply the sealer step by step
Before you open the sealer, check the weather forecast. You need temperatures between 50°F and 90°F, no rain for at least 24 hours after application, and low humidity. Applying sealer in direct midday sun heats the surface and causes the sealer to dry too fast, leaving lap marks and bubbles. Early morning or late afternoon is ideal.
- Stir the sealer: Don't shake it. Shaking introduces air bubbles that transfer to the surface. Stir gently.
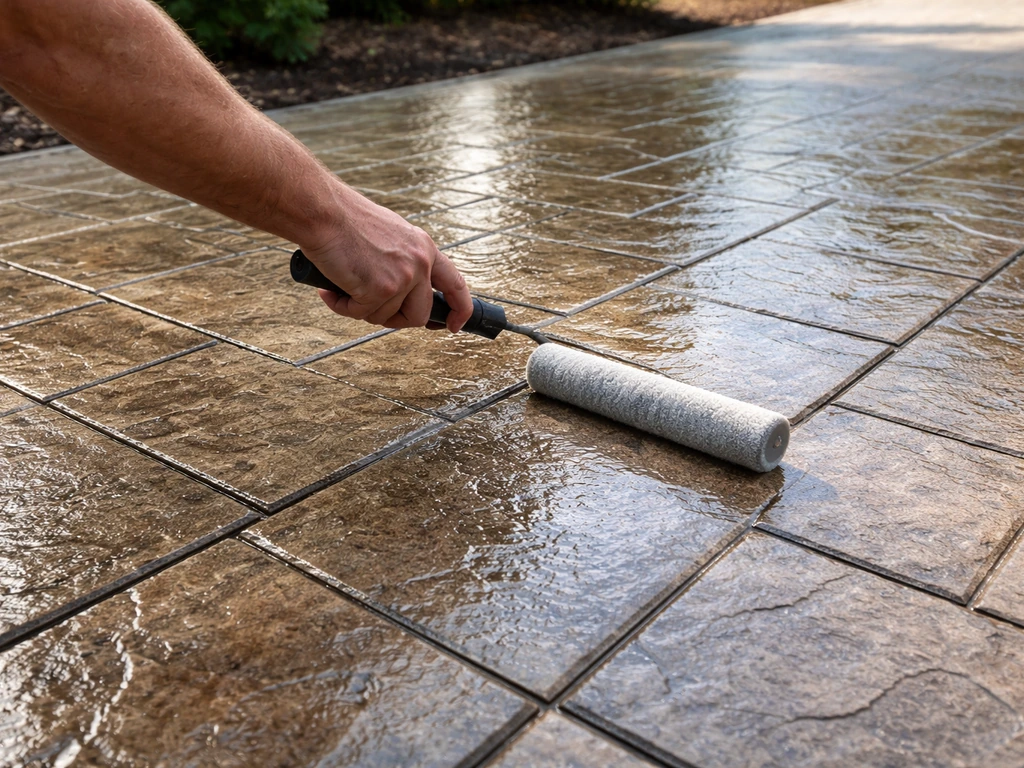
- Apply the first coat with a sprayer: A pump-up garden sprayer or airless sprayer works well for stamped concrete because it gets into the texture. Apply a thin, even coat. Thinner is always better than thicker.
- Back-roll immediately: Right after spraying each section, use a 3/8-inch nap roller to roll over the wet sealer and work it into the stamped texture. This is the spray-and-back-roll technique recommended by Concrete Network specifically for textured surfaces. It prevents pooling in the low spots of the stamp pattern and ensures even coverage.
- Let the first coat dry: With solvent-based sealers, dry-to-touch time is typically 15 to 40 minutes. Don't walk on it until it's dry to the touch.
- Apply the second coat: Go perpendicular to your first coat direction. Use the same spray-and-back-roll method. Two thin coats are always better than one thick one. Thick coats trap solvents and moisture under the film.
- Allow full cure before use: Light foot traffic is typically safe after about 3 hours. Heavy use, furniture, and vehicles should wait 48 to 72 hours.
For coverage planning: at 200 to 250 square feet per gallon (typical for stamped concrete sealers), a 300-square-foot patio needs roughly 1. blank" rel="noopener noreferrer">QUIKRETE lists coverage for its concrete and masonry high gloss sealer as 200 to 400 square feet per gallon (18 to 37 square meters). 2 to 1.5 gallons per coat, so buy 3 to 4 gallons to cover two coats with a little margin. Don't try to stretch coverage by applying too thin; you'll get uneven sheen and less protection. If you’re trying to decide on the best stain for a concrete patio, it helps to match the product to your concrete’s porosity and how much wear and moisture exposure it gets best stain for concrete patio.
After sealing: curing, maintenance, and fixing common problems
Curing and basic aftercare
Keep the patio dry for the first 24 hours after sealing, no exceptions. Even light rain during cure can leave water spots or cause the sealer to turn milky. After full cure (48 to 72 hours for heavy use), the surface is protected but not invincible. For ongoing care, rinse the patio periodically with a garden hose and use a mild pH-neutral cleaner for routine cleaning. Avoid harsh degreasers or acidic cleaners on sealed concrete because they'll degrade the sealer over time. Resealing is typically needed every 2 to 3 years depending on sun exposure, traffic, and climate.
Troubleshooting common sealing problems
White or cloudy sealer is the most common problem and it almost always means moisture was trapped under the film. If it appears right after application, you applied over a damp surface. If it appears days later, moisture migrated up from below. The fix involves opening up the film with a solvent like xylene or acetone (misted lightly, not flooded) and then back-rolling to release the trapped moisture and redistribute the sealer. This is a real fix that actually works, but it's much better to not be in that position. Let the concrete dry properly before you seal.
Bubbles in the sealer usually mean the coat was too thick, the surface was too hot when you applied it, or you shook the sealer. Thin coats, cooler application times, and gentle stirring prevent this. Small bubbles sometimes pop and self-level as the sealer dries. Large bubbles need to be sanded flat and recoated.
Lap marks and roller lines happen when you apply too slowly and the edges start to dry before you overlap them. Work in smaller sections, keep a wet edge, and back-roll while the sealer is still wet.
Peeling or flaking sealer (appearing after some months) usually means the surface wasn't clean enough when sealed, there was a compatibility issue with an old sealer layer underneath, or the sealer was applied over a non-porous surface. At that point, you'll need to look into removing the sealer and starting fresh. And if you're still unsure about how often to redo this whole process, the guide on how to care for a stamped concrete patio covers long-term maintenance in more detail. how to care for a stamped concrete patio covers long-term maintenance in more detail. If you want a simple long-term checklist for ongoing cleaning and resealing, see the full guide on how to care for a stamped concrete patio how often to redo this whole process.
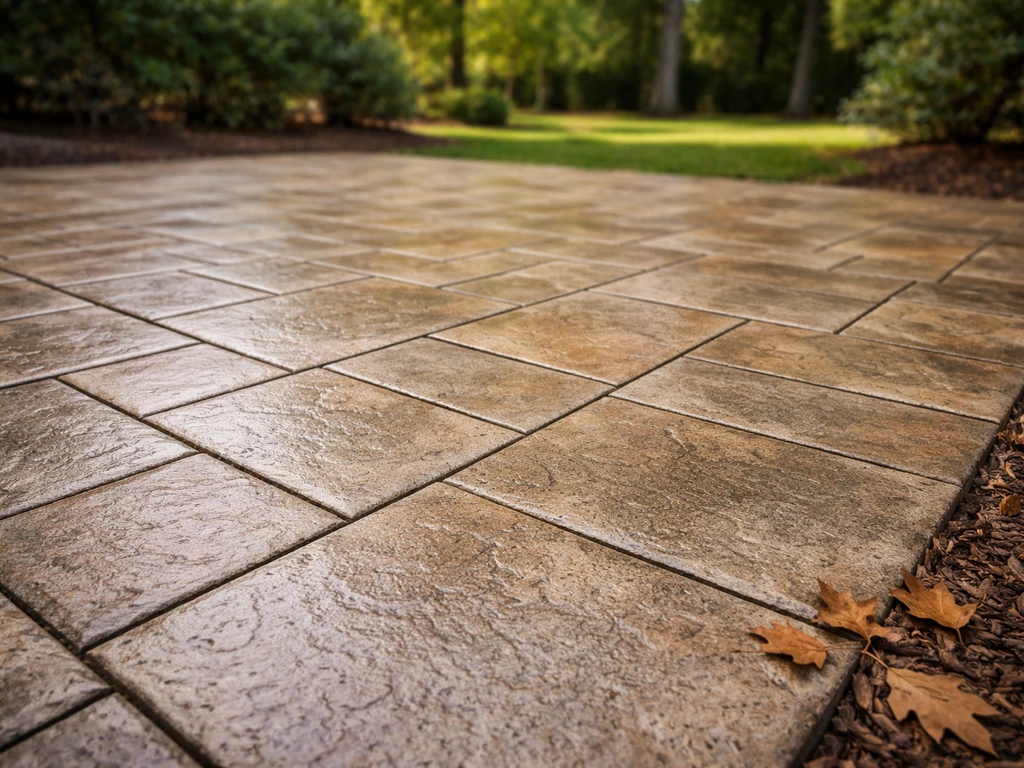
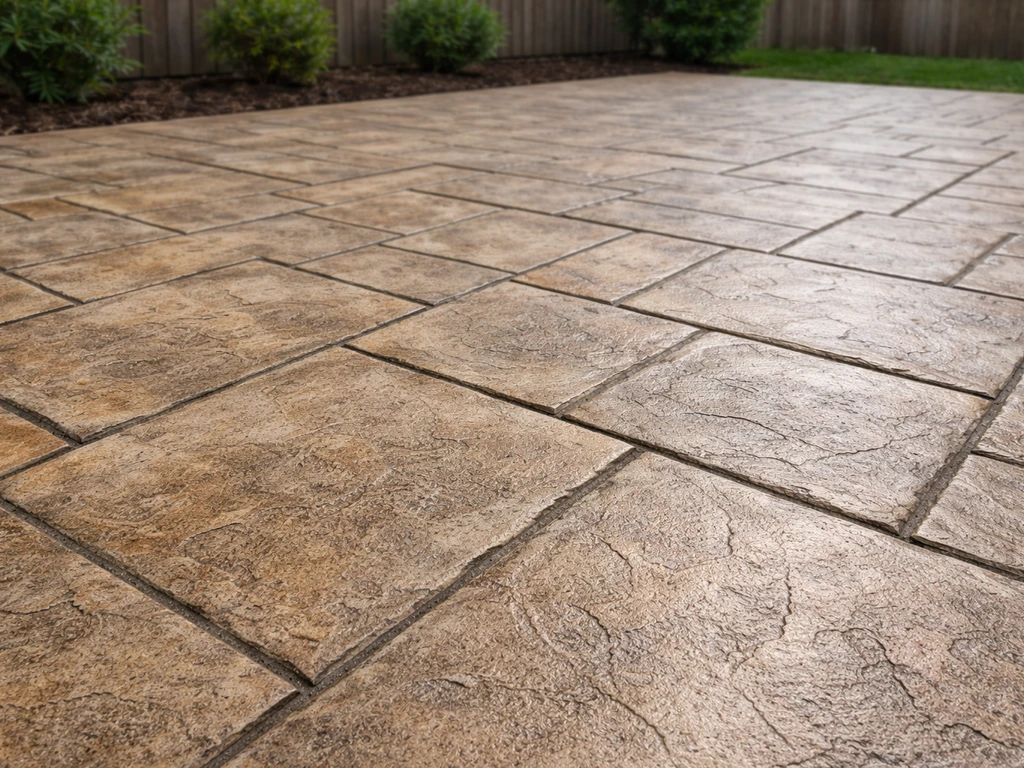
Done right, a freshly cleaned and sealed stamped concrete patio is genuinely satisfying. The texture pops, the color looks rich, and you've just extended the life of that surface by years. The work itself isn't complicated, it just requires patience at the drying stage and honesty about whether the surface is actually ready before you pick up the roller. If you're wondering how to re-stain a concrete patio instead of re-sealing it, the process starts with identifying what finish is already there and stripping or cleaning as needed how to re-stain concrete patio.
FAQ
How can I tell if my stamped concrete is dry enough before sealing?
Do a moisture check, not just a wait. Press a dry plastic sheet (about 2 ft by 2 ft) onto the surface and tape the edges, leave it for 4 to 6 hours, then lift it. If there is condensation or a darkened damp patch under the plastic, delay sealing, moisture is likely trapped in the pores and the sealer can turn cloudy.
Can I seal if there are small cracks, hairlines, or surface spalling spots?
For hairline cracking you can often proceed after filling with a concrete crack filler matched to the surface and letting it cure fully. If you have spalling, flaking, or any loose, scaling material, you need to remove the failing edges and patch, otherwise the sealer film will bridge over unstable material and peel later.
What should I do if I get the wrong cleaner, or I used an acid or bleach and forgot to neutralize and rinse well?
Stop and re-rinse thoroughly. Residual acid or oxidizers can interfere with bonding and can show up as whitening or poor adhesion later. If you used muriatic acid, neutralize completely with baking soda as described and keep rinsing until no fizzing remains and the surface feels neutral to the touch after drying slightly. If you are unsure, do a small adhesion test area and wait for full cure before committing to the rest.
Is it okay to seal in damp weather or after foggy mornings?
Avoid it. Even if the surface looks dry, elevated humidity and dampness can slow cure and increase the chance of milky or cloudy sealer. Wait until the patio is visibly dry, the forecast has no rain, and the air humidity is low, then apply during the recommended temperature window.
Do I need to let sealer dry between coats, and how long should I wait?
Yes, follow the product label cure window, but a practical rule is to recoat only after the first coat has set to the point that it is no longer tacky and fingerprints do not mar it. If you recoat too early, you can trap solvents and moisture, which increases bubbling and clouding.
Should I apply sealer with a roller only, or is there a sprayer option?
For stamped concrete, rolling is usually safer because it helps drive product into texture detail without over-spraying. Sprayers can create uneven thickness and pooling in the low relief if you do not back-brush or back-roll. If you use a sprayer, plan to immediately back-roll to even out the film.
How do I avoid streaks, roller lines, and lap marks if the patio is large?
Work in smaller lanes that you can finish before the edges start to tack. Keep a wet edge, overlap each pass slightly, and back-roll lightly while the coating is still wet. If your sealer starts to set, do not try to fix streaks by adding more later, instead let it cure and address the spot with the manufacturer’s guidance.
What do I do if the sealed surface looks blotchy or uneven in color?
Uneven sheen usually comes from uneven cleaning, inconsistent thickness, or patchy release powder removal. If it is mild, you may be able to correct later by applying an additional thin coat after cure, but if blotching is severe or tied to remaining contaminants, you may need targeted cleaning or full removal depending on the sealer and cause.
Can I seal over existing sealant without testing?
You should not skip testing. Solvent-based sealers can lift or wrinkle some older water-based films, causing bubbling or peeling. Pick a hidden area, clean lightly per label instructions if needed, apply the new sealer, and observe after full cure (not just the first day). If you see lifting, peeling, or wrinkling, removal is required.
How long should I stay off the patio after sealing?
At minimum, keep traffic off during the first 24 hours and follow the label for full cure. For heavy use, many sealers require 48 to 72 hours, if you use the patio too soon you can trap footprints, drag debris into the film, or create uneven gloss.
How often should I clean a sealed stamped concrete patio, and what cleaners are safe?
Routine cleaning is usually mild, use a pH-neutral cleaner and water, and rinse after scrubbing. Avoid harsh degreasers and acidic products because they can dull gloss and degrade the sealer film over time. If you see recurring mildew, treat the cause (shade, drainage, organic debris) and use the appropriate mildew cleaner method rather than repeatedly scrubbing with strong chemicals.
What should I do if sealer peels after a few months?
Peeling indicates a bonding or compatibility failure, typically insufficient surface prep, trapped moisture, or incompatibility with the prior coating. The practical fix is to identify the sealer type and remove the failing film, then re-clean and re-prep to ensure the next coat adheres. If there are recurring moisture signs, address drainage or wait longer between cleaning and sealing.
Next Articles
How to Care for a Stamped Concrete Patio: Cleaning, Sealing
Learn how to care for stamped concrete patio: cleaning, stain removal, sealing timing, repairs, and safe seasonal mainte
How to Clean a Stamped Concrete Patio: Step-by-Step Guide
Step-by-step how to clean a stamped concrete patio, from daily wash to deep stain removal with safe cleaner choices.
Best Stain for Concrete Patio: Choose, Prep, and Apply
Pick the best concrete patio stain, prep properly, choose finish, and learn stain vs paint with cleaning steps.