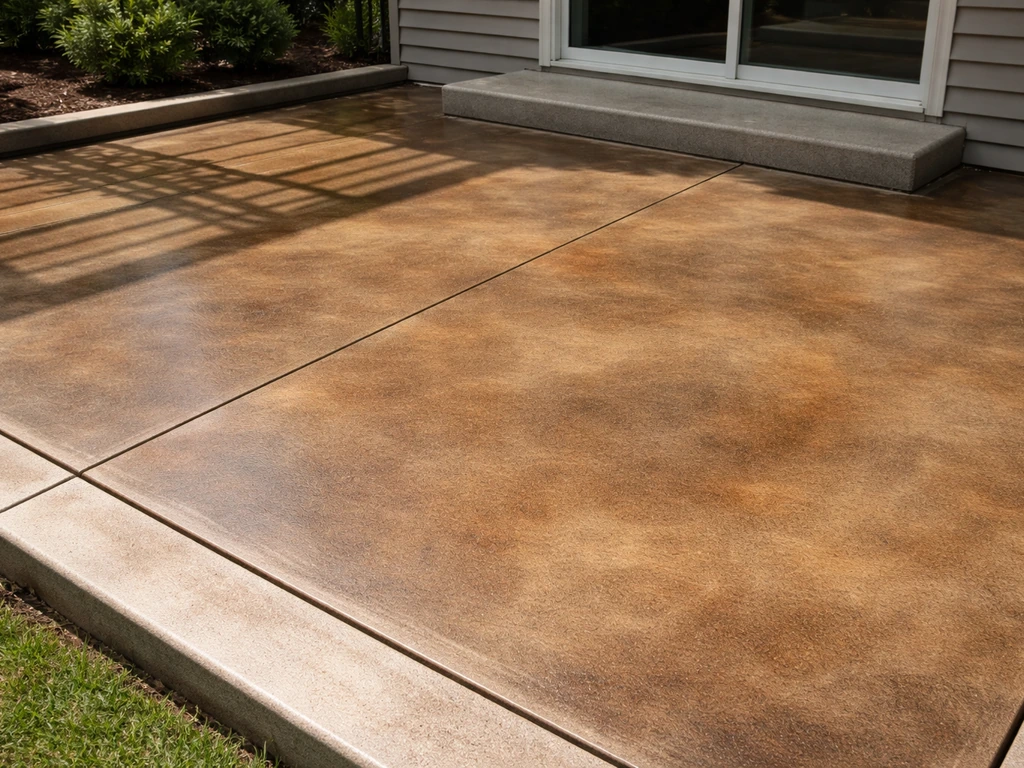
Yes, you can restain a concrete patio, but only if the surface is clean, dry, and free of anything that blocks the new stain from penetrating or bonding. That means removing existing sealers, stripping old topical coatings, scrubbing out mold and grease, and patching cracks before you ever open a can of stain. If you’re also dealing with stamped concrete, the same deep cleaning and prep logic applies, especially when you follow how to clean and seal stamped concrete patio. Skip any of those steps and you'll end up with blotchy, peeling results no matter how carefully you apply the color. Do them right and you can get a dramatically refreshed patio that lasts years.
How to Re-Stain a Concrete Patio Step by Step

Dylan Hale
26 Jun 2026
Can you restain your concrete patio (and when you can't)
Most patios can be restained successfully. The key question is what's currently on the concrete and how well it's bonded. If the old coating is peeling, flaking, or bubbling, you cannot simply stain over it. New stain needs a stable surface to bond to, and a failing coating means anything you apply on top will fail too. Before you buy a single product, do two quick tests.
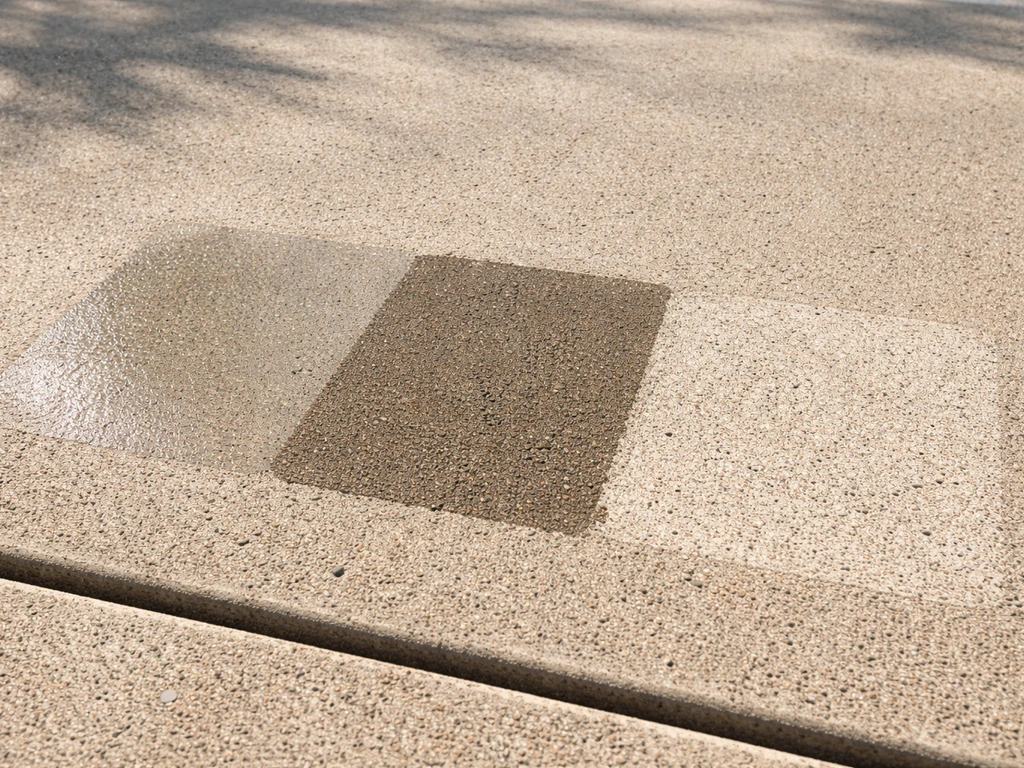
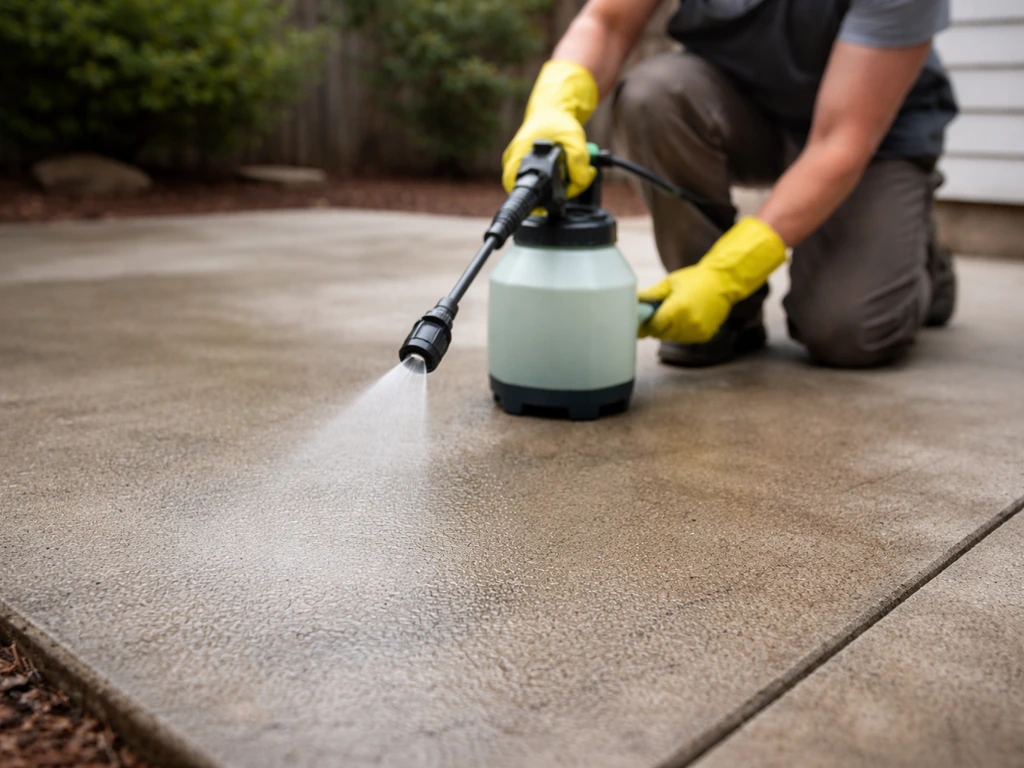
First, the water test: spray a small area with water and watch what happens. If the water beads up and doesn't soak in within 30 to 60 seconds, a sealer is still active on the surface and will block the new stain. If it darkens and absorbs, the concrete is porous and ready to accept stain. Keep in mind that water beading alone doesn't tell the whole story. Oils, silicone residues, or curing compounds can also repel water, so if something looks off (blotchy beading, streaky spots), do a tape test too.
Second, the tape test: press a strip of painter's tape firmly over a small area, let it sit for a minute, then rip it off fast. If you see coating material lift onto the tape, the existing film isn't bonded well enough to stain over. You'll need to strip it. If the tape comes off clean, the existing coating (if any) is still firmly adhered and you can assess whether to stain over it or strip it based on the type.
Here's when restaining is NOT the right move and you need a different approach first:
- The existing coating is peeling, bubbling, or delaminating across more than a small area. Strip completely before proceeding.
- The concrete has deep structural cracks (wider than a hairline), significant spalling, or heaving sections. Patch and level first, or consider resurfacing.
- There's an active moisture problem pushing up from below. A taped plastic sheet left for 24 to 48 hours will show condensation on the underside if moisture is wicking through the slab. Staining over a wet slab causes sealer failure.
- You have a solid-color epoxy or garage-floor paint coating. These are film-forming coatings that typically need full stripping before any stain system will work on top.
- The concrete is brand new. New concrete is highly alkaline (above pH 12) and needs at least 28 days to cure before staining.
Identify what's currently on the concrete
Knowing what you're dealing with saves you from wasted effort and compatibility mistakes. There are three main categories of existing treatments, and each requires a different approach before restaining.
Penetrating sealers
Penetrating sealers soak into the concrete and don't form a film on top. Water may still bead on the surface, but there's no visible coating layer. These are the most forgiving situation: if the sealer is old and the water test shows partial absorption, you may be able to acid stain directly over it since acid stain works through a chemical reaction with the concrete minerals. Water-based stains are trickier because they rely more on surface penetration. In either case, mechanical prep (light sanding, acid etching, or re-etching) can help open the surface back up.
Acrylic or topical sealers and stains
These leave a visible film on the surface that you can sometimes see by looking at the concrete at a low angle in raking light. If it's intact and well-bonded, you have two realistic options: strip it off and start fresh, or apply a compatible product over it. Here's the catch: if you want to switch from a water-based sealer system to a solvent-based one (or vice versa), you generally need to strip the existing layer first because the chemistries don't always bond to each other correctly. If you're staying within the same chemistry family and the existing coat passes the tape test, re-coating may work. When in doubt, strip it.
Paint or epoxy coatings
Solid paint and epoxy coatings are film-forming by nature. Stain cannot penetrate through them. If the paint is peeling, you must strip it. If it's fully intact, stripping is still strongly recommended because stain applied over paint will look uneven and the bond is unreliable. A chemical stripper, floor grinder, or shot blaster will do the job, though floor grinding is a project-level commitment. For most homeowners, a chemical stripper is the practical first step, followed by pressure washing and a thorough inspection.
Deep cleaning and stain removal prep steps
This is the step most people rush and then regret. Contaminants left on the surface will show through the stain as blotchy areas, color variations, or spots where the stain simply didn't take. I've seen patios where the contractor skipped degreasing and the oil stains from years of grilling showed up perfectly outlined through the new color. Clean it like you mean it.
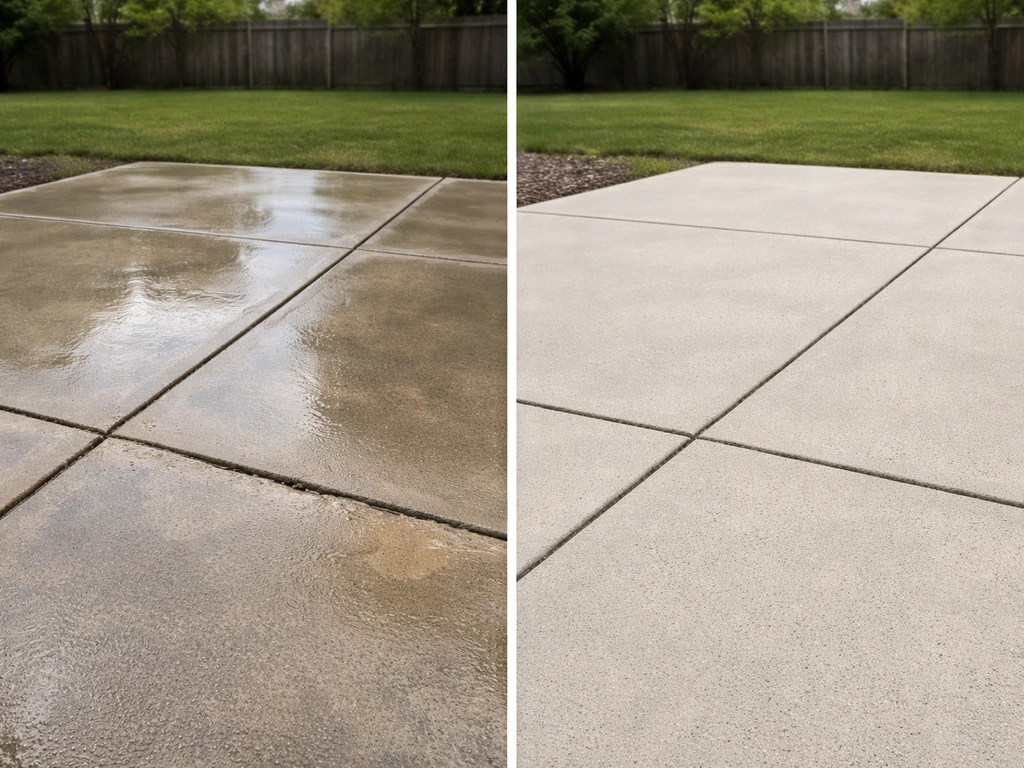
General cleaning: pressure washing vs. manual scrubbing
Start with a general wash to remove loose dirt, debris, and surface grime. If you have a pressure washer, use it at 2,000 to 3,000 PSI with a fan tip (25 to 40 degree), working in overlapping passes. If you don't have a pressure washer, a stiff-bristle brush, a bucket of hot water with dish soap or a concrete cleaner, and a good garden hose rinse will work. It takes longer, but it gets the job done. Let the concrete dry fully before moving on to targeted stain removal. After pressure washing, let the concrete dry fully before you seal so moisture does not get trapped under the sealer before moving on.
Mold, mildew, and algae
Bleach is the most effective option here. Mix 1 cup of household bleach (sodium hypochlorite) with 1 gallon of water, apply it to the affected area, and let it sit for 10 to 15 minutes. For mold remediation with bleach, follow bleach dwell-time guidance such as letting it sit around 10, 15 minutes, and rinse thoroughly before any subsequent chemical use to avoid compatibility issues Bustmold. Scrub with a stiff brush, then rinse thoroughly with a garden hose. Rinse nearby plants and landscaping with plain water after, because even diluted bleach runoff can damage them. If you have pets or prefer a gentler approach, undiluted white vinegar works on lighter mold growth. It's slower and less aggressive, but it's safer to have around kids and animals. Apply it, let it sit 20 to 30 minutes, scrub, and rinse well.
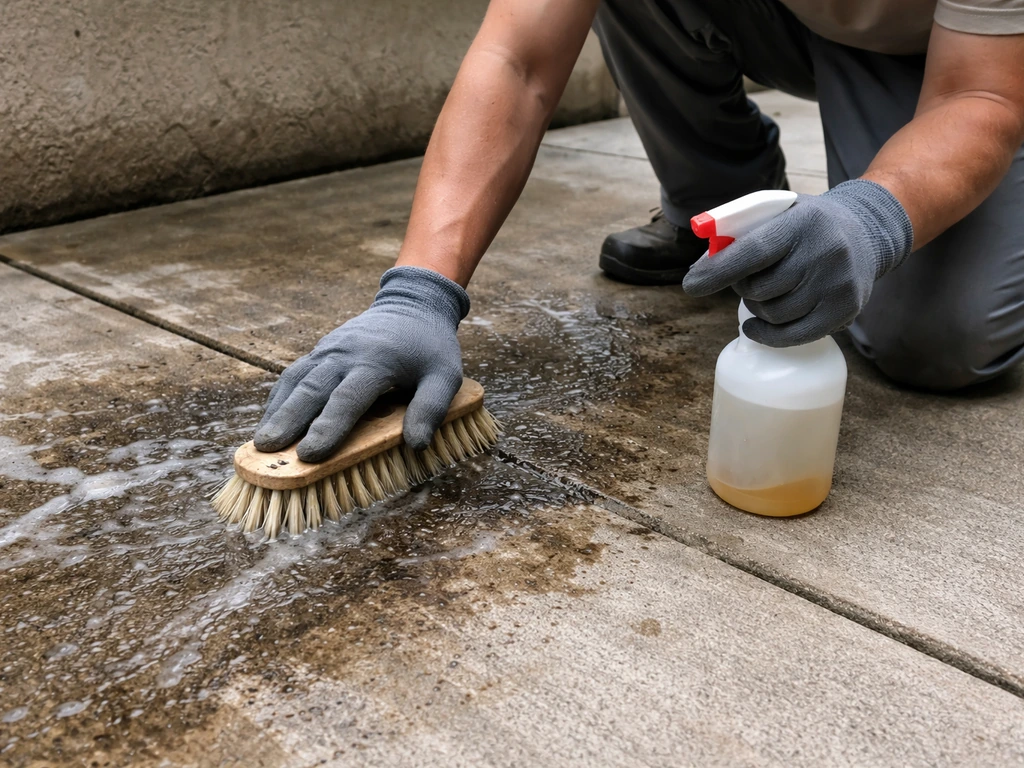
Grease and oil stains
Degrease with a dedicated concrete degreaser or a strong dish soap solution. Apply the degreaser to the stain, work it in with a stiff brush, and let it dwell for 10 to 15 minutes before rinsing. For older, deeply set oil stains, you may need two or three rounds. A poultice made from cat litter or baking soda mixed with a solvent (acetone or mineral spirits) pressed over the stain and left overnight can pull oil out of the pores. Scrape it off, sweep up, then follow with a degreaser wash. Don't skip this step even for stains that look faint. Grease invisible to the eye can still block stain adhesion.
Rust stains
Oxalic acid is the most effective treatment for rust on concrete. You can find it as a wood bleach or a dedicated concrete rust remover. Dampen the stained area first, apply the oxalic acid solution or paste, and keep it wet and working for 15 to 20 minutes before rinsing with fresh water. Phosphoric acid-based rust removers also work well. Follow the product instructions carefully, wear gloves and eye protection, and rinse thoroughly. Repeat if the stain is stubborn. Rinse, rinse, rinse: acid residue left on the surface will interfere with the new stain.
Efflorescence (the white chalky deposits)
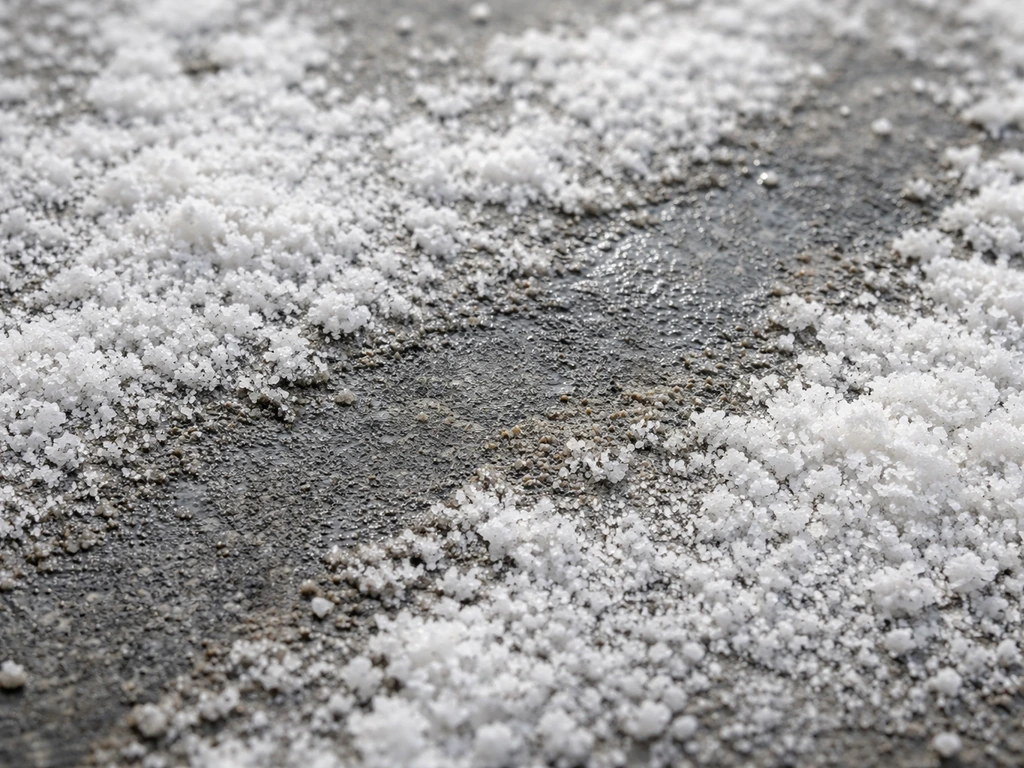
Efflorescence is salt and mineral deposits that migrate to the surface as water moves through concrete. A diluted phosphoric acid solution (1 part acid to 9 parts water) dissolves it effectively. Wet the concrete first, apply the solution, let it work for a few minutes, then scrub and rinse thoroughly. RadonSeal and similar efflorescence cleaners are also good options if you want a pre-formulated product. After cleaning, let the concrete dry completely and check whether efflorescence reappears. If it does, there's a persistent moisture issue that needs to be addressed before you stain.
Surface preparation: etching, neutralizing, drying, and repairs
Surface prep is the make-or-break step. Direct Colors puts it plainly: surface preparation is the single most important factor in a successful acid stain job. The same is true for water-based stains. The concrete needs to be open, clean, neutral in pH, dry, and structurally sound.
Etching (when and how)
Etching opens the pores of the concrete so the stain can penetrate and react evenly. You need to etch if the surface is slick, smooth (like trowel-finished concrete), or if the water test shows poor absorption. You also need it if you want to use acid stain and the surface has never been acid-etched. Muriatic acid diluted to about 1 part acid to 10 parts water is the traditional choice. Pour the water first, then add the acid slowly. Wet the concrete before applying, pour or spray the solution on, and let it fizz and dwell for 5 to 10 minutes. If it doesn't fizz at all, the surface may still have a sealer barrier. Scrub with a stiff broom or brush, then rinse very thoroughly with clean water. A safer alternative for light etching is phosphoric acid or a proprietary concrete etcher, both of which are less aggressive and easier to handle.
Safety when working with muriatic acid
Wear chemical-resistant gloves, safety goggles, old clothes, and rubber boots. Work in a ventilated area and keep a box of baking soda nearby to neutralize any spills. Never mix acid with bleach or other cleaners. If you're not comfortable working with muriatic acid, phosphoric-based etchers sold at hardware stores do a respectable job with less risk.
Neutralizing after etching or acid washing
After etching, you must neutralize the acid residue before staining or sealing. Mix baking soda with water (about 1 cup per gallon) or use TSP (trisodium phosphate) as an alkaline neutralizer. blank" rel="noopener noreferrer">Apply it with a pump sprayer, scrub lightly, then rinse thoroughly with clean water. Use pH test strips to confirm the surface is neutral (pH 6 to 8) before moving on. If the pH is still acidic or strongly alkaline, rinse again and retest. This step matters because acid stain chemistry is pH-sensitive and residue can throw off the results.
Drying time
The concrete must be completely dry before you stain or seal. In warm, dry weather that might mean 24 hours. In humid or overcast conditions, give it 48 to 72 hours minimum. To check for hidden moisture, tape a piece of plastic sheeting (about 18 inches square) to the concrete with tape on all four edges and leave it for 24 to 48 hours. Condensation on the underside of the plastic means moisture is still wicking through. Don't stain until that test comes back clean.
Patching cracks and leveling
Fill hairline cracks with a concrete crack filler or polyurethane caulk designed for concrete. For wider cracks (over 1/4 inch), use a cement-based patching compound and feather the edges smooth. Let patches cure fully per the product instructions before staining. Note that patched areas may absorb stain differently than the surrounding concrete, especially with acid stain, because the patch material has different mineral content. Do a test patch over the repair after everything is prepped to see how the color takes before committing to the full application.
Choosing the right concrete stain and system
There are two main stain types, and choosing the right one shapes every step that follows: acid-based stain and water-based stain. They work differently, look different, and require different application and sealer pairings.
| Feature | Acid-Based Stain | Water-Based Stain |
|---|---|---|
| How it works | Chemical reaction with concrete minerals; color variation is natural and unpredictable | Deposits pigment/dye into surface pores; more uniform, consistent color |
| Color range | Earthy tones: browns, tans, greens, blues (limited palette) | Wide range including bright colors, grays, and custom blends |
| Surface requirement | Must be bare, clean, unsealed concrete; concrete mineral content affects final color | More forgiving but still needs clean, open surface |
| Application difficulty | Moderate; fumes and acid safety precautions required | Easier; water cleanup, no harsh fumes |
| Durability | Generally longer-lasting in high traffic when properly sealed | Good durability with right sealer; may need recoating sooner |
| Sealer needed | Yes, always | Yes, always |
| Best for | Natural, mottled look; experienced DIYers; permanently bare concrete | Consistent color; beginners; broader design options |
My recommendation: if you want a natural, variegated stone-like appearance and you're comfortable with chemical handling, acid stain is worth the extra effort. If you want a specific color, a more uniform finish, or you're newer to this kind of project, water-based stain is the more accessible choice and still looks great when properly sealed.
Sealer compatibility: plan this before you buy the stain
The stain and sealer need to work together. Acrylic sealers are the most common pairing for both stain types and are widely available. For high-traffic areas, a urethane or epoxy-urethane system offers better durability, but urethanes typically need to go over a water-based epoxy primer. If you use a penetrating sealer (silane/siloxane type), know that it's invisible and won't add gloss, but it also means future re-coating requires re-etching or stripping first. Check the stain manufacturer's sealer recommendations and stick to their system, because switching chemistries (water-based sealer over an existing solvent-based one, for example) can cause adhesion failures.
How to apply stain evenly: tools, timing, and test patches
Always do a test patch
Before you commit to the full patio, apply stain to a small inconspicuous corner or a scrap concrete piece with the same prep as the main surface. This tells you how the color looks when dry, whether the concrete is absorbing evenly, and whether any remaining contaminants are causing issues. Let it cure fully (not just surface-dry) before evaluating. A test patch takes 30 minutes of your time and can save you from a costly mistake.
Protect surrounding areas
Cover adjacent surfaces with plastic sheeting and painter's tape before you start. Stain splatter on brick, siding, pavers, or landscaping is difficult to remove. Tape along edges carefully, and if you're using a sprayer, cover everything within several feet. Wetting nearby plants before you start gives them a buffer against any overspray.
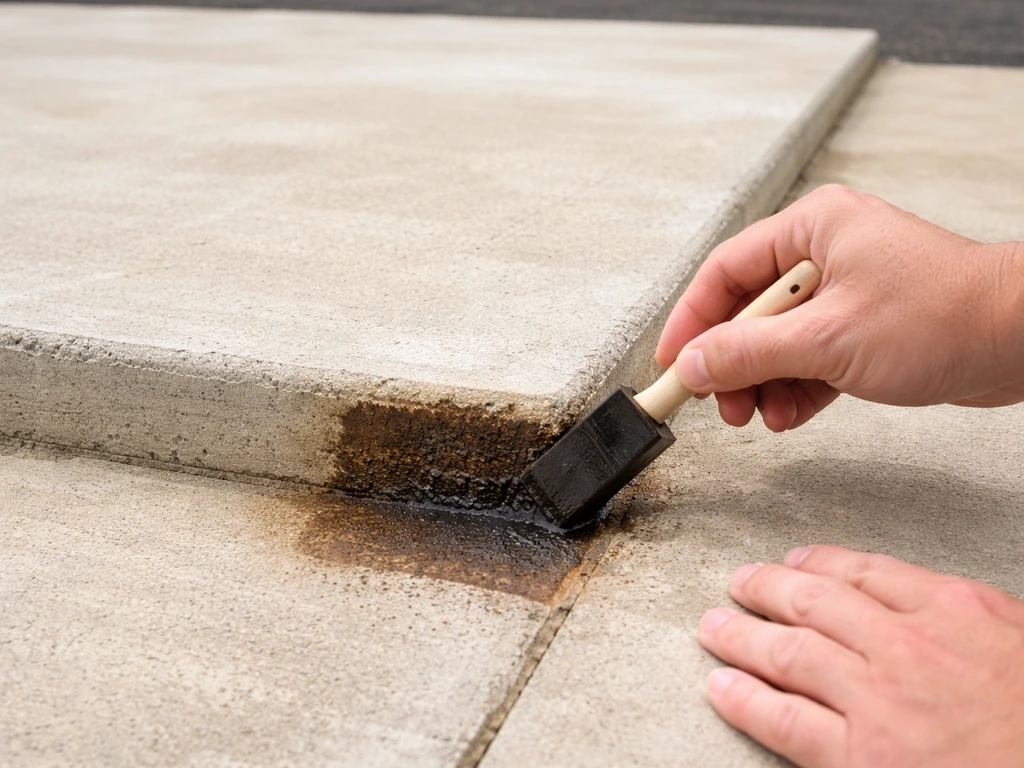
Applying acid stain
Use a pump garden sprayer with a plastic wand (not metal, as acid corrodes it) or a natural-bristle brush. Apply in a circular, overlapping motion to avoid lap marks. Work in manageable sections and keep a wet edge so the stain doesn't dry mid-pass. Bob Vila specifically calls this out: if acid stain dries before the reaction is complete, you'll see noticeable lines where the passes overlapped. Avoid applying in direct sun or hot conditions (over 90°F) because the stain can dry prematurely before it reacts fully. Let the stain react for the time specified on the product label, typically 2 to 4 hours, until you're satisfied with the depth of color. Don't over-apply: pooling or excess product leads to blotchy areas. Once the reaction is complete, neutralize with your baking soda or TSP solution, scrub, and rinse thoroughly.
Applying water-based stain
Water-based stains can be applied with a pump sprayer, roller, or brush. Spraying gives the most even finish: use a slightly circular, overlapping motion with the nozzle held at a consistent distance from the surface (don't arc the spray nozzle high up and down, as that changes coverage thickness). If you're rolling, don't over-roll. Excessive back-rolling redistributes pigment and creates streaks. Most water-based stains look best with two coats: apply the first coat, let it dry completely per the product instructions, then evaluate color depth before deciding on a second coat. Lighter colors need less product than darker ones. Keep the technique consistent across the slab.
Achieving even color
Uneven stain results almost always trace back to prep, not application. Grease spots show as lighter areas. Areas with more porosity (like patches or previous repairs) absorb more stain and go darker. Working in sections that are too large leads to dry edges and lap marks. If you're restaining a large patio alone, consider splitting it into quadrants and working systematically, always keeping a wet edge at the seam between sections.
Sealing, curing, and aftercare to prevent repeat staining
Why sealing is non-negotiable
Concrete stain, whether acid or water-based, only colors the surface layer. It doesn't protect it. Without a sealer, foot traffic, rain, UV exposure, and everyday spills will break down the color within one to two seasons. The sealer is what makes the whole project last. Apply it every time, without exception.
When to apply sealer
For water-based stains, wait at least 2 hours after the final stain coat and confirm the surface is completely dry to the touch. A white rag pressed to the surface should come away clean with no color transfer. For acid stain, wait until after you've neutralized and rinsed, the surface has dried completely (at least 24 hours in good conditions), and the pH is confirmed neutral. If the concrete is still at all damp, the sealer can turn milky or hazy, which is a frustrating failure that requires stripping and redoing.
Dew point and weather conditions
Don't apply sealer when rain is expected within 24 hours, when the temperature is below 50°F or above 90°F, or when humidity is very high. The dew point matters: if the concrete surface temperature is within 5 degrees of the dew point, moisture can condense on the surface during application and cause cloudiness or poor adhesion. Check the weather before you start.
How to apply sealer

For acrylic sealers, a low-nap roller or pump sprayer works well. Apply thin, even coats rather than one heavy coat. Thick coats trap air and can bubble or peel. Two thin coats are always better than one thick one. For penetrating sealers, apply liberally, allow penetration for 5 to 10 minutes, then spread any excess with a brush or roller so it doesn't puddle on the surface and leave a residue film. Let the first coat cure per the label before applying a second.
Traffic and cure times
Most acrylic sealers allow light foot traffic after 24 hours and full traffic (furniture, grilling, regular use) after 48 to 72 hours. Avoid dragging heavy furniture or placing mats directly on the surface for at least a week. For epoxy or urethane sealers, follow the product cure schedule specifically since some require 7 days before full use.
Ongoing maintenance to keep the color looking fresh
Regular maintenance is straightforward. Sweep or blow off debris regularly to prevent grit from scratching the sealer. Rinse the surface with water or a mild soap solution to remove dirt and spills before they sit and stain. Avoid harsh cleaners or pressure washing with high PSI directly on the sealed surface, as both can wear the sealer down faster. Reapply sealer every 1 to 3 years depending on traffic and sun exposure. If you're wondering how to care for a stamped concrete patio, the same rule applies: keeping the surface sealed helps protect the color and finish year after year Reapply sealer every 1 to 3 years. When the sealer starts to show wear (water no longer beads, the surface looks dull, or color seems faded), it's time for a light cleaning and a fresh sealer coat. Catching it at this stage means you probably won't need to restain, just reseal. That's a much easier job and worth staying ahead of.
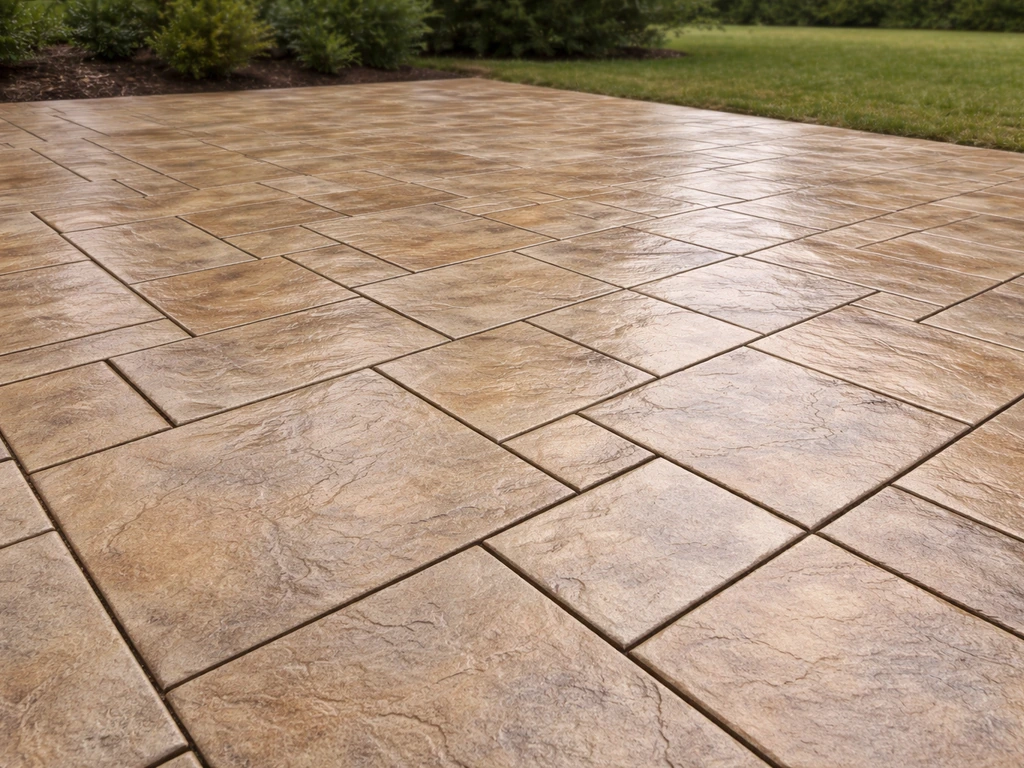
If you're working with stamped concrete specifically, the prep and sealing process has some additional considerations worth knowing about, since the textured surface can trap products differently than a flat slab. If you are trying to learn how to clean a stamped concrete patio before staining or sealing, focus on removing grease, mold, and any residue that could block bonding. Similarly, if you're weighing which stain product to buy before you start, there are specific product families worth comparing based on your patio's conditions and desired finish.
FAQ
Can I re-stain my concrete patio if it already has a stain and it looks faded but not peeling?
Possibly, but only after testing bonding. Do the water test for absorption and the tape test to see if an intact film is present. If the film lifts under tape, you must strip, even if the coating only looks “worn” rather than damaged.
What should I do if the concrete water test beaded in some spots and soaked in others?
Treat it as partial contamination or patch differences, not a simple pass or fail. Re-clean the entire patio, spot-degrease and remove any residues, then re-test after drying. For color consistency, do a test patch in each “type” of area (old repairs, sun-facing sections, shaded sections).
Is it safe to use acid stain or etching if my patio has efflorescence but no visible sealer?
You can, but efflorescence usually signals ongoing moisture movement or salts that will return. You should clean and address the moisture source first, then re-test for reappearance after drying. If it comes back quickly, restaining without a fix will likely lead to mottling and premature sealer failure.
How do I know whether I should use acid stain or water-based stain on a previously sealed patio?
Use the sealer behavior tests as your decision aid, not just visual inspection. If water beads and tape indicates a bonded film, you generally cannot rely on stain to work through it, so you must strip or remove that barrier. Acid stain can react with mineral surfaces, but it still needs an open, neutralized substrate to bond evenly.
Can I use the same sealer over both acid stain and water-based stain?
Sometimes, but compatibility depends on the specific sealer chemistry and the manufacturer’s system pairing. Many acrylic systems work with both, but high-traffic or glossy looks often use different products, including primer requirements for urethane/epoxy systems. Always match the stain and sealer recommendations for adhesion and curing behavior.
What’s the best way to prevent lap marks when restaining a large patio?
Work in smaller, planned sections and keep a consistent wet edge where you meet the next pass. Don’t “wait to see” the color as you go, especially in hot or sunny conditions, because drying mid-reaction creates visible lines. If you can, restain with a crew so one person maintains application while another follows immediately for consistent overlap.
Can I restain over polyurethane or other sealers that are hard and glossy?
Usually no, unless they are confirmed to be compatible and well bonded. Glossy, film-forming coatings are the hardest to get stain to penetrate. If the tape test pulls up coating material, strip before staining, otherwise you risk peeling, flaking, and uneven color.
My concrete still has a stain smell or feels slightly damp after cleaning. Should I etch or stain anyway?
No. Even if it feels dry on top, trapped moisture or active residues can interfere with neutralization, sealer clarity, and adhesion. Let it dry longer than you think in humid weather, and consider the plastic-sheet moisture test before sealing, especially if the patio is shaded or near landscaping.
Why does my restored color look lighter in repaired patches even though I followed the steps?
Patch materials often have different mineral content and porosity than the surrounding slab, so absorption differs. A solid fix is doing a repair-specific test patch, then adjusting stain application or performing targeted pre-treatment on the patched areas. In some cases, spot-sealing patches (after full cure) can even out how the rest of the slab takes color.
Do I need to neutralize after etching if I’m using water-based stain instead of acid stain?
Neutralization is still important whenever you use acidic cleaning or etching products, because leftover acidity can affect bonding and sealer performance. The safer approach is to follow the neutralization and pH verification step whenever an acid etcher is involved, then confirm with pH test strips before applying stain or any sealer.
How long after restaining can I wash the patio or hose it down?
Wait until the stain has fully cured and the sealer has reached its listed cure time before any water exposure. For most systems, light contact is sooner (around a day), but full durability and routine cleaning typically require several days. If you’re unsure, follow the sealer cure instructions rather than the stain-dry time.
Can I re-stain only part of the patio instead of the entire slab?
You can, but it’s harder to make transitions invisible. Edge boundaries can show because sealed areas, porosity changes, and drying history differ. If partial restaining is necessary, you’ll usually need to feather or re-prep to the same level across the transition zone and do a test patch to determine whether blending requires additional coats or a controlled re-etch.
How often should I re-seal after I re-stain, and what signs mean it’s time?
Reapply sealer every 1 to 3 years depending on sun, traffic, and weather exposure. Trigger signs include water no longer beading, the surface looking dull, and color appearing faded. If water stops beading, you may be able to do a refresh clean and reseal without stripping, but only if the existing sealer film is still firmly bonded.
Next Articles
Should I Seal My Concrete Patio After Pressure Washing?
Learn if you should seal a concrete patio after pressure washing, when to wait, and how to prep for lasting protection.
How to Clean and Seal a Stamped Concrete Patio
Step-by-step guide to clean grime, mildew and stains, then seal stamped concrete for lasting color and texture protectio
How to Care for a Stamped Concrete Patio: Cleaning, Sealing
Learn how to care for stamped concrete patio: cleaning, stain removal, sealing timing, repairs, and safe seasonal mainte