
Fertiliser stains on a patio are usually one of three things: a white salt crust from soluble mineral fertilisers, a reddish-brown rust mark from iron-containing products, or a greasy organic residue from bone meal or blood meal. Each one responds to a different cleaner, and using the wrong one (acid on limestone, for instance) can do more harm than the original stain. The fastest fix for a fresh salt stain is a stiff scrub brush, warm water, and a little dish soap. For rust marks, oxalic acid solution works on concrete and brick. For organic residues, oxygen bleach or an enzyme cleaner is your best starting point, no matter the surface.
How to Remove Fertiliser Stains from Patio: Practical Steps

Dylan Hale
20 Jul 2026
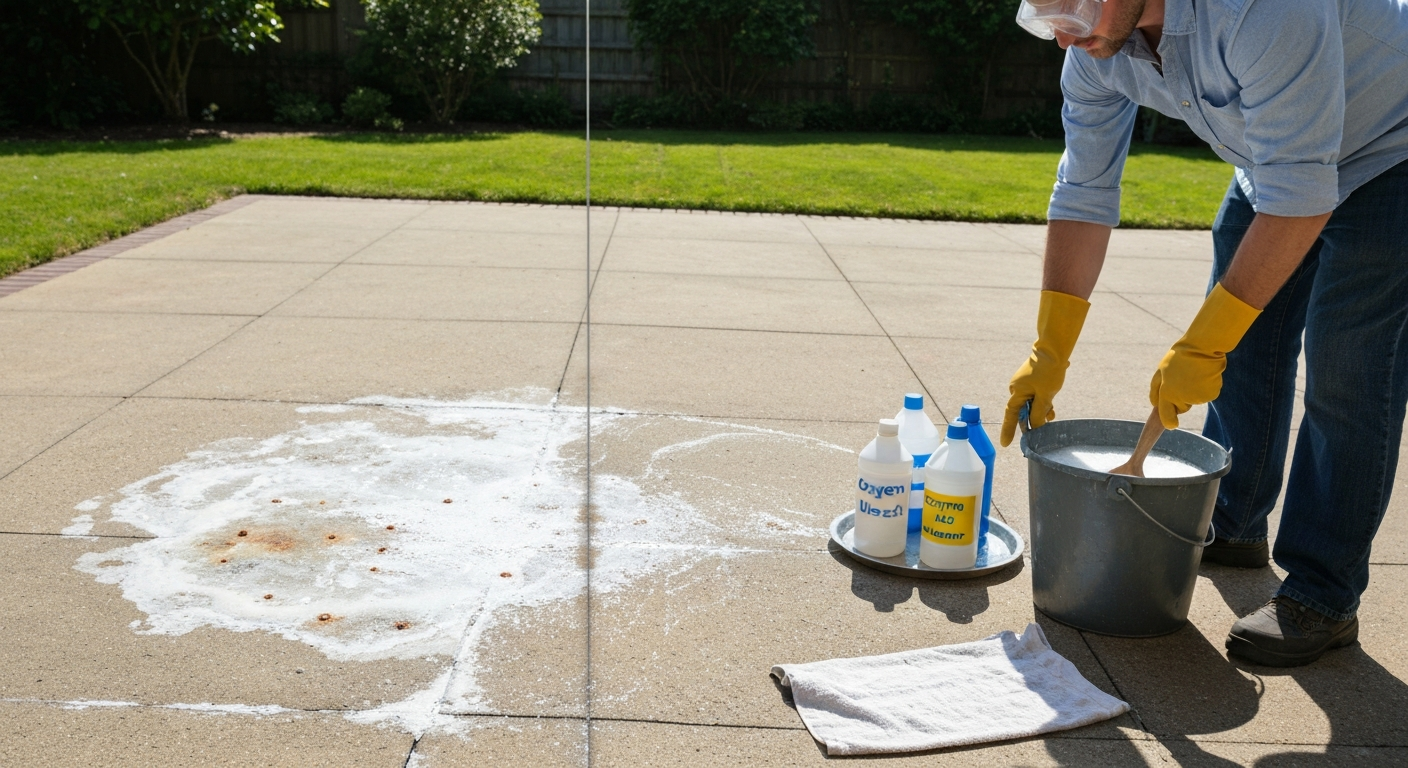
Choose your method in 60 seconds: surface, fertiliser type, stain age
Before you grab a bottle, you need to match the cleaner to three things: the surface underfoot, the fertiliser that caused the mark, and how long the stain has been sitting. A quick decision flow makes this faster.
- Identify your surface: Is it concrete, brick or clay pavers, natural stone (limestone, travertine, flagstone), a sealed or painted slab, or composite decking? Acid-based cleaners are fine on concrete and unglazed brick but will etch limestone and travertine permanently.
- Identify the fertiliser type: Salt/mineral fertiliser (granular lawn food, potash) leaves white or pale yellow crusts. Iron-containing fertiliser (iron sulfate, lawn greening products) leaves orange-brown rust. Organic fertiliser (bone meal, blood meal) leaves darker, greasy or sticky residues.
- Assess the stain age: Fresh (under 48 hours) means soluble salts have not fully bonded — flush with water first. Aged (days to weeks) means the stain has soaked into pores and needs a targeted cleaner with adequate contact time. Old and set (months) may need a poultice or repeated treatments.
- Pick the method column: Salt stain on concrete = oxygen bleach or dilute muriatic acid. Rust on concrete or brick = oxalic acid. Organic residue on any surface = enzyme cleaner or oxygen bleach. Any stain on limestone/travertine = oxygen bleach or enzyme cleaner only, no acids.
What kind of stain is it really? Diagnosing fertiliser vs rust vs organic vs mineral
Not every mark near a plant pot or lawn edge is a fertiliser stain. I've seen efflorescence (natural salt migration from within the slab), rust from metal pot feet, and mould all mistaken for fertiliser residue. Running a few quick field tests takes two minutes and saves you from using the wrong product.
- Wet test: Dampen the stain with plain water. Soluble salt crusts (including most inorganic fertiliser residues) will partially dissolve or soften at the edges. Rust and organic stains will not visibly change.
- Scratch test: Gently scrape the stain with a plastic scraper or your fingernail. Mineral salt crusts are brittle and flake off in white or pale yellow granules. Organic residues are softer or sticky. Rust stains are firmly bonded to the surface and do not scrape off cleanly.
- Acid fizz test (not on carbonate stone): Apply a few drops of diluted household vinegar to a discreet spot on concrete or brick only. Fizzing indicates a carbonate or alkaline mineral deposit (common efflorescence). No fizzing suggests an iron, organic, or soluble salt stain. Never do this on limestone, travertine, marble, or flagstone.
- Bleach spot test: Dab a small amount of diluted sodium hypochlorite (1 part bleach to 10 parts water) onto the stain and wait 2 minutes. Organic and mould-based stains will lighten or disappear. Iron/rust stains will not respond. Salt crusts will not respond either.
- What the results mean: White flaky crust that softens with water and fizzes with vinegar = mineral salt or efflorescence from fertiliser. Orange/brown stain that does not bleach or dissolve = iron/rust from iron-based fertiliser. Dark or greasy mark that lightens with bleach = organic fertiliser residue or mould. White halo that does not react to water, acid, or bleach = possible bleaching damage from prior cleaning.
Safety first: PPE, ventilation, runoff, and what to avoid
I'll be direct here: some of the most effective patio cleaners are also genuinely hazardous if you cut corners. This is not a 'wear gloves if you like' situation. Muriatic acid splashed in the eyes causes serious injury. Chlorine gas produced by mixing bleach and acid in a confined space sends people to hospital. Take three minutes to set up properly before you open any bottle.
- PPE for bleach/sodium hypochlorite: nitrile or rubber gloves, safety glasses or goggles, old clothing you do not mind bleaching, and open-toe shoes are banned.
- PPE for muriatic/oxalic acid: chemical-resistant gloves (nitrile or neoprene), splash-proof goggles (not just glasses), an N95 respirator or a half-face respirator with acid cartridge, long sleeves, and rubber boots.
- Ventilation: Work outdoors and upwind. Never apply acid or bleach cleaners in enclosed patios, conservatories, or covered porches without through-ventilation.
- Never mix bleach with any acid (vinegar, muriatic, citric, oxalic) or with ammonia-based cleaners. Mixing bleach and acid produces chlorine gas. Mixing bleach and ammonia produces toxic chloramines. Both are serious respiratory hazards.
- Protect plants and lawn: Wet surrounding soil and plants with plain water before you start. This dilutes any splashed cleaner. After rinsing, water them again.
- Runoff containment: On sloped patios, use a berm of dry sand or an old towel along the edge to slow runoff reaching drains, soil, or water features. Collect spent acid solutions in a bucket for neutralisation before disposal.
- When to avoid chemicals entirely: If you are pregnant, have respiratory conditions, or are working near a water feature with fish or wildlife, use oxygen bleach or enzyme cleaners only.
- Renter considerations: Check your tenancy agreement. Many landlords prohibit acid use on shared or listed surfaces. When in doubt, stick to oxygen bleach and enzyme cleaners, which are non-corrosive and will not trigger deposit disputes.
Everything you need: tools and cleaners checklist
Here is what I keep on hand for patio stain work. You do not need all of this for every job, but knowing what each product does and when to use it stops you from making expensive mistakes.
| Product | Best for | Not suitable for | Approx. cost |
|---|---|---|---|
| Household sodium hypochlorite (5–6% bleach) | Organic stains, mould, organic fertiliser residue | Natural stone, coloured sealers, metal fixtures | £1–£3 per litre |
| Oxygen bleach / sodium percarbonate ('Oxi' products) | Organic stains, algae, bone/blood meal residue, colour-safe cleaning | Heavy rust or mineral salts (less effective) | £5–£12 per kg |
| Muriatic acid (hydrochloric acid, 30–33%) | Heavy mineral/salt deposits, efflorescence on concrete and brick | All carbonate stone (limestone, travertine, marble), sealed or painted surfaces | £5–£10 per litre |
| Oxalic acid (crystalline or solution) | Iron and rust stains on concrete, brick, and acid-tolerant stone | Carbonate stone, toxic to plants — contain runoff | £5–£15 per pack |
| White vinegar (5% acetic acid) | Light salt stains on concrete or brick as a gentle alternative | Any carbonate stone (limestone, travertine, marble, some flagstone) | £1–£2 per litre |
| Enzyme cleaner (biological outdoor cleaner) | Organic fertiliser residues (bone meal, blood meal), grease, protein stains on any surface including stone | Fast results on mineral/salt stains (slow or ineffective) | £8–£20 per litre |
| Commercial patio cleaner (non-acid pH-neutral) | General maintenance, light stains on all surfaces including sealed and natural stone | Deep-set rust or heavy mineral crust | £6–£15 per litre |
| Stiff nylon scrub brush (deck brush) | Manual scrubbing on all surfaces | Very soft or flaking historic stone (use soft brush instead) | £5–£15 |
| Stiff natural-bristle brush | Brick joints and textured surfaces | Surfaces where bristles might catch and pull sealant | £4–£12 |
| Pressure washer | General rinsing, pre-soaking, removing loose residue | Soft limestone/travertine at high pressure, mortar joints at >1500 psi, sealed surfaces at high pressure | Hire from £30/day or own from £80 |
Pressure washer specs worth knowing: for patio cleaning I recommend a 1200–1800 psi machine for most surfaces. Use a 25-degree (white) nozzle as a safe default. Drop to a 40-degree (black) nozzle for sensitive stone or sealed surfaces. Keep the lance at least 30 cm from the surface and move in consistent passes to avoid streaking. Never use a zero-degree (red) nozzle on any paving surface.
Always test a small area first
This step gets skipped more than any other, and it causes the most regret. A patch test costs you five minutes and can save a very expensive reseal or replacement. Here is how to do it properly.
- Choose a discreet spot: a corner, behind a plant pot, or under a bench. Pick an area about 15 cm square.
- Check for sealer first: Sprinkle a few drops of water. If the water beads up, the surface is sealed. Sealed surfaces need pH-neutral or enzyme cleaners only; acids and strong bleach will strip or cloud the sealer.
- Check for colourfastness: Apply your chosen diluted cleaner to the test patch, leave it for the full intended contact time, then rinse. Wait 30 minutes for the surface to dry fully before assessing. Look for lightening, darkening, etching, or any change in texture.
- Check porosity: If the surface absorbs the cleaner instantly and darkens quickly, it is highly porous. Porous surfaces absorb cleaners deeper, which means longer rinse times and higher risk of residue if not flushed thoroughly.
- Assess the result: If colour, texture, and surface integrity look identical to the untreated area, proceed with the full cleaning. If there is any etching, discolouration, or change in sheen, step down to a gentler product and test again.
Manual cleaning, step by step
Manual cleaning is the right choice when you want maximum control, when you are dealing with a small area, or when the stain is near plant beds or drainage you want to protect. It is also perfectly adequate for most residential jobs, I've removed five-year-old salt crusts from concrete with nothing more than oxygen bleach, a stiff brush, and patience.
- Pre-wet the surface: Soak the stained area and surrounding 30 cm with plain water. This limits how deeply the cleaner soaks in during application and protects surrounding joints.
- Mix your cleaner: Use the dilution table later in this article as your reference. For oxygen bleach, a standard mix is 60 g per litre of warm water (follow product label). For sodium hypochlorite, dilute to 1 part bleach to 10 parts water for organic stains. For muriatic acid on concrete (non-stone surfaces only), 1 part acid to 4 parts water, always adding acid to water, never the reverse.
- Apply and allow contact time: Pour or brush the solution onto the stain. Do not let it dry out — keep it wet. Contact times: 10–15 minutes for bleach/oxygen bleach on organic stains; 5–10 minutes for dilute acid on mineral deposits; 10–20 minutes for enzyme cleaners.
- Scrub: Use a stiff nylon deck brush in overlapping circular passes over the stain. Apply reasonable pressure but do not gouge the surface. For textured brick or natural stone, use a natural-bristle brush to avoid scratching.
- Rinse thoroughly: Flush with generous amounts of clean water. Work from the edges of the stain inward and then out, pushing the rinse water away from drains or plant beds.
- Neutralise if you used acid: After rinsing an acid treatment, apply a solution of 1 tablespoon baking soda per litre of water, scrub lightly, and rinse again. This neutralises residual acid and prevents continued reaction with the paving.
- Assess and repeat: Allow the surface to dry for at least 1 hour before judging the result. A second application is often needed for deep or old stains.
Pressure washing for fertiliser stains, step by step
A pressure washer speeds up rinsing and pre-soaking considerably, but it is not a substitute for the right cleaner. The machine removes loosened residue; the chemistry does the actual stain work. Used incorrectly, pressure washers strip mortar joints, lift sealers, and blast grit into natural stone. Here is how to do it right.
- Set up: Fit the 25-degree (white) nozzle for concrete or brick. Use the 40-degree (black) nozzle for sealed surfaces or natural stone. Never use a zero-degree nozzle on paving.
- Pre-soak: Apply your chosen cleaning solution manually (by brush or pump sprayer) and allow the full contact time before you pick up the pressure washer lance. The machine then removes the loosened stain rather than trying to blast it off raw.
- Pressure and distance: Keep pressure between 1200 and 1800 psi for standard concrete or brick. Work at a consistent distance of 30–40 cm from the surface. For natural stone, drop to 800–1200 psi and increase the distance to 40–50 cm.
- Technique: Use long, overlapping strokes parallel to any joint lines. Avoid stopping the lance in one spot. Work in sections of about 1 square metre so you can track what has been rinsed.
- Joint care: Do not point the lance directly at mortar joints or polymeric sand joints. High-pressure water will erode grout and mortar over time. Hold the lance at a low angle and reduce pressure near joints.
- Final rinse: After treating the stain area, do a broad rinse across the whole section to avoid tide marks where clean meets uncleaned paving.
- Post-wash sealer check: If the patio is sealed, inspect the treated area after it dries. High-pressure washing can lift failing sealer. If you see clouding, peel, or whitening, the sealer needs re-applying before the patio is exposed to rain.
Concrete patios: targeted fertiliser stain removal
Concrete is forgiving. It tolerates oxygen bleach, sodium hypochlorite, and (with care) muriatic acid. The CDC's Cleaning and Disinfecting with Bleach (CDC) notes household sodium hypochlorite is effective on organic and microbial stains and that product labels commonly specify a wet contact time of about 10 minutes for disinfection on hard surfaces (follow label instructions). The main risks on concrete are residue left in pores if you rush the rinse, and sealer damage if the slab has been treated. Always check for sealer with the water-bead test before you apply anything stronger than a pH-neutral cleaner.
Salt and mineral fertiliser residue on concrete
- Pre-wet the slab with plain water.
- Mix oxygen bleach: 60 g sodium percarbonate per litre of warm water. Apply generously, keeping wet for 15–20 minutes.
- Scrub with a stiff nylon deck brush.
- Rinse with clean water. For a persistent white crust, step up to dilute muriatic acid: 1 part acid to 4 parts water (add acid to water). Apply, leave 5–8 minutes, scrub, rinse, then neutralise with a baking soda solution (1 tablespoon per litre of water).
- Allow to dry. Reseal with a concrete penetrating sealer if the surface was previously sealed.
Rust stains from iron fertiliser on concrete
- Do not use bleach — it will not affect iron oxide stains.
- Mix oxalic acid: approximately 450 g per 4 litres of warm water for a moderate stain. Apply with a brush, keep wet for 10–15 minutes.
- Scrub and rinse thoroughly. Oxalic acid is toxic to plants; contain and collect the rinse water.
- Neutralise with baking soda solution as above.
- For very deep or old rust stains, apply as a paste (mix oxalic acid crystals with a small amount of water to a thick consistency), leave 30 minutes, then scrub and rinse.
Organic fertiliser residue (bone meal, blood meal) on concrete
- Apply an enzyme cleaner or diluted sodium hypochlorite (1: 10 in water).
- Contact time: 10–15 minutes for bleach; follow product label for enzyme cleaner (often 15–20 minutes).
- Scrub and rinse. Enzyme cleaners may need a second application for thick residues.
Avoidances on concrete: Do not use muriatic acid on a sealed slab without prior testing, it will strip most concrete sealers. Do not apply acid in direct hot sun; the solution evaporates before it can act, leaving residue and increasing fume risk. Rinsing steps: always rinse until the water runs clear and there is no slippery feel underfoot. Neutralise after every acid application. Preventive notes: a penetrating silane or siloxane sealer applied after cleaning makes future spills far easier to remove. When to call a pro: If the stain covers more than a few square metres, shows colour change deep into the slab, or has reappeared three or more times after treatment, a professional with diamond grinding or industrial acid washing equipment may be needed.
Brick and pavers: targeted fertiliser stain removal
Clay brick and concrete pavers handle similar treatments to plain concrete, but mortar joints need protection and some glazed bricks are more acid-sensitive than you'd expect. I always test a discreet brick edge before applying acid to a mortar-jointed paved area.
Salt and mineral stains on brick or pavers
- Dry-brush loose salt crust with a stiff nylon brush first. Much of a fresh salt stain comes away dry.
- Pre-wet the area including joints.
- Apply diluted oxygen bleach (60 g per litre of warm water) or a pH-neutral commercial patio cleaner. Contact time: 15 minutes.
- Scrub with a natural-bristle brush to clean joints without eroding mortar. Rinse thoroughly.
- For stubborn mineral deposits: dilute muriatic acid at 1:4 (acid to water), apply carefully to brick faces only, avoid running it into joints. Contact time: 5 minutes maximum. Rinse, then neutralise with baking soda solution.
Rust stains on brick or pavers
- Apply oxalic acid solution (as per concrete method above).
- Brush gently, rinse and neutralise.
- Note: polymeric sand joints should not be saturated with oxalic acid. Apply targeted to the brick face using a sponge or small brush rather than pouring broadly.
When to avoid acids on brick: Glazed or painted brick, reclaimed soft brick, and any brick with visible mortar loss are poor candidates for acid treatment. The acid will bleach glaze coatings and accelerate mortar erosion. Stick to oxygen bleach or enzyme cleaners for these. Joint care: After acid or pressure washing, inspect mortar joints. If any mortar has loosened, it needs repointing before rain gets under the joint and begins lifting pavers. Preventive notes: Sealing pavers with a joint-stabilising sealer locks polymeric sand in place and makes the paver face easier to clean next time.
Natural stone (travertine, flagstone, limestone): safe methods and what to never use
This is the section I wish more people read before they damaged their stone. Travertine, limestone, and many flagstones are calcium carbonate-based. Calcium carbonate dissolves on contact with acid. That means vinegar, citric acid, muriatic acid, and even some commercial 'descalers' will physically etch and pit the surface, and that damage cannot be undone without professional grinding and repolishing. Stone deterioration and treatment research (Getty Conservation Institute) warns that acetic acid in vinegar reacts with calcium carbonate in travertine and limestone, causing immediate etching and surface pitting. I've seen beautiful travertine patios turned to a chalky pitted mess by well-meaning cleaning attempts.
- Never use: muriatic acid, oxalic acid (unless specifically formulated for stone, in very low concentrations), white vinegar, lemon juice, citric-acid based cleaners, or any product labelled as a 'descaler' or 'limescale remover'.
- Safe options: Oxygen bleach (sodium percarbonate, 30–40 g per litre of warm water), enzyme cleaners, pH-neutral stone cleaner, warm water with a small amount of non-ionic dish soap.
- For rust stains on natural stone: use a poultice method only. Mix a paste of sodium citrate solution and an absorbent powder (diatomaceous earth or fine kaolin) and apply 1 cm thick over the rust stain. Cover with plastic film and leave 24–48 hours. The poultice draws the iron compounds out of the stone as it dries. Rinse and repeat if needed.
- Contact times for safe cleaners: Oxygen bleach on organic stains — 15–20 minutes, keep wet. Enzyme cleaner — 20–30 minutes, or follow product label.
- Mechanical action: Use only a soft natural-bristle brush or a soft cloth on polished stone. A stiff nylon brush on honed or tumbled travertine is generally fine, but test first.
- Rinsing: Rinse with generous clean water. Residual oxygen bleach is far less damaging than residual acid, but still rinse fully.
- Sealing guidance: Natural stone should be sealed with a penetrating impregnator (silicone or fluoropolymer-based) after cleaning. A good seal means fertiliser spills can be rinsed off the surface before they bond. Re-seal annually on high-traffic patios.
Sealed surfaces and painted or treated patios
Sealed patios are easier to clean but easier to damage with the wrong product. The sealer is your first line of protection and your main constraint when choosing a cleaner. Acids and strong bleach (especially at high concentrations) will strip most topical sealers, leave cloudy patches, or peel painted surfaces.
- Always start with the mildest effective cleaner: warm water and a pH-neutral cleaner, or diluted dish soap.
- For organic fertiliser residue on a sealed surface: diluted enzyme cleaner is ideal. Apply, leave 15–20 minutes, scrub gently with a soft brush, rinse.
- For mineral salt residue on a sealed surface: a diluted oxygen bleach solution (30–40 g per litre) is usually safe. Test first on a hidden area. Contact time: 10 minutes. Rinse well.
- Temperature matters: Do not apply any cleaner to a sun-heated sealed slab. Wait until the surface is cool. Heat causes topical sealers to absorb chemicals faster and increases the risk of discolouration.
- Do not use muriatic acid or undiluted bleach on sealed surfaces.
- After cleaning: inspect the sealer. If it looks cloudy, dull in patches, or is peeling, it needs re-applying. Allow the surface to dry fully (24–48 hours) before sealing.
Pet-safe and renter-friendly options
If you have pets using the patio, children playing on it, or you are in a rented property where you need to avoid liability, the practical and entirely effective approach is to stick to oxygen bleach and enzyme cleaners. Both are far less toxic than chlorine bleach or acid, and both work well on the organic and mineral residues that fertilisers leave behind.
- Oxygen bleach (sodium percarbonate): Biodegradable, breaks down into water, oxygen, and soda ash. Safe for most sealed and unsealed surfaces. Mix 40–60 g per litre of warm water. Allow 15–20 minutes contact time and rinse well. Do not apply to bare metal fixtures.
- Enzyme cleaners: Fully biodegradable, non-toxic to pets once dry. Particularly good for organic fertiliser residues (bone meal, blood meal). Follow product dilution instructions; most need 15–30 minutes contact time.
- Vinegar caveat: Vinegar is often recommended as a 'natural' option, but it is acidic enough to etch carbonate stone and will damage limestone, travertine, and some flagstone permanently. On concrete and brick it can work for light salt stains, but I'd rather reach for oxygen bleach as a safer, more broadly effective alternative.
- Renter protocol: Photograph before and after. Use only products that leave no permanent residue or damage risk. Oxygen bleach and enzyme cleaners fit this requirement. Avoid pressure washing at high pressure near older grouted or caulked joints — restored joints are a common deposit dispute point.
- Stepwise renter-safe method: Sweep loose debris, pre-wet surface, apply diluted oxygen bleach, scrub with a nylon deck brush, rinse with a garden hose at normal pressure, allow to dry fully.
Plant pot mineral stains: white crusts and rust rings
The white rings and rust-coloured marks left by plant pots are among the most common stain questions I get, and they have a very specific cause. White crusty rings come from soluble mineral salts in fertiliser leaching through the pot drainage hole and crystallising on the patio surface as the water evaporates. Rust rings come from metal-containing fertilisers or the iron in terracotta pot rims oxidising on a wet surface.
For white mineral rings on concrete or brick: dry-brush the loose crust, pre-wet the surface, then apply diluted white vinegar (on concrete/brick only) or diluted oxygen bleach and scrub. Rinse thoroughly. For persistent rings, a poultice of baking soda paste (thick mix of baking soda and water) left for 30 minutes can draw out embedded salts. For rust rings: follow the oxalic acid method outlined in the concrete section above. On limestone or travertine, use the sodium citrate poultice method instead. Prevention is where pot stains are best managed: raise pots on pot feet or stands to allow air circulation and prevent pooling water, and place a drip tray underneath to catch fertiliser-laden water before it reaches the patio. This is covered in more depth in the related guides on preventing staining from plant pots.
Grass and weeds between patio stones: removal and fertiliser residue
Fertiliser that lands in or near patio joints actively feeds weed and grass growth. Removing the plants is step one, but you also need to flush and clean the joint area to remove the fertiliser residue that would otherwise re-seed the problem.
- Mechanical removal first: Pull weeds and grass by hand or use a flat-blade weeding tool to get roots out of joints. A pressure washer on a low setting (800–1000 psi, 40-degree nozzle) can blast loose material out of joints without removing sand or mortar.
- Flush the joints: After mechanical removal, flush the joint area with plain water to dissolve and carry away soluble fertiliser residue.
- Eco-friendly joint treatment: Undiluted white vinegar poured directly into weed-cleared joints on concrete or brick will suppress regrowth. It will not harm the paving itself in this targeted use, but do not let it spread to limestone or travertine nearby. Boiling water also works and is completely non-toxic.
- If using a proprietary weed killer: choose a path-and-patio formulation that breaks down in soil within a few weeks. Always follow label instructions and keep pets and children off the area until dry.
- After weed removal, re-sand joints with kiln-dried or polymeric sand to physically block regrowth. Polymeric sand sets firm on wetting and is significantly more resistant to weed establishment than plain sand.
Guides on removing grass from patio stones cover the mechanical and chemical options in more detail, including specific weed killer application timing.
Wood stain splashes on patios: immediate action and surface-specific steps
Wood stain drips during decking maintenance are a different beast from fertiliser stains, but they often appear in the same cleanup session. The approach depends entirely on how fresh the splash is.
- Fresh wood stain (still wet): Blot immediately with an absorbent cloth. Do not wipe, which spreads the stain. Apply a small amount of white spirit or mineral spirits to the cloth and blot again. Rinse with warm soapy water and then plain water.
- Dried oil-based wood stain on concrete or brick: Apply a commercial degreaser or a small amount of acetone on a cloth to the stain. Leave 2–3 minutes. Scrub with a stiff brush. Rinse. Repeat as needed. For large splashes, a poultice of diatomaceous earth or fuller's earth soaked in acetone or mineral spirits, applied 1 cm thick and covered with plastic for 30 minutes, can draw the oil out of porous surfaces.
- Dried wood stain on natural stone: Do not use acetone or mineral spirits without testing first on a hidden area — some solvents affect stone sealers. Use a pH-neutral stone degreaser instead. Apply, leave 20 minutes, scrub gently with a soft brush, and rinse.
- Dried wood stain on sealed pavers: Test the solvent on a hidden sealed area first. If the sealer is unaffected, proceed with white spirit on a cloth, blotting technique. Avoid broad application of solvent on a sealed surface.
- After stain removal: check whether the cleaning process has lifted or clouded any sealer. Re-apply sealer to the affected area if needed.
More detailed steps for specific surface and stain combinations are covered in the related guide on removing wood stain from patios. For step-by-step solvent and detergent methods, see our guide on how to get wood stain off patio.
Troubleshooting persistent or unusual marks
Some marks refuse to shift after one or two attempts, or they keep coming back. Here is what is probably happening and what to try next.
- Efflorescence reappearing: This is salt migrating from within the slab, not just surface residue. The only long-term fix is sealing the surface with a penetrating sealer to slow moisture movement. Clean with dilute muriatic acid (concrete/brick only), rinse, neutralise, dry fully, then seal.
- Rust stains returning: If rust comes back after oxalic acid treatment, the iron source is still present — often a metal pot foot, a buried pipe, or reinforcement bar too close to the surface. Address the source. A professional rust-block sealer can sometimes slow recurrence.
- Bleaching halos around the stain: This usually means the cleaner (particularly sodium hypochlorite) has affected the pigmentation of the paving around the stain. On coloured concrete or coloured pavers, this may not be reversible. A penetrating colour-restorer sometimes improves the appearance.
- Dyeing from fertiliser: Some iron-chelate fertilisers contain dye agents that bond to concrete pigment. Try an enzyme cleaner first, then oxalic acid. If neither works, a poultice is the next step.
- Poultice recipe for deep stains: Mix an absorbent powder (diatomaceous earth, kaolin, or talc) with the appropriate solvent for your stain type: oxalic acid solution for iron/rust, enzyme cleaner for organics, or warm soapy water for general stains. Combine to a thick peanut-butter consistency. Apply 1 cm thick, cover with cling film, tape edges, and leave 24–48 hours. Peel away, scrub residue, rinse. Repeat up to three times for deep stains.
- Stain visible when wet but invisible when dry: This is usually a grease or oil component. Clean with a degreaser or enzyme cleaner and the effect typically resolves.
Quick reference: dilutions, contact times, and when to neutralise
| Cleaner | Dilution | Contact time | Suitable surfaces | Neutralise after? |
|---|---|---|---|---|
| Sodium hypochlorite (household bleach, 5–6%) | 1 part bleach to 10 parts water | 10–15 minutes | Concrete, brick, pavers (NOT stone) | No, but rinse thoroughly |
| Oxygen bleach / sodium percarbonate | 40–60 g per litre of warm water | 15–20 minutes | All surfaces including natural stone and sealed surfaces | No, rinse thoroughly |
| Muriatic acid (hydrochloric acid, 30–33%) | 1 part acid to 4 parts water (add acid to water) | 5–8 minutes | Concrete and unglazed brick ONLY (NOT stone, NOT sealed) | Yes — baking soda solution (1 tbsp per litre of water), then rinse |
| Oxalic acid (crystalline) | 450 g per 4 litres warm water | 10–15 minutes (paste: 30 minutes) | Concrete, brick, pavers (NOT carbonate stone) | Yes — baking soda solution, then rinse; contain runoff |
| White vinegar (5% acetic acid) | Undiluted or 50/50 with water | 5–10 minutes | Concrete and brick ONLY (NOT any stone) | No, rinse thoroughly |
| Enzyme cleaner | Per product label (typically 1:10 to 1:20) | 15–30 minutes | All surfaces including stone and sealed | No, rinse thoroughly |
| pH-neutral commercial patio cleaner | Per product label | 5–15 minutes | All surfaces | No, rinse thoroughly |
Rinsing, disposal, and environmental protection
Rinse water from acid or bleach treatments should not simply run into storm drains, water features, or soil near plants. Oxalic acid in particular is toxic to aquatic life and harmful to plants. Here is how to handle it responsibly.
- Before you start: Use a dry sand berm or folded old towels along patio edges to slow runoff. Have a bucket ready to collect concentrated rinse water from acid treatments.
- Neutralising acid runoff: Collect spent acid rinse water in a plastic bucket. Add baking soda slowly (it will fizz) until fizzing stops, indicating neutralisation. The neutral solution can then be disposed of down an indoor drain with plenty of water.
- Bleach runoff: Dilute sodium hypochlorite runoff is less dangerous but still harmful to pond ecosystems. After rinsing, water surrounding plants generously with plain water to dilute any splash.
- Oxalic acid: Treat spent oxalic acid solution as a hazardous waste. Neutralise with baking soda, then dispose via your local household hazardous waste facility if the quantity is significant. Small amounts, fully neutralised, can go down an indoor drain.
- Local regulations: In many UK local authorities and US municipalities, concentrated chemical discharge to surface water drains is prohibited. Check your local authority's guidance if you are treating a large area.
- Enzyme cleaners: These break down naturally and require no special disposal. Rinse water can be allowed to soak into soil away from water features.
Post-cleaning prevention: sealers, pot stands, and a simple maintenance routine
The single most effective thing you can do after removing a fertiliser stain is apply a quality sealer. It does not prevent stains but it slows absorption dramatically, meaning most spills can be rinsed away before they bond.
| Surface type | Recommended sealer type | Reapply frequency | Key benefit |
|---|---|---|---|
| Concrete | Penetrating silane/siloxane impregnator | Every 3–5 years | Blocks pore absorption, resists salts and oil |
| Brick and clay pavers | Penetrating impregnator (solvent or water-based) | Every 2–4 years | Protects joints, resists salt migration |
| Concrete pavers | Topical acrylic or penetrating impregnator | Every 2–3 years (topical); 3–5 (penetrating) | Enhances colour, reduces stain bonding |
| Travertine/limestone/flagstone | Fluoropolymer or silicone-based penetrating sealer | Every 1–2 years | Acid-resistant barrier, preserves stone surface |
| Sealed/painted surfaces | Re-apply existing sealer type after any chemical cleaning | As needed after cleaning | Restores protective barrier |
- Pot stands and feet: Raise all plant pots at least 2–3 cm off the patio surface using terracotta feet, rubber risers, or metal pot stands. This allows air to circulate, prevents moisture pooling, and stops fertiliser-laden water from sitting on the surface.
- Drip trays: Use drip trays under pots when you fertilise, and empty them within a few hours. Never leave fertiliser water sitting in a drip tray on a patio surface.
- Fertiliser application: When granular fertiliser is used near a patio, sweep or blow stray granules back onto the lawn immediately. Do not allow granules to sit on damp paving — they dissolve and begin staining within hours.
- Regular maintenance: A light sweep and monthly rinse with a garden hose prevents salt buildup in low-lying areas. Once a year, a light oxygen bleach wash across the whole patio surface keeps organic buildup in check and makes individual stain removal easier when it arises.
When to call a professional
Most fertiliser stains are genuinely DIY-removable. But there are situations where calling a specialist is the right decision, not an admission of defeat.
- The stain covers more than 3–4 square metres and has been set for months. Industrial acid washing or professional diamond grinding may be needed.
- The stain keeps returning after three or more treatments. A persistent source (iron in the substrate, rising damp, ongoing salt migration) needs professional diagnosis.
- The patio is a heritage or listed material (handmade Victorian brick, antique limestone, reclaimed slate). Conservators use specialist poultices and very low-concentration treatments that are beyond standard DIY.
- The surface has visible structural damage: cracks, sinking sections, or delaminating sealers across a large area. Cleaning will not fix these and may worsen them.
- Insurance or tenancy-related damage claims. If the stain occurred due to a contractor's error or a landlord-supplied fertiliser product, document everything and get a professional assessment before cleaning, as cleaning may affect the evidence.
- For renters specifically: if you are uncertain whether cleaning will make a potential deposit dispute better or worse, a single professional clean with a written report provides clear evidence of the patio's condition.
Cost and time: what to budget and how long it takes
| Method / scenario | Approx. product cost | Equipment needed | Time (single stain) | Time (full patio) |
|---|---|---|---|---|
| Manual oxygen bleach clean | £5–£12 | Brush, bucket, hose | 15–30 min | 1–2 hours |
| Manual muriatic acid treatment | £5–£10 + neutraliser | Brush, bucket, PPE, hose | 30–45 min | 2–4 hours |
| Oxalic acid rust removal | £5–£15 | Brush, bucket, PPE, hose | 20–40 min | 1–3 hours |
| Enzyme cleaner treatment | £8–£20 | Brush, bucket, hose | 20–40 min | 2–3 hours |
| Pressure wash (hired machine) | £30–£50/day hire | Pressure washer, appropriate nozzle | 10–20 min | 1–2 hours |
| Professional cleaning service | £150–£500+ | None (contractor provides) | N/A | Half-day to full day |
The DIY vs labour decision comes down to stain type, surface value, and your available time. A single rust stain on concrete is a 30-minute DIY job with £10 of oxalic acid. A full travertine patio with multiple set-in mineral stains is a situation where a professional's time and specialist products will almost certainly produce a better result than a day of DIY and a risk of etching the surface.
More patio cleaning guides to help you
Fertiliser stains are just one category of patio stain challenge. If your patio has multiple issues, the following related guides on this site cover specific scenarios in full detail: removing stains from limestone patios (with specialist guidance on acid-sensitive stone), general patio stain removal across surfaces, preventing staining from plant pots (including pot stand recommendations and drainage management), removing grass from patio stones (mechanical and chemical methods), and removing wood stain from patio surfaces (solvent and detergent approaches). For step-by-step instructions specific to acid-sensitive stone, see our guide on how to remove stains from limestone patio. For a practical step-by-step walkthrough, see the guide on how to remove stain from patio. Together these guides cover the full spectrum of problems that appear on residential patios, from the routine to the stubborn.
FAQ
How do I diagnose what kind of fertiliser stain I have before cleaning?
Do a simple field check: 1) Wet the stain with clean water and blot—if it partly dissolves or the white crust sloughs off it’s likely soluble fertiliser salts/efflorescence. 2) Look at colour: reddish‑brown suggests iron/iron sulphate; white/grey crust suggests salts; organic brown/green/black suggests organic fertiliser, mould or algae. 3) Scrape gently with a plastic putty knife—crusty brittle mineral deposits are salts; greasy or powdery organic residues behave differently. 4) Test patch: on an inconspicuous area use dilute household bleach (1:10 bleach:water) for 10 minutes—organic stains will lighten; rust/iron will not. 5) For suspected carbonate stone (travertine/limestone/flagstone) do NOT use acids for testing (vinegar will fizz and will damage stone). Always start with the gentlest test and document results before full treatment.
What general safety and environmental precautions should I take when cleaning fertiliser stains?
Wear gloves, eye protection and a mask if mixing powders or strong cleaners. Work upwind, keep children/pets away, and protect nearby plants with plastic sheeting and rinse water containment—many iron and acid cleaners harm vegetation. Never mix bleach with acids or ammonia (dangerous gases). Follow product label directions and SDS. If using muriatic or oxalic acid, prepare diluted solution by adding acid to water (never water to acid) and neutralise/rinse thoroughly after use. Dispose rinse water per local rules—avoid sending concentrated cleaners into storm drains.
What cleaners and dilution/contact-time guidelines should I have on hand?
Common, effective options: - Oxygen bleach (sodium percarbonate) — follow label; typical homeowner mix: 1/2–1 cup per gallon warm water; contact 10–20 minutes, then scrub and rinse. - Household bleach (5–6% sodium hypochlorite) for organic/microbial residues — 1:10 bleach:water, wet 10 minutes, scrub, rinse well. - Oxalic acid for iron/rust on non‑carbonate surfaces — mix per label; small home recipe used by extension: ~1 lb oxalic acid powder per gallon water (use PPE), apply, wait 5–15 minutes, scrub and rinse; test first. - Muriatic (HCl) acid for heavy mineral deposits on non‑acid‑sensitive masonry — typical cleaning dilution ~1 part acid to 4–10 parts water; always add acid to water, test patch, neutralise and rinse. - Vinegar (5% acetic acid) is useful for mild salt crusts on non‑carbonate stone but avoid on travertine/limestone/marble. - Enzyme/biological cleaners are best for organic fertilisers (bone meal, blood meal) — follow label. Always test a small patch and observe contact times on product label.
How should I remove fertiliser stains from concrete? (step‑by‑step)
1) Diagnose (see earlier). 2) Sweep/brush loose debris and rinse. 3) For soluble salts/efflorescence: scrub with stiff broom and warm water or water + oxygen bleach (1/2 cup per gallon). 10–20 minutes contact, scrub, rinse. 4) For organic residues: apply oxygen bleach or 1:10 bleach:water, wait 10 minutes, scrub with nylon brush, rinse. 5) For iron/rust: try oxalic acid solution (test first) — apply, scrub with stiff nylon brush, wait 5–15 minutes, rinse thoroughly. 6) For stubborn embedded stains repeat or use a poultice (commercial poultice or mix absorbent clay/sawdust with oxalic solution, apply 1/4–1/2" thick, cover with plastic, let dry 24–48 hours, peel off and rinse). 7) Final rinse with a garden hose or pressure washer (see pressure-wash note). Allow to dry and consider sealing concrete to reduce re‑staining.
How should I remove fertiliser stains from brick or pavers?
1) Sweep and wet the area. 2) For soluble salts: scrub with oxygen bleach solution (1/2 cup per gallon) or warm water and a stiff brush; 10–20 minute contact, then rinse. 3) For organic stains: 1:10 bleach:water, 10 minutes contact, scrub, rinse. 4) For iron stains: oxalic acid poultice or dilute oxalic acid solution applied to the stain, scrub, and rinse—test first on a hidden brick. Avoid muriatic acid on coloured or sealed bricks without testing; use low concentrations if manufacturer guidance allows. 5) For mortar joints, avoid long contact with harsh acids that could damage joints—use poultices or repeat gentler treatments. Replace any pavers loosened or physically damaged. After cleaning, let dry and reseal pavers if they were sealed previously.
How do I treat fertiliser stains on travertine, limestone or other carbonate stone?
Do not use acids (vinegar, muriatic, oxalic in strong form) — they will etch and permanently damage the stone. 1) Start with plain water and soft nylon brush to remove loose material. 2) For organic residues use oxygen bleach (sodium percarbonate) mixed per label—apply, allow 10–20 minutes, gently scrub with soft brush, rinse thoroughly. 3) For iron stains, use a poultice recommended for carbonate stone (ammonium oxalate or commercially formulated rust poultice designed for stone) applied per manufacturer/NPS guidance; these limit acid contact. 4) For stubborn embedded salts or iron, call a stone conservation professional. Always test in an inconspicuous area and avoid pressure-washing at close range (may erode soft carbonate). After cleaning, consider resealing with a breathable stone sealer appropriate for the stone type.
Next Articles
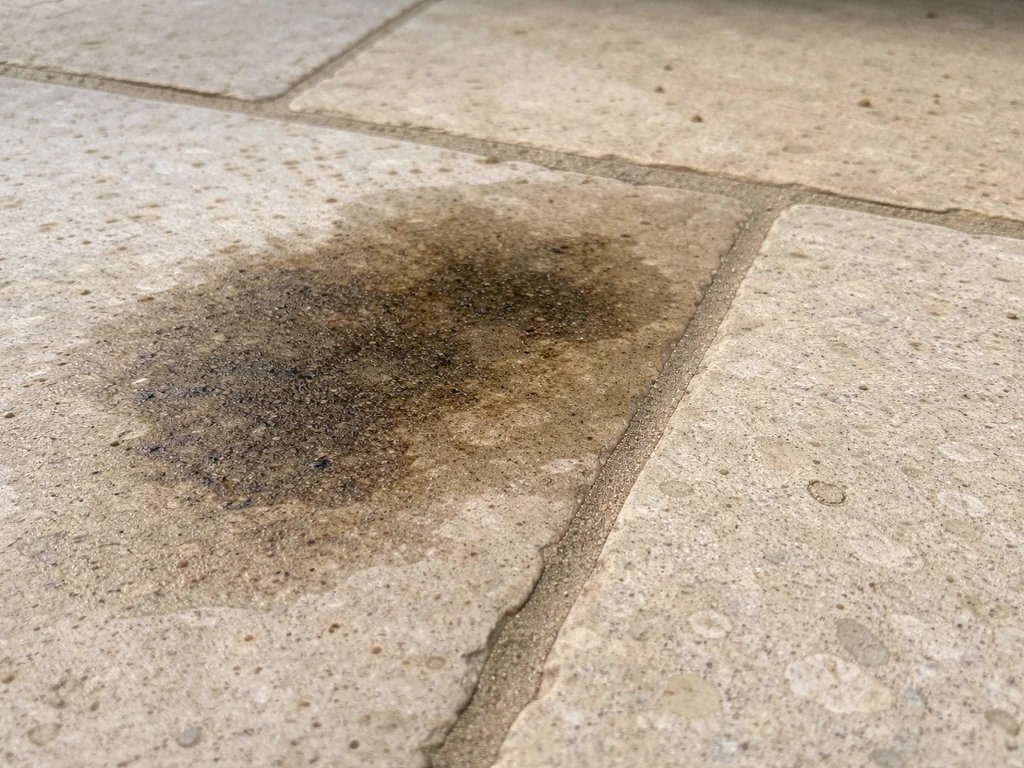
How to Remove Stains From Limestone Patio Grease
Step-by-step to remove grease stains from a limestone patio safely, with dwell times, poultice options, and rinse tips.
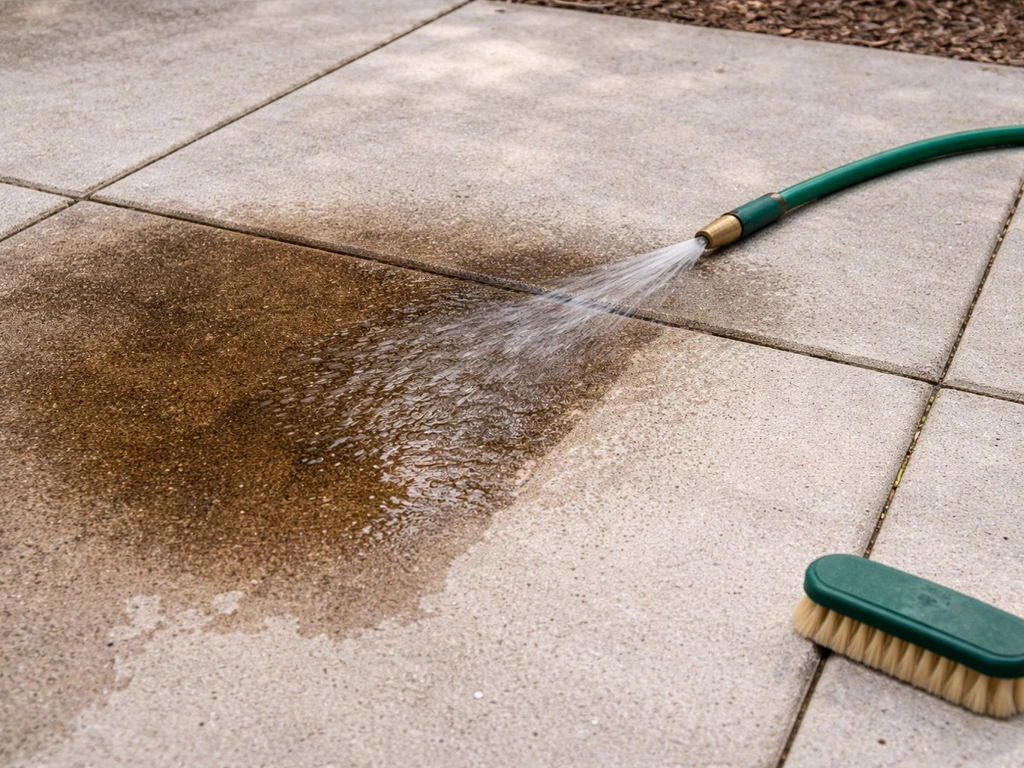
How to Get Wood Stain Off Patio Slabs Step by Step
Step-by-step methods to remove wood stain from patio slabs with safe cleaners, scrubbing, rinse, and prevention tips.
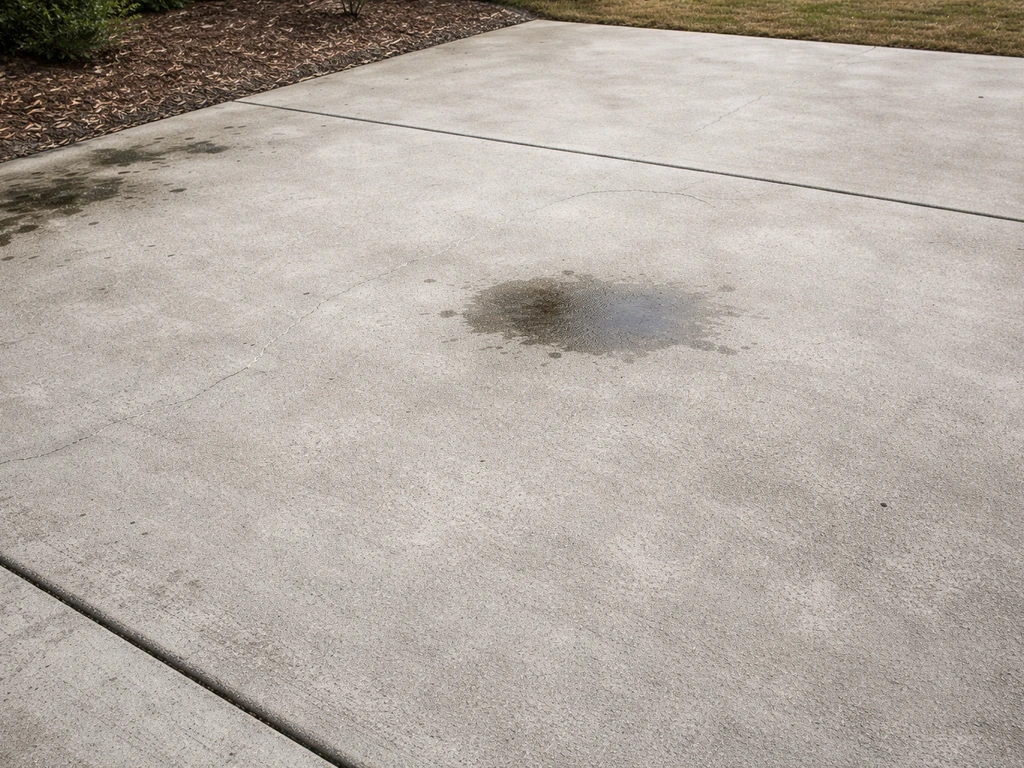
How to Remove Stains From Patio: Step by Step Guide
Step-by-step methods to remove patio stains fast by material and stain type, with safe pressure wash or scrubbing tips.