
Grass growing between patio stones comes out most reliably when you pull it by hand (roots and all) for small patches, use boiling water or 20% horticultural vinegar for medium-sized growth you can't fully extract, and reach for a systemic herbicide like glyphosate only when you're dealing with rhizome-rooted perennial grasses covering more than about 50 square feet. Once the growth is gone, re-filling joints with polymeric sand is the single most effective thing you can do to stop it coming back.
How to Get Grass Out of Patio Stones: Safe Steps & Prevention

Dylan Hale
21 Jul 2026
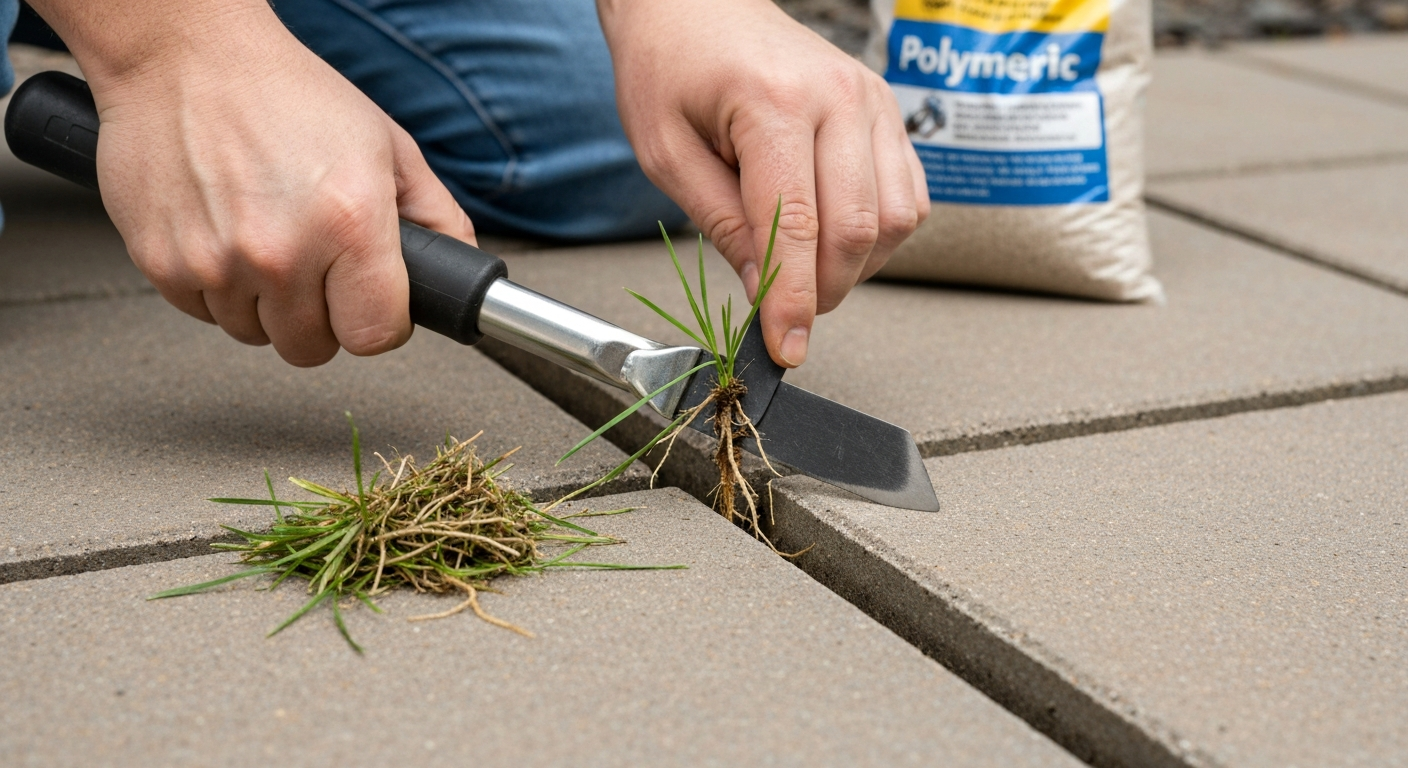
Quick decision guide: pick your method before you start
Not every grass problem needs the same fix. I've seen people reach straight for a pressure washer on a patch that a bread knife and five minutes of hand-pulling would have sorted. Running through these four questions first will save you time, money, and potential damage to your patio surface.
| Situation | Best approach | When to escalate |
|---|---|---|
| A few blades in one or two joints, less than 5 sq ft | Manual pulling, joint knife, stiff brush | If roots snap off and regrowth returns within a week |
| Scattered grass across 5–50 sq ft, mainly annual weeds | Boiling water, horticultural vinegar, mechanical scraping | If perennial/rhizome roots are present after pulling |
| Large infestation over 50 sq ft, or rhizome/runner-type grass | Targeted systemic herbicide (glyphosate per label) or pressure washing | If growth is under slabs or lifting stones |
| Root penetration lifting or cracking stones, or delicate material at risk | Call a paving contractor | Any time you're unsure about material integrity |
One honest caveat: if you're a renter, skip straight to the renter section below before doing anything. Some methods count as alterations and your landlord's permission matters.
Inspect first: is it actually grass, or something else?
Before you treat anything, spend two minutes looking closely at what you've got. Grass, moss, algae, and broadleaf weeds all look greenish from a distance but they respond to completely different treatments. Getting this wrong wastes product and can damage your patio.
Grass vs. weeds vs. moss vs. algae
- Grass and grass-like plants: narrow blade leaves with visible nodes, fibrous root systems, and sometimes runners or rhizomes (underground stems). Sedges look grass-like but have triangular stems — the old reminder is 'sedges have edges.' These need pulling, mechanical removal, or a systemic herbicide for perennial types.
- Broadleaf weeds: wider, flat leaves with obvious veins — think dandelion, clover, or plantain. Contact killers and hand-pulling work well here.
- Moss: a low, soft, leafy carpet with no true roots, just thread-like rhizoids clinging to the surface. It signals damp, shaded conditions. Scrubbing and improving drainage fixes moss; herbicide is overkill.
- Algae: a slimy, green or black-streaked film rather than individual plants. It's a moisture and shade problem, not a rooted weed. Soft-wash with diluted sodium hypochlorite handles algae well.
- Severity check: pull one plant. If the root comes out cleanly and is fibrous and shallow, you're dealing with an annual grass — the easiest type. If you find white horizontal rhizomes connecting plants underground, that's a perennial grass and it will keep returning without root-level treatment.
For anything you can't confidently identify, Virginia Tech's weed ID key (free online) lets you work through leaf shape, stem cross-section, and seedhead form to pin down the species. It matters because contact-only methods like boiling water will never fully control a rhizome grass, you need something systemic or very thorough root extraction.
How your patio material changes the method
This is the part most guides skip, and it's where people accidentally etch or stain their patio while trying to clean it. I'll be direct about what each material can and can't handle.
| Material | Safe pressure range | Acid-based cleaners (vinegar, muriatic acid) | Wire brushing | Notes |
|---|---|---|---|---|
| Unsealed concrete | 2,500–3,500 PSI | Use with caution; test first | Generally fine | Robust but can lose surface texture with repeat high-PSI passes |
| Brick / clay pavers | 1,200–2,500 PSI with wide fan | Avoid strong acids; dilute vinegar spot-use only | Light brushing OK | Mortar joints erode — test a hidden area first |
| Concrete pavers | 1,200–2,500 PSI with wide fan | Diluted only, test first | Light to moderate OK | Joint sand washes out easily; resand after pressure washing |
| Natural stone (granite, slate, sandstone) | 1,200–2,000 PSI | Varies by stone — test first | Soft brush preferred | Porous stones absorb staining agents; seal after cleaning |
| Travertine / limestone / marble | Under 1,200 PSI, soft-wash preferred | Never — acids etch calcareous stone | Soft brush only | Extremely acid-sensitive; even vinegar can pit the surface |
| Flagstone (varies) | Depends on stone type — test first | Avoid unless confirmed non-calcareous | Soft brush preferred | Flagstone is a format, not a mineral — check the stone type |
The travertine and limestone warning is especially important. The Natural Stone Institute and travertine contractor guidance recommend avoiding acids, sand‑blasting, aggressive wire‑brushing and high‑pressure washing on travertine; use mild neutral cleaners, soft mechanical brushing, gentle rinsing and test patches, and prefer resealing rather than high‑PSI blasting for travertine patios Travertine (spec/maintenance) — Natural Stone Institute / Travertine contractor guidance. I've seen homeowners pour straight vinegar onto travertine to kill joint weeds and end up with dull, pitted patches that needed professional re-honing. If your patio fizzes when you drip lemon juice on it, it's calcareous, keep all acids away from it entirely.
Renter? Read this before you touch anything
Renters face a different set of constraints than homeowners and it's worth being honest about them. Most tenancy agreements class any structural or surface alteration, including re-sanding joints, sealing stone, or applying herbicide, as something that requires landlord permission. Using a pesticide in a way that isn't consistent with its label is also a legal issue under FIFRA, and in multifamily buildings, HUD/EPA integrated pest management guidance generally requires property manager oversight and tenant notification for pesticide applications.
The practical upshot: as a renter, stick to purely manual and low-toxicity methods (hand-pulling, boiling water, diluted household vinegar for tiny seedlings, brushing) unless your landlord has explicitly signed off on more. Don't apply herbicides, bleach, or re-sand joints without written permission. These aren't just rules for their own sake, you could be liable for surface damage if the wrong product is used on a material the landlord didn't approve for treatment.
Low-impact options that are almost always renter-safe
- Hand-pulling with a crevice weeder or joint knife (no chemicals, no surface contact beyond the joint itself)
- Boiling water poured from a kettle directly into joints
- Stiff-bristle brush scrubbing with plain water
- Diluted household vinegar (5% acetic acid) spot-applied on visible seedlings only — note this won't touch established or perennial grass
Renter-friendly step-by-step: pulling, boiling water, vinegar, salt, and baking soda
These methods are ordered roughly from least to most involved. Start with the gentlest one that matches your situation.
Method 1: hand-pulling
- Water the area lightly or work after rain — moist soil releases roots much more cleanly than dry compacted joints.
- Use a crevice weeder, narrow joint knife, or even an old dinner fork to loosen soil and expose the root crown before pulling.
- Grip as close to the base as possible and pull slowly and steadily rather than jerking, which snaps roots and leaves them in place.
- Drop pulled plants into a bag immediately — don't leave them on the patio surface where seeds can fall back into joints.
- Brush out loose debris and refill the joint with sand or polymeric sand if you're allowed to. Even plain builder's sand helps block regrowth temporarily.
Method 2: boiling water
- Boil a full kettle. Work quickly — water cools fast and loses effectiveness below roughly 80°C.
- Pour steadily and precisely along the joint, soaking the plant and surrounding soil. A standard kettle spout gives good control.
- Expect wilting and browning within 24–48 hours. The top growth will die but perennial roots often survive.
- Repeat every 7–10 days. Boiling water is contact-only and typically won't kill deep perennial roots with a single treatment.
- Be careful on cold-weather days: rapid thermal expansion can stress some natural stone. On a hot day this is rarely an issue.
Method 3: vinegar
Household vinegar at 5% acetic acid is genuinely effective only on tiny seedlings and annual weeds in their earliest growth stage. For anything established, you need horticultural vinegar at around 20% acetic acid, which is available at garden centres. The stronger stuff is a serious contact desiccant, it causes chemical burns on skin and eyes, so wear gloves, safety glasses, and old clothing. It will also damage or etch acid-sensitive surfaces (travertine, limestone, some bricks), so only use it on concrete or confirmed silicate stone.
- For household vinegar (5%): use undiluted, applied directly to tiny seedlings with a small brush or squeeze bottle. Don't bother on established plants.
- For horticultural vinegar (20%): wear nitrile gloves and eye protection. Apply on a dry, still day to avoid spray drift onto desirable plants.
- Soak the leaves and base of the plant. Avoid the stone surface itself if you're on travertine or limestone.
- Expect top-growth to die within 24 hours on small annuals. Perennial grasses and established plants commonly regrow from the root — multiple applications are needed and results are often incomplete.
- Rinse the treated area with plain water after 30–60 minutes to limit surface exposure and protect nearby soil.
Method 4: salt and baking soda
Salt (sodium chloride) does kill grass, but you need to understand the trade-off before using it. Research shows that effective control requires very high application rates, and even modest salt use causes long-term soil salinization that can prevent anything from growing in that area for years, including if you ever want to re-bed the patio in soil or add planters nearby. Sodium chloride efficacy for crabgrass control, Weed Technology (peer‑reviewed) reports reliable grass kill required very high NaCl application rates (hundreds to thousands kg/ha) and warns of persistent soil salinization risks Sodium chloride efficacy for crabgrass control — Weed Technology (peer‑reviewed). Extension sources actively warn against blanket salt use in landscapes for this reason. If you're going to use it at all, use it only as a spot treatment directly in a joint where you have zero soil or plant-life beneath, not on patio areas near grass edges or garden beds.
Baking soda (sodium bicarbonate) can suppress small seedlings by raising the pH immediately around the plant. Sprinkle it directly onto seedlings in dry conditions. It's very gentle and results are modest, but it's genuinely low-risk for surfaces and surrounding soil in small amounts. Think of it as a last-line option for renters who can't use anything else.
Tools for getting into joints and cracks: what actually works
The joint is the battlefield for patio grass, and most of the work is getting something narrow enough to extract the root without damaging the surrounding stone. Here's what I've found actually useful.
- Crevice weeder (also called a crack weeder or patio knife): a flat, narrow blade angled at the tip. The single most useful tool for this job. Gets under the root crown and levers plants out cleanly.
- Grout saw or grout rake: useful for joints packed with compacted soil and roots. Cuts through debris so you can sweep it out before pulling. Use gently on soft mortared joints.
- Old steak knife or butter knife: a serviceable substitute for a crevice weeder in a pinch — the kind of thing renters can use without buying specialist tools.
- Stiff-bristle hand brush: after pulling, brush the joint to clear loose soil and debris. This is important before refilling with sand.
- Wire brush (brass or steel): effective on wider joints and surface growth, but use with caution. Brass wire is softer and safer for most stone; steel wire can scratch or leave rust marks on lighter-coloured stone. Avoid wire brushing on travertine entirely.
- Narrow trowel or pointing trowel: useful for digging out grass that's established in wider gaps between large flagstones.
One technique I always recommend: after extracting the plant, scrape the joint walls lightly to remove clinging root fragments and biofilm, then brush clean and, if you can, blow out remaining debris with a can of compressed air or even a bike pump. You want as clean a surface as possible before re-filling, because any organic debris left in the joint becomes a seedbed for the next round.
Using boiling water, vinegar, salt and baking soda safely: the details
Each of these natural methods has real limits and some genuine risks that don't always get flagged in quick-tip articles. Here's the honest version.
| Method | Effective on | Not effective on | Surface risk | Key safety note |
|---|---|---|---|---|
| Boiling water | Annual seedlings, small patches, moss | Deep perennial roots, rhizome grasses | Minimal if poured carefully; avoid cold stone in frost conditions | Risk of scalding — use kettle, wear shoes, pour away from your body |
| 5% household vinegar | Tiny annual seedlings only | Established plants, perennial grasses | Etches travertine, limestone, some brick mortars | Low skin risk but keep from eyes; don't use on acid-sensitive stone |
| 20% horticultural vinegar | Small to medium annual weeds, some grasses (top growth) | Perennial root systems (frequent regrowth) | Definite etching risk on calcareous stone; test first on concrete | Chemical burn risk — gloves + eye protection mandatory; drift risk to nearby plants |
| Salt (NaCl) | Will kill top growth at high rates | Rarely practical without soil damage risk | Low direct surface risk, but high soil risk nearby | Do not use near garden beds, lawns, or drain areas; long-term soil damage |
| Baking soda | Tiny seedlings, spot suppression | Any established plant | Negligible | Very safe; modest results only |
A note on mixing: never combine bleach (sodium hypochlorite) with vinegar or any acid. The reaction releases chlorine gas. If you're switching between methods, rinse the surface thoroughly with plain water and allow it to dry before applying anything else.
Mechanical options: scraping, wire-brushing, and hoeing by material type
Mechanical removal means using physical force rather than chemistry to get the plant out. It's often the most immediate and satisfying approach, but the right tool depends entirely on your patio surface.
Scraping
A flat-bladed scraper or crevice knife is safe on nearly all patio materials because you're working inside the joint rather than across the stone face. Keep the blade angled into the joint and don't drag it across the stone surface at a shallow angle, that's how you scratch flagstone and pavers. For travertine, use a plastic or wooden scraper rather than metal to avoid any chance of scratching the soft surface.
Wire-brushing
Wire brushing is useful for clearing surface-level growth from wide joints and for roughing up joint walls before refilling. Use brass wire brushes on natural stone, brick, and coloured pavers, brass is softer than the stone so it won't scratch. Steel wire brushes are acceptable on plain concrete but can leave ferrous particles that rust and stain lighter stone surfaces. On travertine, skip wire brushing entirely and use a stiff nylon brush instead.
Hoeing and flat weeding
A hoe or flat weeder only makes practical sense on very wide joints (say, 15mm or more between large flagstones) where there's enough room to work the blade properly. A stirrup hoe (also called a hula hoe) is good for cutting grass off at soil level in wider gaps. This is top-growth removal only, roots survive and regrowth is fast for perennial types. Use hoeing as a quick-knock-back ahead of a more thorough treatment, not as a stand-alone fix.
| Tool | Concrete | Brick/clay pavers | Concrete pavers | Natural stone | Travertine/limestone | Flagstone |
|---|---|---|---|---|---|---|
| Metal scraper / joint knife | Yes | Yes, carefully in joint | Yes, carefully in joint | Yes, in joint only | Plastic/wood only | Yes, in joint only |
| Steel wire brush | Yes | Avoid on face | Avoid on face | No | No | No |
| Brass wire brush | Yes | Yes | Yes | Yes | No | Yes (test first) |
| Stiff nylon brush | Yes | Yes | Yes | Yes | Yes | Yes |
| Hoe / stirrup hoe | Wide joints only | Wide joints only | Wide joints only | Wide joints only | Wide joints only, no blade contact with stone | Yes, wide joints |
| Grout saw | Yes | Carefully | Yes | Yes | No — use soft tools | Carefully |
Pressure washing and chemical options: PSI, herbicides, bleach, and muriatic acid
These are the heavier-duty options. They work well when the situation calls for them, but each one has specific material and safety requirements that I want to be direct about.
Pressure washing
A pressure washer is genuinely effective at blasting grass and weed matter out of joints, but it's not a targeted tool, it cleans everything and removes joint sand in the process. Plan to re-sand joints after every pressure wash session. Always test a small hidden section first, use a wide-fan nozzle (25–40 degrees), and maintain at least a 30cm standoff distance from the surface.
- Unsealed concrete: 2,500–3,500 PSI is generally safe with a wide-fan nozzle
- Brick, clay pavers, and concrete pavers: 1,200–2,500 PSI — start lower and work up; mortar joints erode quickly at higher pressures
- Natural stone (granite, slate, sandstone): 1,200–2,000 PSI, wide fan, test first
- Travertine, limestone, and marble: stay below 1,200 PSI or use soft-wash (low pressure with a cleaning solution) — high-PSI washing on calcareous stone can erode the surface and destroy joints
- Never use a zero-degree (red) nozzle on any patio surface — it concentrates the stream enough to etch concrete and will destroy softer stones
Herbicides: glyphosate and contact killers
Glyphosate is a non-selective systemic herbicide, meaning it travels through the plant to the roots. That makes it genuinely useful for perennial grassy weeds with deep rhizomes where pulling and contact methods keep failing. Apply it on a dry, calm day with no rain forecast for at least 6 hours. Under FIFRA, using any pesticide inconsistently with its label is unlawful, read the product label every time, including for application rates, PPE requirements, and re-entry intervals.
Diquat is a fast-acting contact desiccant: it kills top growth within hours, which looks impressive, but it doesn't translocate to roots. Use it when you want quick visual knock-back or when you're treating annual grasses that don't have perennial root systems. For persistent perennial grass in patio joints, glyphosate is the more appropriate tool.
Bleach (sodium hypochlorite) for surface growth
Household bleach at 5–6% sodium hypochlorite is primarily useful for killing algae and moss on hard surfaces, not for rooted grass. For algae and surface-level biological growth, a 1:10 dilution (one part bleach to ten parts water) applied and rinsed off after 10–15 minutes is effective on concrete and many brick surfaces. Use a more dilute solution (1:50) for lighter-duty cleaning.
Bleach is corrosive to metals (check for any nearby fixtures), can bleach or discolour coloured pavers and some natural stones, and is toxic to aquatic organisms in runoff, don't let it drain directly into storm drains or waterways. Always wear gloves, eye protection, and old clothes. Don't use bleach on travertine, limestone, or any acid-sensitive stone (bleach itself isn't acidic, but it can cause surface discolouration and react with certain sealers).
Muriatic acid: a last resort
Muriatic acid (hydrochloric acid) is occasionally referenced for heavy staining on concrete, but it has almost no role in grass removal and is genuinely dangerous to use without professional-level PPE. It will destroy calcareous stone instantly and can damage brick mortar. I'd suggest leaving this one to contractors unless you have specific concrete staining, not weed removal, that requires it. It's covered more thoroughly in dedicated stain-removal guides.
Prevention: how to stop grass growing back
Removing existing grass is only half the job. What you do to the joints afterwards determines whether you're back to square one in six weeks or genuinely clear for a few seasons.
Polymeric sand: the most effective joint fix
Polymeric sand (sometimes called polymer-modified paver sand) is a joint sand that contains binding agents activated by water. When correctly installed and cured, it locks into a semi-rigid mass that resists weed establishment far better than plain builder's sand. Brands like Techniseal and Gator are widely available. The key word is 'correctly', application must be done on a completely dry surface, the joint must be filled to within about 5mm of the top, and you must apply water in a controlled way (mist, not blast) to activate the binders. Any moisture during the dry application phase, or a joint that isn't fully dry before you start, significantly reduces performance.
Other joint solutions: mortar, sealers, and edging
- Joint mortar: for older patios with wide, eroded mortar joints, re-pointing with fresh mortar physically seals the gap. This is more permanent than sand but requires more skill and isn't suitable for paver patios designed to flex.
- Patio sealers: sealing the patio surface (including joint edges) after cleaning makes the surface less hospitable to seed germination and easier to clean next time. Use a sealer appropriate to your material — never use a solvent-based sealer on travertine unless specifically formulated for it.
- Edging and borders: grass entering from a lawn edge is one of the most common causes of joint growth. Installing a firm patio edging strip (metal, plastic, or a concrete kerb) between your lawn and patio gives runners and rhizomes a physical barrier to cross.
- Drainage improvements: standing water and damp joints dramatically accelerate moss, algae, and grass establishment. Check that your patio falls away from the house (minimum 1:80 fall is commonly recommended) and clear any blocked drainage points.
Maintenance schedule to stay ahead of regrowth
| Frequency | Task |
|---|---|
| Weekly (growing season) | Walk the patio and pull any new seedlings by hand before they establish — at this stage it takes seconds per plant |
| Monthly (spring through autumn) | Brush joints with a stiff broom to disrupt seedling establishment and clear surface debris |
| Every spring | Inspect joint sand levels and top up any settled or washed-out sections with polymeric sand or builder's sand |
| Every 1–3 years (depending on material) | Re-seal the patio surface after a thorough clean to maintain surface protection |
| Every 3–5 years or as needed | Full re-point or re-sand of all joints if polymeric sand has broken down or mortar has eroded significantly |
Equipment and materials checklist
You don't need all of this at once. The manual kit on the left handles the majority of grass problems; the mechanical and chemical items are for larger or more stubborn infestations.
- Crevice weeder or patio joint knife
- Stiff nylon brush and/or brass wire brush
- Pointing trowel or narrow trowel
- Kettle (for boiling water method)
- Nitrile gloves and eye protection
- Horticultural vinegar (20%) if using chemical-lite methods on concrete or silicate stone
- Polymeric sand and rubber mallet / brush for re-filling joints
- Stiff broom for sweeping in sand
- Garden hose with mist setting (for activating polymeric sand)
- Pressure washer with 25- or 40-degree nozzle (for medium to large areas — check PSI against your material)
- Appropriate patio sealer for your material
- Systemic herbicide (glyphosate) with applicator bottle for perennial grasses in large areas
- PPE: gloves, eye protection, and dust mask when using any concentrated chemical
When to call a professional
Most grass problems in patio joints are firmly DIY territory, but there are situations where calling a paving contractor or professional cleaner is the right call rather than a last resort. Consider it if: grass or plant roots are lifting, cracking, or displacing individual stones; you have travertine, marble, or limestone and are unsure about the correct cleaning approach; the infestation covers a very large area with entrenched rhizome grasses and you've had repeated failures with DIY methods; the patio needs full re-pointing or re-laying of sections; or you're in a rented property where any meaningful intervention requires landlord-coordinated professional work. A paving contractor can also advise on whether existing drainage gradients are contributing to the problem, something that's hard to assess or fix without lifting stones.
If grass growth is accompanied by other surface staining, you may be dealing with overlapping issues. If grass growth comes with surface staining, see our guide on how to remove fertiliser stains from patio for targeted stain-removal steps. Plant pots sitting on patio stones are a common source of both weed seeds and surface staining, and getting on top of both together makes the cleaning process more efficient. If you also need guidance on how to remove stain from patio, see the dedicated stain-removal guide for step-by-step methods and material-specific precautions. If you're dealing with wood stain on patio stones, see our guide on how to get wood stain off patio for step-by-step stain-removal methods tailored to different stone types. For practical tips on preventing and removing pot-related marks, see our short guide on how to stop staining on patio from plant pots.
FAQ
Quick decision guide: how do I choose manual, pressure, chemical or professional removal?
Match severity and constraints: - Tiny problem (<5 sq ft, single blades): manual (pulling, scraping) or boiling water. - Small–medium patches (5–50 sq ft) of annual grassy growth: manual + repeat contact treatments (boiling water, vinegar) or targeted spot pressure-wash. - Large infestations (>50 sq ft) or perennial/rhizome grasses that regrow from roots: consider systemic herbicide (label permitting) or professional service. - Material sensitivity or renter restrictions (no herbicides, no permanent alterations): prefer manual/low-toxicity methods; call the landlord/property manager before chemical use. Use safety, surface type and access (water runoff, nearby plants) to move toward gentler options first; escalate only if those fail.
How can I tell grass/grasslike weeds apart from moss, algae or other growths?
Look at growth form: grassy weeds have blade-like leaves, nodes, and fibrous roots; they often produce seedheads. Sedges/ rushes are grasslike but have triangular stems or differing ligules. Moss forms a dense, low carpet with no true roots; algae creates slimy green/black films. Identification matters: moss/algae respond to moisture control and scrubbing; grasses need root/crown removal or systemic control. When unsure, compare to extension ID keys or take a photo to a local extension office.
Does the patio material change the recommended method?
Yes. Concrete and hard pavers tolerate tougher mechanical cleaning and higher pressure (within limits). Brick and dense natural stone generally handle moderate pressure but test first. Travertine, calcareous limestones and some flagstones are soft/acid-sensitive — avoid acids, wire-brushing, sand-blasting and high PSI; use gentle scrubbing, neutral cleaners and soft-wash. Always test a small hidden area and protect grout/joints.
Renter-friendly manual and low-toxicity methods (step-by-step)?
1) Tools: gloves, crevice weeder/joint knife, stiff brush, bucket, kettle or pot for boiling water, spray bottle for vinegar, hand pruner for clumps. 2) Pulling: loosen soil in the joint, grip base of blade at crown, pull steadily to remove root mass. 3) Scraping: use a joint knife or grout saw to remove plant + root; clear debris. 4) Boiling water: pour freshly boiling water directly onto blades/roots from 1–2 ft away; retreat in 7–10 days. 5) Household vinegar (5%): spot-spray leaves on dry, calm day; expect repeat applications; avoid spraying desirable plants and acid-sensitive stone. 6) Baking soda/salt note: avoid widespread salt use — it can salinize soil and harm surrounding plants; baking soda can help small seedlings but is limited. 7) Clean up and refill joints immediately (resand or polymeric sand) to limit re-establishment.
How effective is vinegar and what safety precautions apply?
Household vinegar (≈5%) kills only very small seedlings; horticultural vinegars (20%+) are stronger but are contact desiccants only and can cause severe skin/eye burns and etch acid-sensitive stone. Use PPE (gloves, eye protection), avoid drift onto plants, rinse nearby hard surfaces if contact occurs, and never mix with bleach. Repeat treatments are usually needed; do a test patch on the patio material first.
When and how should I use boiling water?
Use boiling water for small patches and spots where you want renter-friendly, chemical-free control. Boil in a kettle and pour directly onto the weed crown and roots; expect immediate wilting and browning within 1–2 days and plan a retreat in 7–10 days because deep roots may survive. Protect hands/feet, avoid splashing on nearby desirable plants, and do not pour boiling water onto delicate stone surfaces without testing (it may weaken some mortars).
Next Articles
How to Remove Fertiliser Stains from Patio: Practical Steps
How to remove fertiliser stains from patio: step-by-step fixes for concrete, pavers, stone with safe dilutions.
How to Remove Stains From Limestone Patio Grease
Step-by-step to remove grease stains from a limestone patio safely, with dwell times, poultice options, and rinse tips.
How to Get Wood Stain Off Patio Slabs Step by Step
Step-by-step methods to remove wood stain from patio slabs with safe cleaners, scrubbing, rinse, and prevention tips.