
Black spots on patio flags are almost always caused by one of five things: biological growth (mold, algae, or lichen), soot or pollution crust, oil or grease, rust, or efflorescence mixing with dirt. Once you know which one you are dealing with, the fix is straightforward. For most biological black spots, a diluted bleach or oxygen bleach solution scrubbed in with a stiff nylon brush will clear them. For rust, you need an oxalic acid-based remover. For grease, a degreaser or poultice. For delicate natural stone like travertine or limestone, avoid acids entirely and stick to pH-neutral cleaners. This guide walks through identification, material-safe methods, recipes with dwell times, pressure-wash guidance, and prevention so you leave with a clear plan for your specific flags. For a step-by-step DIY approach, see our detailed guide on how to get black spots off patio slabs.
How to Remove Black Spots from Patio Flags: Complete Guide

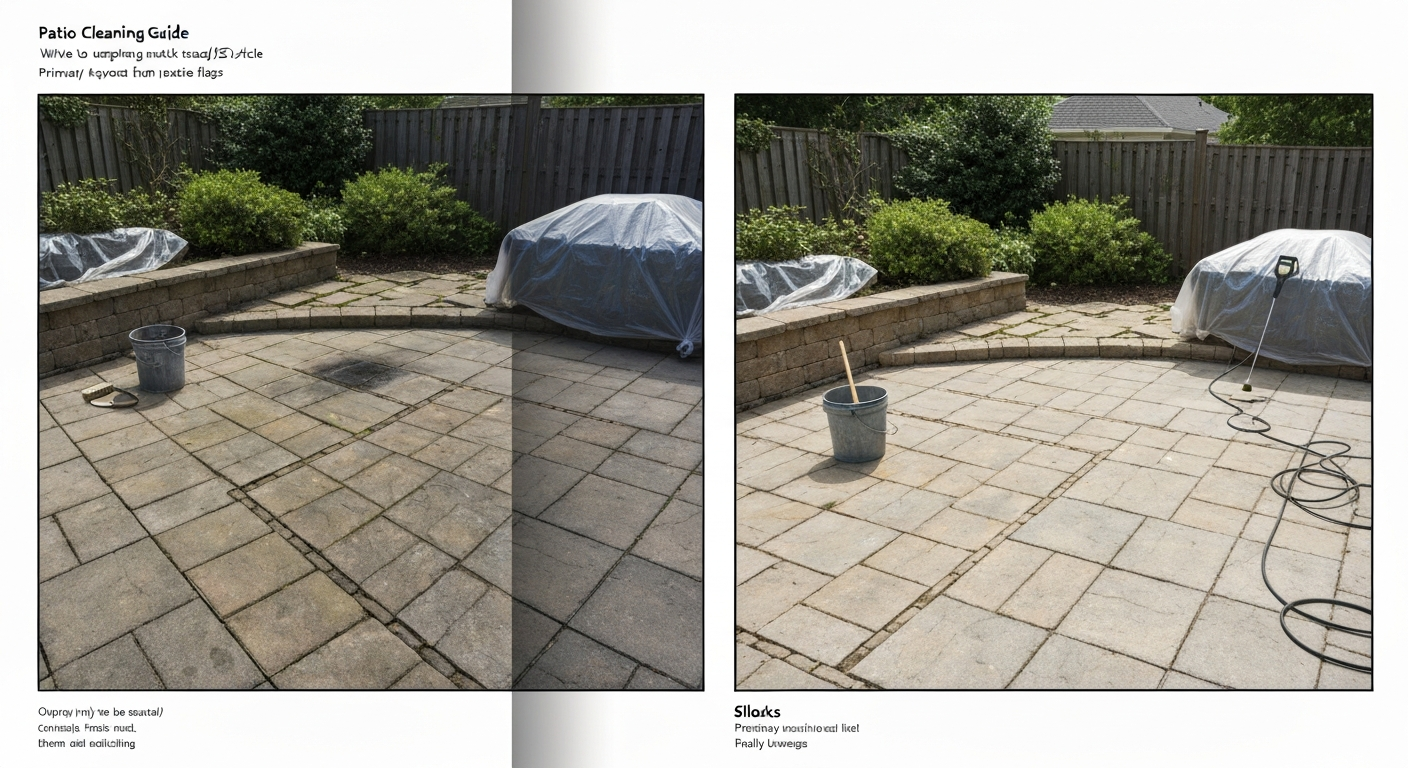
What these black spots are and your fast action plan
The vast majority of black spots on patio flags are biological. Algae, mold, and lichen thrive in shaded, damp corners and produce dark patches that look almost painted on. They are superficial, living on organic films and dust rather than eating into the stone itself, which means they respond well to biocidal cleaners. The second most common culprit is blank" rel="noopener noreferrer">soot or air-pollution crust, which forms a compact, hard dark film, especially in urban areas or near barbecues and fire pits. Unlike biological growth, soot does not lighten with bleach. Oil and grease spots are dark, sometimes shiny or tacky when fresh, and repel water. Rust stains run orange-brown and radiate outward from a metal source like a planter or furniture leg. Efflorescence is technically white or grey but can look nearly black when it mixes with atmospheric dirt. blank" rel="noopener noreferrer">Efflorescence for Inspectors (InterNACHI) recommends a simple wet-finger or spray 'water rub' test, efflorescence usually dissolves or washes away, whereas biological growth will smear and generally remain.
Fast action plan: identify the stain type using the simple tests in the next section, cross-reference your patio material in the decision guide, grab the right cleaner from the recipes section, and always do a 30-second spot test before treating the whole area. See our full guide on how to remove black spots from patio stones for step‑by‑step instructions, cleaner recipes, and material‑specific advice. If you have travertine or limestone flags, skip anything acidic and go straight to the pH-neutral or oxygen bleach option.
How to identify what is causing the black spots
Spend two minutes on identification and you will save yourself from using the wrong product and potentially damaging your flags. Here are the visual clues and the three quick in-place tests I use every time.
Visual clues by stain type
| Stain type | Appearance | Location clues | Texture/feel |
|---|---|---|---|
| Biological (mold/algae/lichen) | Dark green, grey, or black; can look fuzzy or slimy | Shaded, north-facing, near drains or water features | Smears when rubbed wet; damp feel |
| Soot/pollution crust | Hard, flat, black or dark grey crust | Near BBQ, fire pit, urban areas, under overhangs | Compact and gritty; does not smear |
| Oil/grease | Dark brown-black, sometimes shiny or oily sheen | Under car, near kitchen door, around BBQ | Tacky or waxy when fresh; repels water droplets |
| Rust/iron | Orange-brown to reddish-black rings or streaks | Below metal furniture, planters, or iron-rich soil runoff | Hard, flat staining; may have visible rust source nearby |
| Efflorescence + dirt | White, grey or yellowish powder, can look dark with trapped dirt | New concrete/brick, areas with poor drainage | Powdery or crystalline; can flake off |
Three quick in-place tests
- Water rub test: rub the spot with a wet finger or spray a little water on it. Efflorescence tends to dissolve or partially wash away almost immediately. Biological growth smears and stays. Soot and rust do not react at all.
- Vinegar fizz test for efflorescence: drop a few millilitres of household white vinegar directly onto the deposit. Calcium carbonate-based salts fizz or dissolve visibly. Important: do not run this test on limestone, travertine, or marble flags because the acid will etch the surface.
- Bleach response test for biological growth: mix about 1 part household bleach with 10 parts water and dab a small amount on an inconspicuous spot. Organic black or green growth will start to lighten or lose colour within a few minutes. Soot, rust, and mineral stains will not react. Rinse the test area thoroughly after.
If you suspect grease or oil, press a piece of plain white tissue onto the dry stain. If the tissue picks up a faint oily residue, you have a hydrocarbon stain and a degreaser is your tool. For confirmed rust, note that bleach will not touch it and may even darken it slightly, so go straight to an oxalic acid-based rust remover.
Which cleaning methods are safe for your specific flags
This is the most important section if you have natural stone. Using the wrong method, particularly acids on calcareous stone or high pressure on sandstone, can cause damage that is difficult or impossible to reverse. Use the table below as your reference before picking a method.
| Material | Biological spots | Rust stains | Grease/oil | Efflorescence | Acids (vinegar/muriatic) | Pressure wash | Notes |
|---|---|---|---|---|---|---|---|
| Concrete slabs (poured) | Bleach, oxygen bleach, commercial biocide | Oxalic acid remover | Alkaline degreaser | Dedicated efflorescence remover or dilute acid | Yes (dilute) | Up to 2500–3000 PSI with 25° nozzle | Tough, tolerates most methods; test first |
| Concrete interlocking pavers | Bleach, oxygen bleach | Oxalic acid remover | Alkaline degreaser | Efflorescence remover | Yes (dilute) | 1500–2500 PSI, 25–40° nozzle | Avoid stripping joint sand; rinse well |
| Clay/pressed brick pavers | Dilute bleach or oxygen bleach | Oxalic acid product | Degreaser/poultice | Dilute muriatic acid (carefully) | Yes (dilute) | 1000–1500 PSI, 40° nozzle, keep moving | Softer surface; avoid concentrated acids |
| Limestone | pH-neutral cleaner, oxygen bleach only | Chelating rust remover (non-acid) | pH-neutral degreaser or poultice | pH-neutral remover only | NO — acids etch limestone | Max 600–800 PSI, 40° nozzle | Very acid-sensitive; never use vinegar or bleach undiluted |
| Travertine | pH-neutral cleaner, oxygen bleach only | Chelating rust remover (non-acid) | pH-neutral degreaser or poultice | pH-neutral remover only | NO — acids etch travertine | Max 600–800 PSI, 40° nozzle | Filled travertine: protect fill; avoid soaking |
| Sandstone/flagstone | Dilute oxygen bleach, soft scrub | Oxalic poultice (test first) | Degreaser poultice | Very dilute mild acid or pH-neutral (test) | Extreme caution with vinegar | 600–1000 PSI, 40° nozzle, keep moving | Highly porous; absorbs liquids fast; avoid soaking |
| Slate | Oxygen bleach or dilute bleach | Oxalic acid product (test) | Degreaser | pH-neutral or mild acid | Use with caution; test first | Up to 1500 PSI, 25–40° nozzle | Dense but can split with very high pressure on faults |
| Porcelain pavers | Bleach, oxygen bleach, commercial cleaner | Oxalic acid product | Degreaser | Mild acid or pH-neutral | Usually fine; test grout | Up to 2000 PSI | Very low porosity; stains mainly in joints/grout |
A note on sealed versus unsealed surfaces: if your flags are sealed with a topical sealer, aggressive chemicals and high pressure can strip or cloud the coating. Test in a hidden corner first and use the gentler end of any recommended pressure or chemical range. If unsure whether your flags are sealed, drop a few millilitres of water on the surface: if it beads up, the surface is sealed or very dense. If it soaks in within 30 seconds, it is unsealed and porous.
Everything you need before you start
Tools and cleaning supplies checklist
- Stiff nylon scrubbing brush (general-purpose scrubbing on concrete, pavers, and brick)
- Soft tampico or horsehair brush (for natural stone, travertine, sandstone)
- Wire-free deck brush or long-handled scrubbing brush (for large areas without kneeling)
- Plastic or rubber bucket (2 x 10-litre minimum)
- Garden hose with adjustable nozzle or a spray bottle for applying solutions
- Pressure washer (optional but useful): electric models 1200–2000 PSI are adequate for most domestic jobs
- 25-degree nozzle tip (concentrated cleaning, concrete only)
- 40-degree nozzle tip (wider, gentler; general use and natural stone)
- White vinegar (5% acetic acid — standard supermarket variety)
- Sodium percarbonate powder (oxygen bleach — sold as patio cleaner, deck cleaner, or laundry booster)
- Household bleach (sodium hypochlorite, typically 3–5% available chlorine in domestic products)
- Dedicated efflorescence remover product (follow manufacturer label for dilution)
- Oxalic acid-based rust remover (for rust stains; follow product label)
- pH-neutral stone cleaner (for limestone, travertine, marble)
- Alkaline degreaser or washing-up liquid (for grease spots — washing-up liquid works for light grease)
- Poultice material (diatomaceous earth, fuller's earth, or fine absorbent powder for stubborn grease on porous stone)
- Plastic sheeting or bin bags and adhesive tape (to protect plants and nearby surfaces)
- Stiff broom or garden brush (for pre-sweep)
Personal protective equipment (PPE)
- Chemical-resistant rubber gloves (nitrile or heavy-duty household rubber — not thin latex)
- Safety goggles or wraparound glasses (especially when using bleach, acids, or pressure washing)
- Old clothing or a waterproof apron (bleach and acids will ruin fabric)
- Non-slip footwear with closed toes (wet patios are slippery; pressure-wash rebound can be strong)
- Face mask or respirator when working with powdered sodium percarbonate or concentrated acid products in enclosed spaces
- Knee pads if doing extended hand scrubbing
Spot-testing, protecting your surroundings, and rinsing safely
I always spot test, even on surfaces I have cleaned before. Product formulations change, coatings age, and stone can behave differently in different conditions. Pick an inconspicuous area, about 30 x 30 cm, ideally near the edge of the patio or behind a planter. Apply the cleaning solution at the intended concentration, leave it for the full dwell time, scrub or rinse as planned, and then check the surface when fully dry. Look for etching (a dull haze or rough texture), colour change, or damage to any sealer. If all looks fine after 24 hours, you are good to proceed.
Protecting plants and neighbours matters more than most cleaning guides admit. Bleach and acid runoff can kill grass and plants almost instantly. Before you start, soak any adjacent soil and plant beds thoroughly with plain water: this dilutes any chemical runoff that reaches the soil. Cover sensitive plants with plastic sheeting weighted down at the edges. If you are working near a neighbour's garden, fence, or wall, wet those surfaces with plain water first and rinse them again during and after cleaning. Never let cleaning solution pool and run toward a drain without diluting it heavily with fresh water first.
Rinsing is not optional. After any chemical treatment, rinse the entire cleaned area thoroughly with a garden hose or pressure washer on a low setting, working the rinse water away from plants and drains. For bleach solutions, rinse at least twice. For acid-based products (efflorescence removers, rust removers), neutralize with a dilute baking soda and water solution (roughly 1 tablespoon of baking soda per litre of water) applied to the rinsed area, then rinse once more with plain water. This brings the pH back toward neutral before discharge.
Step-by-step manual cleaning (no pressure washer needed)
Manual cleaning is my go-to recommendation for renters, anyone on a tight budget, and for delicate natural stone where pressure washing carries real risk. It takes more effort but gives you full control over where the solution goes and how hard you scrub. These methods work on almost any patio surface when matched to the right cleaner. For step-by-step instructions specifically for patio bricks, see how to get rid of black spots on patio bricks.
Stage 1: dry prep (always do this first)
- Sweep the entire patio with a stiff broom to remove loose debris, leaves, and surface dirt.
- Remove any furniture, pots, or obstacles so you can access the full area.
- Pre-wet the surface with a garden hose. This prevents the stone from absorbing your cleaning solution too fast, gives you longer dwell time, and reduces chemical waste.
Stage 2: apply your chosen solution and scrub
Apply the cleaning solution (see recipes in the next section) evenly across the affected area using a watering can, spray bottle, or brush. Work in manageable sections of about 1–2 square metres at a time so the solution does not dry out before you scrub. Use a stiff nylon brush on concrete, pavers, and brick. Use a soft tampico or horsehair brush on natural stone. Scrub with firm circular motions, paying extra attention to the black spots themselves. For deep biological staining I usually scrub, let the solution sit again for another few minutes, then scrub a second time.
Recipes, concentrations, and dwell times for manual cleaning
| Cleaner | Mix ratio | Safe surfaces | Dwell time | Expected result |
|---|---|---|---|---|
| White vinegar (5% acetic acid) | Undiluted or 1:1 with water | Concrete, pavers, brick, slate (NOT limestone, travertine, marble, sandstone) | 10–20 minutes; do not let dry | Dissolves efflorescence, lightens mild biological spots |
| Sodium percarbonate (oxygen bleach) | 100–150 g per litre of warm water | All surfaces including natural stone; safest for travertine and limestone | 15–30 minutes; keep wet | Effective on mold, algae, lichen; gentler than chlorine bleach |
| Household bleach (sodium hypochlorite ~3–5%) | 1 part bleach to 10 parts water (roughly 100 ml per litre) | Concrete, pavers, brick, slate (NOT natural stone unsealed; patch test always) | 10–15 minutes maximum; do not let dry | Kills and lightens biological growth; no effect on rust or soot |
| Washing-up liquid / alkaline degreaser | 5–10 ml per litre of water (squirt of dish soap) | All surfaces | 5–10 minutes; scrub actively | Removes light grease and oil stains; needs vigorous scrubbing |
| Commercial patio cleaner (pH-neutral type) | Per product label (typically 1:5 to 1:10) | All surfaces; essential for limestone/travertine | Per product label, usually 10–20 minutes | General cleaning and biological removal on sensitive stone |
Stage 3: rinse and assess
- Rinse the section thoroughly with a garden hose on a strong stream or jet setting.
- Work the rinse water away from plants and off the patio edge.
- For acid-based treatments, apply a dilute baking soda neutralizer, wait two minutes, then rinse again.
- Let the surface dry fully (ideally 24 hours) before assessing results. Wet stone looks darker and can hide remaining stains.
- Repeat the treatment if staining persists. Some heavy biological staining needs two or three applications.
Step-by-step pressure-wash methods
A pressure washer speeds things up significantly and is genuinely useful for large concrete or paver patios with heavy biological growth. The risks are surface damage on softer stone, stripping joint sand from pavers, and spreading contaminated water everywhere if you go too fast. Match your pressure setting and nozzle to the material and you will be fine.
Pressure and nozzle guide by material
| Material | Max pressure (PSI) | Recommended nozzle | Stand-off distance | Notes |
|---|---|---|---|---|
| Poured concrete slabs | 2500–3000 PSI | 25-degree (yellow) | 20–30 cm | Can use turbo/rotary nozzle for stubborn growth; keep moving |
| Concrete interlocking pavers | 1500–2500 PSI | 25–40-degree | 25–35 cm | Avoid prolonged dwell on joint sand; re-sand joints after if needed |
| Clay/brick pavers | 1000–1500 PSI | 40-degree (white) | 30–40 cm | Softer surface; constant motion; never static spray on one point |
| Limestone / travertine | 600–800 PSI | 40-degree or soap nozzle | 40 cm minimum | Use pressure wash only for rinsing; apply cleaner by hand; low pressure only |
| Sandstone / flagstone | 600–1000 PSI | 40-degree | 40 cm minimum | Pre-wet well; constant motion; high porosity means fast saturation |
| Slate | Up to 1500 PSI | 25–40-degree | 25–35 cm | Check for loose or laminating sections before washing; avoid faults/edges |
| Porcelain pavers | Up to 2000 PSI | 25–40-degree | 25–35 cm | Surface itself is robust; focus care on grout lines |
Pressure-wash sequence
- Sweep and clear the patio as per the manual method.
- Connect your washer and attach the correct nozzle for your material. Start on the lower-pressure setting and increase only if needed.
- Pre-wet the surface with the pressure washer on a low or rinse setting (or use a hose).
- Apply your chosen cleaning solution (diluted bleach, oxygen bleach, or commercial cleaner) using the washer's detergent injector or a separate applicator. Let it dwell for the recommended time (keep the surface wet during dwell time).
- Wash the surface using overlapping passes, working from one end to the other and directing the spray away from plants and drains. Keep the nozzle at the recommended distance and keep it moving constantly.
- Rinse thoroughly in the same direction. On pavers, rinse along the joint lines last to clear loosened material from them.
- For acid-based treatments, apply baking soda neutralizer solution by hand, wait two minutes, and rinse once more.
- Allow to dry for 24 hours before assessing results.
One safety point I emphasize to anyone new to pressure washing: the rebound spray from a washer carries the same chemical residue you applied. Keep goggles and gloves on throughout the entire process, not just during application.
Full chemical and gentle recipes with concentrations, dwell times, and safety notes
White vinegar (5% acetic acid)
Standard supermarket white vinegar contains around 5% acetic acid. Use it undiluted for stubborn efflorescence on concrete or brick, or dilute 1:1 with water for general biological spot cleaning on concrete or slate. Apply, wait 10–20 minutes (do not let it dry on the surface), scrub with a nylon brush, and rinse thoroughly. Do not use vinegar on limestone, travertine, marble, or sandstone. The acid will etch calcareous stone and can roughen the surface permanently. Vinegar is a good first option if you have pets or children who use the patio, since it is non-toxic once rinsed, but it is less effective on heavy biological infestations than bleach or oxygen bleach. Does vinegar remove black spots on patio? Vinegar can help lift light biological stains and some efflorescence on concrete or brick, but it's less effective than bleach or oxygen bleach and must not be used on limestone, travertine, marble, or sandstone. For more detail on using white vinegar on patios, see does white vinegar clean patios.
Sodium percarbonate (oxygen bleach)
This is my preferred cleaner for most patios, especially where natural stone or nearby plants are a concern. Dissolve 100–150 g of sodium percarbonate powder per litre of warm water (minimum 40°C water to fully activate). Apply generously to the pre-wetted surface and keep it wet during a 15–30 minute dwell time. The solution releases hydrogen peroxide and sodium carbonate on contact with water, which kills biological growth and oxidizes organic staining without the harshness of chlorine bleach. Scrub and rinse. It is safe for use around most plants once diluted and rinsed, though I still recommend diverting runoff away from borders. It is effective on mold, algae, and lichen on virtually all surfaces including limestone and travertine, but less effective on heavy soot or mineral staining.
Household bleach (sodium hypochlorite)
Domestic bleach in the UK and US is typically 3–5% available chlorine. Dilute to 1 part bleach to 10 parts water (approximately 100 ml bleach per litre of water) for general biological spot cleaning. For particularly heavy growth, a 1:5 dilution (200 ml per litre) can be used on concrete only, tested first. Apply, leave for 10–15 minutes maximum, and rinse extremely well. Do not let bleach solution dry on the surface. Do not use bleach on natural stone (it can discolour and damage the surface over time) and avoid any contact with metal fittings and furniture (it causes rust). Never mix bleach with vinegar, ammonia, or any acid-based cleaner: this produces toxic chlorine gas. Bleach runoff is harmful to plants and aquatic environments so dilute heavily before rinsing toward drainage.
Efflorescence removers
Dedicated efflorescence removers, such as those produced by Quikrete and similar manufacturers, typically contain dilute acids (phosphoric, sulfamic, or muriatic) formulated for masonry. Always follow the product label for dilution ratios and dwell times exactly. Most products recommend pre-wetting the surface, applying diluted solution, waiting 5–10 minutes (not longer), scrubbing, and rinsing. Neutralize with a dilute baking soda solution before the final rinse. Do not use these products on limestone, travertine, marble, or other calcareous stones. Only use them in well-ventilated conditions and never mix with bleach.
Rust removers (oxalic acid-based)
Oxalic acid or chelating rust remover products are the correct treatment for iron/rust staining. Bleach will not remove rust and can darken it. Follow the product label for dilution (most products are used at 5–10% oxalic acid concentration or as supplied ready-to-use). Apply to the pre-wetted stain, dwell for the product-specified time (usually 5–15 minutes), scrub, and rinse. For porous stone, a poultice method works better: mix the rust remover with an absorbent powder (diatomaceous earth or fuller's earth) to form a thick paste, apply over the stain, cover with plastic wrap, and leave for 12–24 hours before removing. Always test on a small area first, particularly on natural stone. Do not mix oxalic acid products with bleach or alkalis.
What never to mix
- Bleach + vinegar or any acid = produces chlorine gas (toxic)
- Bleach + ammonia-based cleaners = produces toxic chloramine gas
- Bleach + hydrogen peroxide at high concentrations = unstable and potentially hazardous
- Muriatic acid + any bleach product = extremely dangerous chlorine gas
- Two different commercial cleaners mixed together = unpredictable reactions; always rinse fully between products
Comparison of cleaning methods at a glance
| Method | Best for | Effective on biological? | Effective on rust? | Effective on grease? | Safe for natural stone? | Equipment needed | Renter-friendly? |
|---|---|---|---|---|---|---|---|
| White vinegar (5%) | Efflorescence, mild biological on concrete/brick | Partially | No | No | Not limestone/travertine | Spray bottle, brush | Yes |
| Oxygen bleach (sodium percarbonate) | Biological growth on all surfaces | Yes | No | Partially | Yes | Bucket, brush | Yes |
| Household bleach (dilute) | Heavy biological on concrete/pavers/brick | Yes (strong) | No | No | No | Bucket, brush, hose | Yes |
| Oxalic acid rust remover | Rust/iron staining | No | Yes | No | Test first | Brush, bucket, gloves | Yes |
| Alkaline degreaser/dish soap | Grease and oil stains | Minimal | No | Yes | Yes (pH-neutral options) | Brush, bucket | Yes |
| Poultice (powder + cleaner) | Deep grease or rust on porous stone | No | Yes (with oxalic) | Yes (with degreaser) | Yes | Brush, plastic wrap | Yes |
| Pressure washer + cleaner | Large areas, heavy biological, concrete | Yes | Only with correct cleaner | Only with correct cleaner | Low pressure only | Pressure washer | If renting machine |
Preventing black spots from coming back
Cleaning the patio is satisfying, but the real win is reducing how often you need to do it. Biological growth keeps returning in shaded, damp conditions because those conditions do not change. The most effective prevention strategy is a combination of regular light maintenance and, where appropriate, sealing.
- Sweep regularly: removing organic debris (leaves, soil, bird droppings) eliminates the nutrient film that biological growth feeds on. A weekly sweep in autumn and a monthly sweep in summer makes a real difference.
- Improve drainage: if water pools on or near your flags, biological growth will be persistent. Check that your flags have a slight fall away from the house and that drains are clear.
- Trim overhanging plants and trees: reducing shade increases drying time after rain, which dramatically slows biological growth.
- Annual oxygen bleach treatment: a preventative application of a dilute sodium percarbonate solution (about 50 g per litre) on a dry sunny day once a year, left to dwell and then rinsed, is usually enough to keep biological growth at bay between deep cleans.
- Seal the surface (optional but effective): a penetrating sealer on concrete, pavers, and natural stone (use only sealer rated for that material) reduces porosity, making it harder for biological growth and stains to take hold. Sealers typically need reapplying every 3–5 years. Avoid topical film-forming sealers on natural stone that breathes, such as sandstone, as they can trap moisture. Always clean and fully dry the surface before sealing.
- Lift metal furniture and planters: fit rubber or plastic feet to metal furniture and use drip trays under terracotta planters to prevent rust and tannin staining.
Troubleshooting stubborn stains and delicate stone
Some black spots genuinely resist standard cleaning. Lichen, in particular, can take weeks to fully clear after treatment because the bleach or oxygen bleach kills the organism but the dead material stays bonded to the stone until it weathers off. If stains do not respond after two or three applications, the cause is likely different from what you initially diagnosed, or the staining has penetrated deeply into porous material. This is when a poultice method is worth the extra effort: apply the appropriate cleaner mixed into an absorbent powder paste, cover with plastic, leave overnight, and remove the following day. The poultice draws the staining agent out of the pores as it dries.
For delicate stone like travertine, limestone, or aged sandstone, I strongly recommend avoiding all acid-based products and pressure washing above 800 PSI. Stick to oxygen bleach solutions and pH-neutral stone cleaners, use a soft brush, and accept that results may be gradual. If the stone has been sealed, check whether the sealer itself has discoloured and is causing the dark appearance: in that case, cleaning the surface will not help and the sealer needs stripping and reapplying.
Soot and hard pollution crusts are among the most difficult stains to remove manually. They do not respond to biocides, acids, or standard degreasers. If you have confirmed soot or pollution crust on a historic or decorative stone patio, this is genuinely a case where professional intervention is worth considering. Specialist stone cleaning contractors use low-pressure steam, chemical poultices designed for carbon-based deposits, or micro-abrasive methods that are not practical for DIY.
When to call a professional
Most black spots on standard patio flags are a genuine DIY job. Call a professional stone cleaner or restoration specialist when you are dealing with any of the following: confirmed hard soot or pollution crust on natural or historic stone; extensive rust staining on porous limestone or travertine that has not responded to chelating rust removers; flagging that appears to be actively crumbling, delaminating, or spalling (cleaning will not fix structural damage and may worsen it); a sealer that has failed, discoloured, or is trapping moisture inside the stone (requires stripping and reapplication with correct products); or any situation where you are uncertain about the stone type and the potential damage from getting it wrong. A specialist can identify the stone, carry out controlled tests, and use equipment and products not available domestically. The cost is usually justified when the flags are expensive natural stone or when DIY attempts have already failed.
FAQ
How do I identify the cause of black spots on patio flags?
Look, feel and test: biological (mold/algae/lichen) is slimy or fuzzy, green-black, and smears when wet; soot/urban black crust is hard, ingrained and does not smear; oil/grease is dark, sometimes shiny or tacky and repels water; rust is orange/brown rings or streaks near metal sources; efflorescence is white/grey salt bloom (may be mistaken when mixed with dirt). Quick tests: water rub—bio smears or remains, efflorescence dissolves; 1:10 bleach spot test—bio lightens in minutes; vinegar fizz (or mild acid) indicates carbonate salts but DO NOT use acids on calcareous stone without testing; solvent swab (mineral spirits) dissolves grease.
Which removal methods are safe for each patio material (decision guide)?
Concrete slabs & concrete pavers: robust—manual scrubbing, oxygen bleach, mild acids for efflorescence, pressure wash OK with care. Clay/brick pavers: moderate—avoid very high pressure; use oxygen bleach, efflorescence removers per label. Sandstone/flagstone/slate: porous—use gentle scrubbing, oxygen bleach or poultices; avoid acids on calcareous varieties. Limestone, travertine, marble (calcareous stones): acid-sensitive—NO vinegar/muriatic; use pH‑neutral cleaners, oxygen bleach, or call pros. Porcelain/architectural/manufactured pavers: durable—follow manufacturer; pressure wash and stronger cleaners usually tolerated but test. Always test an inconspicuous area first.
What manual (non-pressure) step-by-step method works for most black spots?
1) Clear area of debris and dry. 2) Identify material and test inconspicuous spot. 3) Put on PPE. 4) Mix cleaner (see recipes below) or use a stiff nylon brush and plain water for light bio. 5) Apply cleaner, let dwell (per recipe or 5–15 minutes), scrub with nylon brush along joints, don’t over-saturate. 6) Rinse thoroughly with garden hose until suds/chemicals gone. 7) Repeat stubborn spots or use poultice for grease/rust. 8) Allow to dry and inspect; consider sealing if appropriate.
How do I use a pressure washer safely (step-by-step)?
1) Verify surface tolerance (no delicate stone). 2) Use 25–40° nozzle emulating 15–3000 psi depending on material—start lower. 3) Keep wand 12–24 inches away, use sweeping strokes, avoid concentrated blasting on grout/joints or edges. 4) Use 120–200 bar (approx) for concrete/pavers; reduce for brick/porous stone. 5) Pair with a biodegradable detergent for bio when possible; do not use pressure to remove efflorescence or stubborn crusts—these require chemical/specialist methods. 6) Rinse well and stop if surface etching or joint erosion appears.
What chemical and gentle DIY recipes should I use (concentrations and dwell times)?
Gentle options: - Oxygen bleach (sodium percarbonate): 1 scoop (~30 g) per 1 gallon (3.8 L) warm water—apply, dwell 10–20 minutes, scrub, rinse. - White vinegar (5% acetic acid): 1:1 water for spot testing only; DO NOT use on limestone/travertine/marble. Apply briefly (1–2 minutes), rinse immediately—use only for efflorescence tests or light mineral grime. Stronger/targeted: - Household bleach (sodium hypochlorite): 1:10 household bleach:water (≈0.5–0.6% available chlorine) for biological growth; apply, dwell 5–15 minutes, scrub, rinse thoroughly; protect plants and metals. - Efflorescence remover (manufacturer product) or mild muriatic diluted per label—use on concrete/brick only, follow PPE and neutralize after. - Rust: oxalic-acid-based removers or chelators per product TDS; poultice with oxalic solution on cloth/paste, dwell per directions. Always test small area, avoid acids on calcareous stones, and neutralize/flush after use.
What are poultices and when should I use them?
A poultice is a paste (e.g., absorbent powder like diatomaceous earth or powdered clay mixed with solvent, cleaning solution or oxalic solution) placed over a stain, covered, and left to draw out the contaminant as it dries. Use for localized grease/oil, rust on porous stone, or deep-set stains when surface cleaning fails. Apply, cover with plastic if instructed, allow to dry 24–72 hours, remove, and rinse. Follow product guidance and test first.
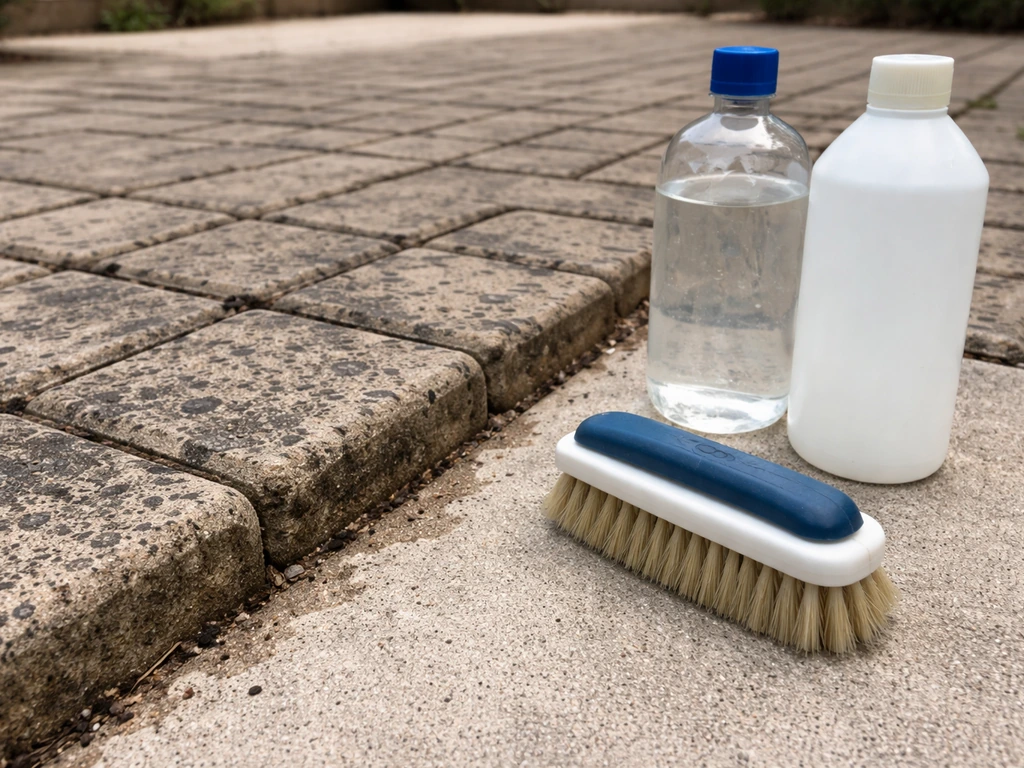
Find the cause of black patio brick spots and use the right scrub, oxygen bleach, or lime acids safely to remove.
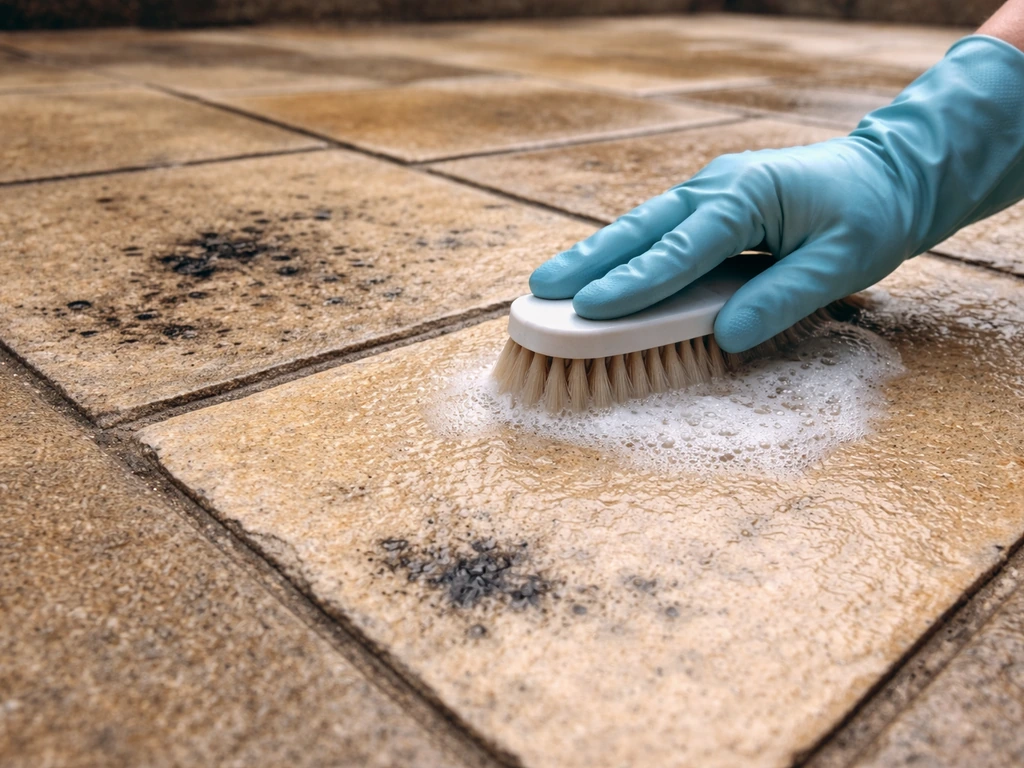
Step-by-step ways to remove black spots from sandstone patio stones, identify causes, clean safely, and prevent regrowth
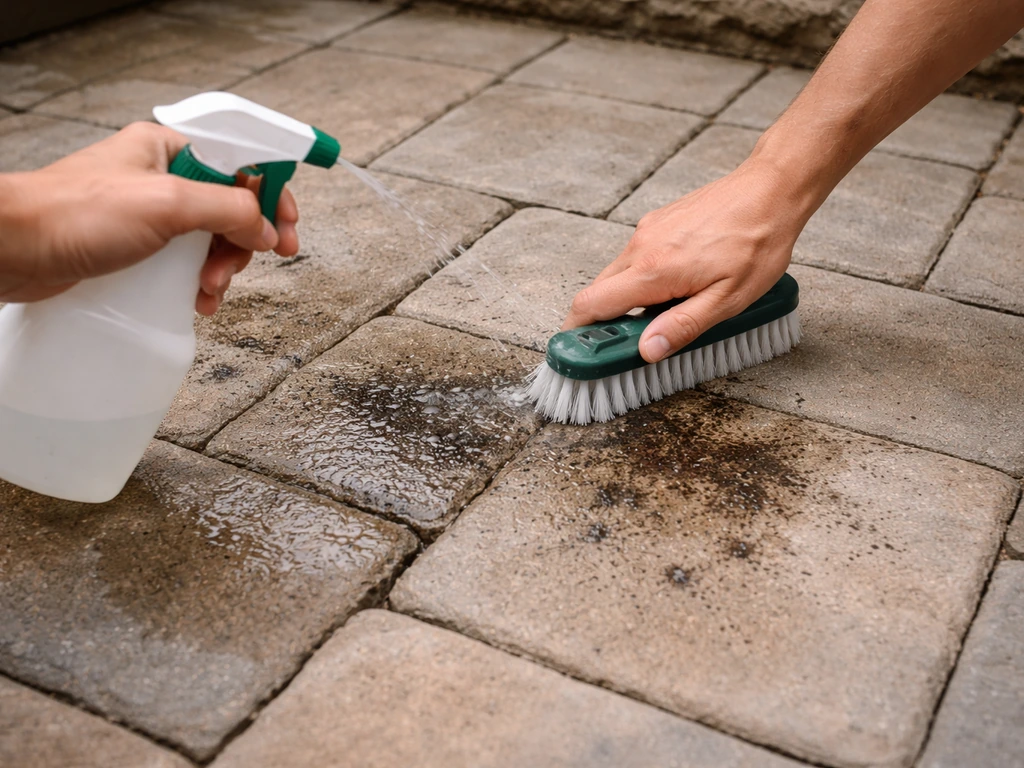
Yes in some cases: learn when vinegar removes patio black spots, how to apply safely, and what to do if it won’t.