Those black spots on your patio bricks are almost always mold, algae, or lichen growing on the surface, and the good news is that most of them respond well to an oxygen bleach solution, a stiff brush, and some patience. The key is matching the cleaner to the stain type first, because what works on a mold patch does nothing for a mineral deposit, and using the wrong acid on brick can make things worse.
How to Get Rid of Black Spots on Patio Bricks

Dylan Hale
18 Jun 2026
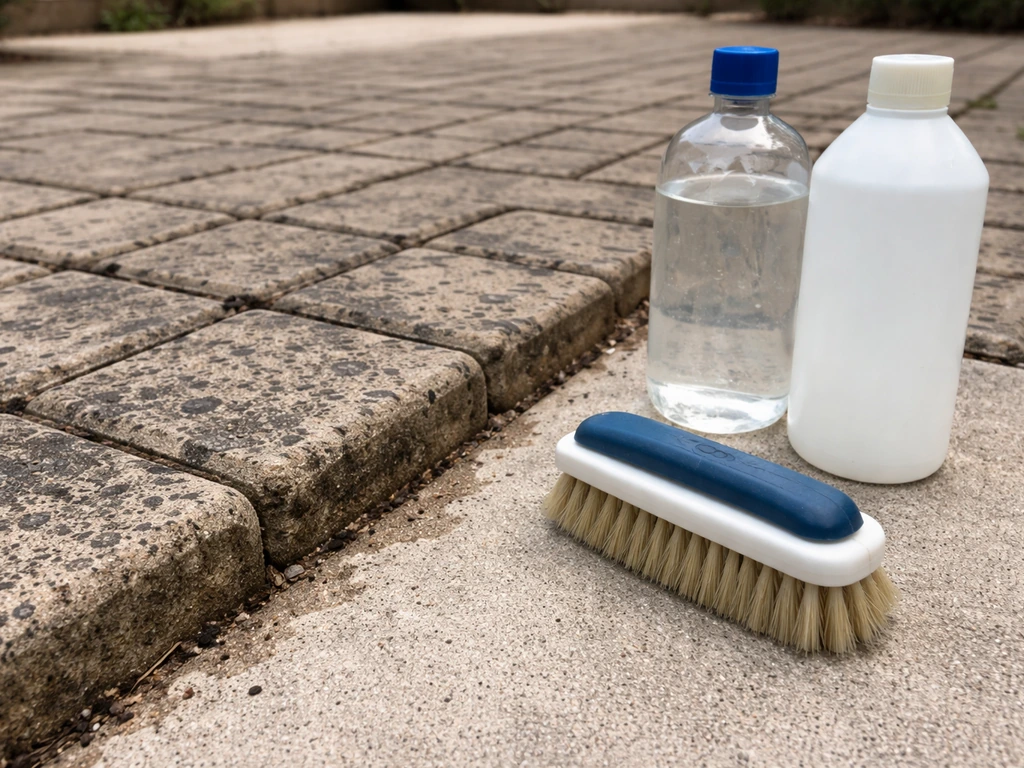
Figure out what's actually causing the black spots
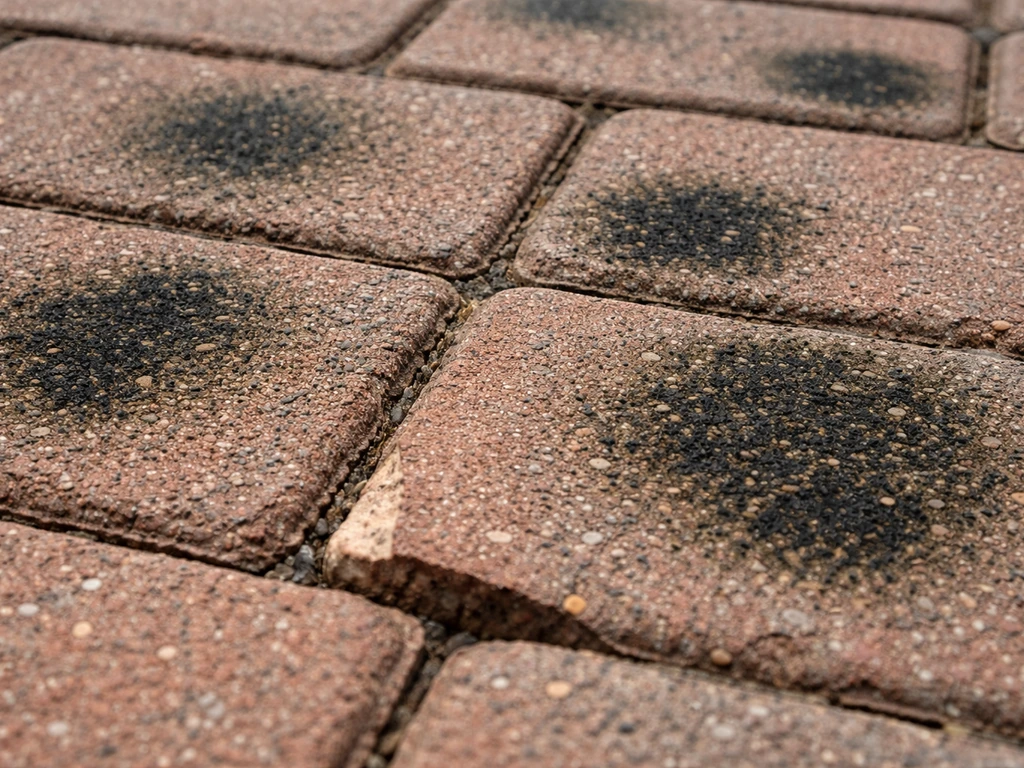
Before you grab a bottle of anything, take a close look at the spots. The cause determines the fix, and there are a few common culprits on brick patios.
- Mold, algae, or lichen: The most common cause of black or dark green spots on brick. These are living organisms that thrive in shaded, damp areas. The spots often look fuzzy or slimy when wet and spread outward from a central patch.
- Soot or smoke staining: Flat, gray-black marks near a fire pit or outdoor grill. These don't grow or spread and tend to have sharp edges.
- Grease or oil: Dark, slightly shiny patches that often feel slightly tacky. Usually found near cooking areas or under vehicles.
- Efflorescence: Normally appears as a white or chalky powder, not black, but it can trap dirt and discolor over time. If you pinch the deposit and it turns to powder, it's efflorescence. Mold does not do this.
- Rust or mineral staining: Orange-brown to dark reddish-black spots, often streaking downward from metal furniture legs, screws, or iron-rich water sources.
- Hard water or mineral buildup: Grayish-white to dark crusty deposits, especially near sprinkler heads or in areas with high mineral content in the water.
The majority of black spots on patios are biological, meaning mold, algae, or lichen. If the spots are in shaded areas, near drains, or in low spots where water sits, start there. If the spots are near metal objects or your sprinkler system hits that area regularly, look at rust or mineral staining. The treatment for biological stains and mineral stains are genuinely different, and using bleach on a mineral deposit won't help, just as using acid on mold won't either.
Safe prep before you start cleaning
A few minutes of prep will save you from damaging your landscaping, your skin, or the brick itself. None of this is complicated but skipping it is how people end up with bleached plants or etched bricks.
Clear the surface and protect nearby plants
Sweep or blow off loose debris first. Leaves and dirt sitting on top of black spots will just absorb your cleaner before it reaches the stain. Move any furniture, planters, or decorative items off the patio. Then wet down any plants, shrubs, or grass right next to the patio with plain water before you apply any cleaning solution. This dilutes any overspray or runoff that reaches the plants. After you're done, rinse the landscaping again.
Test in a hidden spot first
Always test your cleaning solution on an inconspicuous area first, like the back corner of the patio or under a planter. Brick varies in how porous and how color-stable it is, and some older bricks react unexpectedly to bleach or acid. Apply the solution, let it dwell, rinse it, and wait for it to dry completely before judging the result. Five minutes of testing can prevent permanent discoloration across your whole patio.
Gear up properly
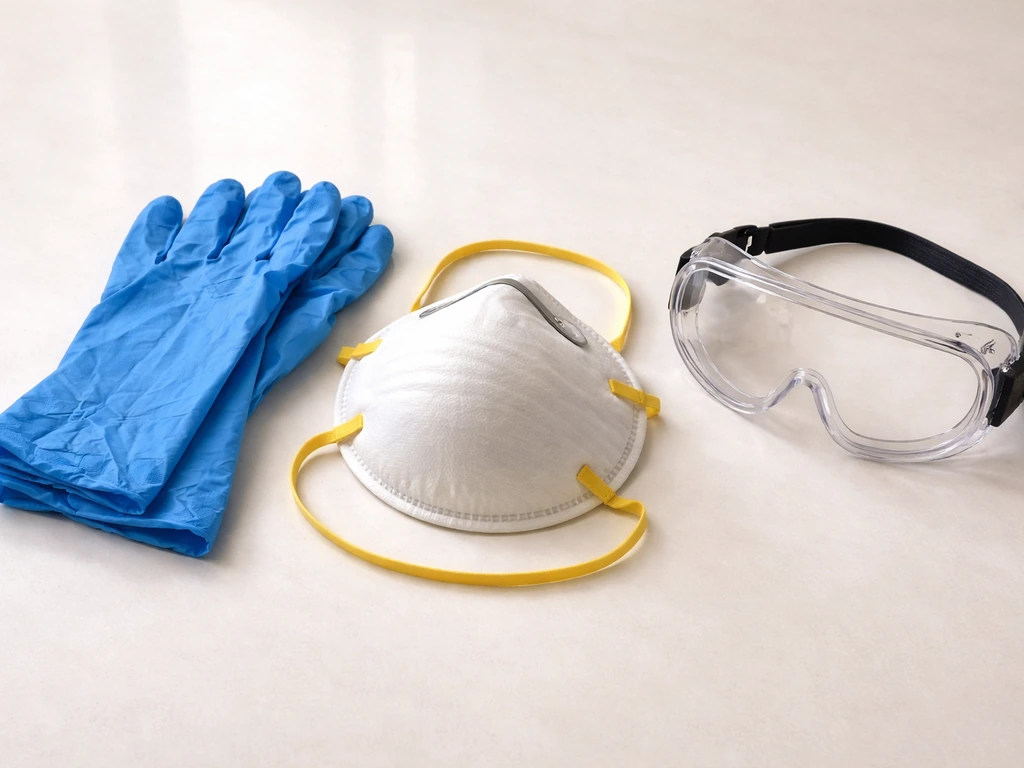
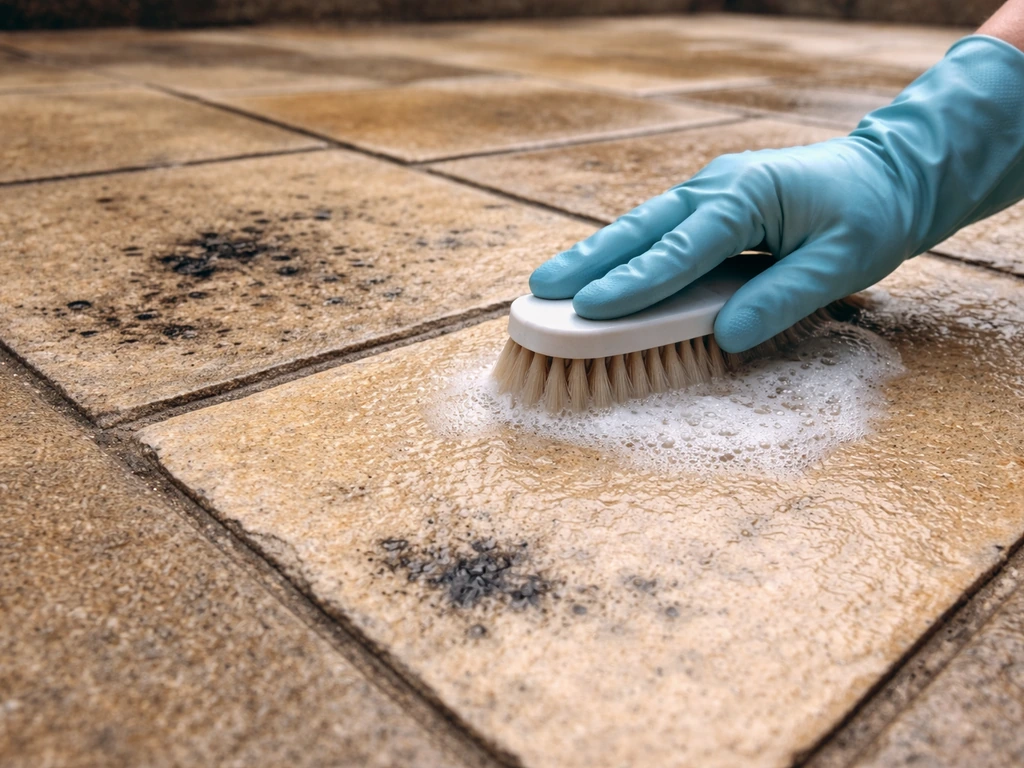
The EPA and CDC both recommend minimum PPE for any mold cleaning work: rubber or nitrile gloves, safety goggles (not just glasses), and an N-95 respirator. This applies whether you're using bleach, oxygen bleach, or even just scrubbing dry mold. If you're mixing or applying bleach-based solutions, add old clothes you don't mind ruining. Work in a well-ventilated area and never mix bleach with vinegar or any acid-based cleaner. That combination releases toxic chlorine gas.
Choose the right tools
For hand scrubbing, a stiff-bristled deck brush or a natural-fiber scrub brush works well on brick. Avoid wire brushes, as they can scratch the brick face and leave metal fragments that rust later. For mixing solutions, use a plastic bucket. For application, a garden sprayer or a watering can with a rose head gives you good coverage without waste.
Cleaning methods for brick patios
There are three main approaches, roughly ordered from gentlest to most aggressive. Start with the gentlest that seems appropriate for your stain type and only escalate if you need to.
Gentle wash for light staining or regular maintenance
For light surface grime or early-stage algae, a warm water wash with dish soap or a dedicated patio cleaner is a good starting point. Wet the brick surface, apply the soapy solution, scrub with a stiff brush, and rinse thoroughly. This won't tackle deep-set mold or heavy biological growth, but it's a useful first step and tells you how bad the problem actually is once the surface dries.
Oxygen bleach (sodium percarbonate) for organic staining
Oxygen bleach, which is sodium percarbonate, is my go-to for black mold and algae spots on brick. It's gentler than chlorine bleach, safer around plants, and does a genuinely good job on biological stains. Mix about 4 oz (roughly half a cup) per gallon of warm or hot water. Hot water activates the percarbonate faster and more effectively than cold water. Apply the solution generously to the stained area, let it dwell for 15 to 30 minutes, scrub with a stiff brush, and rinse hard. For maintenance cleaning you can go lighter, around 1 cup per gallon, with a 5 to 20 minute dwell time. If you're using a product like OxiClean Outdoor, some formulas contain probiotics that keep working for up to a week after application, which can help slow regrowth.
Chlorine bleach for heavy mold, algae, or stubborn biological stains
When oxygen bleach doesn't cut it, chlorine bleach (sodium hypochlorite) is the next step up. The CDC-recommended dilution for mold cleanup is no more than 1 cup of bleach per 1 gallon of water. Don't go stronger than this thinking it'll work better. Pre-wet the brick surface, apply the bleach solution, let it sit for 10 to 15 minutes, scrub if needed, and rinse thoroughly. Re-wet any plants or landscaping afterward. Chlorine bleach is effective but it's harder on the surrounding environment and on certain brick types, so use it when oxygen bleach hasn't done enough, not as your default first choice.
Removing mold and algae without damaging the brick
The biggest mistakes people make when killing mold on brick are not letting the solution dwell long enough, rinsing too early, or scrubbing dry before the mold is broken down. Dwell time is everything. The sodium hypochlorite or sodium percarbonate needs time to penetrate the mold colony and kill it at the root. Scrubbing too early just smears it around.
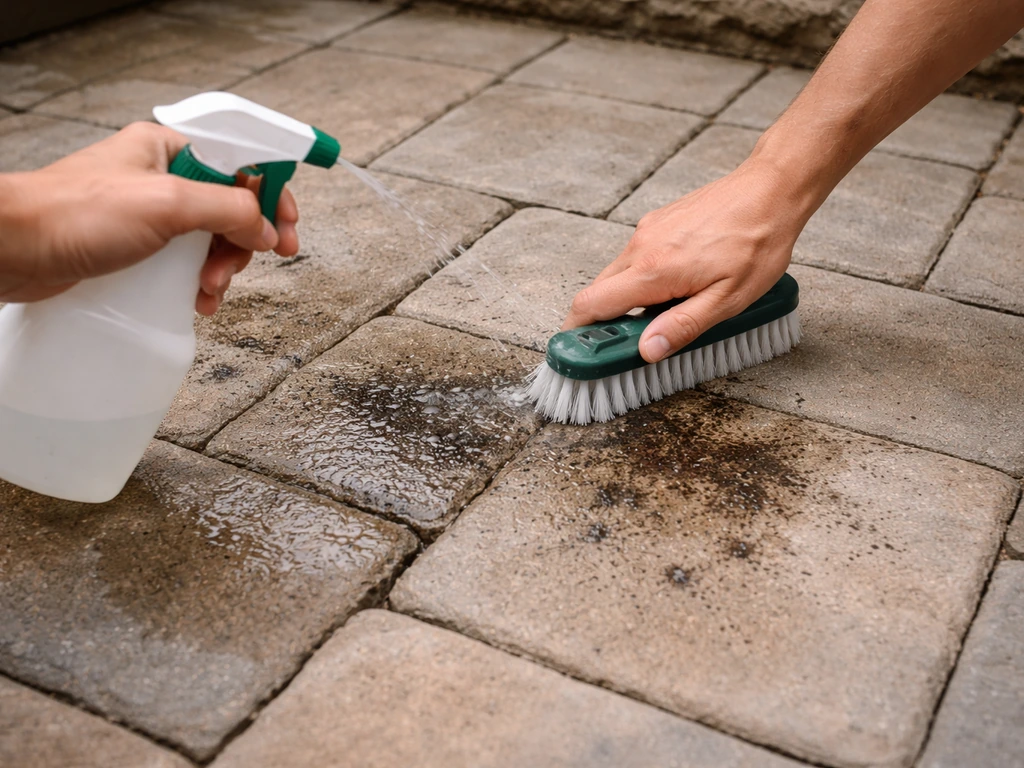
- Pre-wet the entire area with plain water. This opens up the brick pores slightly and helps the cleaning solution penetrate rather than bead off.
- Apply your oxygen bleach solution (4 oz per gallon of warm water) or your diluted chlorine bleach solution (1 cup per gallon of water) generously, working it into the texture of the brick.
- Let it dwell. For oxygen bleach: 15 to 30 minutes. For chlorine bleach: 10 to 15 minutes. Don't let it dry out on the surface; if it's a hot day, mist it lightly to keep it wet.
- Scrub with a stiff-bristled brush in a circular motion, working the solution into any pitted or textured areas of the brick.
- Rinse thoroughly with clean water, starting from the highest point and working down so you're pushing dirty water away from already-cleaned areas.
- Let the surface dry completely, then assess. Some deep-set stains may need a second treatment.
If you're dealing with black lichen specifically, which grips brick harder than algae, you may need two rounds of treatment and more aggressive scrubbing. Lichen is slow to respond and may leave a ghost stain even after the organism is dead. A second application after 24 hours usually handles this.
When to use acid, and when to stay far away from it
Acid-based cleaners, especially muriatic acid, are specifically for mineral-based deposits: hard water marks, certain types of efflorescence (which is more often white than black, but can collect dark grime), and calcium or lime deposits. They do nothing useful for biological stains and can actually set organic staining deeper into the brick.
When acid is appropriate
If your black spots are actually dark mineral deposits or heavily soiled efflorescence, a dilute acid can dissolve them when nothing else will. Some masonry-specific efflorescence removers use sulfamic acid or phosphoric acid, which are gentler on brick than muriatic acid. Always dilute heavily, apply to a pre-wet surface, scrub gently, and rinse thoroughly. Neutralize with a baking soda and water rinse after the acid treatment to stop the reaction and protect the brick surface.
When to avoid acid completely
Multiple brick manufacturers and masonry specialists advise against using muriatic acid on brick, describing it as outdated and harmful for most cleaning jobs. Package Pavement, for example, explicitly recommends against it for masonry cleaning. The risks are real: muriatic acid can etch brick faces, damage mortar joints, leave acid burns that discolor permanently, and worsen efflorescence if the underlying moisture problem hasn't been addressed first. If the black spots on your brick are from mold, algae, soot, or grease, acid is not the right tool and may cause damage on top of not fixing the stain.
| Stain Type | Use Acid? | Better Option |
|---|---|---|
| Mold / algae / lichen | No | Oxygen bleach or sodium hypochlorite solution |
| Efflorescence (salt deposits) | Sometimes, with caution | Masonry-specific efflorescence remover or diluted sulfamic acid |
| Hard water / mineral deposits | Sometimes, with caution | Diluted phosphoric acid or commercial descaler |
| Soot / smoke | No | Detergent scrub or oxygen bleach |
| Grease / oil | No | Degreaser or dish soap with hot water |
| Rust staining | No | Dedicated rust remover (oxalic acid-based) |
Pressure washing vs. scrubbing by hand

You don't need a pressure washer to remove black spots from patio bricks, but it does speed things up and rinses more thoroughly. The trade-off is that wrong technique with a pressure washer can damage brick, erode mortar joints, or spread mold spores across a wider area. If you're renting or don't have access to a pressure washer, hand scrubbing with the right solution is completely effective.
Pressure washing: settings, nozzles, and technique
For brick patios, keep the PSI between 1,000 and 2,000. Home Depot's guidance on masonry cleaning suggests 500 to 1,000 PSI for general brick work, while sources focused specifically on patio cleaning suggest up to 1,500 to 2,500 PSI is workable with correct technique. I'd stay at the lower end for older or softer brick and go higher only for newer, harder pavers. blank" rel="noopener noreferrer">Use a 25-degree or 40-degree nozzle. For patios, this guide recommends keeping PSI around 1500, 2500 and using a 25° or 40° nozzle for effective yet less damaging cleaning on brick/stone patios blank" rel="noopener noreferrer">using a 25-degree or 40-degree nozzle. The wider the angle, the gentler the spray pattern. Never use a 0-degree (red) nozzle on brick; it concentrates pressure into a jet that can chip the brick face and blast out mortar. Keep the wand at least 12 inches from the surface, work in smooth, overlapping strokes at an angle, and never hold the nozzle stationary on one spot. Work from one end of the patio to the other so you're consistently pushing dirty water forward, not back over cleaned areas.
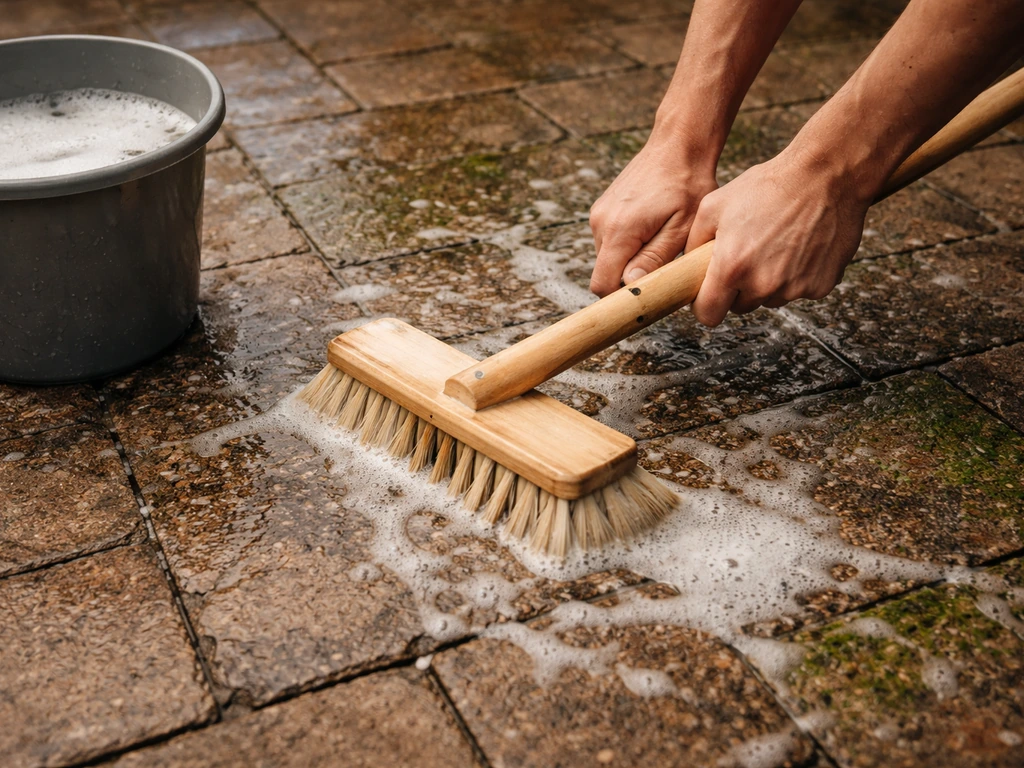
Hand scrubbing: when it makes more sense
Hand scrubbing gives you more control over where the solution goes and how long it dwells, which actually makes it more effective than a quick pressure wash for deep-set mold. Apply your cleaning solution, let it dwell, scrub in sections with a stiff deck brush, and rinse with a regular garden hose on a strong jet setting. This works takes longer but it's safer if you have pets or kids nearby, gentler on older brick and mortar, and doesn't require any equipment beyond what most people already own.
A note on vinegar
White vinegar gets mentioned a lot as a gentler alternative for black spots on patio surfaces, and it can help with light staining and maintenance. It's worth knowing though that vinegar (being acidic) is more relevant for mineral deposits than for mold or algae, and it's too mild for heavy biological staining. The more important safety note: never combine vinegar with bleach. The combination releases toxic chlorine gas, which is a genuine health hazard, not just a precautionary note. If you want to use vinegar as a maintenance step, make sure any bleach you've used is fully rinsed and dry before applying it.
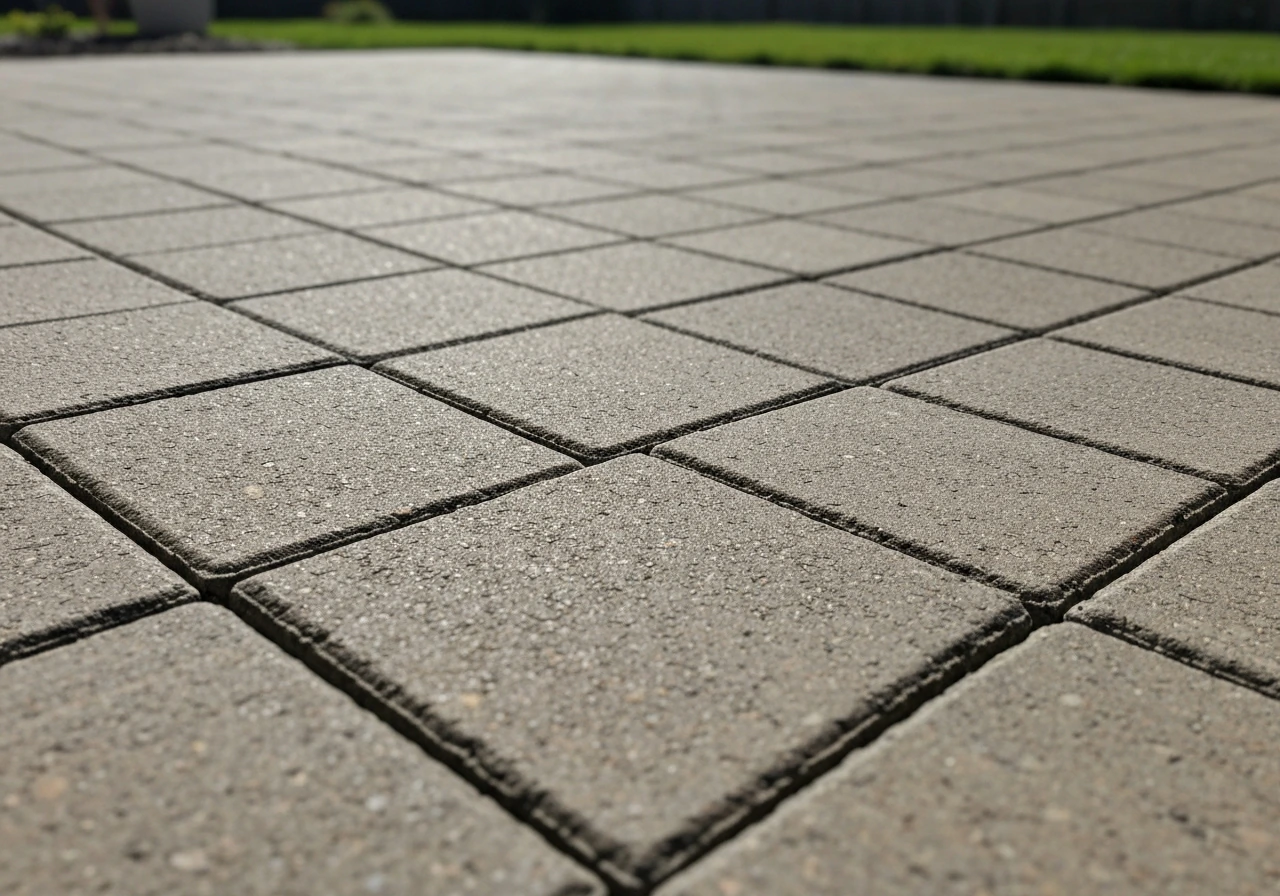
After cleaning: seal it, drain it, and keep up with maintenance
Getting rid of black spots is only half the job. That means using the right cleaner and technique for your specific stain so you can remove black spots from patio flags without making them come back. If you don't address why they appeared, they'll be back within a season. The three things that keep black spots from returning are reducing moisture, improving airflow, and sealing the brick if it's appropriate.
Should you seal the brick?
Sealing patio bricks can help repel moisture and reduce the conditions that mold and algae need to grow. But you have to choose the right type of sealer. For brick, you want a breathable, vapor-permeable sealer, specifically a silane/siloxane-based water repellent. These allow moisture vapor inside the brick to escape (so you don't trap moisture and cause efflorescence or spalling) while keeping rain and surface water from soaking in. Acrylic film-forming sealers that sit on top of the brick can trap moisture and cause exactly the kind of damp conditions that encourage mold. Make sure the brick is completely dry before applying any sealer; applying to damp brick causes clouding and adhesion failure. If your black spots were efflorescence-related, RadonSeal specifically recommends a breathable water-repellent sealer to address rain and surface moisture.
Drainage and airflow improvements
Mold and algae need standing water and shade to thrive. If part of your patio is low-lying and water pools there after rain, that's where the black spots will keep coming back. Look at whether your patio has adequate slope (typically at least 1/8 inch per foot away from the house) to move water off the surface. Trim back overhanging trees or shrubs that keep the patio in shade and trap moisture. If your sprinkler system is hitting the brick directly, adjust the heads to redirect spray. These fixes address the root cause rather than treating the symptom.
A simple ongoing cleaning routine
You don't need to do a full deep-clean every month, but a light maintenance routine makes a real difference. OxiClean Outdoor and similar oxygen bleach products suggest a maintenance cleaning every few weeks to once a month for patios prone to mold or algae. A lighter solution (around 1 cup of oxygen bleach powder per gallon of water), applied and rinsed without heavy scrubbing, keeps biological growth from getting a foothold. Sweep the patio weekly to remove leaves and debris that hold moisture against the brick. And every spring, do a proper clean before the growing season kicks off so you're starting fresh rather than trying to recover from a full season of growth.
If your patio is made from a different material, the approach varies slightly. The methods here are specifically suited to brick, which is more porous and chemically sensitive than concrete slabs or natural stone flags. The core principle is the same across materials: identify the stain, match the cleaner, and deal with the moisture source afterward. For the specific steps, see our guide on how to get black spots off patio slabs identify the stain, match the cleaner, and deal with the moisture source afterward.
FAQ
Can I remove black spots on patio bricks without using a pressure washer?
Yes, if the spots are biological (mold, algae, lichen) you can remove them without power washing by using oxygen bleach or chlorine bleach plus dwell time and a stiff brush. Pressure washing is optional, but if you choose it, keep the nozzle wide, avoid holding the jet in one spot, and rinse thoroughly to prevent a cleaner residue that can re-darken.
Why do the black spots look worse right after I clean them?
If the brick looks darker after cleaning but the spots are no longer “active,” let it fully dry before deciding. Many mold and algae stains appear lighter when wet and reveal the true final tone as they dry. If spots return quickly (within weeks), it usually means the moisture source (pooling, sprinkler overspray, poor airflow) was not corrected or lichen needs a second round.
What should I do if the black spots don’t disappear after the first treatment?
Do not apply another cleaner right away. Wait until the surface is completely dry, then reassess whether you are dealing with biological growth versus mineral staining. Re-treat biological stains only after the first application has rinsed and dried, and if you suspect lichen, plan for a second treatment about 24 hours later rather than changing chemistry immediately.
Will oxygen bleach or chlorine bleach harm my grass and plants?
Yes, but only if the cleaner is fully rinsed and the area has dried. Use water to rinse around plants first, apply the solution only to the targeted area, and re-wet landscaping after bleach-based treatments. Avoid “blanket soaking” runoff onto beds, because oxygen bleach and chlorine bleach residues can still stress sensitive leaves even when diluted.
Is it ever better to use stronger bleach to get faster results?
Oxygen bleach can be used in most situations, but chlorine bleach should be reserved when oxygen bleach fails, and it should not be made stronger than the recommended dilution. Stronger mixes increase the chance of discoloration and damage to grout and mortar, and they do not necessarily penetrate biological growth better than proper dwell time.
Should I seal the patio after removing black spots, and how long should I wait?
Bleaching first and sealing later is usually fine, but the brick must be thoroughly dry. If you seal damp brick, you can trap moisture, which may lead to efflorescence or renewed growth. Also, sealing before you correct causes like pooling water, shaded conditions, or sprinkler overspray often makes the problem reappear under the sealer.
Can cleaning solutions permanently damage brick if I used the wrong one?
If the brick is already etched, a second cleaning solution often will not “fix” the surface. Etching usually happens with aggressive acids or very concentrated bleach, and it can be permanent in terms of texture and tone. The practical next step is to switch to the correct cleaner for the original stain type, then address the moisture cause to prevent recurrence.
How can I tell whether my black spots are mold versus mineral deposits?
If the spots are mineral deposits, a bleach-based product will not remove them because it targets living organisms, not dissolved or crystallized salts. Look for clues like crusty or chalky buildup and consider a masonry efflorescence remover or a carefully diluted acid product, then neutralize with a baking soda and water rinse as recommended in the article.
Why does black lichen leave a stain even after treatment?
Lichen is tough because it can leave a “ghost” stain even after the organism is dead. A practical approach is to do the recommended treatment, let it dry, then evaluate after a full day. If you still see the same lichen pattern, plan a second round rather than scrubbing harder immediately.
I used vinegar once, can I still use oxygen bleach or chlorine bleach now?
If you already cleaned with vinegar, the safe move is to fully rinse the surface and let it dry before using any bleach or oxygen bleach. Vinegar plus bleach is the critical hazard, but even after vinegar has dried, residual acidity can still change how later chemicals react at the surface.
What maintenance routine actually keeps black spots from returning?
Sweeping debris helps, but the bigger prevention step is routine moisture control and airflow. That means removing leaves that hold water against the brick, trimming vegetation that blocks airflow, and fixing pooling areas or sprinkler misalignment. For maintenance, a lighter oxygen bleach routine every few weeks to monthly on problem patios is usually more effective than deep-cleaning less often.
Are there brush or technique choices I should make if my patio has older or soft mortar?
Yes, but the right approach depends on the mortar and brick age. Avoid wire brushes because they scratch masonry and can introduce metal fragments that rust. If your mortar joints are soft or crumbling, stick to gentle-to-moderate scrubbing and consider hand cleaning only, because pressure washing can widen joint damage over time.
What PPE do I really need when cleaning black spots, even if I’m not sure what it is?
Gloves and goggles are essential, even when you are only scrubbing. If you use oxygen bleach or chlorine bleach, wear an N-95 respirator to reduce inhaling airborne spores or mist, and work with good ventilation. If you get splashed or feel burning, rinse immediately with plenty of water and stop until the area is safe to re-enter.
Next Articles
How to Remove Black Spots From Patio Stones (Sandstone)
Step-by-step ways to remove black spots from sandstone patio stones, identify causes, clean safely, and prevent regrowth
Does Vinegar Remove Black Spots on Patio? Steps to Try
Yes in some cases: learn when vinegar removes patio black spots, how to apply safely, and what to do if it won’t.
How to Get Black Spots Off Patio Slabs Step by Step
Step-by-step removal of black spots from patio slabs, with material checks, safe chemicals or none, and prevention.