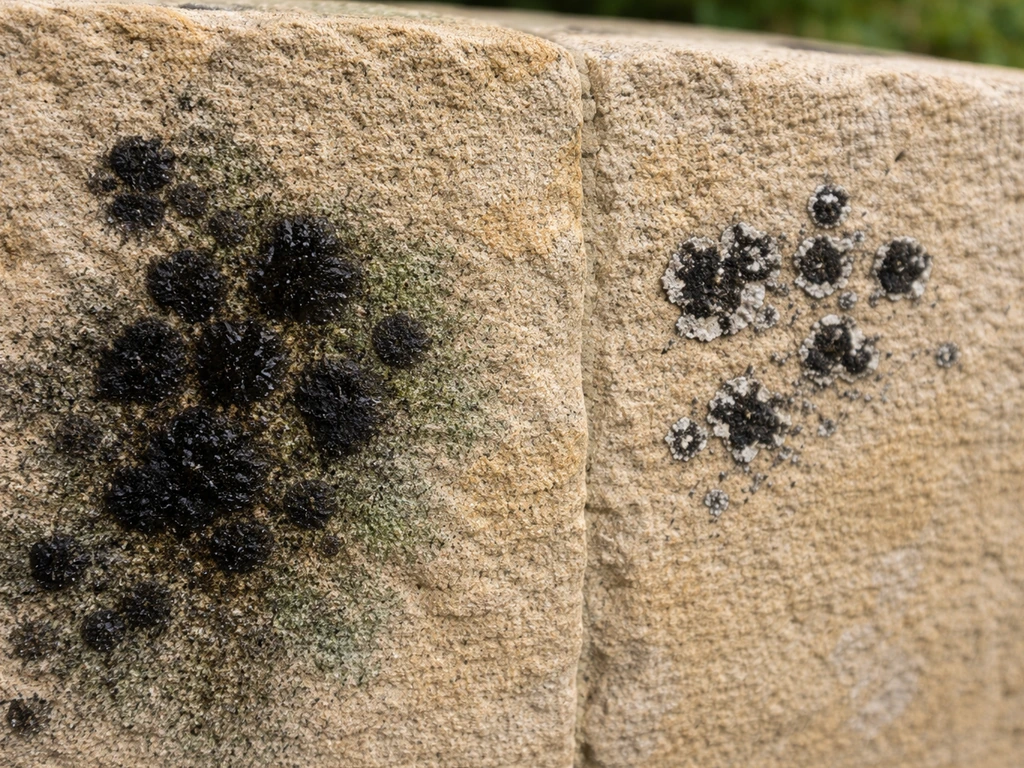
Black spots on sandstone patio stones are almost always living biological growth: mold, mildew, or algae that has taken hold in the porous surface. You can use the same approach described in the article to target and remove black spots on patio bricks safely, without damaging the surface. Occasionally they're embedded grime or organic residue, but if your patio is in a shaded or damp spot and the spots seem to spread or multiply after rain, you're dealing with bio-growth. The good news is you can remove it yourself today using either a gentle scrub-and-rinse method or an oxidizing cleaner like oxygen bleach, without damaging your sandstone, as long as you stay away from acidic cleaners and keep your pressure washer below 1,500 PSI.
How to Remove Black Spots From Patio Stones (Sandstone)

Dylan Hale
11 Jun 2026
Quick diagnosis: what are those black spots actually?
Before you reach for a cleaner, take a close look at the spots and think about where they're showing up. That tells you a lot about what you're dealing with.
- Spreading dark patches or a fuzzy/slimy texture, especially in shaded or persistently damp areas: this is almost certainly algae, mold, or mildew. Living biological growth thrives in exactly those conditions and is the most common cause of black spots on outdoor sandstone.
- Tiny discrete black dots scattered across the surface, sometimes with a slight green tinge around them: this is typically early-stage algae or lichen. It responds well to oxidizing treatments.
- Dark smears or flat discoloration near plant pots, leaf piles, or drainage paths: organic residue and tannin staining from decomposing matter. Gentler cleaning often handles this.
- Hard, crusty dark patches that don't wipe at all: potentially lichen or deep-set biological growth that's been there a long time. This needs more dwell time with a stronger oxidizing solution.
- Spots that appear only after heavy rain and then fade slightly when dry: a moisture-and-algae combination. Even if they look lighter when dry, the organism is still there.
One important thing to flag: some homeowners see black discoloration and assume it's dirt, then reach for vinegar or lemon juice because they seem like natural, safe options. If you’re wondering, vinegar is a common home remedy, but it can damage sandstone and is not the right choice for removing black spots on a patio. On sandstone, that's a mistake. Sandstone can be calcareous (containing calcium carbonate), and acidic cleaners etch and dull it permanently. A Surface Care Pros knowledge-base notes that acidic cleaners can contribute to etching or discoloration on porous sandstone, which can soak up liquids and be damaged by the wrong chemistry blank" rel="noopener noreferrer">acidic cleaners etch and dull it permanently. I'll cover the safe chemistry options below.
Prep and safety before you start
A few minutes of preparation saves you from damaging the stone, killing plants, or getting chemicals on your skin. None of this is complicated, but skipping it is how people end up with a bigger problem than the black spots.
Protect what's around the patio
- Wet down any grass, garden beds, or potted plants near the patio with plain water before you apply any cleaner. This dilutes any runoff that reaches them.
- Move potted plants away from the work area entirely if you can.
- Cover ornamental grasses or low ground-cover plants right at the patio edge with plastic sheeting while you're working.
- Rinse plants again with plain water after you've finished cleaning and done your main rinse.
Personal protection and chemistry rules
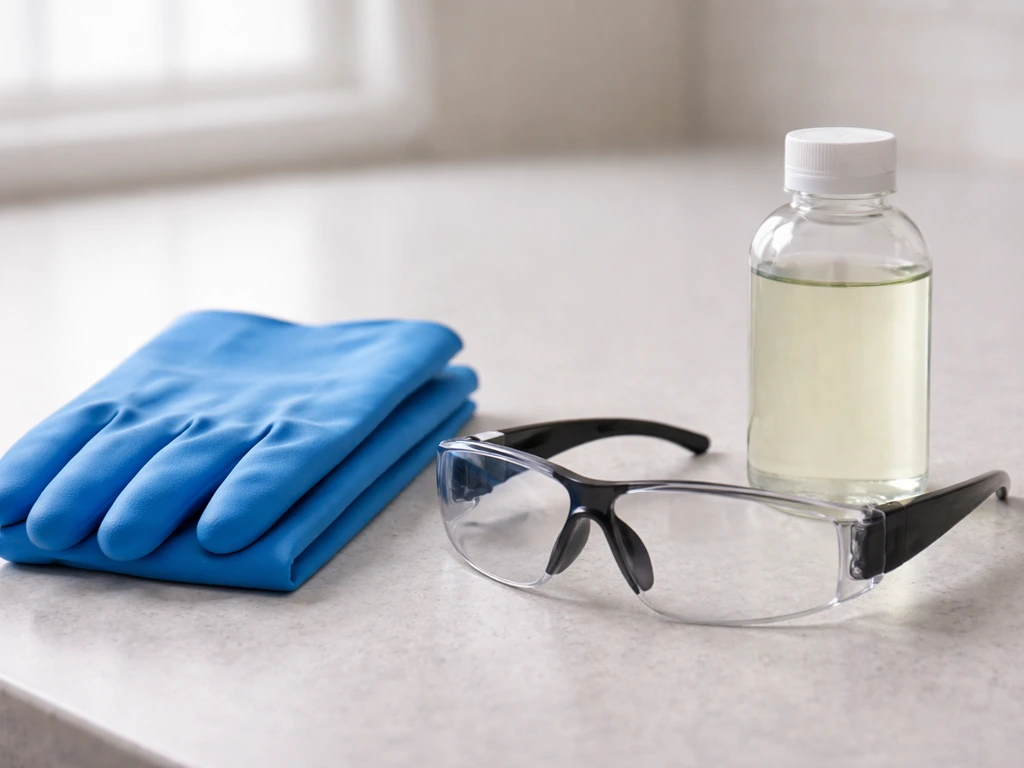
- Wear chemical-resistant gloves and safety glasses any time you're using bleach-based products, oxygen bleach, or commercial stone cleaners.
- Work in a ventilated area. If you're cleaning a covered patio or enclosed courtyard, open it up as much as possible.
- Never mix bleach with ammonia. The combination creates toxic chloramine gas. Check any multi-surface cleaners you already have at home before using them alongside bleach products.
- Never mix different cleaning products together, period, unless the label explicitly says it's safe.
Do a test patch first
Whatever cleaner you plan to use, apply it to a small, inconspicuous section first, a corner or an edge that's less visible. Leave it for the same dwell time you'd use on the full area, then rinse and let it dry completely. Sandstone varies in color and mineral composition, and what's fine on one batch of stone can cause bleaching or discoloration on another. Testing takes five minutes and can save you a lot of regret.
Tools to gather before you start
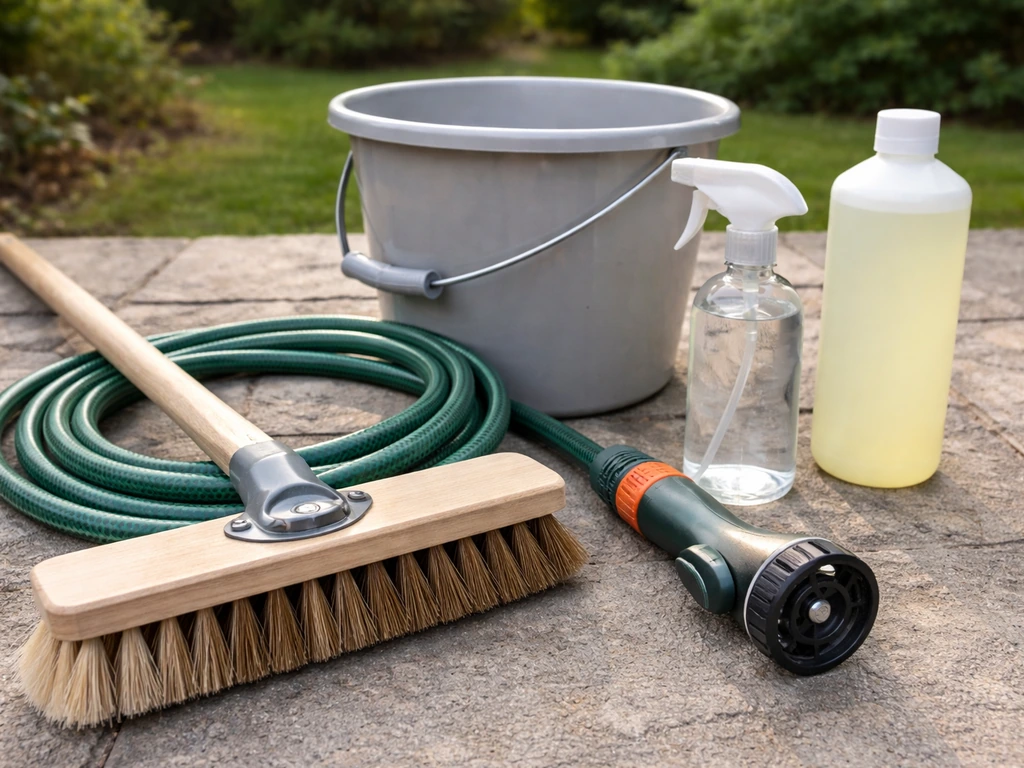
- Stiff-bristled brush or deck brush (nylon or natural bristle, not wire)
- Garden hose with adjustable spray nozzle
- Bucket
- Spray bottle (useful for targeted spot treatment)
- Pressure washer if you have one (details on settings below)
- Oxygen bleach powder or diluted sodium hypochlorite solution (your main cleaning agent for bio-growth)
- pH-neutral stone cleaner for routine maintenance
- Gloves and safety glasses
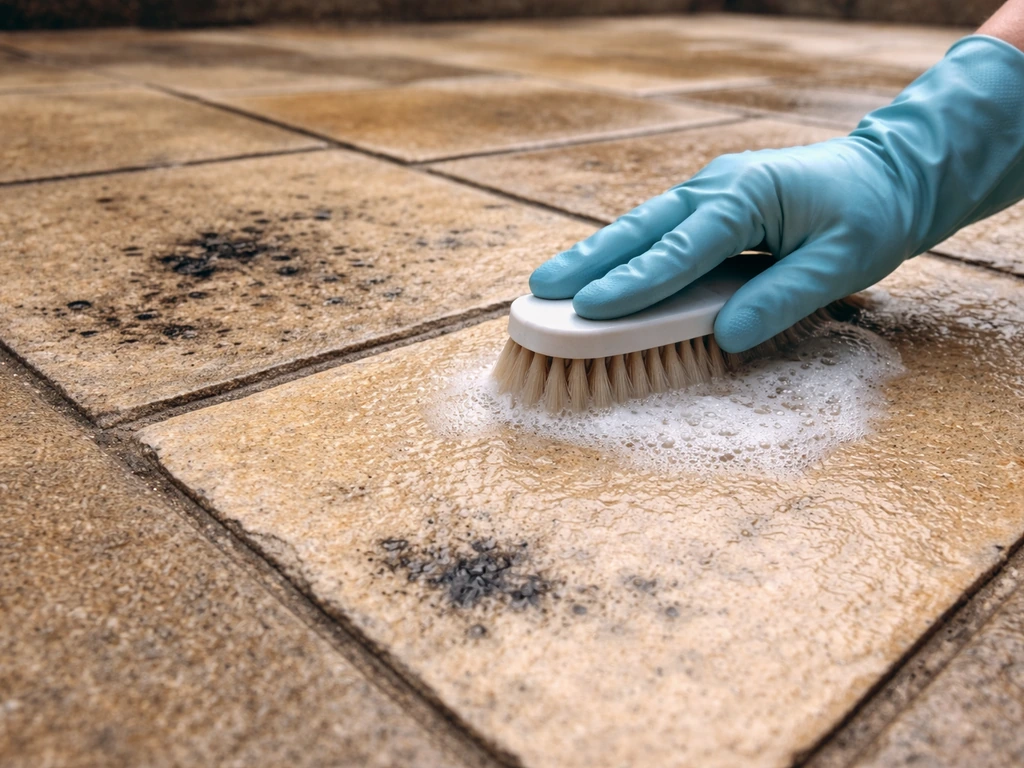
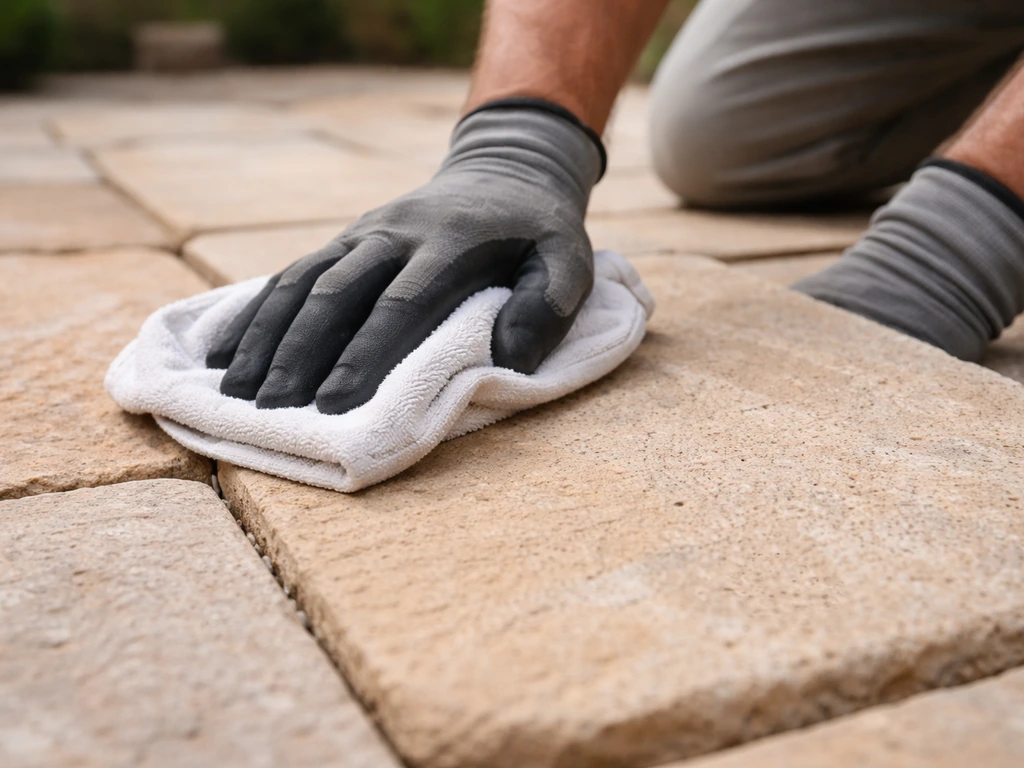
Gentle cleaning first: scrub, rinse, and targeted removal
Start with the gentlest effective method. For light black spot coverage or organic residue staining, a good scrub with a pH-neutral cleaner and a rinse will often do the job without needing to bring in stronger chemistry. This is also the right approach if you have pets that use the patio area, or if you're working very close to a garden.
- Wet the entire patio surface with plain water from your garden hose. Keeping the stone moist during cleaning is important: it helps the cleaner work evenly and prevents residual salts from forming on the stone surface as things dry.
- Mix a pH-neutral stone cleaner according to its label directions in a bucket. These are widely available at hardware stores and home centers, and are specifically formulated to clean stone without etching or dulling it.
- Apply the solution to the affected area and let it sit for 5 to 10 minutes. Don't let it dry on the stone. If the sun is strong or it's a warm day, re-wet the surface so it stays damp.
- Scrub firmly with a stiff-bristled brush, working in small sections. Use circular or back-and-forth strokes directly over the black spots. You'll often see the surface color lift noticeably.
- Rinse thoroughly with clean water from the hose. Use a strong stream to flush away loosened biological material and cleaner residue. Rinse more than you think you need to.
- Let the area dry and inspect. If spots are lighter but still visible, repeat once more before moving to a stronger method.
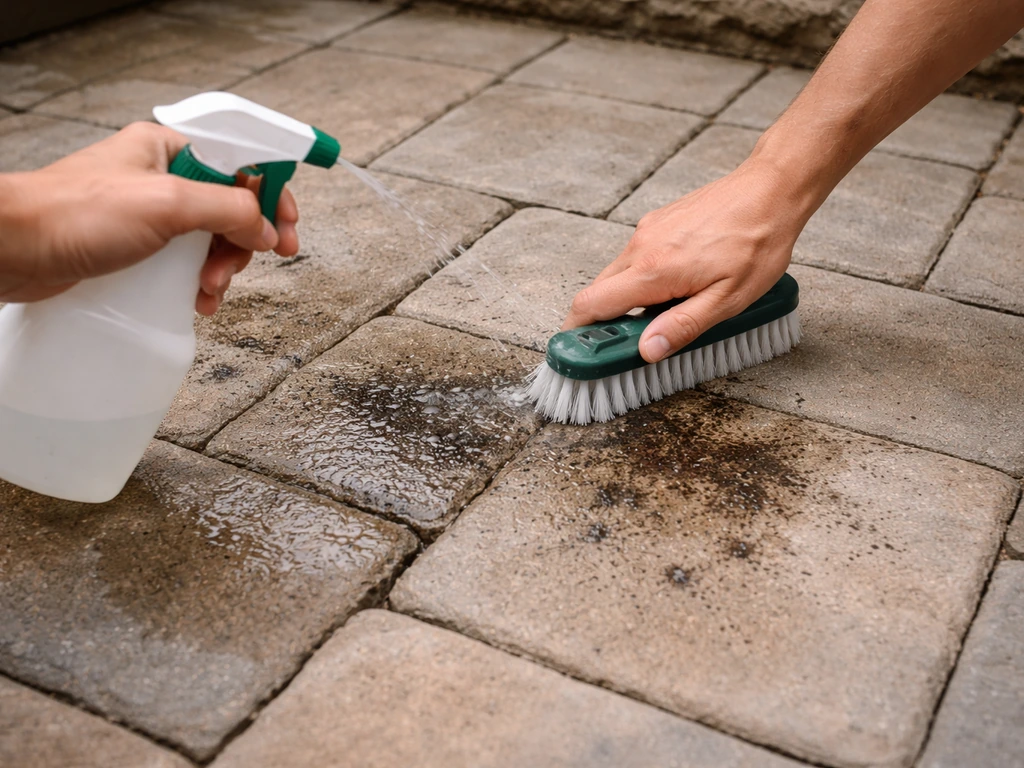
For isolated spots or a small cluster of black dots, a spray bottle makes targeted treatment easier. Mix your cleaner in the bottle, spray directly on the spots, scrub with a smaller brush, and rinse. This is more efficient than treating the whole patio when you only have a few problem areas.
One thing to keep off sandstone entirely: vinegar, lemon juice, or any other acid-based cleaner. I know vinegar gets recommended all over the internet for outdoor cleaning, and it does work on some materials. But on natural stone, especially calcareous sandstone, it etches the surface and can cause permanent dull patches or discoloration. The porous nature of sandstone means the acid soaks in before you even realize the damage is happening. Stick to pH-neutral formulations for routine cleaning.
Oxidizing cleaners for stubborn black growth
When gentle scrubbing doesn't fully clear the black spots, or when you're dealing with heavy biological growth that's clearly established in the stone surface, you need an oxidizing cleaner. These work by breaking down the organic material in the mold, algae, or mildew at a chemical level, rather than just physically scrubbing it away. You have two main options: oxygen bleach (sodium percarbonate) or diluted chlorine bleach (sodium hypochlorite).
Oxygen bleach (sodium percarbonate)
This is my preferred starting point for sandstone because it's effective, safer for surrounding plants when properly rinsed, and less aggressive on the stone itself. Products like OxiClean Outdoor (or any sodium percarbonate-based outdoor cleaner) fall into this category. Dissolve roughly 2 to 4 tablespoons per gallon of warm water as a starting point, though always check your product's label since concentrations vary. Apply it to the pre-wetted stone surface, let it dwell for 15 to 30 minutes (keep the surface damp, don't let it dry), then scrub and rinse thoroughly. One thing to know: oxygen bleach works more slowly in cold water, so if you're cleaning on a cool day, give it closer to 30 minutes of dwell time. Stubborn or thick biological growth may need a second application.
Diluted chlorine bleach (sodium hypochlorite)
For persistent algae, mold, or mildew that hasn't responded to gentler methods, a diluted bleach solution is effective and is actually endorsed by stone-care authorities for exactly this situation, provided you rinse the stone completely with clean water afterward. A roughly 1-to-10 dilution (about 1.5 cups of standard household bleach per gallon of water) is a commonly used starting concentration for bio-growth on hardscapes. I'd suggest starting even more diluted, around a quarter cup per gallon, especially on lighter-colored sandstone, and strengthening only if needed. Halyard Health’s bleach dilution example for sodium hypochlorite uses about 0.25 cup of bleach per gallon for roughly a 1:100 dilution, as an approximate chemistry context around a quarter cup per gallon. Apply to wet stone, let it dwell for 10 to 15 minutes without drying, scrub, and rinse very thoroughly. Don't overdo the bleach concentration: using more than necessary doesn't speed things up meaningfully and creates more risk to the stone and surrounding plants.
| Cleaner | Best for | Dwell time | Key caution |
|---|---|---|---|
| pH-neutral stone cleaner | Light grime, organic residue, routine maintenance | 5–10 minutes | Keep stone moist; don't let it dry on surface |
| Oxygen bleach (sodium percarbonate) | Moderate bio-growth (mold, mildew, algae) | 15–30 minutes | Slower in cold water; rinse very thoroughly |
| Diluted chlorine bleach (sodium hypochlorite) | Stubborn or heavy biological growth | 10–15 minutes | Never mix with ammonia; rinse extremely well; protect plants |
| Vinegar / acidic cleaners | Do not use on sandstone | N/A | Causes permanent etching and dulling on calcareous stone |
Pressure washing vs manual scrubbing: what works, what doesn't
Sandstone is a soft stone, and that changes everything about how you approach pressure washing. Unlike concrete, which can handle high-pressure blasting, sandstone can be damaged, pitted, or have its joint material blown out if you use too much pressure or the wrong nozzle. That said, a pressure washer used correctly is genuinely useful for rinsing away loosened biological growth and cleaner residue across a large patio area.
If you're using a pressure washer
- Keep pressure below 1,500 PSI for sandstone. This is the key number. Higher pressure risks etching the stone surface, eroding the texture, and blowing mortar or sand out of the joints between stones.
- Use a wide-angle nozzle: a 25-degree or 40-degree tip rather than a zero-degree or 15-degree tip. The wider the spray angle, the lower the impact force on the stone.
- Keep the nozzle at least 12 inches from the surface, and ideally further. Hold it at an angle to the stone rather than straight down, and sweep steadily rather than holding it in one spot.
- Avoid directing the spray directly into the joints between stones. This is where joint sand or mortar gets dislodged, which can leave your stones loose over time.
- Use the pressure washer for rinsing after your cleaner has done its work, not as a substitute for letting the cleaner dwell and scrubbing.
If you're doing it by hand
Manual scrubbing is genuinely effective and is the safer option if you're not confident about pressure washer settings, if your sandstone is older or visibly worn, or if you're working around established garden borders. A stiff-bristled deck brush gives you good mechanical action without the risk. It takes longer, but you have full control. For a standard-size patio, plan on 45 minutes to an hour of active scrubbing per treatment session. The results with a good oxidizing cleaner and a thorough scrub are comparable to what a carefully-used pressure washer achieves.
What to avoid regardless of method
- Wire brushes or metal-bristle tools: these scratch sandstone and can leave iron particles behind that rust and create new staining
- Pressure washing without pre-treating with a cleaner: you'll just redistribute surface debris rather than killing the biological growth
- Letting chemical cleaners dry on the stone surface at any point during treatment
- Pressure washing sealed sandstone with a strong nozzle: it can strip the sealer off unevenly
After the clean: rinse, neutralize, dry, and protect
Getting rid of the black spots is only half the job. How you finish the cleaning process and what you do in the weeks after determines whether the problem comes back in a few months or stays away for years.
Rinse thoroughly and neutralize if needed
After any cleaning treatment, rinse the entire patio surface with plenty of clean water. Then rinse again. Residual cleaner, especially bleach-based products, left on the stone surface can cause discoloration or damage over time. If you used a bleach solution, a follow-up rinse with clean water is sufficient for neutralization since the stone itself isn't acid-sensitive to water. The key goal is removing every trace of the cleaning product. Keep your stone moist during the final rinse and make sure runoff is directed away from planted areas.
Let it dry completely before anything else
Give the patio 24 to 72 hours of dry weather before applying any sealer or other treatment. If it's cooler or your patio is shaded, lean toward the longer end of that window. Sealing over damp sandstone traps moisture under the sealer, which causes it to cloud, peel, or fail prematurely. Patience here is worth it.
Sealing sandstone to prevent return
Sandstone is porous, and that porosity is what makes it so hospitable to mold, mildew, and algae. A penetrating stone sealer (sometimes called an impregnating sealer) fills the pores without leaving a film on the surface, making it much harder for biological growth to establish a foothold. Penetrating sealers also allow the stone to breathe, which matters for outdoor surfaces exposed to rain and temperature changes. Topical sealers sit on the surface and form a film, which can look good initially but tends to trap moisture under it if applied to outdoor sandstone in a damp climate.
After applying a penetrating sealer, wipe the surface dry within the application window specified on the label, then allow full cure time of 24 to 48 hours before using the patio or exposing it to rain. Reapplication frequency depends on the product and how much traffic and weather your patio gets, but once every one to three years is a typical range for maintained sandstone.
Ongoing maintenance that keeps black spots away
- Improve airflow and light: trim back overhanging branches or nearby shrubs that keep the patio in constant shade. Biological growth needs moisture and darkness. Even small improvements to sun exposure make a meaningful difference.
- Don't let organic matter sit: sweep away leaves, plant debris, and soil deposits regularly. Decomposing organic material feeds mold and algae and leaves tannin staining.
- Rinse the patio monthly with a plain water hose-down. A strong stream from a garden hose once a month clears surface spores before they establish.
- Check drainage: if water pools on or around your sandstone after rain, that standing water is the single biggest factor feeding biological growth. Improving the slope or clearing blocked drainage channels addresses the root cause.
- Spot-treat early: if you see a few small black dots starting to appear, hit them with a diluted oxygen bleach solution and a scrub immediately. A five-minute spot treatment now prevents a full patio cleaning job in three months.
One realistic expectation to set: if the underlying conditions (shade, poor drainage, high humidity) don't change, black spots will return eventually regardless of how well you clean. Cleaning removes the current growth; improving the environment and sealing the stone are what keep it from coming back. For patio flags, the same approach applies: identify whether it's living bio-growth, then use pH-neutral scrubbing or an oxygen bleach treatment as needed how to remove black spots from patio flags. If you're dealing with black spots on patio slabs, brick pavers, or flagstone rather than sandstone, the approach shifts somewhat, since different materials respond differently to the same cleaners, so it's worth checking guidance specific to your stone type.
FAQ
How can I tell if the black spots are mold and algae versus embedded dirt on my sandstone patio?
If the discoloration looks like it grows back after rain, darkens in shade, or spreads slowly across the surface, it is usually living bio-growth. Embedded grime tends to stay in the exact same outline and won’t noticeably intensify after wet weather. You can also lightly scrub one spot with a pH-neutral cleaner, then rinse; if the spot lightens gradually, it was likely surface grime or early growth, while persistent dark staining that returns faster suggests bio-growth deep in pores.
What should I do if a cleaner dries on the sandstone before I rinse it?
Stop the process and rinse immediately with plenty of clean water. Letting oxygen bleach or diluted bleach dry can leave residues that can cause uneven lightening or lingering dark halos. For best results, keep the treated area damp during the full dwell time, then perform a thorough rinse that you can visually confirm is coming off clear.
Can I use bleach or oxygen bleach if I have nearby plants or grass?
Yes, but treat plants like they are “in the splash zone.” Wet the surrounding area first, apply cleaner to the stone only, and rinse very thoroughly when the dwell time ends. For chlorine bleach, consider using the lower end of the dilution range and redirect runoff away from planted areas, since repeated overspray or runoff can stress leaves and roots even with dilution.
Is it safe to use a pressure washer to remove black spots on sandstone?
It can be, but only if you keep pressure conservative and you’re rinsing, not blasting. Sandstone is softer than concrete, so high pressure or a narrow nozzle can pit the surface or blow out the joint material between stones. If you are unsure, use manual scrubbing with a stiff deck brush, then rely on a gentle rinse pass over large areas to remove loosened growth and residue.
What pressure level is “safe” if I decide to use a pressure washer anyway?
Stay below about 1,500 PSI as a rule of thumb, and use a wider spray pattern. Avoid close-range blasting on edges and corners, where chipping and pitting start first. If you see any surface roughening or sand-like erosion, stop and switch to scrubbing.
How often should I re-seal sandstone after treating black spots?
Many penetrating sealers need reapplication about once every one to three years for ongoing outdoor protection, but your stone’s exposure matters. After you clean and fully cure (24 to 48 hours after sealing, and only after 24 to 72 hours of dry weather), re-check after one season for water beading or darkening patterns. If water no longer beads or dark spots return quickly in the same shaded zones, it is usually time to re-seal.
Can I improve results without stronger chemicals?
Yes. Focus on conditions that feed growth, like shade and moisture. Improve drainage away from the stones, trim overhanging plants, and remove debris that holds moisture (leaf litter, organic mulch against the patio). Also, using the right method matters: treat only the affected areas first when possible, then scrub and rinse thoroughly to prevent leftover residue from becoming a food source for new growth.
What’s the right approach if the black spots return within weeks?
That usually means the underlying growth source remains, or residue was left behind. Re-clean using the appropriate category again, then make sure you do two full rinses after the final treatment. Afterward, address shade and drainage and consider a penetrating impregnating sealer, but only once the patio is fully dry and cured properly.
Should I dilute oxygen bleach or chlorine bleach differently for lighter or darker sandstone?
For lighter-colored sandstone, start on the gentler side of the dilution range and increase only if needed, because uneven bleaching can show as patchy light or “ghost” areas. Darker sandstone is often more forgiving visually, but it still benefits from the same rule: correct dwell time, keep the surface damp, and rinse very thoroughly.
Can I mix cleaners, like oxygen bleach with other products, to speed up results?
No. Do not mix oxygen bleach with other chemicals or detergents, and do not combine bleach-based cleaners. Mixing increases risk of unwanted reactions and can create residues or discoloration you cannot easily fix. Stick to one cleaner category per treatment session, follow the dwell time, then rinse completely before deciding whether a second application is needed.
Next Articles
Does Vinegar Remove Black Spots on Patio? Steps to Try
Yes in some cases: learn when vinegar removes patio black spots, how to apply safely, and what to do if it won’t.
How to Get Black Spots Off Patio Slabs Step by Step
Step-by-step removal of black spots from patio slabs, with material checks, safe chemicals or none, and prevention.

How to Remove Thompson’s Patio Sealer Step by Step
Step-by-step removal of Thompson’s patio sealer on concrete, brick, pavers, and stone, with safety, tests, and cleanup.