Keeping a patio in good shape comes down to three things: knowing what your surface is made of, cleaning it the right way before problems dig in, and protecting it so you're not starting from scratch every spring. The specific steps matter because what works great on concrete can permanently etch travertine, and the pressure setting that's fine for brick can blast the sand out from under your pavers. Get those details right and patio maintenance is genuinely manageable, even without professional equipment.
How to Maintain a Patio: Clean, Seal, and Prevent Stains
Dylan Hale
29 Apr 2026
Know your patio material and why it matters
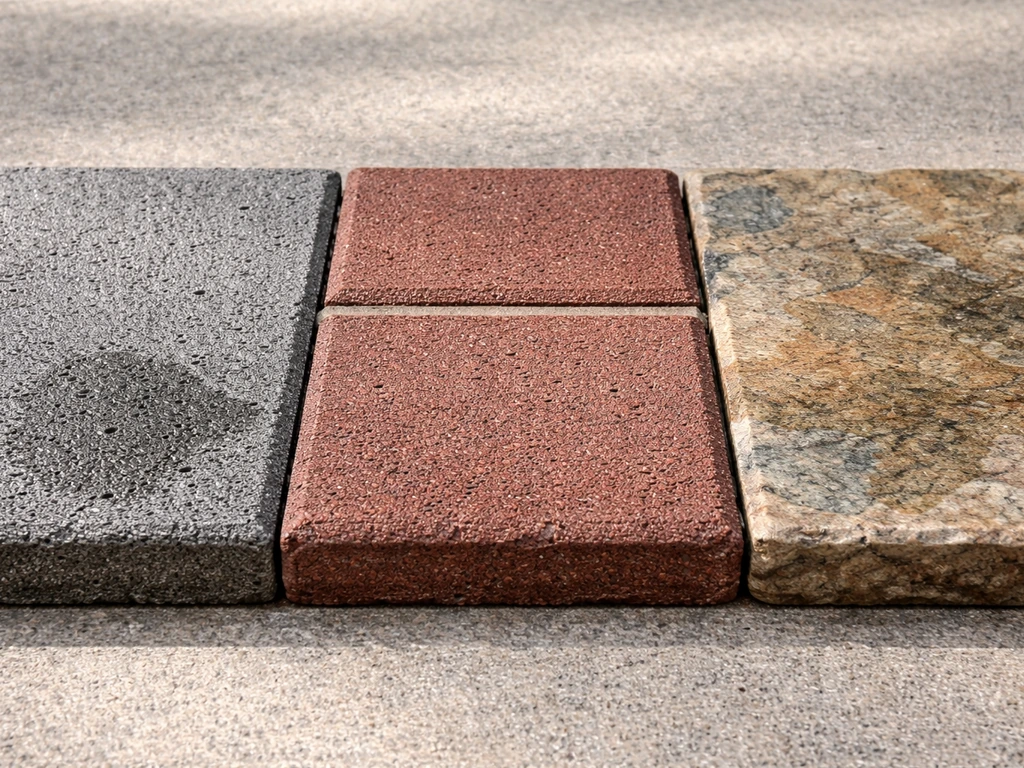
Before you grab a cleaner or turn on a pressure washer, figure out exactly what you're working with. The six most common patio surfaces are concrete, brick, natural stone (like bluestone or slate), pavers (concrete or clay), travertine, and flagstone. Each one has a different density, porosity, and surface finish, and those differences determine which cleaners are safe, how much water pressure is appropriate, and whether sealing will actually help or cause problems.
Concrete is durable but porous and stains easily. Brick is tough but can be damaged by acid cleaners and bleach, which strip color and degrade the surface. Natural stone and flagstone vary enormously, from dense slate to soft sandstone, so always test a small hidden area first. Travertine is calcium-based and reacts badly to any acidic cleaner, including phosphoric acid, vinegar, or muriatic acid. Concrete pavers look like a harder product but have a specific vulnerability: the joints between them are the most fragile part of the whole installation, and that's where cleaning mistakes cause the most damage. If your pavers sit on a sand base, that sand can be eroded by high-pressure water, leaving unstable, shifting stones.
If you're not sure what you have, try this: pour a few drops of water on the surface. If it absorbs quickly, the material is porous and will need sealing. If it beads, it may already be sealed or is a denser material. For stone, look for crystalline sparkle (granite/slate), a chalky or open texture (travertine, limestone), or a more uniform pressed look (concrete pavers). When in doubt, treat the surface as sensitive until you know otherwise.
A simple maintenance schedule you can actually stick to
Most patio problems, from stubborn algae to deep stains, come from neglect over a long period rather than one bad event. A consistent lightweight routine prevents the kind of buildup that requires aggressive cleaning later. Here's what I'd recommend across the year.
Weekly and after-use tasks
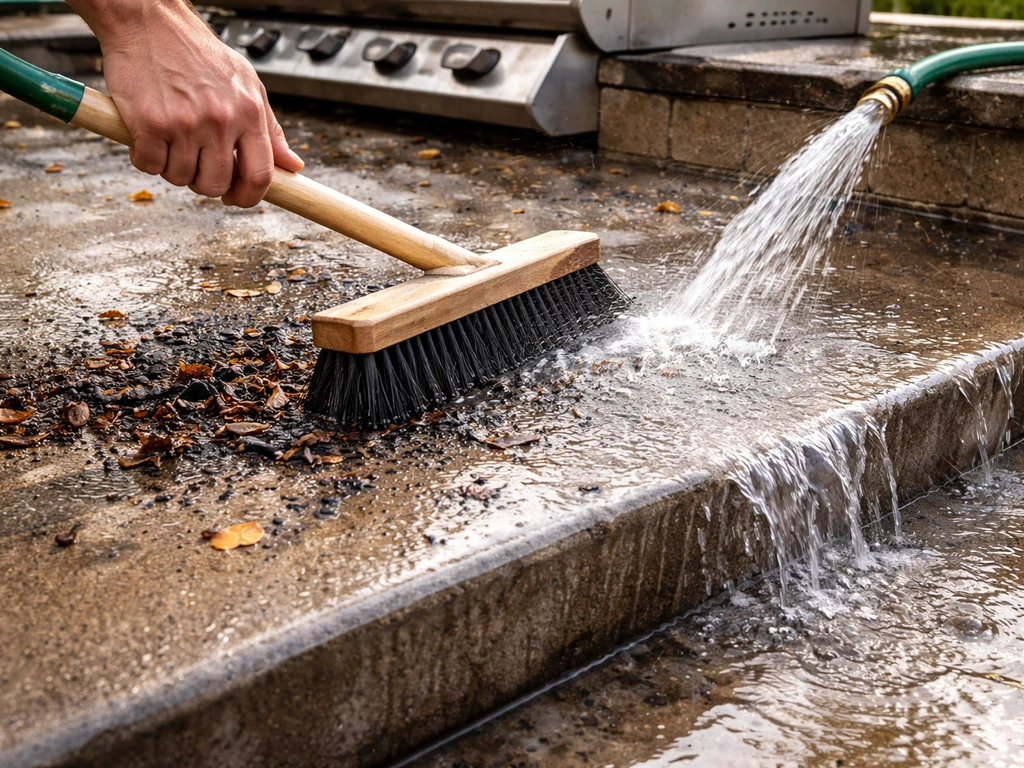
- Sweep debris off the surface with a stiff-bristle broom. Wet leaves and organic matter are the main source of staining and algae growth.
- Rinse with a garden hose after grilling, eating outdoors, or any event where grease or food might have landed on the surface.
- Check joints on paver patios for displaced sand or weeds starting to root. Pull weeds by hand while they're small.
Monthly tasks
- Do a closer visual check for early mold or algae (green or black patches in shaded areas).
- Spot-treat any stains before they cure into the surface.
- Clear drainage channels or gaps around the patio edge so water doesn't pool.
Seasonal tasks
- Spring: Do a full deep clean, inspect for winter damage (cracking, frost heave, joint erosion), and reapply sealer if needed.
- Summer: Stay on top of grease and food stains, especially if you're grilling regularly.
- Fall: Remove all furniture and planters, sweep thoroughly, treat any growth before it overwinters, and clear drains before the first freeze.
- Winter: Keep the surface clear of standing water and avoid using salt-based ice melts on concrete or stone, which cause spalling and surface damage.
How to clean your patio without damaging it
There are two main approaches: pressure washing and manual scrubbing. Both work, and the right choice depends on your material, the condition of your patio, and what equipment you have. The key principle across both methods is to start gentler than you think you need to and escalate only if necessary.
Pressure washing
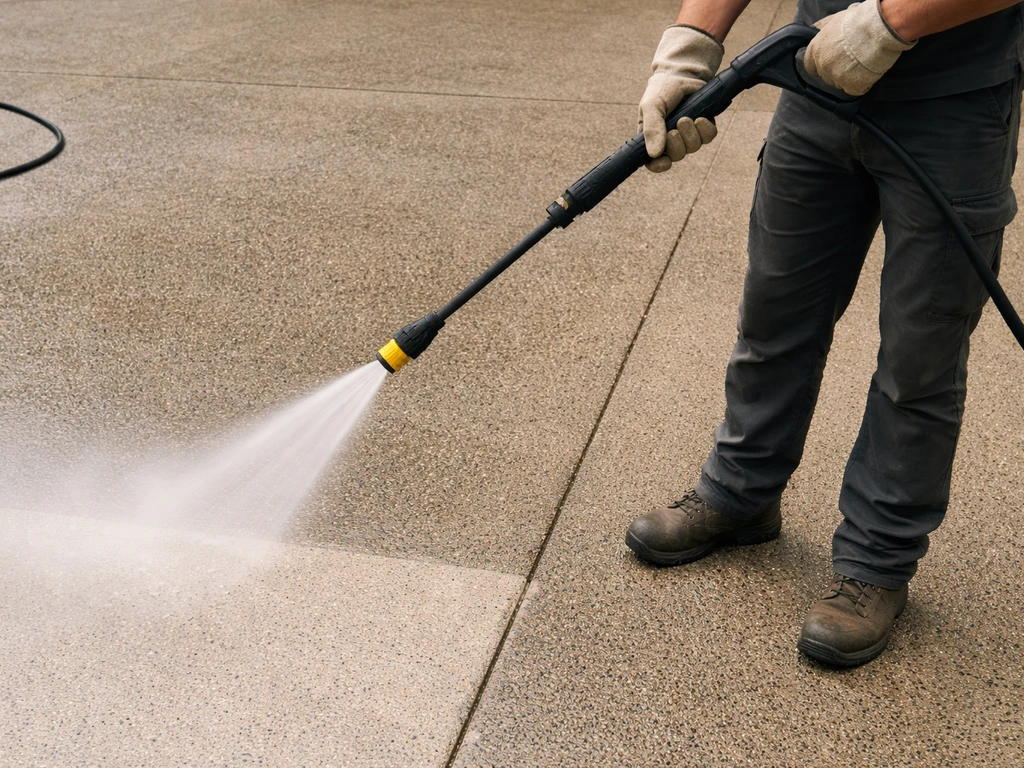
Pressure washing is fast and effective on concrete, dense stone, and brick, but it's easy to do damage if you rush. For concrete and most brick, a yellow 15-degree tip is appropriate for removing grime and growth. Keep the nozzle at least two feet from the surface on powerful machines (3,000 PSI or above), and never hold the stream in one spot. On concrete pavers, I'd actually recommend skipping pressure washing as the first option entirely. The joints between pavers are the weakest point, and high-pressure water can displace joint sand and cause long-term instability. Use a gentler rinse or manual scrub first, and only use a pressure washer on pavers at low pressure if nothing else is working.
- Concrete: Up to 3,000 PSI with a 15-degree or 25-degree tip, keeping 2 feet of distance
- Brick: 1,500 to 2,000 PSI maximum, 25-degree tip, work in the direction of the mortar joints rather than across them
- Concrete pavers: 1,200 to 1,500 PSI at most, 40-degree wide tip, keep moving constantly to avoid joint erosion
- Natural stone and travertine: Avoid pressure washing or use the lowest possible setting (under 1,000 PSI) with a wide fan tip
Manual cleaning
Manual cleaning is the safer choice for travertine, flagstone, honed natural stone, and any pavers in questionable condition. You'll need a stiff-bristle brush (not metal on stone), a bucket, and your chosen cleaner. Apply the solution, let it dwell for the recommended time, scrub in circular or back-and-forth motions, then rinse thoroughly. This takes longer than pressure washing but gives you far more control, and for sensitive surfaces it's genuinely the better result. Rinse with clean water when done and rewet any nearby plants that got splashed, especially if you used a bleach-based cleaner.
Fix the most common patio problems
Mold, mildew, and algae
Black, green, or slimy patches in shaded or damp areas are almost always mold, mildew, or algae. On concrete, a diluted bleach solution is the most effective treatment: mix 1 cup of sodium hypochlorite (regular household bleach at 5 to 6 percent) per gallon of water, apply to the affected area, let it dwell for 10 to 15 minutes, scrub, and rinse well. Always rinse plants in the nearby area after, as bleach runoff can harm them. For brick, be careful with bleach concentration as it can lighten mortar over time. On natural stone or travertine, skip bleach entirely and use an oxygen-based cleaner or a diluted solution of pH-neutral cleaner instead. Vinegar sounds appealing but avoid it on travertine, marble, or limestone, since its acidity etches the surface.
Rust stains
Rust usually comes from metal furniture, planters, or irrigation hardware sitting on the surface. On concrete, a commercial oxalic acid-based rust remover works well. Apply it to the stain, let it dwell for 5 to 10 minutes, scrub, and rinse. Muriatic acid is sometimes used on concrete for stubborn rust but it's aggressive: dilute it at no more than 1 part acid to 10 parts water, wear chemical-resistant gloves and eye protection, work in good ventilation, and never use it on stone, travertine, or brick. For those surfaces, stick to oxalic acid or a dedicated stone-safe rust remover.
Grease and food stains
Fresh grease stains should be blotted (not rubbed) immediately with an absorbent material like kitty litter or baking soda, then swept up after 30 minutes. For set-in grease on concrete, a heavy-duty alkaline degreaser applied at a ratio of 1 part cleaner to 2 parts water for heavy buildup works well. Let it dwell for 5 to 10 minutes and scrub vigorously. For lighter soil, dilute to 1 part cleaner to 5 parts water. On natural stone and travertine, use a pH-neutral degreaser and avoid alkaline products with high pH ratings, which can damage some finishes.
Organic stains (leaves, berries, dirt)
Tannin stains from wet leaves or berries respond well to oxygen bleach (sodium percarbonate), which is safer on most surfaces than chlorine bleach. Mix it per the product label, apply, let it work for 15 to 20 minutes, then scrub and rinse. This is a good option for colored concrete pavers and brick where you want to avoid bleaching the pigment. Avoid ECOgardener's warning here: bleach, ammonia, and acid cleaners are all documented causes of paver color and texture damage, so oxygen bleach is usually the smarter choice for those surfaces.
Weeds in joints
Pull weeds by hand before they establish a root system in the joints. For persistent growth, a targeted application of a patio weed killer (or undiluted white vinegar applied directly with a spray bottle) into the joint can work on concrete or brick. Don't apply vinegar to stone or travertine surfaces. Once weeds are cleared, refill the joints with polymeric sand, which binds on contact with water and resists future weed growth far better than regular jointing sand.
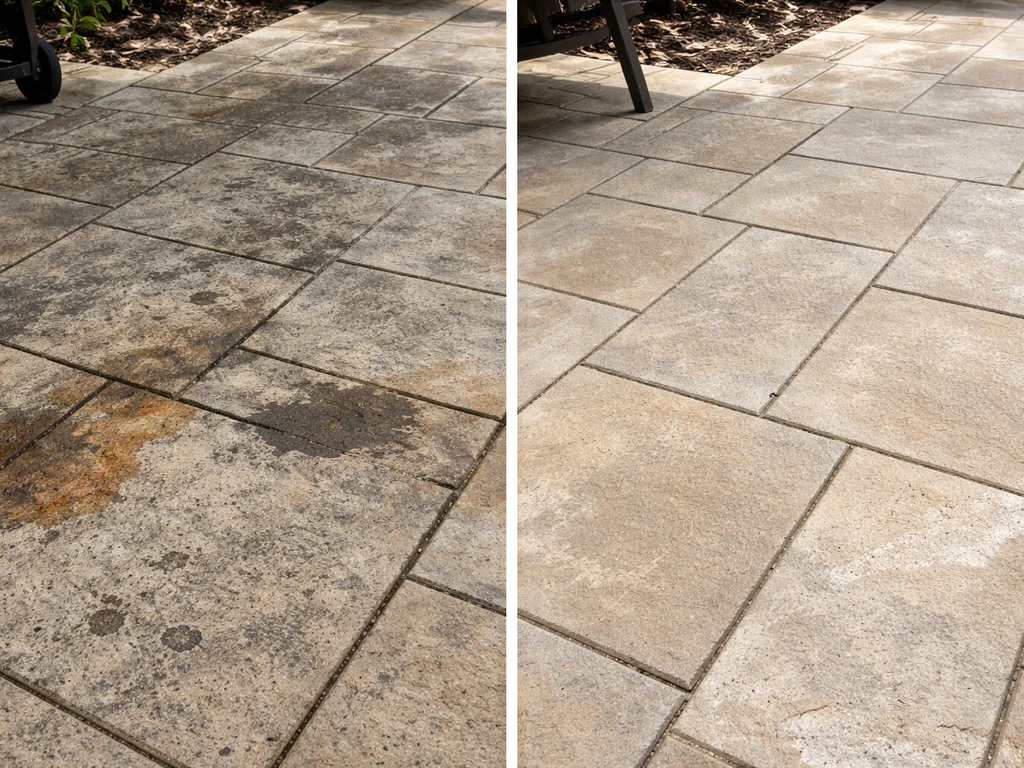
Deep cleaning and sealing strategy
A deep clean should happen at least once a year, ideally in spring before the heavy use season, and again in fall if your patio sees a lot of use. The process is: clear all furniture and planters, sweep, apply your chosen cleaner, let it dwell, scrub or pressure wash, rinse thoroughly, and allow the surface to dry completely before any sealer goes down. That last step matters more than most people realize. If a previous curing compound or sealer is still present on the surface, a new penetrating sealer cannot bond properly and will fail.
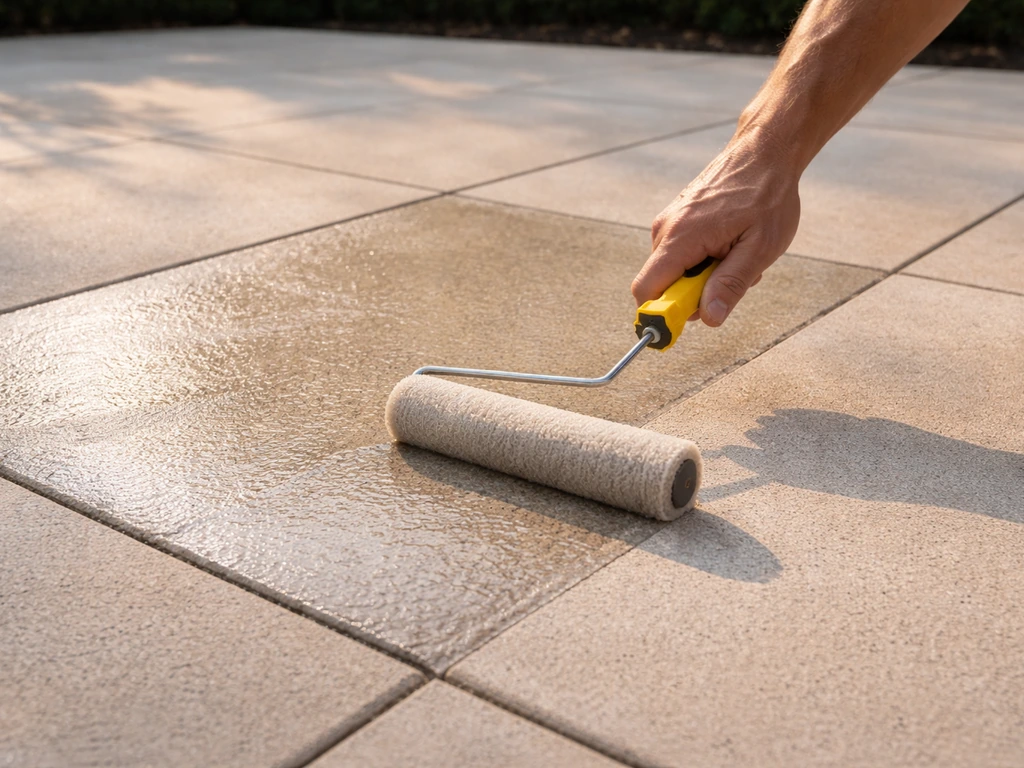
When and whether to seal
Not every patio needs sealing, but most benefit from it. Porous materials like concrete, travertine, natural stone, and unsealed brick absorb stains and moisture much faster than sealed surfaces. A quality penetrating (impregnating) sealer soaks into the pores of the material and repels water and oil from within rather than forming a film on top. A good silane/siloxane sealer on concrete can improve water repellency by 80 percent or more, which meaningfully reduces both staining and freeze-thaw damage. These sealers are breathable, meaning interior moisture can still escape without damaging the sealer or the surface. That breathability is important: a non-breathable film sealer on a damp or slightly porous surface can trap moisture and cause spalling or bubbling.
One important limitation: silane/siloxane sealers are formulated for concrete and masonry substrates specifically. They don't work effectively on natural stone, clay brick, or wood. For travertine and honed natural stone, use a sealer specifically rated for those surfaces, such as a stone-specific impregnating sealer designed for tumbled or honed finishes. Travertine in particular needs a cleaner rated as alkaline or pH-neutral before sealing, not an acid-based product.
Sealer types by surface
| Surface | Recommended sealer type | Avoid |
|---|---|---|
| Concrete | Silane/siloxane penetrating sealer (breathable) | Non-breathable film sealers on damp surfaces |
| Concrete pavers | Penetrating impregnating sealer (paver-rated) | High-gloss film sealers that alter appearance |
| Brick (clay) | Breathable masonry sealer rated for clay brick | Silane/siloxane sealers (not effective on clay) |
| Natural stone / flagstone | Stone-specific penetrating impregnating sealer | Acid-based cleaners before sealing; silane/siloxane |
| Travertine (honed/tumbled) | Stone-specific sealer for honed/tumbled travertine | Any acid-based cleaner; high-pH alkaline sealers |
How often to reseal
The honest answer is: monitor rather than schedule. Some penetrating sealers are marketed as needing reapplication only when performance drops, and that's the right approach. Do the water bead test once a year: pour a small amount of water on the surface. If it absorbs quickly instead of beading, it's time to reseal. For most concrete and stone patios in regular use, that typically means resealing every 2 to 5 years depending on weather, foot traffic, and the specific product used. You can reapply most penetrating sealers at any time once performance has declined.
Preventive care that makes the whole job easier
Drainage
Standing water is the root cause of most algae, mold, and frost damage. Make sure your patio slopes slightly away from the house (at least 1/8 inch drop per foot) so water runs off rather than pooling. Keep drains and gaps along the patio edge clear of debris. If you consistently have wet spots, a French drain or channel drain around the perimeter may be worth the investment.
Furniture and planters
Metal furniture and planters are the main sources of rust staining. Use rubber or felt caps on furniture legs to prevent direct metal-to-stone contact. Elevate planters on pot feet or stands so water drains freely underneath rather than sitting trapped against the patio surface. Move furniture periodically so you can clean underneath and catch any developing stains early.
Joints and weed prevention
For paver patios especially, keep joints in good condition year-round. Refill any depleted joints with polymeric sand immediately, as exposed or shallow joints invite weeds and allow water to penetrate under the base. This is the single most protective maintenance step for paver installations, since the joints are the most vulnerable part of the whole structure.
Winter preparation
Before freezing temperatures arrive, store or cover furniture, remove planters, sweep the surface clean, and treat any remaining mold or algae growth so it doesn't resurface in spring. Avoid rock salt and most ice melts on concrete and stone patios because the chemicals cause surface spalling and can stain. Sand provides traction without the chemical damage. If you have cracks developing in concrete, fill them with a flexible concrete patching compound before winter, since water entering those cracks freezes, expands, and makes the crack significantly worse.
Concrete patios have a few extra considerations around protection and treatment that go deeper than general cleaning, and if you want more detail on those specifics, the guidance on how to protect and treat concrete patios covers that ground in more depth. The same goes for removing concrete dust or surface haze from freshly finished or refinished areas, which requires a different approach than general maintenance cleaning. If you're trying to get rid of concrete dust on a patio, follow the material-specific steps for surface haze so you clean effectively without damaging the finish get rid of concrete dust on patio. Start with the basics here, build the routine, and layer in the material-specific detail as your situation calls for it. If you are wondering how to treat a concrete patio after staining, mold, or winter damage, the right approach starts with picking the right cleaner and following material-safe steps concrete patios.
FAQ
Can I seal my patio right after cleaning, or should I wait?
Yes, but only if you match the sealer to the surface and the surface condition. Do a water test first, and make sure the patio is fully dry (no damp spots, no trapped moisture). Also inspect for residues from old sealers or curing compounds, because new penetrating sealer can fail to bond if the pores are already coated.
Do I need different cleaners and sealers for different patio materials?
Avoid using the same cleaner and sealer plan for all materials. Concrete and most brick can tolerate the cleaners and sealers described for masonry, but travertine and many stones need pH-neutral or alkaline-safe products, and sealers rated for those finishes. If you seal with the wrong chemistry, you can darken, haze, or lock in staining.
What should I do if there is mold or algae before sealing?
Do not apply sealer over moss, active algae, or unclean residue. Treat growth first, scrub, rinse, and let the patio dry completely, then do the water bead test. If the surface still absorbs quickly, it is still not ready for sealing or it may need a different cleaning approach.
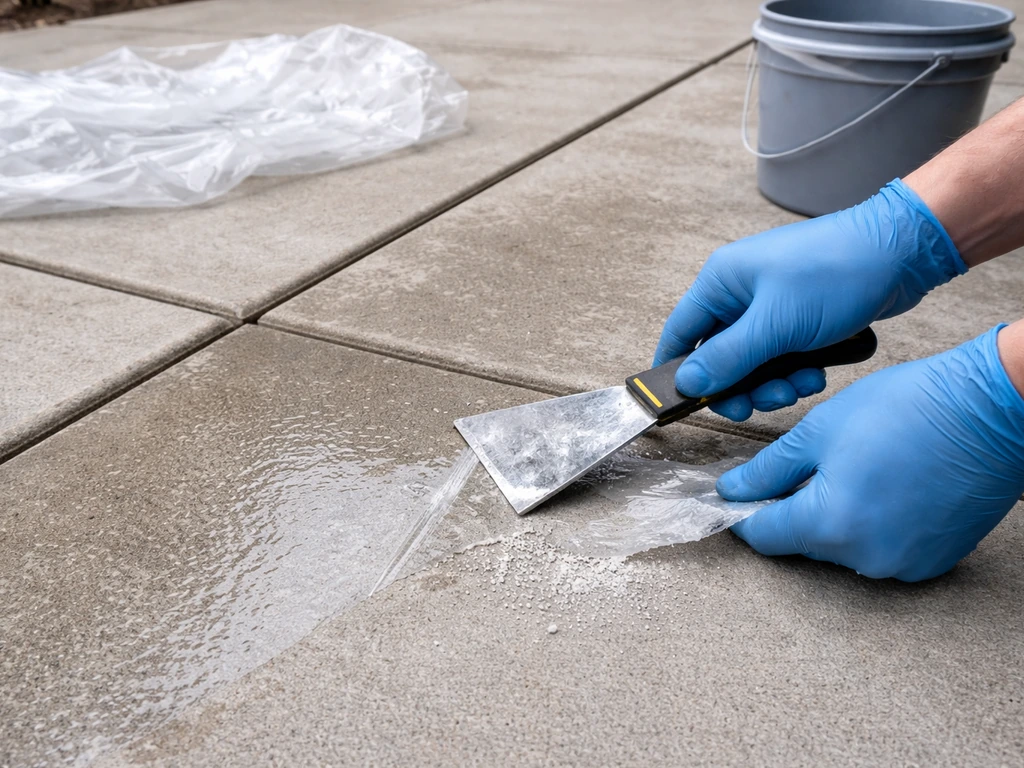
How do I prep a patio for sealing so it does not end up patchy or streaked?
Remove furniture and anything that can trap moisture, then rinse thoroughly and let the patio dry fully before sealing. Before you start, check for “shadowing” risk, if old drips or powdery spots remain they can create darker streaks under sealer. Place plastic under planters if you used any chemical products so runoff does not create uneven drying.
How often should I reseal, and what signs tell me it is time?
For most penetrating sealers, you should not need to reapply if the surface still beads water and stains do not absorb as quickly. If you see reduced water repellency, the water bead test becomes your trigger. Reapply earlier only if you washed aggressively, replaced joints on pavers, or used a cleaner that may strip repellency.
When is the best time of year (and weather) to seal a patio?
Timing matters, if you seal on a damp day or before the patio dries, you risk trapped moisture and bubbling or spalling, especially on more porous materials. Plan for a dry stretch, and avoid sealing in direct scorching sun where the sealer can skin over before it penetrates.
Can I pressure wash near the paver joints if I plan to keep the joints polymeric?
It depends on how the joints were built and what is underneath. If joints are polymeric and intact, you can usually clean the surface around them, then top up lightly when needed, but avoid power washing directly into the joint to prevent sand displacement. If you have plain sand joints, pressure washing increases the chance of erosion.
What is the most effective way to keep weeds from coming back between pavers?
Yes, but treat them as a system, weeds need removal, then joint stabilization. Hand-pull is best early, then for established growth you can spot treat in the joint on compatible surfaces. After clearing, refill with polymeric sand so water cannot travel under the pavers and weeds do not return as quickly.
What is the safest way to remove dark algae or mildew without damaging the surface?
For concrete, use caution with bleach, it can lighten mortar or damage nearby plants if not rinsed properly. For natural stone, travertine, and many sensitive finishes, use oxygen-based cleaners or pH-neutral products, and skip acids like vinegar on those surfaces to prevent etching and permanent dullness.
How do I tell if a stain is rust versus something else, and what should I use?
Yes, but you should not treat all “rust-like” marks the same. Rust often comes from metal contact, remove or protect the source first, then use oxalic acid-based rust remover on concrete. On stone, use a stone-safe rust remover and avoid muriatic acid, because it can damage or discolor sensitive substrates.
Is it a problem if the patio looks different after cleaning (like spots or mild haze)?
Let any treated area dry and check for color change before sealing. If you still see yellowing, whitening, or roughness after cleaning, do not seal yet. That is often a sign of residue or etching, and sealing over it can make the appearance worse.
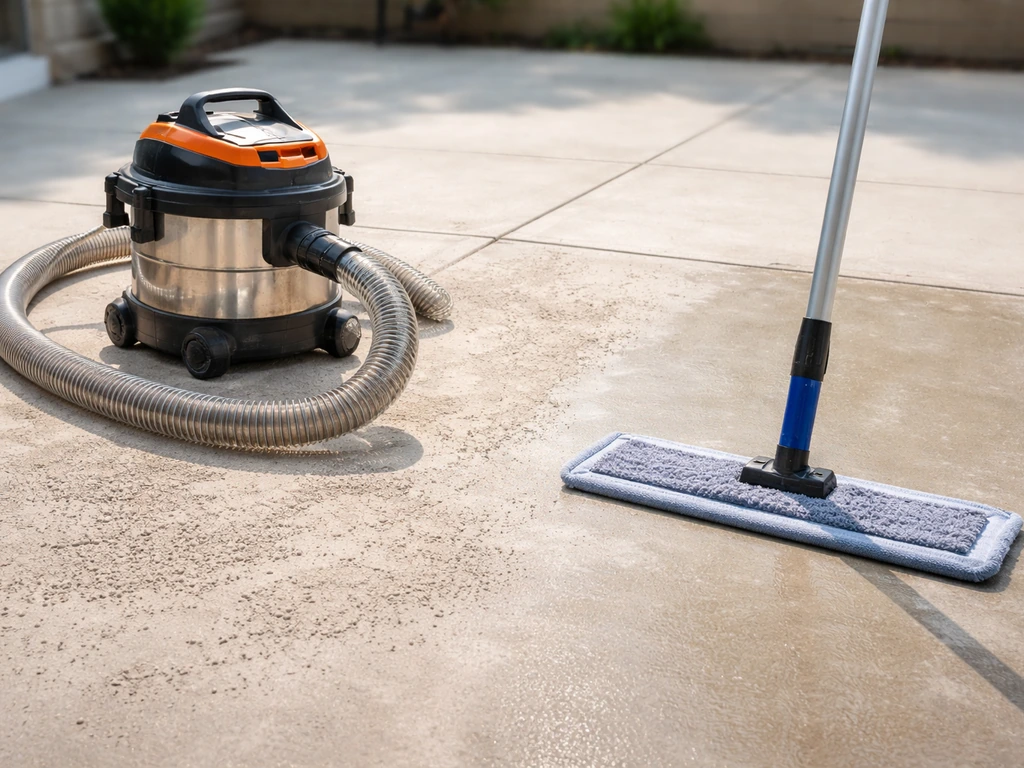
How should I clean concrete dust or haze if my patio is newly finished?
Concrete dust and surface haze are not removed the same way as normal dirt. Freshly finished or refinished areas often need a haze or residue-specific cleaning process so you do not scratch or etch the surface. If you are working near a new pour or resurfacing, confirm the stage of cure and follow a haze-removal approach rather than general degreasing or bleach.
What are the key steps to take before winter so my patio does not get damaged?
For outdoor storage, cover or store cushions and protect metal legs with caps so they do not rust in place. Remove planters and debris, and sweep before winter so organic material does not sit and feed algae. If cracks are forming, repair them with a flexible patch compound before freeze-thaw, because water expansion can widen cracks.
Next Articles

How to Maintain a Concrete Patio: Clean, Seal, Protect
Step-by-step how to maintain concrete patio: clean stains, avoid damage, seal correctly, and follow seasonal care checkl
How to Get Rid of Concrete Dust on a Patio Safely
Step-by-step safe cleanup for concrete dust on patios: vacuuming, mopping, deep cleaning, and acid-safe material tips.
How to Remove Thompson’s Patio Sealer Step by Step
Step-by-step removal of Thompson’s patio sealer on concrete, brick, pavers, and stone, with safety, tests, and cleanup.