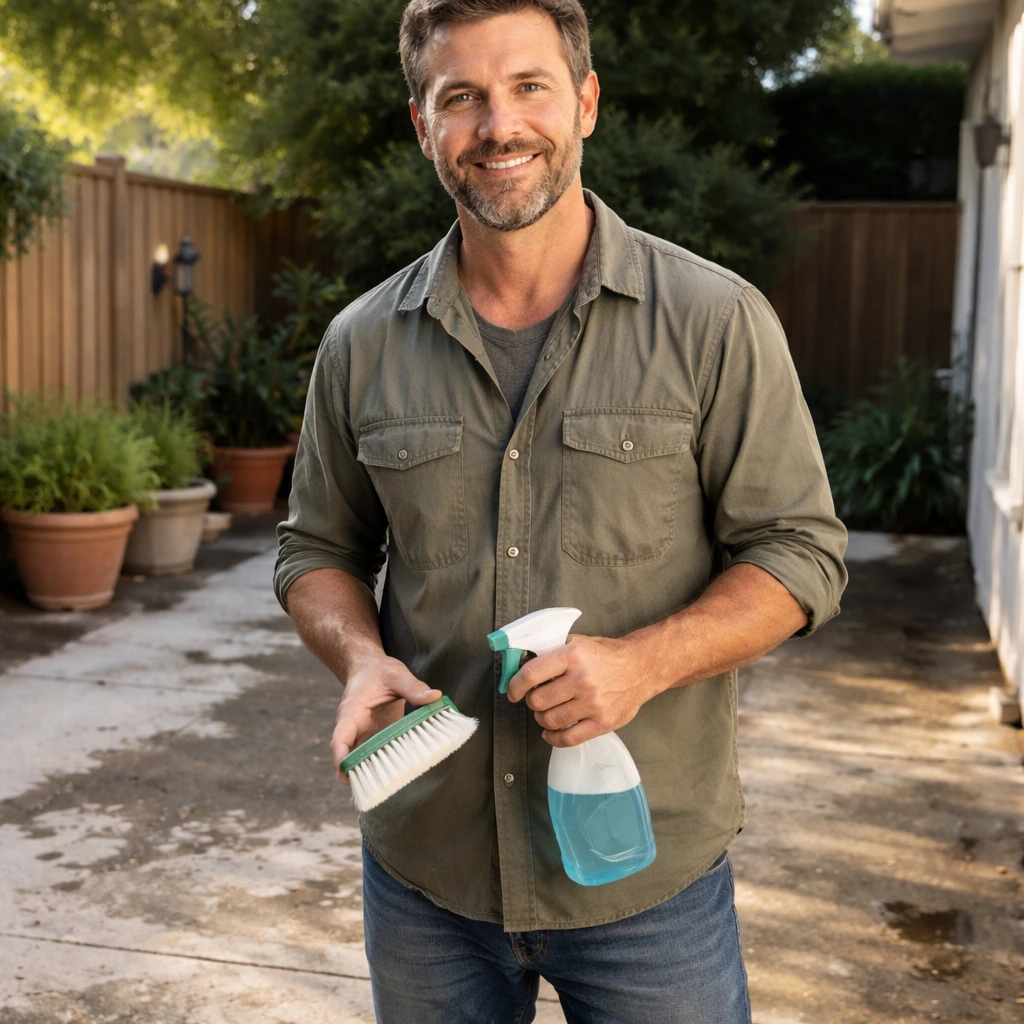
To maintain a concrete patio, you need four things: a basic cleaning routine, the right cleaner for each type of stain, a quality sealer applied at the right time, and a few smart habits around drainage and winter care. Do those consistently and a concrete patio can look great and hold up for decades without major repairs.
How to Maintain a Concrete Patio: Clean, Seal, Protect
Dylan Hale
29 Apr 2026

Curing and early care for a brand-new concrete patio
If your patio was just poured, the most important thing you can do is keep it wet. Concrete does not dry to gain strength, it cures through a chemical reaction called hydration, and that reaction needs moisture to keep going. The first week is the most critical window. I keep the slab continuously wet using wet burlap, a soaker hose on a slow trickle, or by fogging it down multiple times a day. The goal is that the surface never dries out, especially in hot or windy conditions. High evaporation in those early days is one of the main causes of shrinkage cracking.
From a practical standpoint, here is what to do and avoid in the first 28 days after a pour:
- Keep the surface continuously moist for at least the first 7 days using wet burlap, plastic sheeting with water underneath, or a soaker hose. Mist it several times a day if you cannot set up a continuous system.
- Do not walk heavily on the slab for at least 24 to 48 hours, and keep furniture and planters off it for the first week.
- Do not pressure wash new concrete. Even light pressure can open surface pores and damage the paste layer before it has hardened.
- Do not apply any sealer until the slab has cured for a full 28 days. Sealing too early traps moisture and causes adhesion failures.
- Before sealing at the 28-day mark, do the plastic sheet moisture test (ASTM D4263): tape a piece of plastic sheeting flat to the concrete and leave it for 16 hours. If you see condensation or darkening on the underside, the slab is still releasing too much moisture. Wait another week and test again.
- Avoid using any de-icer salt on new concrete through at least the first winter. The concrete has not reached the strength needed to resist freeze-thaw cycling combined with de-icer chemicals.
That 28-day mark is when concrete reaches its design strength, which is why it is the standard minimum before sealing. Rushing it is one of the most common and expensive mistakes homeowners make.
Routine cleaning schedule and what to use
Concrete is porous, which means dirt, algae, and spills work their way in fast if you leave them. A basic rhythm prevents buildup from becoming a restoration project. Here is the schedule I recommend:
| Frequency | Task | Best tool or product |
|---|---|---|
| Weekly | Sweep debris, leaves, and dirt | Stiff-bristle broom |
| Monthly | Rinse with a garden hose or light pressure wash | Garden hose or pressure washer on a wide fan tip |
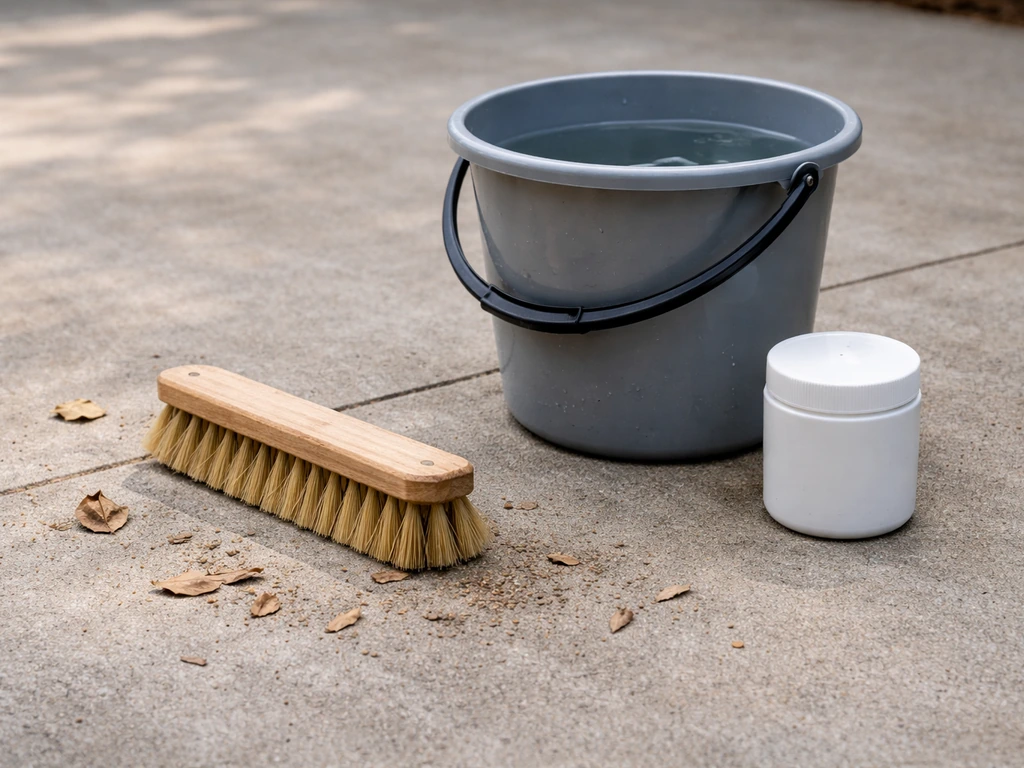
| Every 3 to 6 months | Scrub with a pH-neutral cleaner or diluted dish soap | Stiff deck brush, bucket of warm soapy water |
| Annually (spring) | Deep clean: pressure wash and inspect for stains, cracks, or sealer wear | Pressure washer, targeted stain removers |
| Every 1 to 3 years | Reseal the surface | Acrylic or penetrating silane/siloxane sealer |
For general cleaning, a diluted solution of dish soap or a pH-neutral concrete cleaner and a stiff brush does the job most of the time. If you want a greener option, a mix of white vinegar and water (roughly 1 part vinegar to 4 parts water) handles light organic growth and mild surface grime without harsh chemicals. It works more slowly and may need a longer dwell time than sodium hypochlorite-based products, but it is a reasonable choice if you have pets or plants near the patio.
For tougher general cleaning and mold or algae that has taken hold, a diluted sodium hypochlorite (bleach) solution works well. Mix about 1 cup of household bleach per gallon of water. Apply it, let it sit for 10 to 15 minutes, scrub, and rinse thoroughly. Keep it off nearby plants and rinse the surrounding area with clean water after you finish. Always wear gloves and eye protection when using bleach-based cleaners outdoors.
Removing common stains
Different stains need different chemistry. Using the wrong cleaner wastes time and can damage the surface. Here is what works for the stains I see most often on concrete patios.
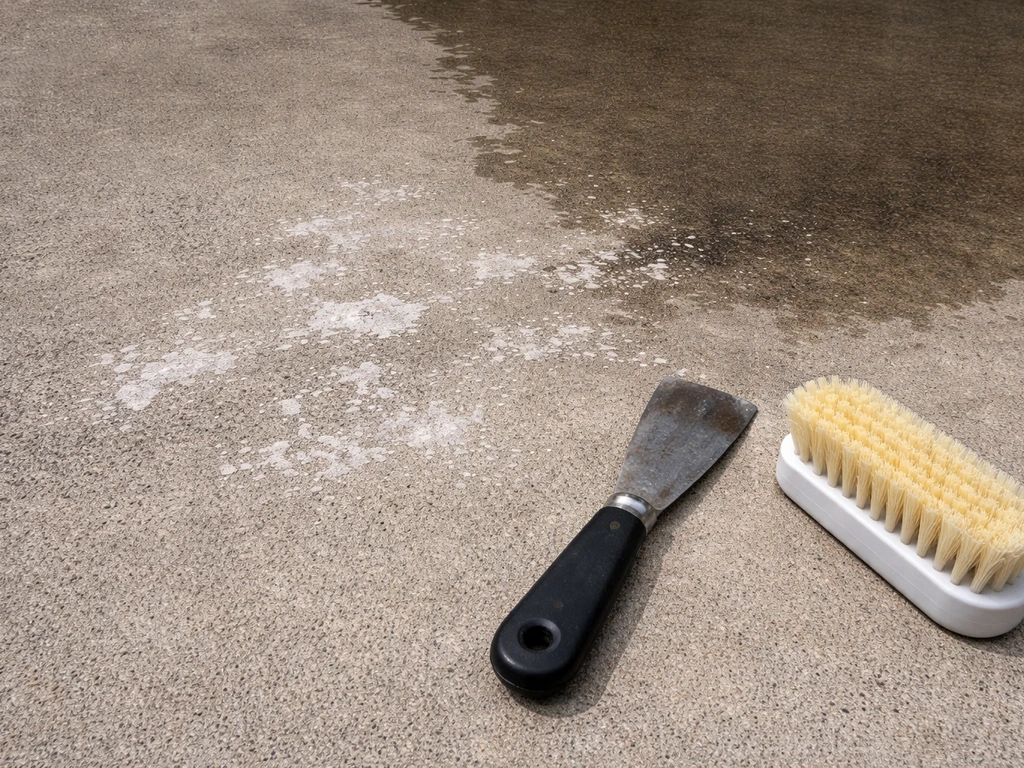
Oil and grease
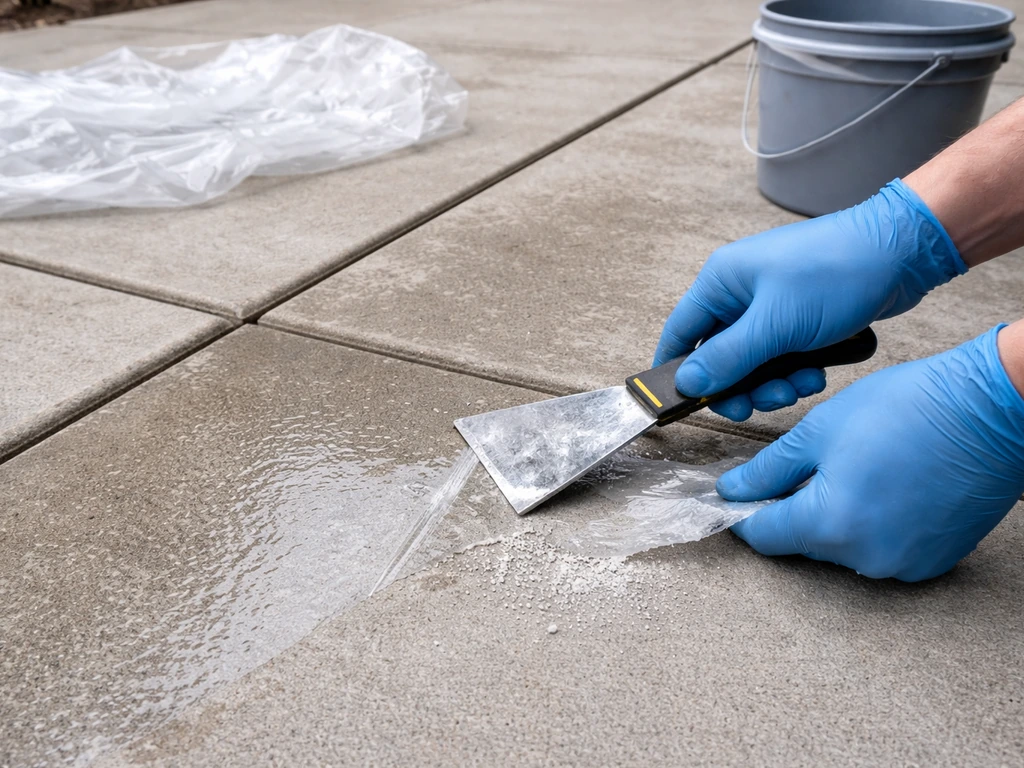
Oil and grease are the trickiest because they penetrate quickly. The most effective approach for a set-in grease stain is a poultice cleaner. Products like PROSOCO's Oil and Grease Stain Remover are designed specifically for this: you apply the paste over the stain, let it dwell for 5 to 8 hours while it draws the oil out of the pores, and then sweep up the dried material and dispose of it. For fresh spills, absorb as much as possible with cat litter or cornstarch first, then follow with a degreaser and stiff brush scrub. Dish soap works on very fresh grease. For older stains, you need the poultice.
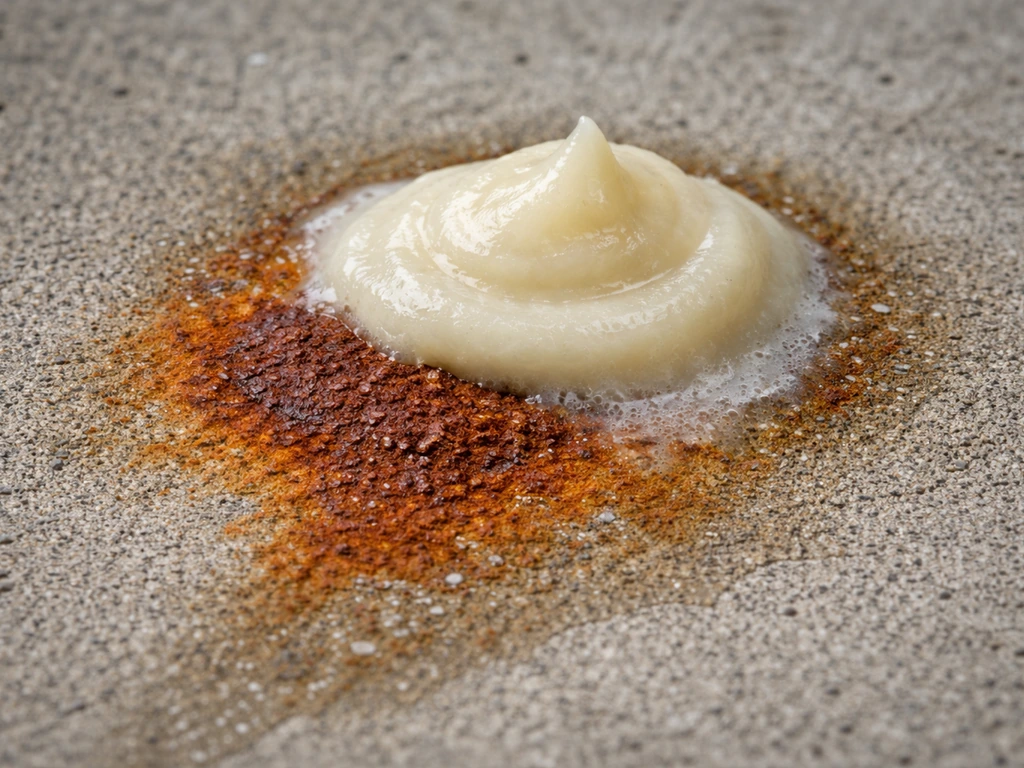
Rust stains
Rust stains usually come from metal furniture, planters with drainage holes, or rebar bleeding through a crack. Oxalic acid is one of the most effective rust-removal options for concrete, and the approach is again a poultice: mix oxalic acid powder with water to a paste-like consistency, apply it over the stain, let it work, then scrub and rinse. You can also find commercial rust removers formulated for concrete that use similar chemistry. Wear rubber gloves and do not let the acid solution sit on surrounding areas beyond the stain. Rinse everything thoroughly when done.
Organic growth: mold, mildew, algae, and moss
Organic growth is the most common issue on shaded or damp patios. For light growth, white vinegar straight from the bottle or a diluted bleach solution (1 cup bleach per gallon of water) both work. For heavy, dark mold or thick algae patches, sodium hypochlorite at a slightly higher concentration, around 2 to 3 cups per gallon, works faster. Apply, let it sit for 10 to 15 minutes (do not let it dry on the surface), scrub with a stiff brush, and rinse well. For stubborn moss in joints, a wire brush helps dislodge the roots before you apply cleaner.
Efflorescence
Efflorescence is that white, chalky, crusty deposit that appears on concrete when water moves through the slab and deposits salts on the surface. It is a moisture signal more than a cosmetic problem. To remove it, use a dedicated efflorescence cleaner (often a diluted acid-based product). The key timing detail: apply it, let it work for 3 to 5 minutes, and rinse before it dries on the surface. Letting it dry creates a secondary problem. One caution worth noting: overly aggressive pressure washing on efflorescence can open pores and encourage more to appear, so start gentle. If the efflorescence keeps coming back, the underlying moisture issue needs attention, and that points back to drainage and sealing, which I cover below.
Paint and graffiti
For paint on concrete, acetone is an effective chemical remover. Spray or apply it to the paint, work it back and forth, and scrape the softened paint with a putty knife while it is still gooey. Repeat applications are often needed for thick or layered paint. For graffiti, use a product specifically formulated for concrete graffiti removal, and do not let it dry on the surface before rinsing. If paint removal is your main concern, this falls into broader concrete treatment territory, and you may want to look at dedicated paint-stripping guidance for stubborn cases.
Pressure washing vs manual scrubbing: how to choose
You do not need a pressure washer to maintain a concrete patio. A stiff-bristle deck brush, a bucket, and the right cleaner handles most routine jobs and even some stain removal. That said, pressure washing cuts cleaning time dramatically on a large patio and does a better job lifting embedded grime before resealing.
When manual scrubbing is the right call
- You have a newer slab (under 6 months old): pressure can damage immature concrete.
- You are dealing with a localized stain that needs a poultice or dwell time, not rinsing pressure.
- You are working around plants, pets, or delicate adjacent materials.
- You are a renter or do not have access to a pressure washer.
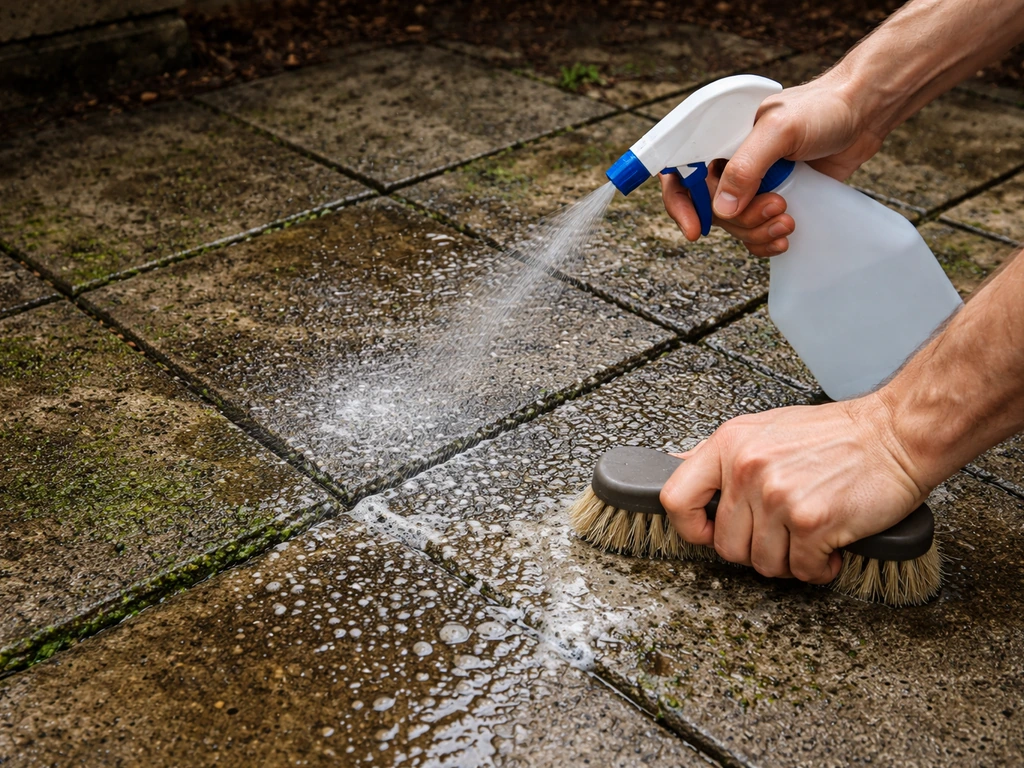
How to pressure wash concrete safely
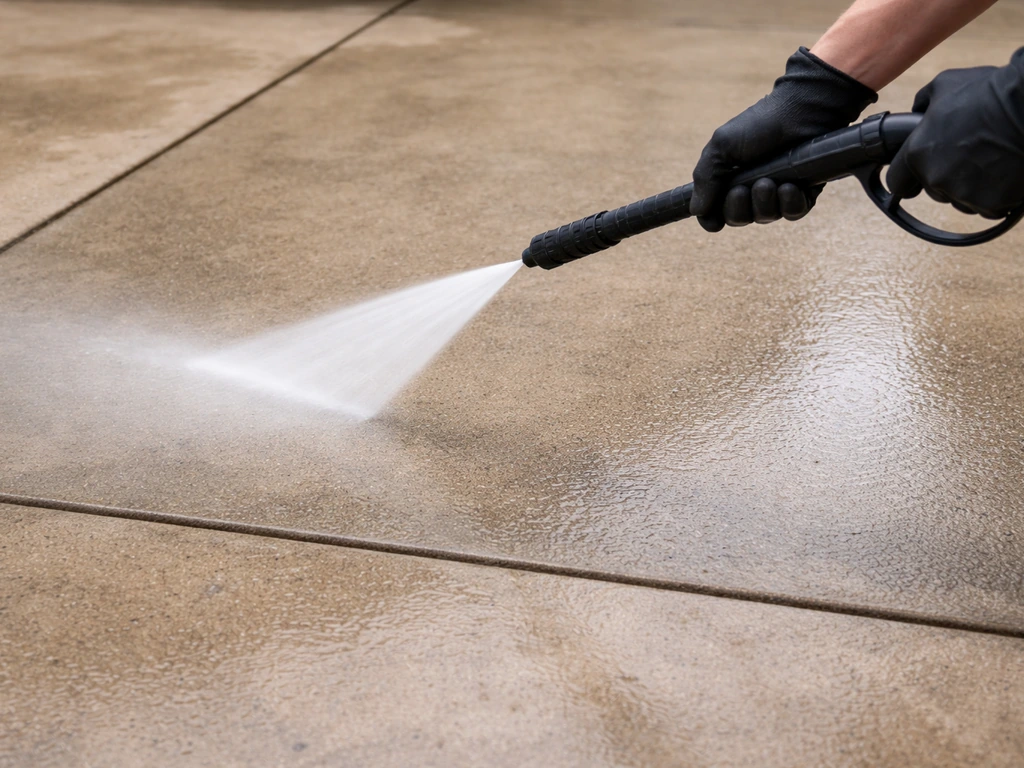
If you do use a pressure washer, use a 25-degree or 40-degree fan tip, never a zero-degree pinpoint tip on a patio surface. Keep the nozzle about 12 inches from the surface when working with equipment under 2,000 PSI. For machines above that, move further back or use a wider tip. Work in consistent, overlapping passes and keep the wand moving so you do not etch lines into the surface. Always pre-wet the area, apply your cleaner, let it dwell, then pressure wash to rinse. Rinsing at high pressure without a cleaner first just redistributes dirt.
Before resealing, an aggressive power wash or power brooming is often required to fully remove old sealer residue, dirt, and any dissipating curing compounds. That surface prep step is non-negotiable if you want the new sealer to bond correctly.
Sealing and reapplying sealant
Sealing is the single most impactful thing you can do to extend the life and appearance of a concrete patio. It blocks water, resists stains, and in freeze-thaw climates, it dramatically reduces the risk of spalling and scaling. Here is how to do it right.
When to seal
For a new slab, wait a minimum of 28 days after the pour before sealing. After that, confirm with the plastic sheet moisture test that the concrete is not still releasing significant moisture from below. For an existing patio, seal any time the surface looks faded, water no longer beads up on it, or the previous sealer is visibly wearing. Spring is the most practical time because the surface is dry, temperatures are moderate, and you have the whole outdoor season ahead to benefit from the protection.
Choosing the right sealer
| Sealer type | How it works | Best for | Reapplication interval |
|---|---|---|---|
| Penetrating silane/siloxane | Absorbs into the concrete and chemically bonds with the cement; invisible finish | Outdoor patios in freeze-thaw climates; maximum water repellency without changing appearance | Every 3 to 5 years (or as needed) |
| Acrylic film-forming | Forms a thin protective film on the surface; can add slight sheen | General outdoor use; good stain resistance; affordable and easy to apply | Every 1 to 3 years (exterior exposure shortens lifespan) |
| Epoxy or polyurethane film-forming | Thicker, more durable topcoat; high abrasion and chemical resistance | Covered or partially covered patios; high-traffic areas; decorative finishes | Every 2 to 5 years depending on traffic |
| Curing and sealing compounds | Applied right after finishing on new concrete; combines curing moisture retention with early protection | New slabs only (within the first hours/days); not a substitute for a full sealer at 28 days | One-time use at placement; clean off before resealing |
For most outdoor patios in climates with freezing winters, I lean toward a penetrating silane/siloxane sealer. It does not change the look of the concrete, it handles water and freeze-thaw stress better than film-formers, and it does not peel. If you want a finished, slightly glossy appearance or are in a mild climate, an acrylic sealer is a fine, budget-friendly choice. Just know you will be reapplying it every one to three years as exterior exposure breaks it down.
How to apply sealer
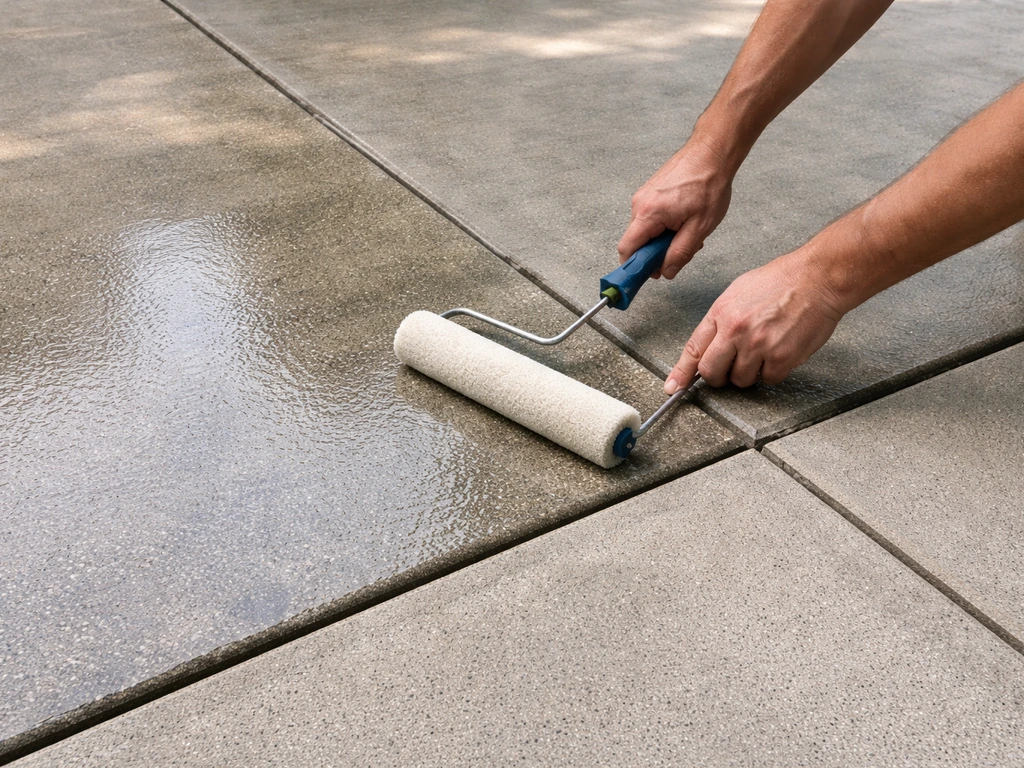
- Clean the surface thoroughly: sweep, then pressure wash (or scrub) to remove all dirt, stains, and old sealer residue. Any contamination left under the sealer will show through and prevent bonding.
- Let the concrete dry completely. At least 24 hours after washing in warm weather, longer in cool or humid conditions.
- If the old sealer is peeling or flaking, strip it fully with a chemical sealer remover before applying a new coat.
- Apply sealer with a roller or sprayer in thin, even coats. Two thin coats bond better than one thick coat.
- Allow proper drying time between coats as listed on the product label. Most acrylics want 1 to 2 hours between coats.
- Keep foot traffic off for at least 24 hours after the final coat, and furniture off for 72 hours.
Preventing cracks, spalling, and water damage
Most patio damage comes down to water getting in and freezing, or drainage pushing water against the slab repeatedly over years. Here is how to manage both.
Drainage and water management
Your patio should slope slightly away from the house, typically about 1/8 to 1/4 inch per foot. If water puddles on the surface after rain, you have a drainage issue that will eventually work its way into cracks and make them worse. To learn the right timing and product types, follow the guidance in how to treat concrete patio. Check that gutters and downspouts are directing water away from the patio, not dumping it at the edge. Planter pots sitting directly on the concrete trap moisture underneath and leave stains, so use pot feet or risers to keep air and drainage flowing.
De-icing choices and what to avoid
This is an area where I see a lot of homeowners cause accidental damage. Sodium chloride (rock salt) and other chloride-based de-icers accelerate scaling on concrete, especially when combined with freeze-thaw cycling. The damage happens when the de-icer and liquid water are present together on the surface as temperatures drop. The safest approach in winter is to avoid chemical de-icers on concrete entirely, especially for the first year after a pour. Use sand for traction instead. If you do need to melt ice, calcium magnesium acetate (CMA) is one of the gentler alternatives on concrete.
On the concrete side, air entrainment (small air bubbles mixed into the concrete at the time of pour) is the most effective protection against freeze-thaw damage built into the slab itself. If you are having new concrete poured, ask your contractor about air-entrained mix, especially if you are in a northern climate. If you already have an existing slab, this is where sealing and de-icer avoidance carry the most weight.
Dealing with cracks before they grow
Hairline cracks (under 1/4 inch) are cosmetic in most cases and can be filled with a concrete crack filler or polyurethane sealant. The key is not letting water get in and freeze. For anything wider than 1/4 inch, or cracks at control joints that are moving, you are dealing with a structural or settling issue that deserves a closer look before you just fill it and move on. Freeze-thaw damage often starts at joints and edges where moisture concentrates, so keep those areas sealed and clean.
Seasonal maintenance checklist and what to do next
Here is a practical checklist organized by season so you know exactly what to do and when. Treat this as your annual maintenance cycle. If you learn how to maintain patio surfaces with the right cleaning, sealing, and drainage checks, you will keep it looking its best all year annual maintenance cycle.
Spring
- Sweep and rinse off winter debris, sand, and dirt.
- Inspect for new cracks, spalling, or scaling that developed over winter.
- Check whether water still beads on the surface. If not, the sealer needs reapplication.
- Deep clean with a pressure washer or stiff brush and appropriate cleaner.
- Address any stains (rust from furniture, organic growth, efflorescence) before resealing.
- Reseal if it has been 1 to 3 years since the last application or the surface looks worn.
Summer
- Rinse regularly to prevent dirt and organic matter from building up.
- Clean spills (especially oil, grease, and food) as soon as they happen.
- Use pot feet under planters to prevent moisture staining.
- Check that drainage around the patio is functioning after heavy rain events.
Fall
- Clear leaves promptly: wet leaves cause organic stains and trap moisture.
- Do a visual inspection of the sealer, cracks, and joints before winter.
- Fill any cracks with a concrete sealant before temperatures drop.
- Make sure gutters and downspouts are clear so winter melt water drains away from the patio.
Winter
- Avoid using chloride-based de-icers (rock salt, calcium chloride) on the surface.
- Use sand or CMA for traction instead.
- Use a plastic shovel rather than a metal one to avoid gouging a sealed surface.
- Do not chip ice with sharp tools directly on the concrete.
When results are not what you expected
If you cleaned thoroughly and stains came back within a few weeks, the issue is usually that the source was not addressed. Rust returns when the rusting object is still on the patio. Efflorescence comes back when there is still a moisture path through the slab. Organic growth returns fast if shade and dampness remain and the surface is not sealed. Trace the source, not just the symptom.
If your sealer is peeling or looks milky after application, the two most common causes are applying it to a damp surface or applying it over an incompatible old sealer. Strip it, let the surface dry completely, and reapply. If cleaning is not improving the patio's appearance as much as you hoped, it may be time to look into whether treating or resurfacing the concrete is the right next step, which is a bigger topic that goes beyond routine maintenance.
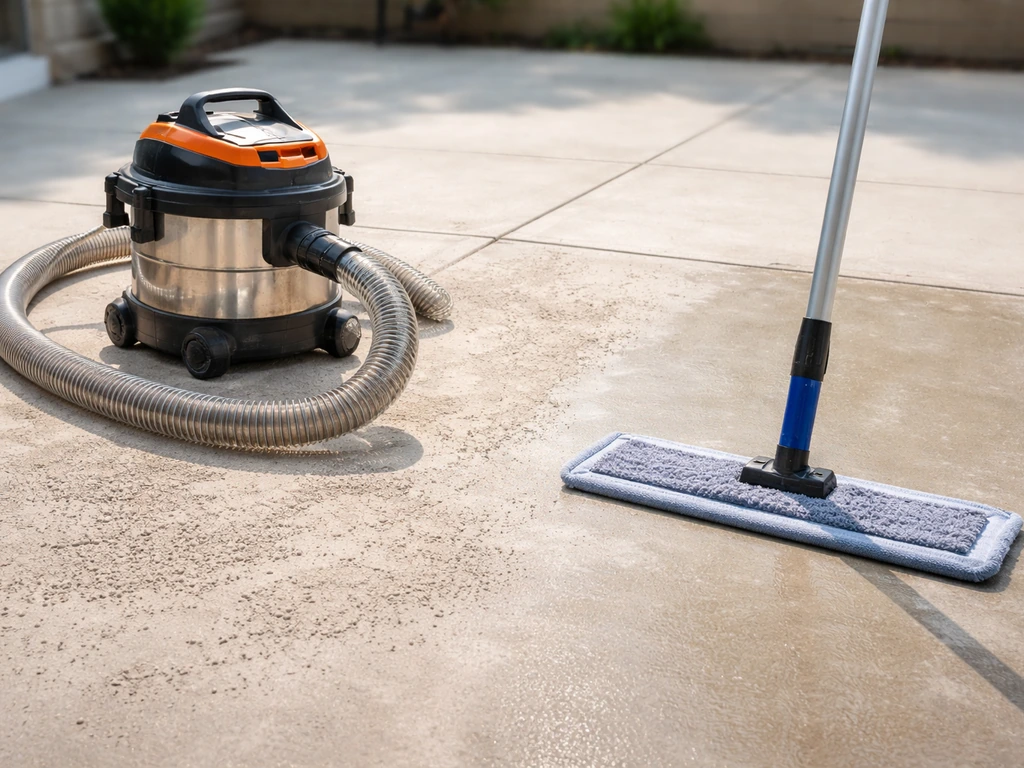
Keeping up with the basics, sweeping, cleaning, sealing, and managing water, genuinely does extend a patio's life significantly. Most of the patios I have seen in rough shape got there from years of neglect, not from one bad event. Staying on the routine is the whole game. If you are seeing concrete dust after cleaning or grinding, use the right dry cleanup method first, then switch to a gentle wet rinse so the dust does not spread concrete dust on a patio.
FAQ
Can I seal right after cleaning or stain removal?
Yes, but only if you do it correctly. Many cleaners, especially bleach or acid-based products, leave residues that can interfere with bonding. After any stain-removal treatment, rinse until runoff is clear, let the slab dry fully, and wait at least 24 to 48 hours before sealing (longer if the area stays humid or shaded). If you can’t confirm dryness by feel, use the plastic-sheet moisture check again, since sealing over trapped moisture leads to cloudiness or peeling.
How do I know when my concrete sealer needs to be reapplied?
For most patios, the target is a sealed surface that resists water penetration without trapping moisture. A good test is to sprinkle water on the concrete after it is fully cured, if the water soaks in within minutes, the sealer is failing and it is time to reapply. If water beads and stays on the surface longer, it is still performing. This is more reliable than looking for a specific “sheen,” since wear can be uneven across high-traffic areas.
Is it okay to seal only part of the patio?
Spot sealing can work for localized areas, but it can create visible differences, especially with penetrating sealers that soak in unevenly. If only a few spots are fading or getting stained, clean those areas thoroughly and reapply sealer to the same depth and coverage, then feather the edges so the transition is less noticeable. If peeling or milky residue is happening widely, treat it as a full re-seal project because underlying incompatibility or moisture issues will keep showing up.
What should I do if my patio starts producing concrete dust after cleaning?
Check for dust, loose powder, or sealer failure rather than assuming the sealer is the problem. Concrete “dusting” after cleaning can come from an existing weak surface layer, worn paste, or old sealer residue mixed with dirt. If you see powder when you sweep, avoid using a pressure washer to “fix” it, instead do a dry cleanup first, then rinse gently, and consider a resurfacing or densifying step if dust returns quickly.
My patio keeps getting white chalky spots (efflorescence). Will sealing alone stop it?
Do not try to fix active efflorescence with another heavy scrub alone. Because efflorescence indicates a moisture path, the practical sequence is: correct drainage if water is getting under or against the slab, remove the deposits with the right efflorescence cleaner and a short dwell time, then seal once the slab is dry and stable. If efflorescence returns after sealing, it usually means the moisture source still exists, so stop and investigate where the water is traveling.
How can I tell if a crack is just cosmetic or a bigger problem?
Start by confirming whether the cracks are stable or moving. Hairline cracks under about 1/4 inch are often cosmetic, but if you see widening seasonally, cracking along control joints, or water collects in that area, it is a sign of movement or a drainage problem. For moving cracks, using the wrong rigid filler can fail quickly, so the better approach is to address drainage and use a crack system appropriate for joint movement rather than a simple patch.
Can I seal in hot weather or if rain is in the forecast?
Yes, but timing matters. You can keep the slab wet during curing, but after that, sealing while temperatures are very hot or direct sun can cause rapid solvent flash-off for film-forming products and lead to uneven appearance. Aim for moderate temperatures and avoid sealing when rain is expected within the curing and drying window. If condensation is likely (cool nights after warm days), wait until the surface is uniformly dry.
What’s the safest way to handle ice on a concrete patio in winter?
If you must remove ice, prioritize mechanical methods first (shoveling, sand for traction). If you use a de-icer, CMA is gentler than chloride salts, but you still need to avoid long exposure where liquid water sits on the concrete. After the freeze period, rinse the slab with clean water in milder conditions to remove residual material. Also avoid repeated cycles of melt and refreeze, which is where damage accelerates.
Do potted plants affect concrete patio maintenance?
Yes, some plants can cause problems even if the patio is sealed. Planters directly on the concrete trap moisture underneath, which can feed organic growth and contribute to rust or staining from soil and metal components. Use pot feet or risers so air can circulate under the container, and avoid setting porous trays or wet planters directly on the slab.
Next Articles
How to Get Rid of Concrete Dust on a Patio Safely
Step-by-step safe cleanup for concrete dust on patios: vacuuming, mopping, deep cleaning, and acid-safe material tips.
How to Remove Thompson’s Patio Sealer Step by Step
Step-by-step removal of Thompson’s patio sealer on concrete, brick, pavers, and stone, with safety, tests, and cleanup.
Can You Remove Patio Sealer? How to Strip It Safely
Learn if you can remove patio sealer and how to strip it safely by type, material, and method.