The most effective way to protect a concrete patio is to clean it thoroughly first, repair any cracks, let it dry completely, and then apply a penetrating silane/siloxane sealer that blocks water at the pore level. Do that once every two to three years, keep up with basic maintenance in between, and your patio will resist freeze-thaw cracking, staining, spalling, and surface wear far better than unprotected concrete ever could.
How to Protect a Concrete Patio From Water, Cracks, and Stains

Dylan Hale
29 Apr 2026
Why concrete patios fail in the first place
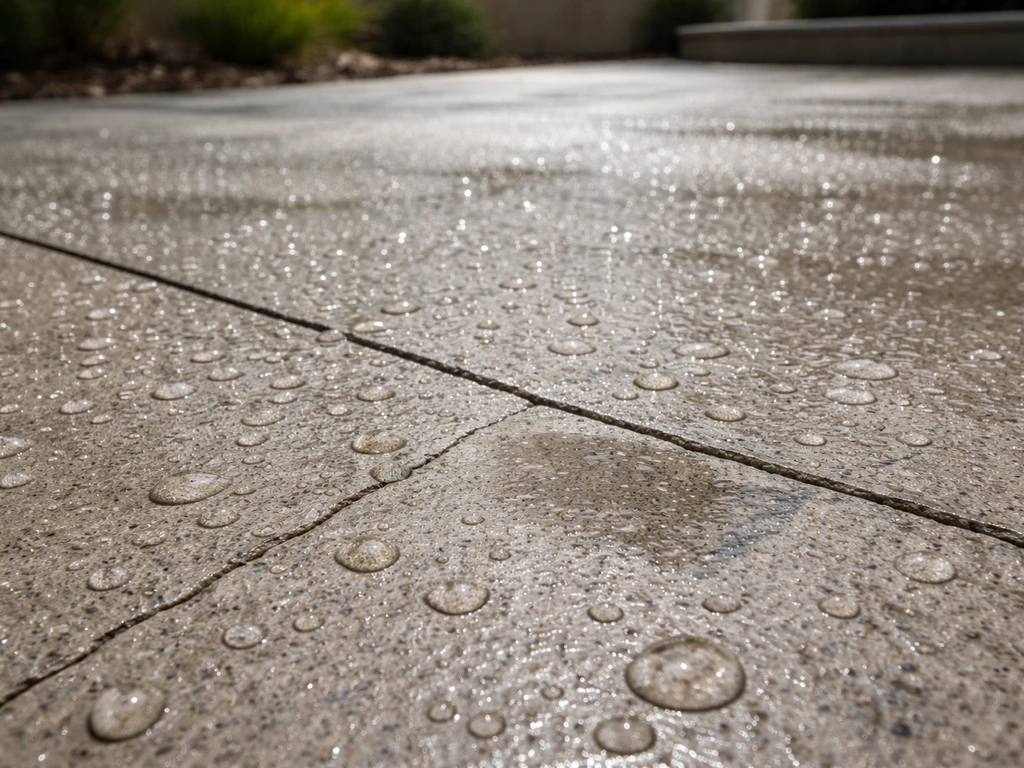
Concrete looks solid, but it's full of tiny capillary pores that pull in water like a sponge. Once water gets inside, it can do serious damage depending on your climate and what's landing on your patio surface.
In cold climates, the freeze-thaw cycle is the biggest threat. Water soaks into those pores, freezes, expands, and physically pushes the concrete apart from the inside. Over repeated cycles, you get surface scaling (a flaky, pitted look), microcracking, and eventually spalling, where chunks of the surface break away entirely. Deicing salts make this dramatically worse because salt solutions penetrate more aggressively and lower the freezing point in ways that create more damaging expansion pressure.
If you've noticed white chalky deposits on your patio surface, that's efflorescence: soluble salts being carried to the surface by that same capillary water movement and left behind when the water evaporates. It's cosmetic at first, but it signals that moisture is actively moving through your concrete.
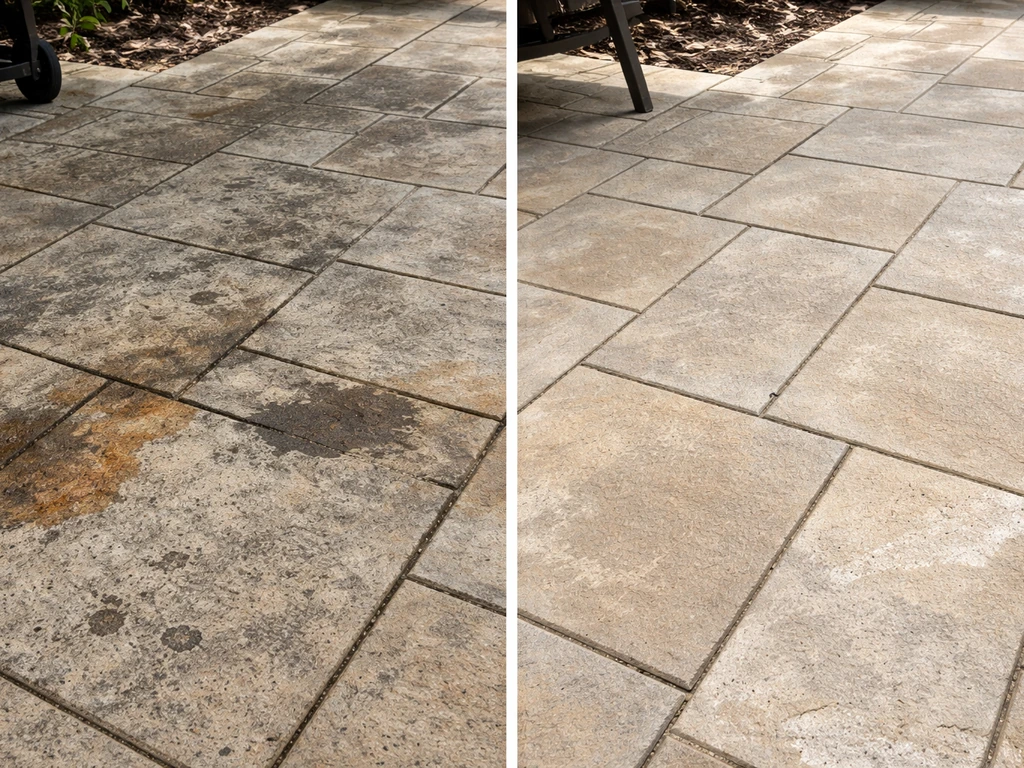
In warmer, wetter climates, the primary enemies are organic growth (mold, algae, moss), staining from grease and rust, and UV fading that makes an otherwise sound slab look tired and grey. Surface wear from foot traffic, furniture dragging, and pressure washing without protection gradually roughens the surface, giving stains and organic growth even more places to grab hold.
The common thread in all of these failure modes is moisture getting in. Seal off those pathways and you address almost every problem at once.
Clean the patio first, and do it right
You cannot skip this step. Sealing over dirt, mold, or stains locks them in and ruins adhesion. Whether your patio just needs a refresh or has visible staining and growth, cleaning comes before any protective treatment. Here's how to approach it depending on what you have available.
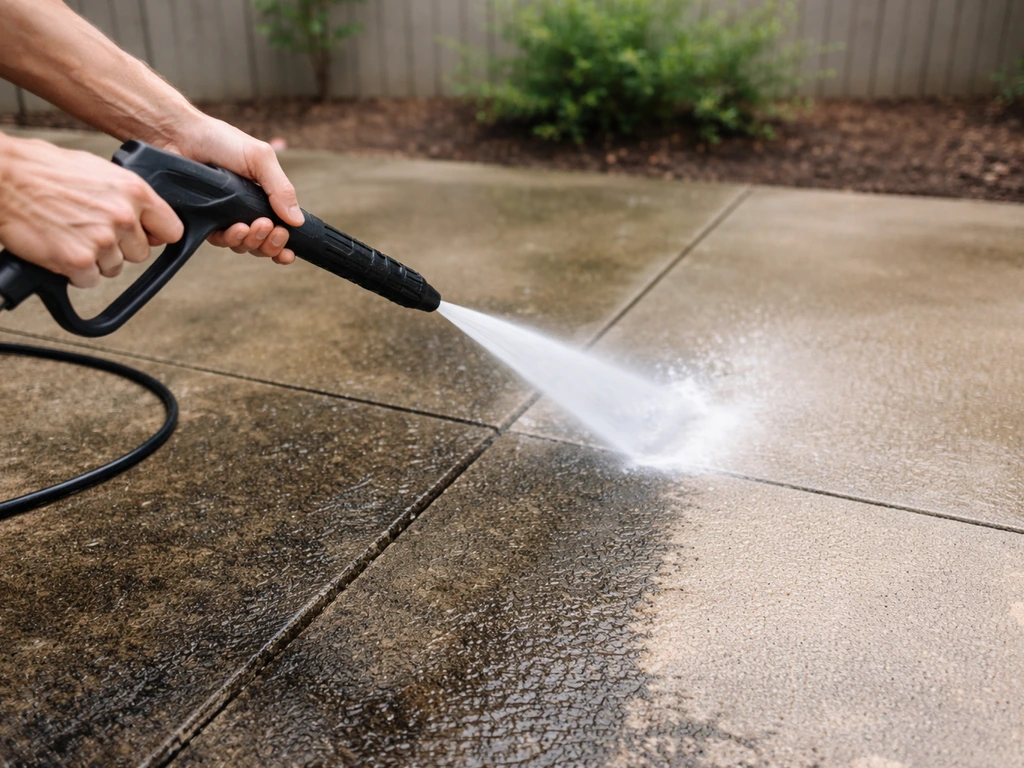
Pressure washing vs. hand scrubbing
If you have access to a pressure washer, use it. For a standard residential concrete patio, 2,500 to 3,000 PSI is the sweet spot: strong enough to blast out embedded dirt and lift surface grime without etching or damaging the concrete. Use a 25-degree fan tip and keep it moving. Holding the nozzle in one spot or getting too close (under 6 inches) can etch the surface and actually make staining worse over time. Work in overlapping passes and rinse toward a drainage point.
If you're renting and don't have a pressure washer, a stiff-bristled deck brush, a garden hose with a good spray nozzle, and the right cleaning solution will get the job done. It takes more elbow grease, but it works. Apply your cleaning solution, let it dwell for the recommended time, scrub in circular motions, and rinse thoroughly. I've cleaned plenty of patios this way and the results are completely comparable when you use the right chemistry for the stain type.
Stain and mold removal by type
Different stains need different approaches. Using the wrong cleaner wastes time and can sometimes make things worse. Here's what actually works on the most common concrete patio problems.
Mold, mildew, and algae
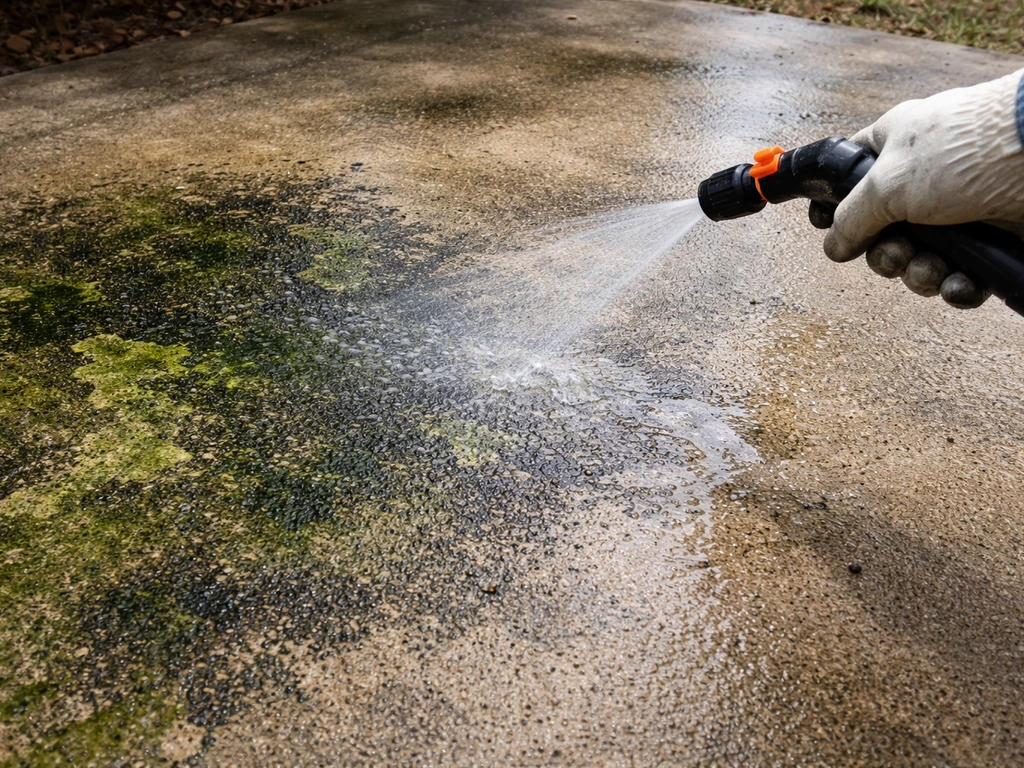
For mold, mildew, and green algae, sodium hypochlorite (plain household bleach) diluted with water is your most effective option. Mix one part bleach to three parts water, apply it to the affected area, and let it dwell for 10 to 15 minutes before scrubbing and rinsing. This kills the organic growth at the root so it doesn't just come right back.
If you have pets or prefer a gentler approach, undiluted white vinegar applied and left for 30 minutes works well on lighter growth, though it's less effective on heavy black mold or thick algae mats. Always wear rubber gloves and eye protection when working with bleach, and avoid using it on nearby plants without rinsing them first. The U. S.
EPA advises that bleach (sodium hypochlorite) should generally not be used as a routine practice for mold cleanup and should be used only according to specific biocide guidance avoid using it on nearby plants without rinsing them first.
Rust stains
Rust stains from metal furniture, tools, or rebar bleed-through are one of the harder stains to remove. Bleach won't touch them. What you need is an oxalic acid-based cleaner, which is sold as wood brightener or concrete rust remover at most hardware stores. Apply it to the stain, let it sit for 10 to 15 minutes, scrub with a stiff brush, and rinse well.
For very stubborn mineral deposits or heavy rust, a diluted muriatic acid solution (1 part acid to 10 parts water, always add acid to water, never the reverse) can dissolve what oxalic acid leaves behind. Muriatic acid is serious chemistry: wear chemical-resistant gloves, eye protection, and old clothes, work outdoors with good airflow, and neutralize the treated area with a baking soda and water rinse before the final rinse. I'd call this a last resort, not a first step.
Grease and oil drips
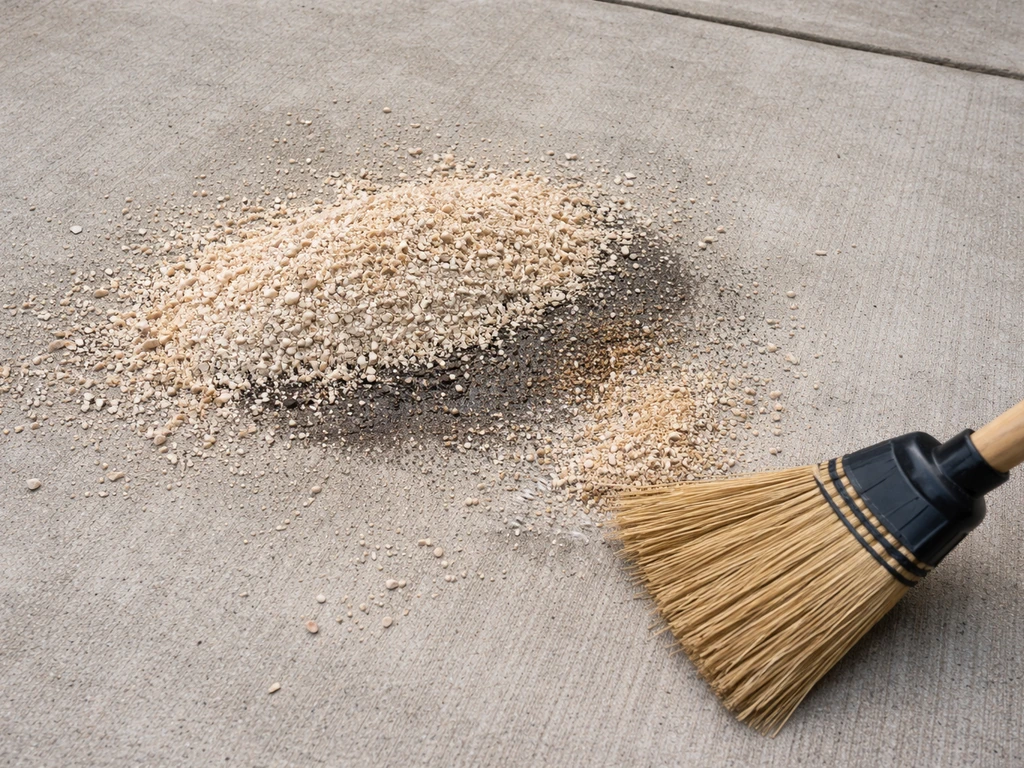
Fresh grease is much easier to deal with than old, set-in oil. For fresh spills, absorb as much as possible with cat litter or sawdust, let it sit for 30 minutes, sweep it up, then scrub with a degreasing dish soap or a commercial concrete degreaser and hot water. For older grease stains, you'll need a commercial degreaser specifically formulated for concrete: apply it, let it penetrate for 20 to 30 minutes, agitate with a stiff brush, and rinse with hot water. Repeat if needed. Pressure washing after degreasing dramatically improves results. Baking soda paste (mixed with water to a thick consistency) is a gentler option that works reasonably well on light grease and is safe around pets and plants.
What type of sealer or coating to use
Once the patio is clean, you have a few protection options. The right choice depends on your climate, what you want the patio to look like, and how much maintenance you're willing to do.
| Sealer Type | How It Works | Best For | Finish | Reapply Every |
|---|---|---|---|---|
| Penetrating silane/siloxane | Soaks into pores and chemically bonds to concrete to repel water from inside | Cold climates, freeze-thaw protection, natural look | Natural/invisible | 3 to 5 years |
| Acrylic topical sealer | Forms a thin film on the surface that repels water and stains | Warmer climates, UV protection, moderate traffic | Glossy or satin sheen | 1 to 3 years |
| Epoxy/polyurethane coating | Thick film-forming coating for heavy traffic and chemical resistance | Garage-style patios, high-use areas, stain resistance | High gloss | 3 to 5 years (but prep-intensive) |
| Water repellent (silicone) | Penetrating treatment that beads water off the surface | Light protection, older concrete, budget option | Natural/invisible | 1 to 2 years |
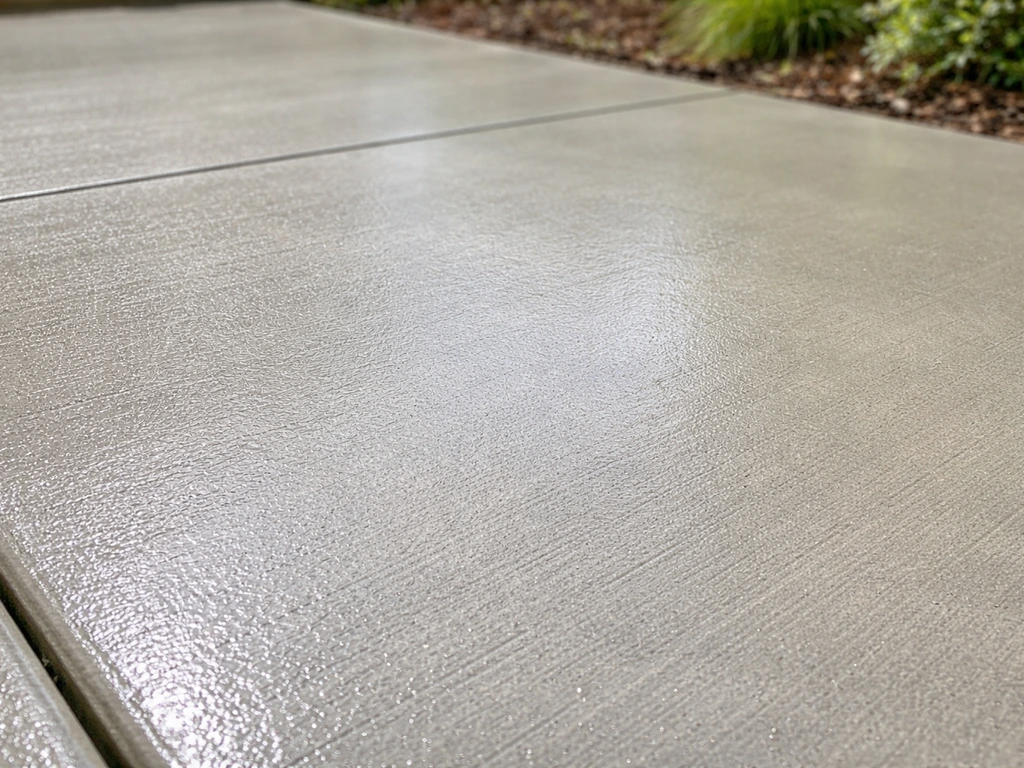
My recommendation for most homeowners in four-season climates: go with a penetrating silane/siloxane sealer. The NAHB explains that silane/siloxane water repellents work as penetrating-type treatments that react in concrete to form a hydrophobic resin within pores, reducing water absorption Silane and Siloxane Water Repellents for Concrete and Masonry. It doesn't change the look of the concrete, it won't peel or trap moisture (a real risk with film-forming coatings if applied to damp concrete), and it provides genuine protection against the freeze-thaw damage that causes spalling. In warmer climates where UV fading and staining are bigger concerns than freeze-thaw, a quality acrylic sealer gives you good protection and a polished appearance without the intensive prep that epoxy requires.
How to prep concrete before sealing
Prep is where most DIY sealing jobs go wrong. Rushing this stage leads to peeling, bubbling, or a sealer that just doesn't bond properly.
Repair cracks first
Surface cracks wider than a hairline (roughly 1/8 inch or more) should be filled before you seal. Use a polyurethane or epoxy concrete crack filler, not regular caulk, which won't bond well to concrete long-term. For narrow cracks, a concrete crack injection kit or self-leveling sealant works well. Press filler in flush with the surface, let it cure according to the product instructions, and lightly sand if needed so you have a smooth surface for the sealer to cover evenly.
Dry time and the water bead test
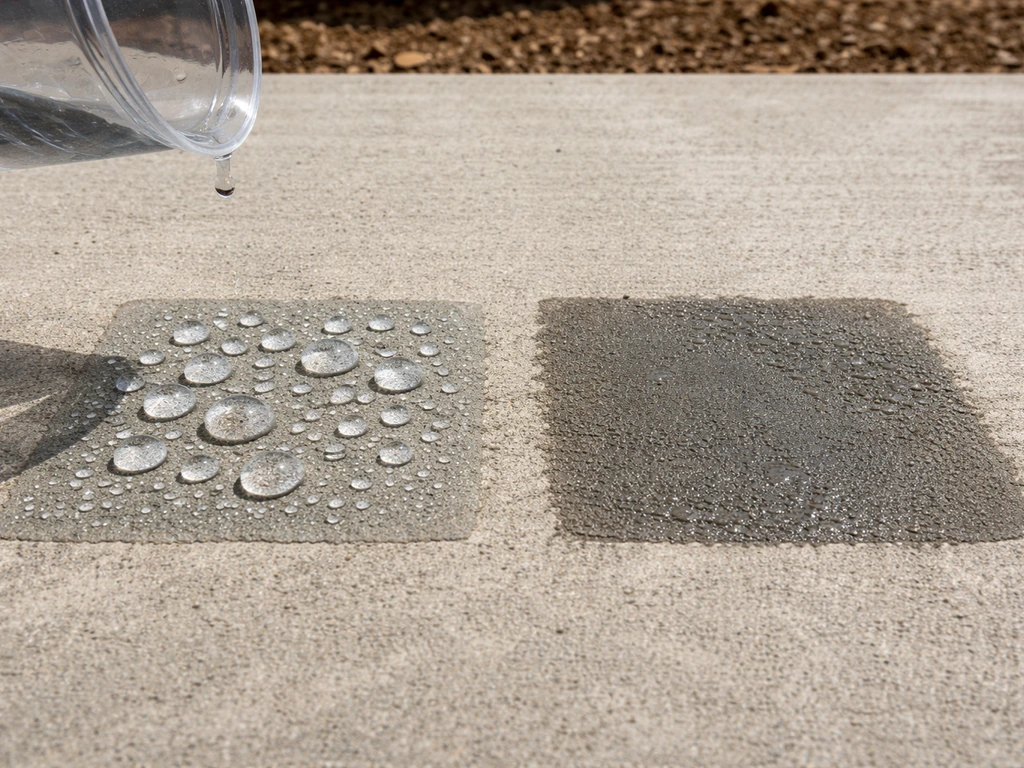
Concrete must be completely dry before you apply any sealer, especially a film-forming type. After cleaning, give it at least 24 to 48 hours of dry weather. In humid conditions, 72 hours is safer. To check if it's ready, pour a small amount of water on the surface: if it beads up, there's already a sealer or residue present that needs to be stripped or etched before you apply a new coat. If the water soaks in quickly, the concrete is clean and open, which is exactly what you want. If it soaks in slowly or unevenly, give it more drying time.
Surface profiling (optional but helpful)
If you're applying an acrylic or film-forming sealer to a very smooth, dense concrete surface, lightly etching it with a diluted muriatic acid solution (same 1:10 ratio mentioned for rust stains) or a commercial concrete etcher gives the sealer more surface texture to grip. This step is optional for penetrating sealers since they soak in rather than film over, but it genuinely helps with topical coatings. Rinse thoroughly and let dry completely after any etching.
How to apply sealer without streaks or peeling
Application technique matters as much as the product you choose. Here's the process that gives the most consistent results.
- Check the weather forecast before you start. You want temperatures between 50°F and 90°F, no rain expected for at least 24 hours, and low humidity if possible. Applying sealer in direct hot sun can cause it to dry too fast and leave lap marks.
- Pour sealer into a paint tray or pump sprayer. For large patios, a pump garden sprayer speeds up application considerably. For smaller areas or tight spots, a 3/8-inch nap paint roller works well.
- Apply the first coat in thin, even passes. Thin is key — thick applications trap solvents, cause bubbling, and peel. For penetrating sealers, one coat is often enough; for topical acrylic sealers, two thin coats outperform one thick coat every time.
- Work in 3- to 4-foot sections and maintain a wet edge to avoid lap lines. Start at one end and work toward an exit point so you're never stepping on wet sealer.
- If applying a second coat, wait for the first coat to become tacky but not fully cured — usually 2 to 4 hours depending on the product and conditions. Apply the second coat perpendicular to the first to ensure even coverage.
- Stay off the sealed surface for at least 24 hours for foot traffic. Wait 72 hours before moving furniture back or driving over it (if it covers a driveway adjacent to the patio).
If you notice white haziness or milky spots after the sealer dries, that's usually moisture that got trapped. On a topical sealer, you can sometimes buff it out with a dry cloth if you catch it early; otherwise, you may need to strip that section and reapply. This is why dry concrete and the right temperature window matter so much.
Keeping it protected over time
Sealing is not a one-and-done fix. The long-term protection comes from combining the sealer with consistent, low-effort maintenance habits that prevent damage from accumulating in the first place.
Routine washing schedule
A quick rinse with a garden hose every few weeks keeps organic debris, dirt, and pollen from building up and staining the surface. A proper scrub-down or light pressure wash once or twice a year is enough for most patios. Don't skip the fall cleanup: leaves and organic matter left sitting over winter trap moisture and accelerate the mold and staining cycle.
Treating concrete dust issues from surface wear is part of this routine too, since fine concrete dust can signal surface degradation that needs attention before your next sealing cycle. To get rid of concrete dust on a patio, focus on correcting surface wear and then re-sealing once the surface is clean and fully dry how to get rid of concrete dust on patio.
Keep drainage working
Standing water is the fastest route to freeze-thaw damage. Make sure your patio has a slight slope (at least 1/8 inch per foot) directing water away from the house. Keep drains, gutters, and downspouts clear so water isn't pooling on or near the surface. If you notice water sitting in the same spot repeatedly, that's worth addressing before resealing, sometimes a small amount of self-leveling concrete overlay can correct a low spot.
Reapplication schedule
Use the water bead test to check sealer performance every year. Pour a cup of water on the surface: if it beads up readily, the sealer is still working. If it soaks in within a few seconds, it's time to reapply. As a general guide, penetrating silane/siloxane sealers typically last 3 to 5 years, acrylic topical sealers need reapplication every 1 to 3 years depending on traffic and sun exposure, and silicone water repellents are the shortest-lived at 1 to 2 years. High-traffic areas and patios in harsh freeze-thaw climates will trend toward the shorter end of those ranges.
Small habits that make a big difference
- Put rubber or felt feet on metal furniture to prevent rust transfer and surface scratching.
- Avoid using rock salt or harsh deicers directly on the patio in winter; use sand for traction instead, or a concrete-safe deicer like calcium magnesium acetate.
- Sweep or blow off debris after storms rather than letting it sit.
- Address new cracks or spalling patches promptly — small repairs now prevent larger ones later.
- If you use a grill on the patio, lay down a grill mat to catch grease drips before they penetrate the concrete.
The whole system works together: clean the patio properly, remove existing stains by type, seal with the right product applied correctly, and stay on top of basic maintenance. If you want a step-by-step routine, follow this guide for how to maintain patio surfaces year-round. Do that and your concrete patio will hold up for decades. The readers who get into trouble are almost always the ones who either skip the cleaning step, apply sealer to damp or dirty concrete, or wait until there's visible damage before thinking about protection. Start now and you're ahead of the problem.
FAQ
Can I seal my concrete patio if it still feels slightly damp after cleaning?
No, especially for penetrating sealers. If the concrete is still damp below the surface, the sealer may not soak in evenly, and film-forming products can trap moisture and increase peeling or hazy spots. Use the water bead test and also allow extra drying time (often 72 hours in humid conditions) before sealing again.
How can I tell if I should strip an old sealer before applying a new one?
If water beads uniformly, that usually means the existing sealer is still present, but you should not just apply another coat. The risk is poor bonding or trapped moisture. Strip/etch the surface first, then clean and reseal so the new product can penetrate or adhere properly.
What should I use to fill cracks before sealing, regular caulk or a concrete filler?
Not ideally. Regular caulk does not have the strength or bond designed for concrete movement, so it often pops loose around freeze-thaw expansion. For cracks wider than hairline size (about 1/8 inch or more), use a polyurethane or epoxy concrete crack filler that cures hard and stays flexible enough for typical patio movement.
Is it okay to seal over dark spots or light mildew to avoid extra cleaning?
Stains and mildew must be removed first, because sealing over them locks in the contamination and can prevent the sealer from bonding to clean pores. Even if the stain “looks” minor, treat the cause (organic growth, rust, grease) with the correct cleaner, rinse thoroughly, and let the concrete dry fully before any sealer goes on.
Will pressure washing help or hurt if I’m planning to seal soon?
Yes, but it depends on what you already have. Acrylic topical and other film-forming sealers can be damaged by aggressive pressure washing if you hold the nozzle too close, and they can spread residue you did not fully rinse. For prep, stay with moderate distance, use overlapping passes, and do a final thorough rinse so no cleaner residue remains.
What should I do if water still pools on my patio after sealing?
Start by checking if the patio is sloped correctly and whether downspouts or roof runoff are directed onto the slab. Standing water usually means a drainage problem, not just a sealer failure. If the same spot stays wet, address grading or use a small self-leveling overlay before resealing.
Do I need to etch my concrete before sealing to get better adhesion?
Plan for higher effort on very smooth or dense surfaces. If you are applying an acrylic or another topical sealer, a light etch or commercial concrete etcher can improve grip. For penetrating silane/siloxane, etching is typically unnecessary, but you should still remove residue and confirm the concrete is clean and dry.
Why do some sealed patios turn hazy or milky after drying?
Yes, test first in a hidden area. Some concrete cleaners and salts (especially after rust or heavy staining treatment) can leave residues that cause bubbling, haziness, or uneven curing of the sealer. After cleaning, rinse thoroughly, let dry, and run the water bead test. If water beads when you expect it to soak in, you likely need stripping/etching.
Which sealer is best for freeze-thaw protection, penetrating silane/siloxane or acrylic?
If you’re trying to prevent freeze-thaw damage, choose penetrating silane/siloxane rather than a short-lived silicone repellent or a heavy film. The deeper pore-level water blocking is what reduces expansion stress that leads to scaling and spalling. For high-UV, warm climates, an acrylic topical may be more about appearance and stain resistance, but it requires careful prep.
What does concrete dust on the patio mean, should I just reseal?
Concrete dust is often a warning sign that the surface is wearing and the top layer may be degrading. Resealing might temporarily improve appearance, but it will not correct ongoing surface wear. Correct the wear, clean thoroughly, and then seal only after the surface is sound and fully dry.
Next Articles
How to Maintain a Patio: Clean, Seal, and Prevent Stains
Identify patio material, remove mold rust grease stains, deep clean, and choose the right seal to prevent future damage.
How to Maintain a Concrete Patio: Clean, Seal, Protect
Step-by-step how to maintain concrete patio: clean stains, avoid damage, seal correctly, and follow seasonal care checkl
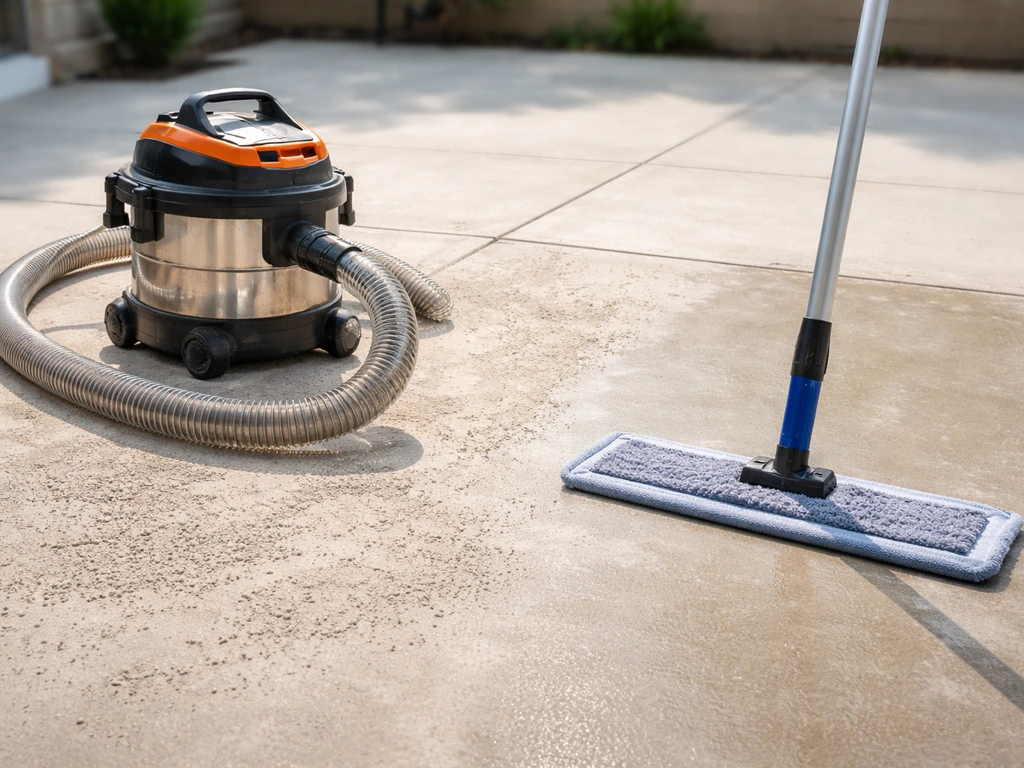
How to Get Rid of Concrete Dust on a Patio Safely
Step-by-step safe cleanup for concrete dust on patios: vacuuming, mopping, deep cleaning, and acid-safe material tips.