The most effective way to keep a patio under a deck dry is to tackle the problem in three stages: find exactly where the water is coming from, fix or redirect it, then clean up the damage it left behind. If you are trying to keep patio dry, this same approach of tracking the source, fixing or redirecting it, and then cleaning up what’s left is the best place to start. Most people skip the first step and wonder why their quick fixes never stick. Water under a deck almost always comes from one of five sources, and each one needs a different solution. Once you know your source, the fixes are very doable, even on a weekend.
How to Keep Patio Under Deck Dry: Fix Moisture Fast

Dylan Hale
4 Jul 2026
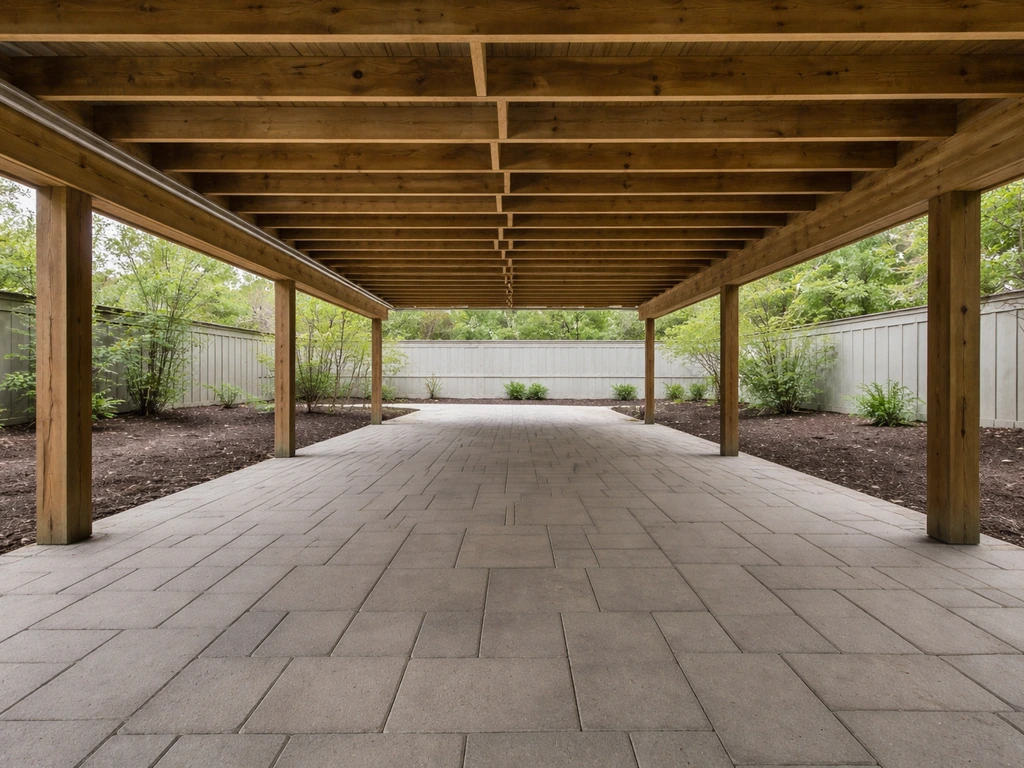
Diagnose why water is getting under the deck
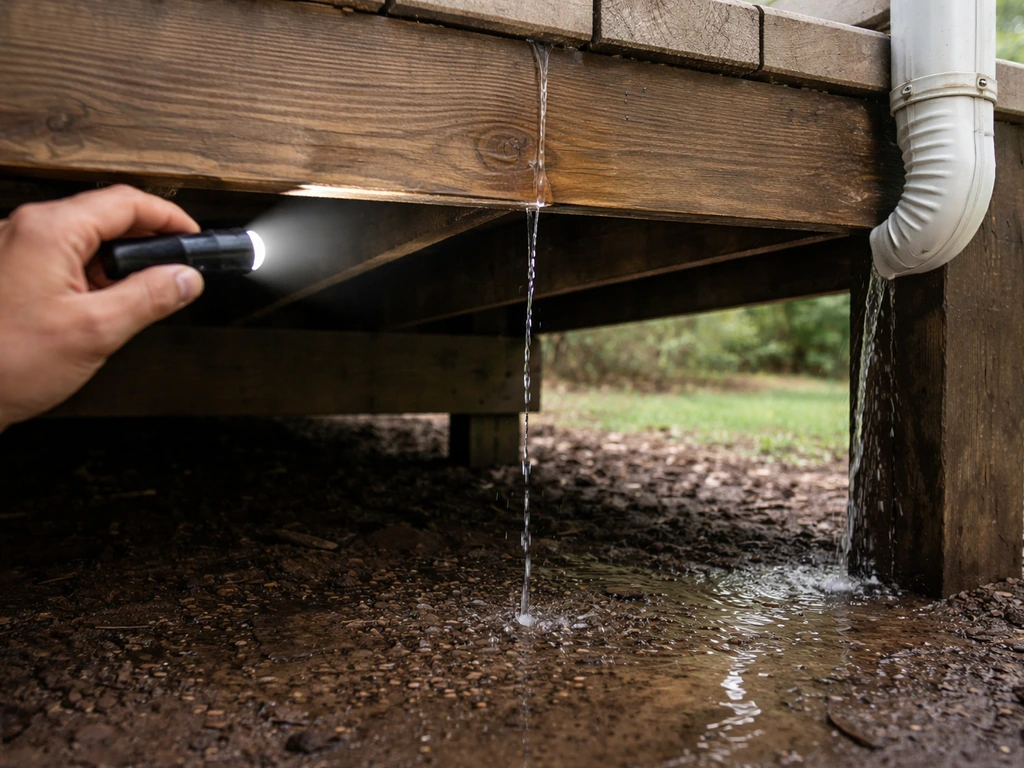
Before you buy a single product or start digging, spend 15 minutes figuring out where the water actually comes from. I've seen homeowners install drainage systems only to find the real problem was a clogged gutter overhead. Walk out during or right after a heavy rain if you can, it will show you things a dry inspection misses completely.
Here are the six most common culprits, and how to spot each one:
- Deck board gaps: Rain falls straight through the gaps between decking boards and lands directly on the patio surface below. Look up at the deck during rain and you'll see the curtain of water coming through.
- Gutter and downspout overflow: A clogged or undersized gutter dumps water over the edge of the deck or splashes it against the house, where it runs down to the patio. Check for watermarks and algae streaks on fascia boards.
- Poor grading around the patio: If the ground slopes toward the house instead of away from it, runoff from rain and lawn irrigation will pool under the deck. Use a long level or a line level to check the slope across a 10-foot run.
- Splash-back from the surrounding ground: Rain hits surrounding hardscape or soil and bounces upward onto the patio. You'll see a consistent wet band around the perimeter of the patio rather than uniform wetness.
- Capillary rise through the slab or pavers: Moisture wicks up from the soil beneath the patio surface itself. This shows up as general dampness with no obvious overhead source, often worse in shaded areas.
- Leaks around deck posts and ledger board: Water seeps in where the deck is attached to the house or pools around post bases that sit on the patio. Look for dark staining or soft wood at post bases and along the ledger.
Once you've identified your source (or sources, because there's often more than one), you can match your fix to the actual problem instead of guessing.
Quick fixes for standing water and leaks (today or this weekend)
These are the things you can do right now to stop the situation from getting worse. None of them require permits or special skills.
- Clear your gutters and check downspouts: Pull out leaves, shingle grit, and debris. Run a hose through the downspout to confirm it flows freely. A clogged gutter is the single most common reason patios under decks stay wet.
- Extend your downspouts: If a downspout terminates near the deck, add a plastic extender (about $5 at any hardware store) to push water at least 4 to 6 feet away from the structure.
- Sweep and clear debris off the patio: Wet leaves and dirt sitting on the patio hold moisture against the surface and accelerate mold and staining. Clear everything off.
- Move furniture and rugs: Anything sitting on a wet patio traps moisture underneath and creates perfect conditions for mold. Pull everything back until the surface has dried out.
- Seal obvious gaps around the ledger board and post bases: Use an exterior-grade polyurethane or silicone caulk rated for outdoor use. Run a bead along the ledger flashing and around any post base hardware sitting on the patio surface.
- Check and redirect any irrigation heads: A sprinkler aimed toward the deck or patio adds a surprising amount of water over time. Adjust heads to spray away from the structure.
- Create a temporary diversion channel: If you have standing water pooling in one spot, a simple shallow trench filled with gravel leading away from the patio gives water somewhere to go while you plan a longer-term fix.
These steps won't permanently solve a drainage or grading problem, but they will stop the bleeding and dry things out enough for you to assess what you're dealing with.
Build a dry-surface plan: drainage, grading, and ground barriers
Once the immediate water is gone, you need a real plan for keeping it gone. This is where you address the underlying issue rather than just managing symptoms. The three pillars are slope, drainage, and ground barriers.
Fix the grade first
The ground around your patio should slope away from the house at a minimum of 1 inch per 8 feet. If it doesn't, water will always find its way back. For a concrete or paver patio that's already installed, this might mean adding a gravel border or a channel drain at the low point to capture runoff before it sits. If you need a fresh patio surface, drying point a patio is a related technique to consider dry point a patio. For a dirt or mulched surround, you can regrade by adding soil on the house side to build up the slope. This is not glamorous work, but it's the most effective long-term fix.
Install a ground barrier under and around the patio
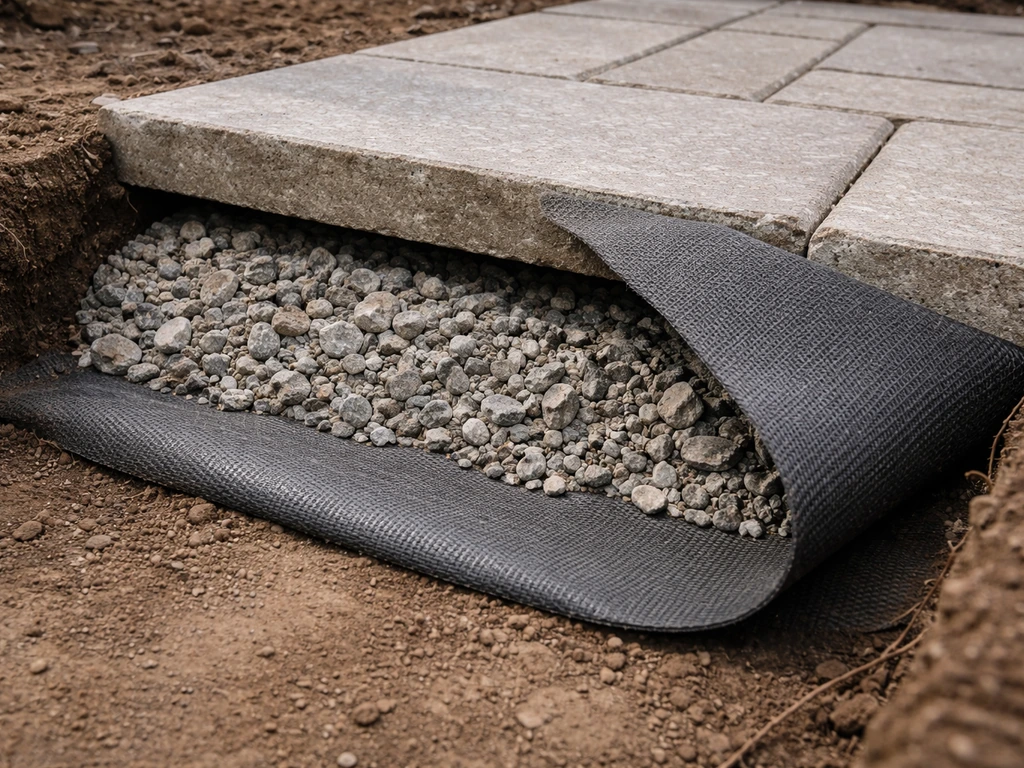
If capillary rise is part of your problem, a ground barrier makes a real difference. A layer of crushed gravel (3 to 4 inches deep) under the patio area, ideally with a geotextile fabric beneath it, breaks the capillary path from soil to slab. If you are still seeing standing water after adding this barrier layer, you can also review how to stop puddles on patio with drainage and grading tweaks to finish the job crushed gravel (3 to 4 inches deep) under the patio area. If you're not ripping out an existing patio, you can at least add a gravel border around the perimeter to reduce how much moisture wicks in from the edges.
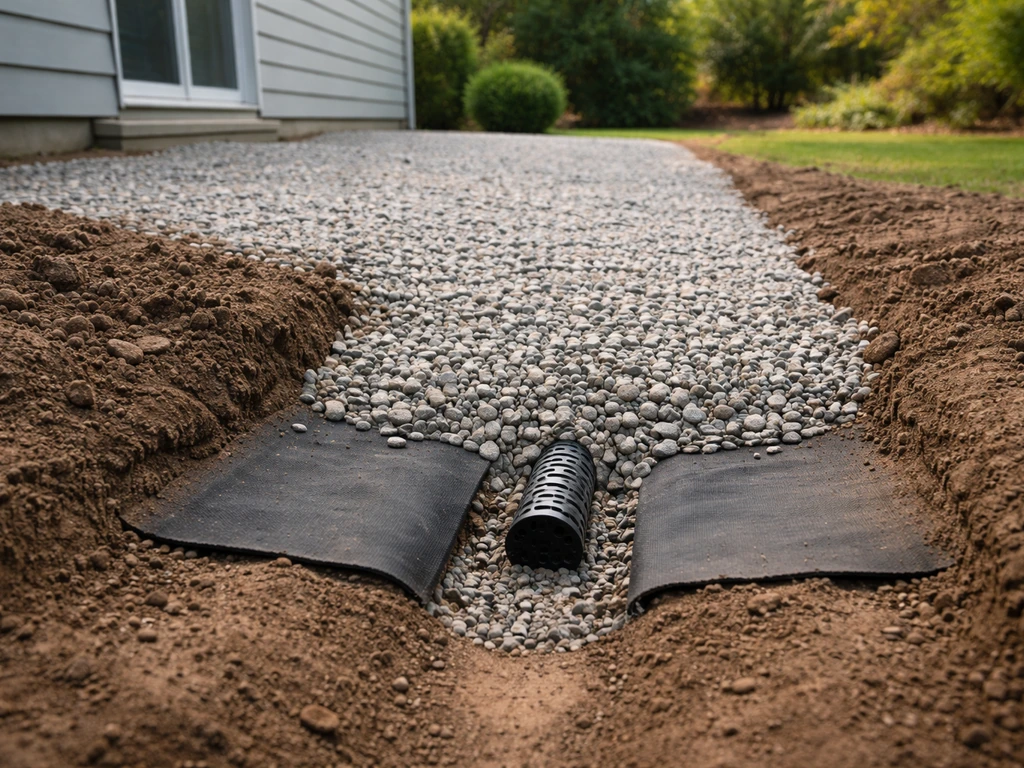
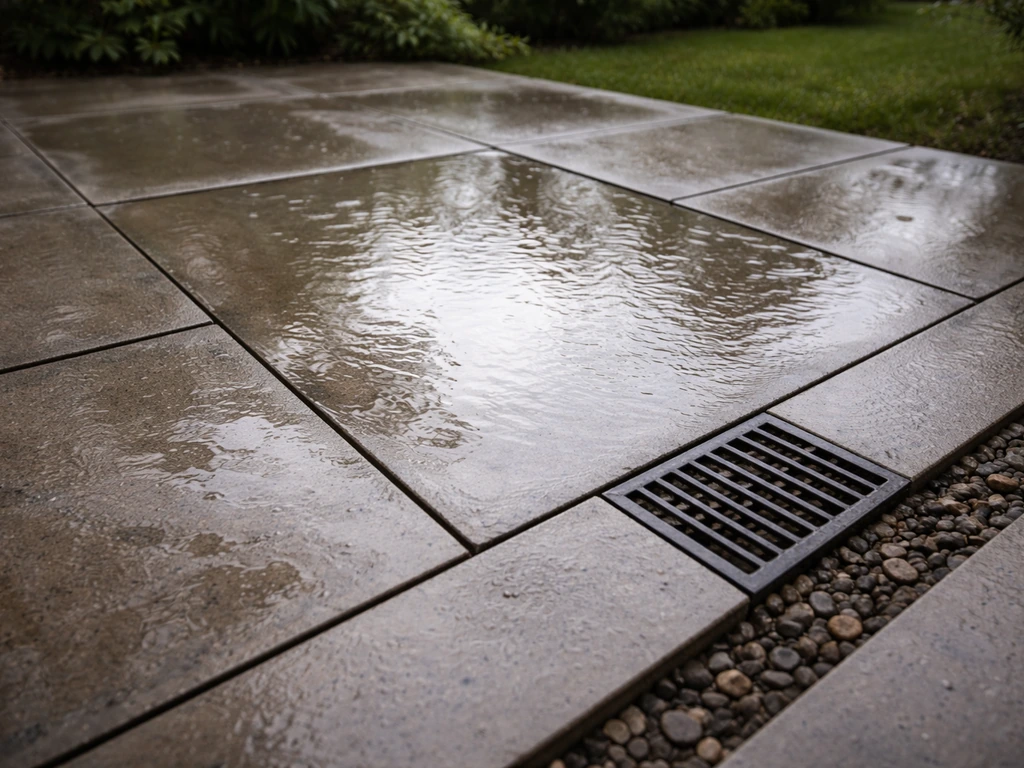
Add drainage where water collects
For patios that collect water from surrounding hardscape or turf, a French drain or channel drain installed at the low point of the patio routes water away before it can pool. Channel drains are easier to retrofit into an existing patio than a French drain because they sit at surface level. Run the outlet to a dry well or a point in the yard at least 10 feet from the house foundation.
Water management strategies for under-deck space
If the primary source of water is rain falling through the deck boards themselves, the best long-term answer is an under-deck drainage system. These systems catch water before it ever hits the patio below and channel it to the sides of the deck where it can drain away properly. Decks.com explains that an under-deck drainage system catches water before it hits the patio and routes it to the sides of the deck so it can drain away properly channel it to the sides of the deck where it can drain away properly.
Under-deck drainage systems work by installing a network of panels or trays between the deck joists, angled so water flows to a collection gutter at the edge. That gutter connects to a downspout that routes water away from the structure. Systems like ZipUP use a slope of roughly 1/6 inch per foot (about half an inch over every 3 feet) to keep water moving consistently without pooling in the panels. Trex RainEscape works on a similar principle, routing water into a gutter and then off the deck entirely.
I'd recommend this approach for anyone with a raised deck where the patio underneath is meant to be a usable, furnished space. It genuinely transforms a wet, unusable area into a dry one. The installation involves attaching the drainage panels to the joists from below and connecting the collection gutter to a downspout, which most confident DIYers can handle in a weekend.
A few other strategies worth considering alongside or instead of a full drainage system:
- Deck board sealing: Applying a water-repellent sealer to the deck boards above reduces how much rain actually penetrates through and splashes down. This is a complement to other fixes, not a standalone solution.
- Splash guards on deck stairs: Stairs are often overlooked but funnel a lot of water directly onto the patio. Adding a rubber or metal kick plate to each riser redirects flow.
- Post base waterproofing: Where deck posts sit directly on the patio surface, cap the post base hardware with sealant and consider post base covers to prevent water from sitting in the bracket.
- Landscape edging and gravel buffer: A 12-inch band of decorative gravel around the patio perimeter slows down splash-back from adjacent soil and gives water a path to absorb rather than run onto the patio.
Cleaning and maintenance after it's dry (mold, mildew, algae)
Once you've dealt with the water source, you'll likely have mold, mildew, algae, or dark staining left behind on the patio surface. Under-deck patios are particularly prone to this because they stay shaded and don't get the UV exposure that naturally slows biological growth. Here's how to clean it up properly.
Start with a dry sweep and rinse
Sweep off all loose debris first. Then rinse the surface with a garden hose to see what you're actually dealing with. What looks like heavy staining is sometimes just surface dirt that rinses off. What's left after the rinse is what you need to treat.
For mold and mildew
A diluted bleach solution of 1 part bleach to 10 parts water is highly effective on most hard patio surfaces. Apply it, let it dwell for 10 to 15 minutes, then scrub with a stiff-bristle brush and rinse thoroughly. This works well on concrete, brick, and most pavers. I've found this is the fastest option when you have a lot of coverage to deal with.
If you prefer a gentler route (better for pets and nearby plants), undiluted white vinegar or a 50/50 vinegar-water mix works on light to moderate mildew. Apply it, let it sit for 20 to 30 minutes, and scrub well. It takes longer and needs more elbow grease, but it's safe around garden beds and won't bleach surrounding materials.
For algae (the green or black slippery stuff)
Algae on shaded patios is extremely common and also a slip hazard. A sodium hypochlorite solution (same active ingredient as bleach, just at a higher concentration) at roughly 3 to 5 percent applied to the surface and left for 15 minutes before scrubbing will kill algae effectively. Rinse thoroughly afterward. You can also use a commercial outdoor algae cleaner, many of which are sodium hypochlorite-based but formulated to cling to vertical and angled surfaces better than plain bleach solution.
Pressure washing considerations
Pressure washing is fast and satisfying, but you need to match the pressure to the material. For concrete, 2,500 to 3,000 PSI with a 25-degree tip is fine. For pavers, brick, or softer stone, stay at 1,200 to 1,500 PSI and use a wider 40-degree tip. Never pressure wash travertine or soft sandstone at high pressure as it will erode the surface. Always work with the texture of the material, not against it, and keep the nozzle moving. For algae specifically, a chemical pre-treatment followed by lower-pressure rinsing works better than high pressure alone.
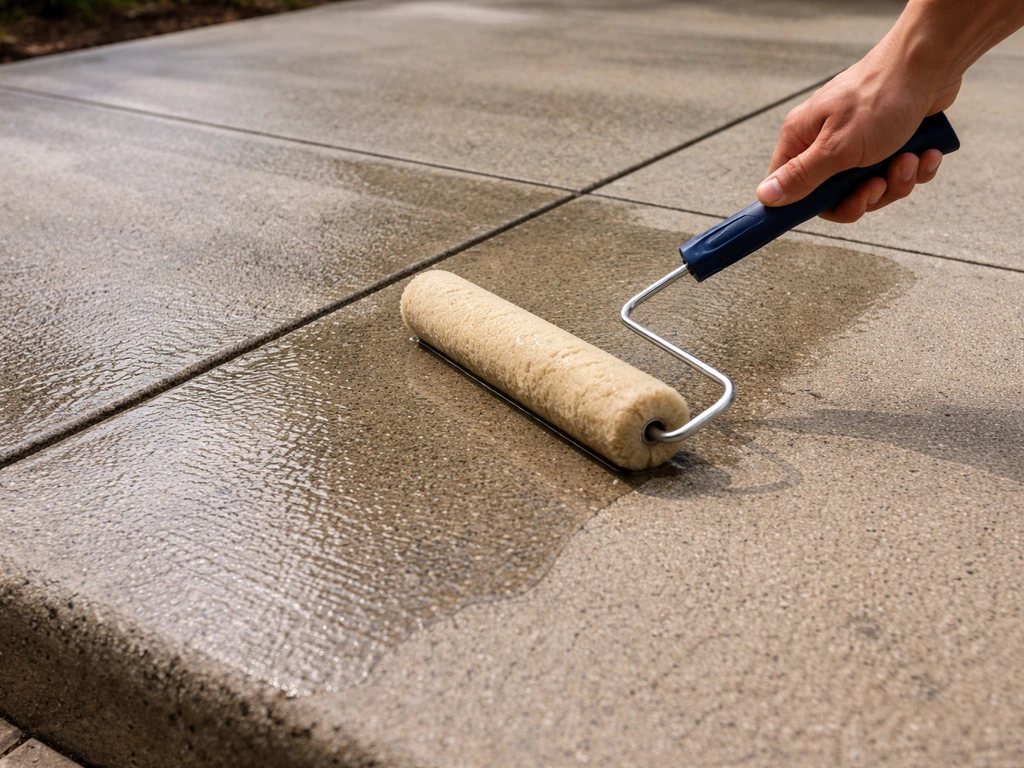
After cleaning: apply a sealer
Once the patio is fully clean and dry (give it 48 to 72 hours after cleaning), apply a penetrating water repellent sealer appropriate for your patio material. After you stop the water at the source, a good waterproofing approach like slope correction and surface sealer helps protect the patio long-term penetrating water repellent sealer. This significantly slows the return of mold and algae by reducing how much moisture the surface absorbs. Reapply every 2 to 3 years depending on the product and the level of shade.
Material-specific guidance (concrete, pavers, stone, brick, travertine, flagstone)
Not every cleaning method works on every patio surface. Using the wrong product can etch, discolor, or permanently damage stone and masonry. Here's what I've found works, and what to avoid, for each surface type common in under-deck patios.
| Material | Safe Cleaners | Max Pressure Wash PSI | Avoid |
|---|---|---|---|
| Concrete | Diluted bleach (1:10), sodium hypochlorite, degreaser | 2,500–3,000 PSI | Straight muriatic acid without dilution; long dwell times with acid |
| Brick | Diluted bleach (1:10), vinegar solution, mild detergent | 1,200–1,500 PSI | High-concentration acid; high pressure directly into mortar joints |
| Pavers (concrete or clay) | Diluted bleach, paver-specific cleaner, vinegar | 1,200–1,500 PSI | Muriatic acid on clay pavers; aggressive pressure that dislodges joint sand |
| Natural stone (granite, slate) | pH-neutral stone cleaner, mild dish soap, diluted vinegar | 1,000–1,200 PSI | Bleach (can discolor), muriatic acid (will etch) |
| Travertine | pH-neutral stone cleaner, mild soap only | 800–1,000 PSI maximum | Bleach, vinegar, any acid-based cleaner — all will etch and pit travertine |
| Flagstone | Mild soap, pH-neutral cleaner, diluted vinegar for non-limestone types | 1,000–1,200 PSI | Acid-based cleaners on limestone or sandstone flagstone; high-pressure on soft varieties |
Travertine and soft limestone flagstone deserve extra caution. Both are calcium carbonate-based, which means any acid, including vinegar, will etch the surface and dull the finish over time. If you have either of these materials and are dealing with mold or algae, stick strictly to a pH-neutral stone cleaner and a soft brush. It takes longer, but it won't damage something that's expensive to repair or replace.
For concrete specifically, if you have stubborn efflorescence (those white powdery deposits common under wet conditions), a carefully diluted muriatic acid solution (1 part acid to 10 to 12 parts water) applied briefly and rinsed off quickly can dissolve it. If your concrete patio is sweating, tackling the drainage and moisture source is key, because cleaning alone usually does not stop the condensation how to stop concrete patio from sweating. Wear gloves, eye protection, and old clothes. Don't let it dwell longer than 5 minutes, and neutralize the surface with a baking soda and water rinse before your final rinse. Never use muriatic acid on any natural stone, brick, or clay pavers.
Safer products and methods: bleach vs vinegar vs pressure washing, and what to avoid
People ask me all the time whether bleach or vinegar is better. The real answer is: it depends on the material and how serious the problem is. Here's a practical breakdown so you can make the right call for your situation.
| Method | Best For | Pros | Cons | Safe On |
|---|---|---|---|---|
| Diluted bleach (1:10) | Mold, mildew, algae on hard surfaces | Fast acting, widely available, inexpensive | Can bleach surrounding materials; harmful to plants if not rinsed; fumes in enclosed spaces | Concrete, brick, most pavers |
| White vinegar (undiluted or 50/50) | Light mildew, general cleaning, pet-safe situations | Non-toxic, safe near plants, no fumes | Slower, requires more scrubbing; not effective on heavy mold | Concrete, pavers, slate, granite (avoid on travertine/limestone) |
| Sodium hypochlorite (3–5%) | Heavy algae, large surface areas | More concentrated than household bleach; very effective | Stronger fumes; corrosive to metals; must be rinsed thoroughly | Concrete, brick, clay pavers |
| Pressure washing alone | Routine maintenance, light dirt, rinsing | No chemicals needed; fast for large areas | Doesn't kill biological growth, just moves it; can damage soft stone at high PSI | All materials at appropriate PSI |
| pH-neutral stone cleaner | Any natural stone, travertine, flagstone | Safe on all surfaces including sensitive stone | More expensive; may need multiple applications for heavy growth | All materials including travertine and limestone |
What to avoid: muriatic acid on anything except concrete and only when you have stubborn efflorescence and know what you're doing. It will permanently damage travertine, limestone, marble, and softer sandstone flagstone. Also avoid using undiluted bleach directly on pavers with polymeric sand joints because it can degrade the binder. And don't use a high-pressure zero-degree (red tip) nozzle on any patio material. That pencil-thin stream etches concrete, blasts mortar out of brick joints, and strips the surface off softer stone.
One more thing: if your patio is in a genuinely enclosed under-deck space with limited airflow, be careful with bleach and sodium hypochlorite. The fumes concentrate quickly in tight spaces. Open up as much ventilation as possible, and if the area is small, vinegar or a pH-neutral cleaner is a smarter choice from a safety standpoint, even if it's a bit slower.
Keep it dry long-term: a simple maintenance routine
Once you've fixed the water source and cleaned the surface, a consistent light-touch routine will stop you from ending up back at square one. This same kind of moisture-control routine is also how to stop condensation on a patio roof how to stop condensation on patio roof. The problems that make under-deck patios a constant battle are almost always a result of deferred maintenance on the simple stuff.
- Clean gutters twice a year (spring and fall) and after any major storm. Blocked gutters are the most common cause of under-deck wetness.
- Inspect the deck ledger board and post base seals every spring. Recaulk anywhere the sealant has cracked or separated.
- Sweep the patio monthly to remove debris that holds moisture against the surface.
- Check the drainage path after heavy rain. If water is pooling anywhere, clear the exit point before it becomes a recurring problem.
- Spot-treat any new mold or algae growth as soon as you see it. Small patches take 10 minutes to treat. Large ones take an afternoon.
- Reapply penetrating sealer every 2 to 3 years, or whenever water stops beading on the surface.
- If you have an under-deck drainage system, clear the collection gutter and check the downspout connection each spring before rainy season.
Keeping a patio under a deck dry is genuinely manageable once you've addressed the root causes. The combination of redirecting water at the source, maintaining proper drainage and grade, and following up with appropriate cleaning for your specific patio material will keep the space clean, dry, and usable year after year.
FAQ
How can I tell if the water is coming from the deck itself or from the yard around it?
After a heavy rain, look for a wet pattern that starts above the joists (usually deck-board leaks or trapped water) versus a pattern that matches runoff paths across the surrounding ground or hardscape (usually grading or a clogged downspout/drain). If the patio stays dry until the yard runoff arrives, focus on slope and channel collection points first.
What should I do if water is still pooling even after I add slope or a gravel channel?
Check for a clogged outlet path, not just the capture area. A channel drain or French drain can fail if the downstream outlet (dry well, daylight, or yard discharge) is blocked, overfilled, or too close to the foundation causing water to back up.
Can I solve an under-deck patio leak without removing the deck or patio surface?
Often yes. Retrofitting a surface-level channel drain at the low point or installing an under-deck drainage system from below can be less invasive than regrading. If the problem is capillary rise, a perimeter gravel border may help temporarily, but a true under-slab or under-patio barrier typically requires opening up the area.
How do I keep mold and algae from returning if the space stays shaded year-round?
Use cleaning plus a penetrating water repellent sealer once the patio is fully dry, then plan a recoat cycle (typically every 2 to 3 years). Also, remove debris and leaves quickly, since organic buildup holds moisture and accelerates biological growth even when bulk water is controlled.
Is it safe to use bleach or sodium hypochlorite near plants under a deck?
Be cautious, even with diluted mixes. Runoff can hit nearby beds and harm vegetation, so protect plants with plastic sheeting and rinse thoroughly after dwell time. If the area is very enclosed with limited ventilation, switch to a gentler pH-neutral or vinegar-based cleaner for safety.
Why does my patio still feel wet in the morning even when there are no obvious puddles?
That often indicates residual moisture, not pooling, such as vapor transfer, damp sub-base, or ongoing capillary rise through edges and joints. Fixes usually require ground barriers (crushed gravel with geotextile), improved perimeter drainage, and sealing after the surface fully dries, typically allowing 48 to 72 hours post-cleaning.
What’s the biggest mistake people make when they try to keep an under-deck patio dry?
They treat symptoms instead of identifying the active source. A clogged gutter above the deck or a deck-board leak that drains sideways can look like “ground water,” but the solution differs. Start with a rain-time inspection so you can match the fix to the actual water path.
Can I pressure wash to speed up drying, or will it worsen the problem?
Pressure washing can remove staining, but it can also drive water into joints, loosen mortar in masonry, and increase moisture behind the surface if you blast too hard. Use material-matched PSI and tip angles, and follow with proper drying time before sealing, rather than trying to force the patio dry immediately.
Will sealing alone keep an under-deck patio dry?
Sealer helps slow absorption, but it does not stop incoming water from leaks, runoff, or pooling. Use sealer only after you have corrected the source and drainage, otherwise trapped moisture can remain beneath the surface and still feed mold or staining.
How far from the house should my French drain outlet discharge?
Aim to route water at least 10 feet away from the foundation, so you do not send runoff back into the building perimeter. Also make sure the discharge destination can handle peak flow (avoid low, soggy spots where water will simply re-form puddles).
Next Articles
How to Stop Condensation on a Patio Roof Today
Stop metal patio roof condensation today with cause checks, ventilation and insulation fixes, and safe mold and rust cle

How to Waterproof Patio: Step-by-Step by Material
Step-by-step how to waterproof a patio by material, with cleaning, sealing choices, repair prep, and troubleshooting.
How to Fix Standing Water on a Patio: Step by Step
Diagnose and fix standing water on patios with step-by-step drainage checks, material-specific repairs, cleaning, and pr