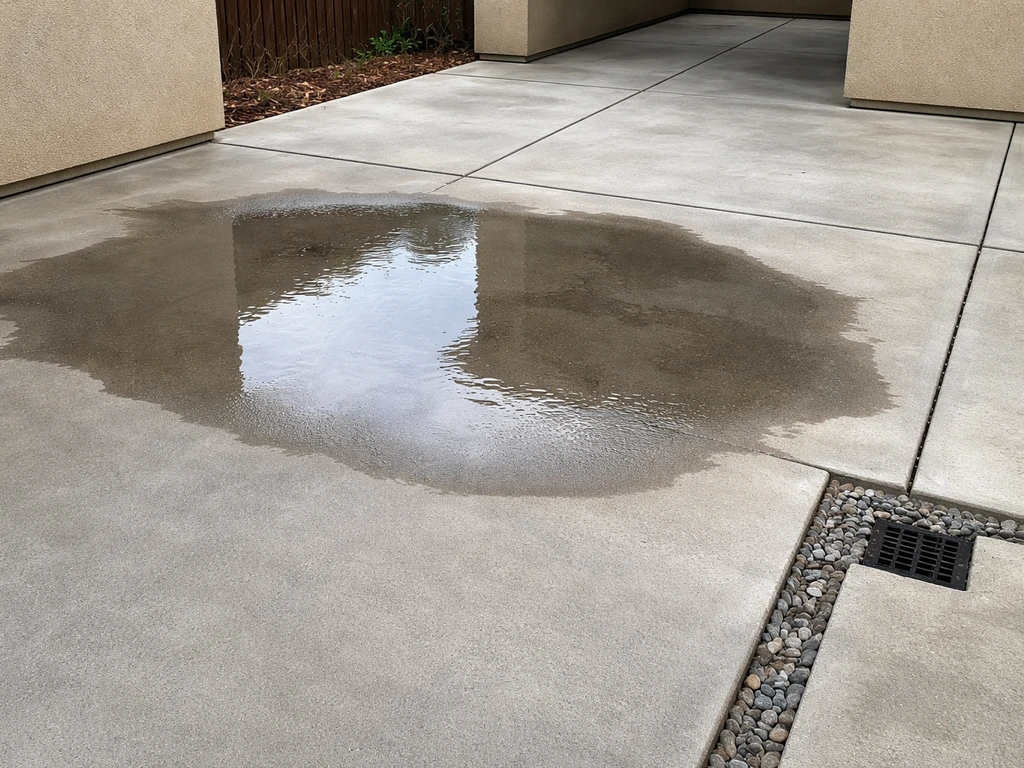
Water pooling on your patio almost always comes down to one of three things: the surface isn't sloped correctly, something is blocking the water's escape route, or the patio surface itself has deteriorated to the point where water sits instead of runs off. The good news is that most pooling problems have a fix you can start on today, whether that's clearing debris, unclogging a drain, or tackling a longer-term regrading project. Stopping puddles on a patio often starts with improving drainage so water can move off the surface quickly pooling problems.
How to Stop Water Pooling on Patio: Fix Drainage Fast

Dylan Hale
15 May 2026
Quick diagnosis: figure out where the water is coming from
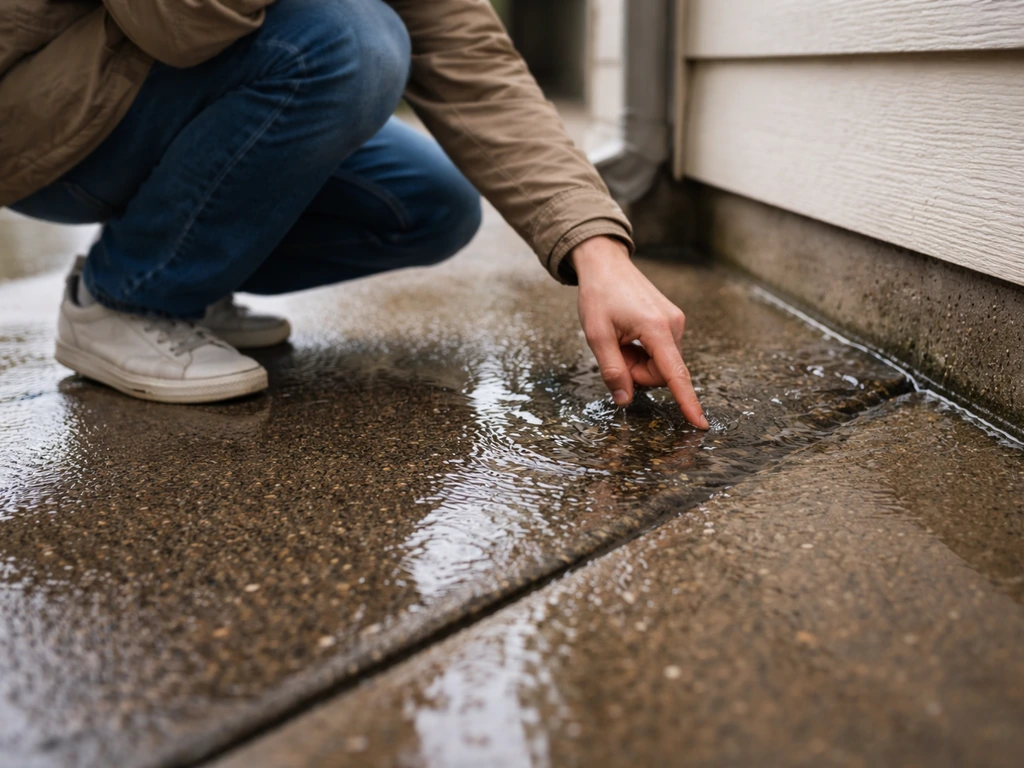
Before you do anything, spend five minutes watching where water actually collects after rain. This tells you almost everything you need to know. Is it pooling in one corner? That suggests the slab or pavers have settled unevenly. Is it spreading across the whole surface? The overall slope toward the yard is probably wrong. Does it pool right next to the house wall? That's a serious one and needs attention fast, because water that sits against your foundation causes far worse problems than a wet patio.
- Pool near the house wall: grade slopes toward the house instead of away; downspout is discharging too close to the slab
- Pool in one low spot: pavers, slabs, or flagstone have settled and created a depression
- Pool across the whole surface: overall slope is less than the recommended 1/4 inch per foot (about 2% grade) needed for runoff
- Pool at the edge of the patio: the runoff path into the yard or drain is blocked by debris, sand, or overgrown grass
- Pool only during heavy rain: channel drains or weep holes exist but can't handle the volume, usually because they're partially clogged
A simple way to check slope: put a level on the patio surface and measure how far off level it sits over a 4-foot span. You want the surface to fall at least 1/4 inch per foot away from the house. If it's flat or tilting toward the house, you've found your culprit. Also walk around and look at where your downspouts terminate. They should discharge at least 4 to 6 feet from the foundation, with 10 feet or more being ideal. A downspout emptying directly onto the patio edge or against the house wall explains a lot of pooling situations.
Fixes you can do right now
Some of the most effective pooling fixes cost nothing and take less than an hour. Start here before committing to any bigger project.
- Clear the patio surface of leaves, dirt, and debris. Even a thin layer of organic material across the joints or surface pores can slow drainage significantly.
- Check the edge of the patio where water should exit into the yard or garden. Overgrown grass, compacted soil buildup, or edging materials can create a small dam that stops water from leaving the patio. Clear it out.
- Look for weep holes along any retaining walls or raised borders around the patio. These small gaps are intentional drainage points. If they're packed with soil or debris, water has nowhere to go. Poke them clear with a thin stick or screwdriver.
- Redirect any downspouts that are discharging onto or directly adjacent to the patio. A simple flexible downspout extender (available for under $15 at any hardware store) can push water 4 to 6 feet further from the patio and house.
- Break up any standing puddles after rain and sweep the water toward the yard edge with a push broom. This won't fix the root cause, but it stops water from sitting long enough to cause algae, mold, or joint deterioration.
Clean the surface to restore drainage and stop algae from making it worse
Pooling water and poor drainage create the perfect conditions for algae, mold, and biofilm to take hold, and once they do, they make the problem worse. Algae and mold add a slippery, water-retaining layer over surface pores and joints, slowing drainage even further. Cleaning the patio isn't just cosmetic here, it's part of the fix.
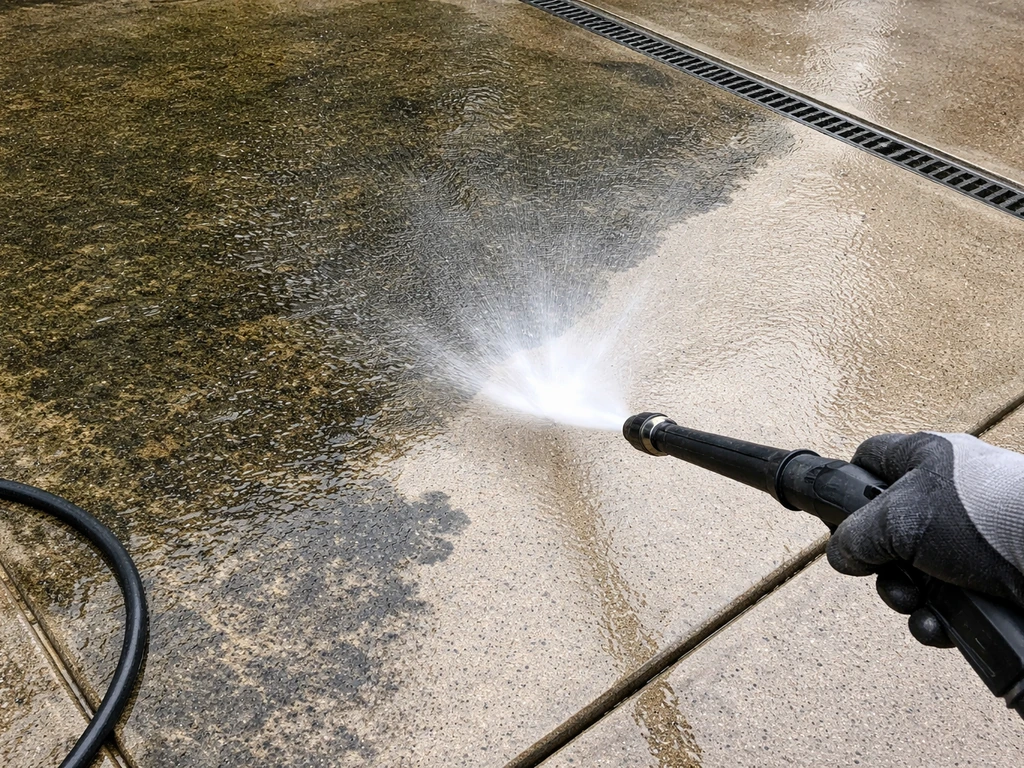
Pressure washing: fastest results
For most patio materials, a pressure washer set between 1,200 and 1,800 PSI does the job without causing damage. Use a 25-degree or 40-degree fan tip and keep the nozzle moving. For natural stone surfaces like travertine and flagstone, stay closer to 800 to 1,000 PSI and use wide fan angles. Pay special attention to joints between pavers or stones, which trap organic matter and slow drainage. Blast along the joint lines to clear them out.
Manual cleaning: for renters or those without a pressure washer
Mix 1 cup of white vinegar with 1 gallon of warm water and scrub with a stiff-bristled deck brush. This handles light algae and general grime on most materials and is safe around pets and plants. For heavier mold or algae growth on concrete or brick, a diluted sodium hypochlorite solution (roughly 1 part bleach to 10 parts water) works faster. Apply it, let it sit for 10 to 15 minutes, then scrub and rinse thoroughly. Do not use bleach or acidic cleaners on travertine or natural limestone, as they etch the surface. Muriatic acid should only be considered for severe efflorescence on concrete and only with proper safety gear (gloves, eye protection, good ventilation) and significant dilution. I'd exhaust every other option before going there.
One thing worth knowing: if you're seeing a white powdery residue on your concrete, grout, or pavers (called efflorescence), that's a sign water has been carrying soluble salts through the material to the surface. It's basically a visible record of persistent moisture moving through your patio. Fixing the drainage issue is what stops it from coming back, not just scrubbing it off.
What to do based on your patio material
Not every fix works on every material. Here's what to know for the most common patio surfaces.
| Material | Main pooling cause | Cleaning approach | Key caution |
|---|---|---|---|
| Concrete | Wrong slope, surface cracks, clogged pores | Pressure wash 1,200–1,800 PSI; diluted bleach for mold | Avoid film-forming sealers if moisture is trapped underneath; can cause delamination |
| Brick / Stone | Clogged mortar joints, settled sections, debris buildup | Pressure wash 1,200–1,500 PSI; stiff brush with diluted bleach | Avoid muriatic acid on softer brick; test a small area first |
| Pavers | Joint sand erosion, base settling, clogged joints | Pressure wash 1,200 PSI; replenish polymeric sand after cleaning | Wait 24 hours after rain before adding polymeric sand; wait 30+ days to seal |
| Travertine | Filled holes opening up, surface pitting, wrong slope | Gentle wash 800–1,000 PSI; pH-neutral cleaner only | Never use acid or bleach; etches and dulls the finish permanently |
| Flagstone | Uneven settling, wide joint gaps filling with debris | 800–1,000 PSI pressure wash; vinegar solution for light growth | Check individual stone stability before washing; loose stones can shift |
Pavers: joint sand matters more than you think
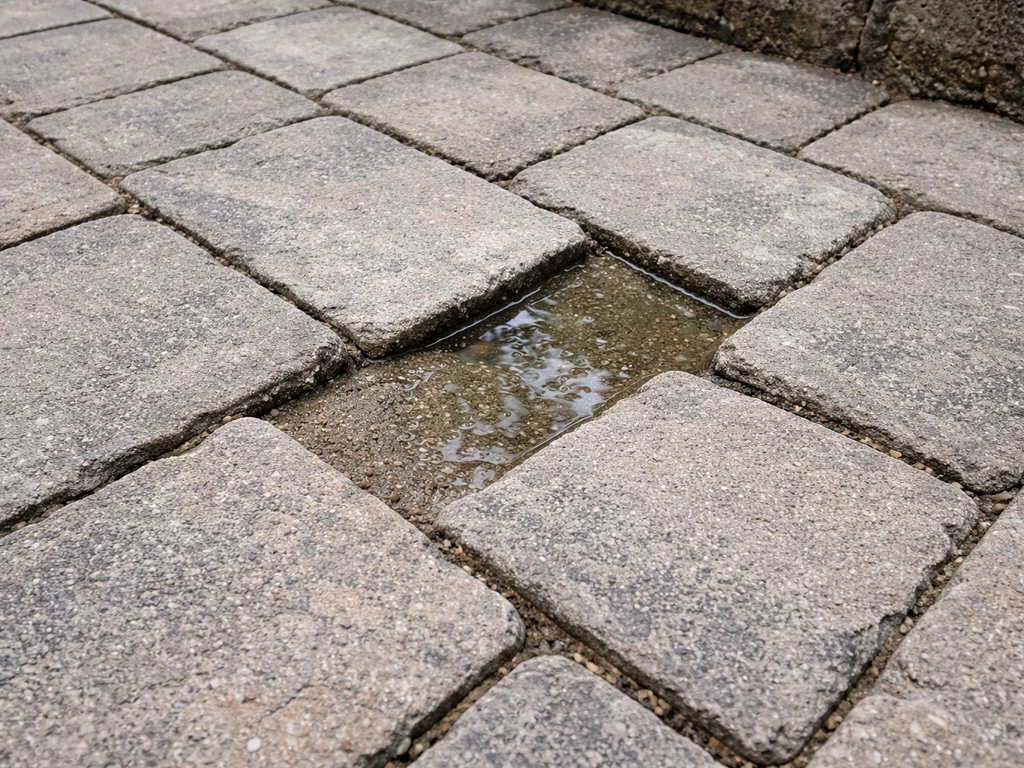
For paver patios specifically, eroded or missing joint sand is one of the most overlooked drainage problems. When the sand washes out, water has no stable path and joints collapse unevenly, creating small depressions that hold water. After cleaning, refill joints with polymeric sand, compact it in, and activate with a fine mist of water. Let it cure for at least 30 days before applying any sealer. Pressure washing helps restore drainage but don't wash joints out completely if the sand is still doing its job.
Long-term fixes: slope, settling, and surface corrections
If cleaning and clearing the drainage path doesn't solve the pooling, the surface itself needs correction. These fixes take more effort but they're what actually stop the problem permanently.
Regrading the patio area
The standard rule for outdoor paved surfaces is a slope of at least 1/4 inch per foot away from the house. FEMA-referenced building codes put this at a minimum 2% grade across the first 10 feet from the foundation. A 5% grade across that same 10-foot distance is even better and is recommended by soil and water conservation guidance. If your patio is sloping toward the house or sitting flat, the ground underneath needs to be regraded. For a concrete slab, this typically means either breaking up and repour sections, adding a concrete overlay with a corrective slope built in, or using a self-leveling compound for smaller depressions. For pavers and flagstone, you can lift individual sections, adjust the base material underneath, and relay the stones or pavers with the correct slope.
Fixing settled or sunken sections
Standing water in a specific spot almost always means that spot has sunk. For pavers, the fix is straightforward: lift the affected pavers, add or regrade the sand or gravel base underneath, compact it, and relay the pavers level with the surrounding surface. After you get your patio drainage under control, you can move on to how to dry point a patio for a longer-lasting finish. For concrete, slab jacking (pumping material underneath to raise a sunken section) is a professional fix worth calling someone in for if the settled area is large. If you suspect a larger section needs slab jacking, have the area inspected so you choose the right approach to lift the concrete and restore drainage. For small depressions in concrete, a vinyl concrete patcher or hydraulic cement can fill the low point and restore a drainage path. Left alone, sunken spots don't stay harmless. Water sitting in joints and under a slab breaks down the sub-base, causes more settling, and in freeze-thaw climates, cracks the surface from the inside out.
Drainage upgrades that make a real difference
Sometimes resloping isn't practical, especially on an established patio you don't want to tear up. Drainage additions are the next best move.
Channel drains (trench drains)
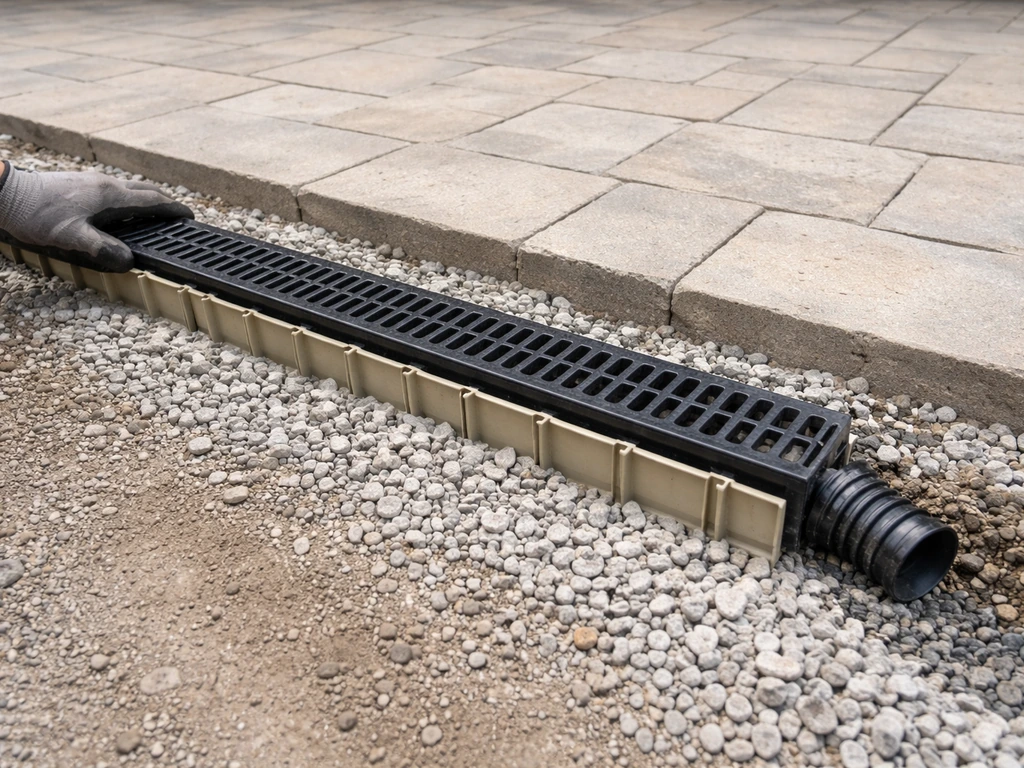
A channel drain installed across the width of the patio intercepts water before it pools and directs it away. Products like NDS Dura Slope trench drain sections come with a factory-molded slope built in (about 0.7%, or 0.34 inches of fall per 4-foot section), which makes installation simpler since the grade is already built into the product. Channel drains work especially well across patio doorways or at the low end of a sloped patio. They require cutting into the existing surface, which is manageable for pavers and flagstone but more involved for poured concrete slabs.
French drains
A French drain alongside or behind the patio intercepts groundwater and surface runoff before it reaches the patio surface. A typical French drain trench runs 6 to 8 inches wide and 18 to 24 inches deep, filled with gravel and a perforated pipe wrapped in geotextile filter fabric (the fabric stops soil from migrating into the drain and clogging it). The trench needs a consistent grade of about 0.5 to 1% (roughly 1/8 inch per foot) toward the outlet point. French drain installation costs roughly $10 to $35 per linear foot if you hire it out, with an average project running around $5,000, but a straightforward run alongside a patio is achievable as a DIY project on a weekend.
Downspout redirection
If a roof downspout is dumping water onto or near the patio, extending or redirecting it is one of the highest-impact, lowest-cost fixes available. Discharge should land at least 4 to 6 feet from the foundation, with 10 feet being the standard recommendation. Flexible extensions are cheap and easy to install yourself. If 10 feet of clearance isn't physically possible because of yard constraints, direct the discharge to a proper drainage path (a swale, a planted bed, or a drywell) rather than leaving it to run across the patio.
Permeable paving options
If you're rebuilding or expanding part of the patio, permeable pavers are worth considering. They allow water to pass through the surface into a gravel sub-base and then into the soil, eliminating surface runoff entirely in moderate rain events. The key maintenance requirement is keeping the pores clear: rake or blow leaves regularly and avoid letting fine sediment accumulate. Sand-blasting or high-pressure washing can remove debris from pores but should be done carefully to avoid displacing the gravel fill.
Troubleshooting checklist and when to bring in a pro
Use this checklist after you've made your fixes to confirm the pooling problem is actually solved, not just temporarily improved.
- After the next rainfall, walk the patio and check every previous pooling spot. Water should be moving or fully drained within 30 minutes of rain stopping.
- Check that water at the patio edge is exiting into the yard, not backing up. If it's still backing up, the exit path needs more clearing or regrading.
- Inspect joints and grout lines. Standing water in joints means they're still clogged or the slope between pavers isn't correcting outward. Re-clean and refill with polymeric sand if needed.
- Run a hose on the patio for 5 minutes and watch how the water moves. It should sheet consistently toward the yard edge, not meander or pool in low spots.
- Look for new efflorescence (white powder) appearing on concrete or grout lines after rain. If it's still showing up, moisture is still moving through the material, meaning the drainage fix hasn't fully resolved the moisture pathway.
- For travertine and flagstone: after drying, check for any new pitting or surface damage. If the surface is deteriorating, persistent moisture is getting under the stone and the sub-base needs attention.
- Confirm downspouts are discharging at least 4 to 6 feet from the patio edge and that the discharge point drains freely.
When to call a professional
Most pooling problems are genuinely DIY-fixable, but a few situations warrant calling someone in. If water is pooling against the foundation wall and you can't redirect it with downspout extensions or simple regrading, a professional drainage assessment is worth the cost, since foundation water intrusion is expensive to fix later. If a large section of concrete slab has sunk significantly, slab jacking or mudjacking requires professional equipment. And if you're seeing water coming up through the patio surface (rather than pooling on top after rain), that suggests hydrostatic pressure from a high water table, which is a different problem entirely and needs a professional drainage engineer to assess. For everything else described in this guide, including regrading small sections, relaying pavers, installing channel drains, and extending downspouts, a motivated DIYer can handle it without specialist help.
Solving pooling water is also a good moment to think about related issues: if condensation on a covered patio roof is adding to the surface water load, or if you're looking to keep the whole patio dry through multiple weather events, those problems have their own specific fixes worth addressing alongside the drainage work you're doing here. If you mean condensation and moisture forming on the surface, there are additional steps you can take to stop a concrete patio from sweating. If you have an under-deck area, the same drainage principles can help you keep the patio under your deck dry keep the whole patio dry. If you follow the steps above, you can keep patio water from collecting and help the drainage system work as intended keep the whole patio dry. For more help, see our guide on how to stop condensation on a patio roof before it leads to excess moisture condensation on a covered patio roof. If the goal is a truly waterproof patio, focus on combining proper drainage with surface sealing that matches your material.
FAQ
How can I tell if the pooling is caused by the slope or by a clogged drain line underneath?
After the rain, check whether water is coming to the surface in the same spot every time (often settling or a low point) or whether it disappears after a certain time (more consistent with an outlet getting clogged). If you can access nearby cleanouts or a drain inlets, look for debris and confirm water can flow out, not just sit on top.
Is it okay to seal the patio after I clean it, or should I wait?
Do not seal until you fix the drainage issue and the surface is fully dry. For pavers, wait at least 30 days after refilling and activating polymeric sand before sealing, because trapped moisture or uncured sand can lead to haze, poor bond, and re-pooling.
What’s the best way to avoid damaging joints when pressure washing?
Keep the nozzle moving and use a fan tip at the appropriate PSI for your material. If you have pavers with joint sand, avoid blasting directly into joints with high pressure, because you can wash sand out and recreate the same low spots that caused pooling in the first place.
Can I stop pooling by draining gutters only, or do I always need to correct patio slope?
Downspout redirects often fix pooling when runoff is a direct cause, especially if water lands near the patio edge or against the house. However, if the patio is flat or sloped toward the home, redirecting roof water may reduce the volume but puddles can still form, so you still may need regrading or a drainage addition.
How do I measure slope correctly if the patio has multiple sections or an uneven base?
Measure in short sections and compare, rather than assuming one reading represents the whole patio. Leveling across a 4-foot span is a good start, but inconsistent readings point to localized settlement where only a subset needs lifting or patching.
What should I do if water pools right next to the foundation after rain?
Treat it as a priority because foundation seepage can follow sitting water. Focus on redirecting downspouts away from the foundation, improving the immediate grade away from the wall, and clearing any obstructions at drainage outlets before doing cosmetic cleaning.
How long should I wait to see improvement after clearing debris or unclogging a drain?
For active blockages, you should see a noticeable change after the next rainfall and sometimes during the same event as standing water clears. If pooling persists on every storm in the same low spot, plan for surface or base correction rather than repeating cleaning.
Will adding a channel drain or French drain always solve pooling on its own?
It helps when the issue is water interception at a specific flow path. If the patio surface has multiple low points, you may need a combination approach, for example, resloping the surface to carry water toward the new drain location.
When installing a French drain, how do I make sure it won’t clog?
Use geotextile fabric around the pipe and keep the trench grade consistent toward an outlet. Poor outlet design, removing too much filter protection, or allowing fine soil to enter are common reasons French drains lose capacity and stop draining over time.
What does white powdery residue (efflorescence) mean, and does scrubbing remove the root cause?
Efflorescence indicates soluble salts are being carried to the surface through recurring moisture movement. Scrubbing can improve appearance, but it does not stop the ongoing moisture route, so the drainage fix is what prevents it from returning.
Can permeable pavers solve pooling if I already have a low spot?
Permeable pavers reduce surface runoff when rain can pass through the surface into the gravel sub-base. If the area is sunk enough to hold water due to settlement, you may still need to lift and relevel the section so water can reach the permeable pathways effectively.
What signs mean I should call a pro instead of DIY?
Call a professional if water is coming up from beneath the patio surface (not just pooling on top), if a large slab section has visibly sunk, or if the pooling is against the foundation and you cannot correct it with downspout redirection and localized regrading. These often involve equipment, permits, or hydrostatic pressure considerations.
Are there emergency steps I can take right after heavy rain to reduce damage?
Reduce time spent with standing water by using a wet/dry vac, moving planters and debris away from puddle edges, and clearing any visible leaves and silt from obvious inlets. Avoid acid or bleach treatment while water is actively pooling, because you may just drive more contamination into joints and pores.
Next Articles

How to Remove Thompson’s Patio Sealer Step by Step
Step-by-step removal of Thompson’s patio sealer on concrete, brick, pavers, and stone, with safety, tests, and cleanup.
Can You Remove Patio Sealer? How to Strip It Safely
Learn if you can remove patio sealer and how to strip it safely by type, material, and method.
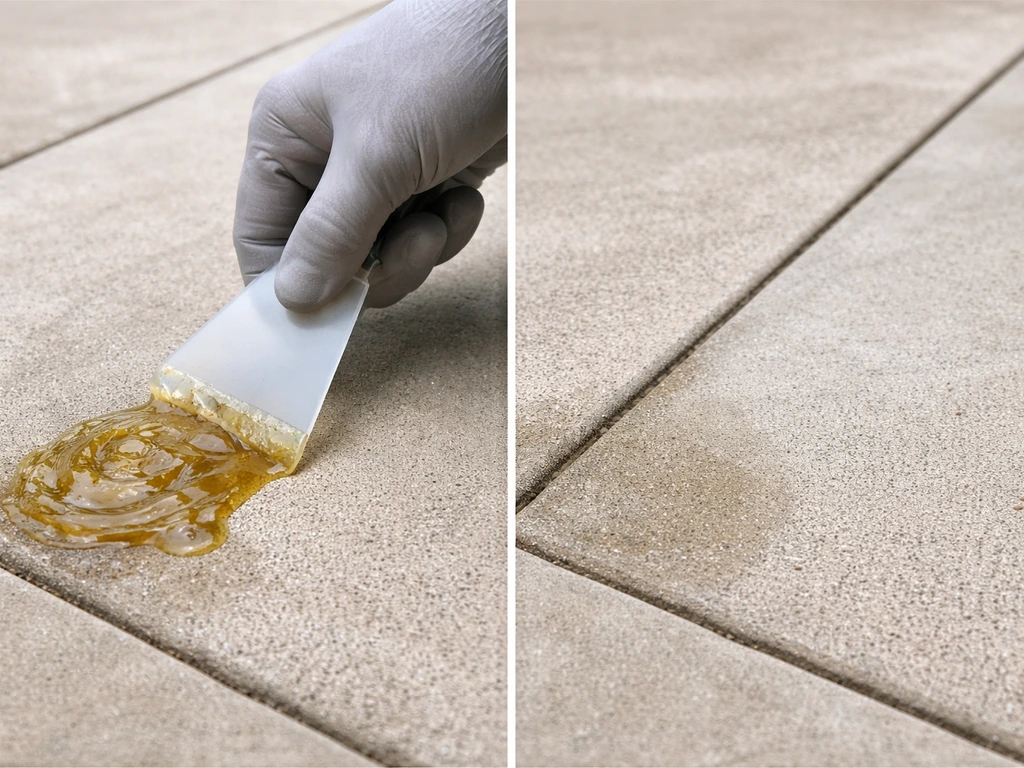
How to Remove Resin From Patio Safely by Surface Type
Step by step guide to remove resin from patio by surface type with safe scraping, softening and solvent methods.