
Candle wax on patio slabs comes off most reliably in two stages: first you remove the solid bulk using either freezing or gentle heat, then you tackle any oily or colored residue left behind with a solvent or poultice. The exact approach depends on your surface material and whether the wax has left a stain in the pores, but in most cases you won't need anything fancier than an ice pack, a plastic scraper, and a bottle of mineral spirits.
How to Get Candle Wax Off Patio Slabs: Step-by-Step Guide

Dylan Hale
25 Jul 2026
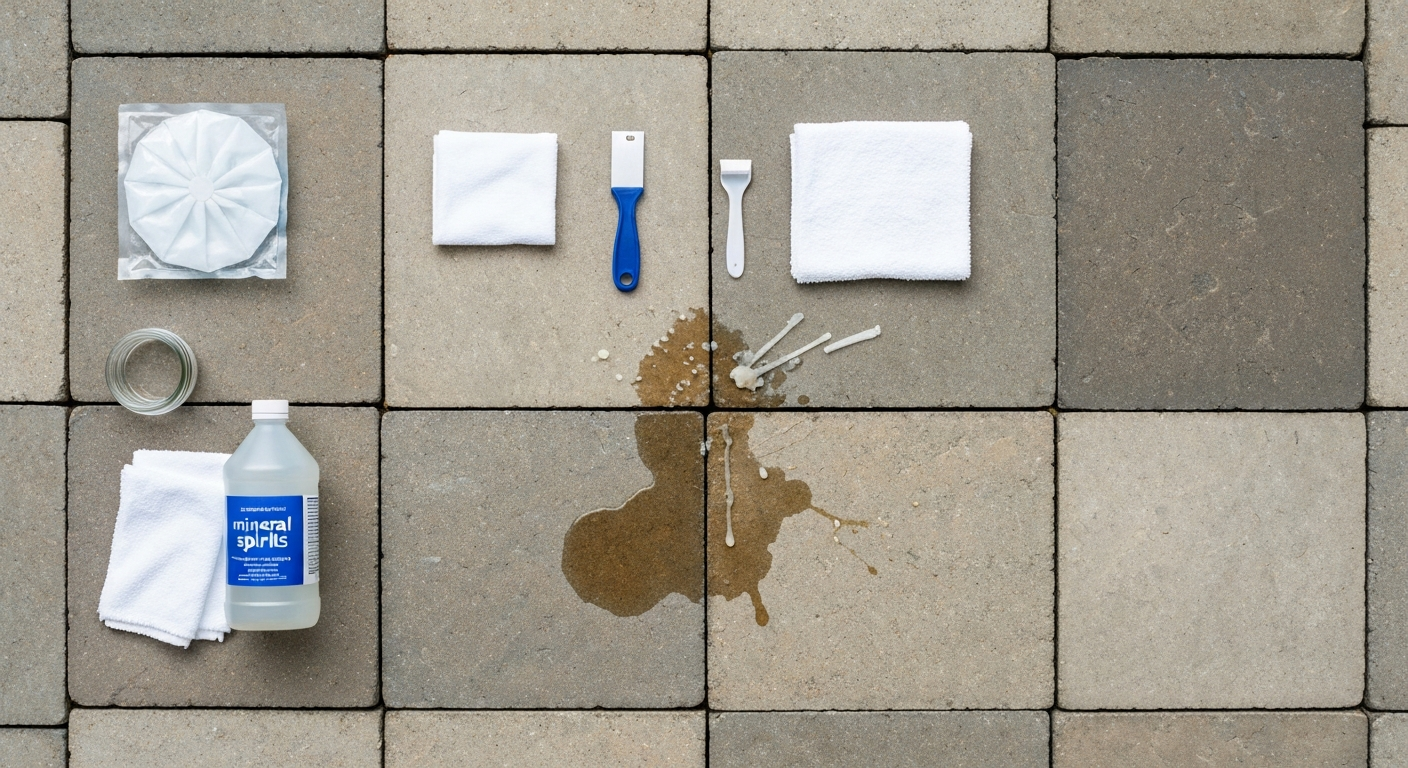
Choosing the right removal method for your surface
Not every method works on every surface, and picking the wrong one can scratch stone, strip sealer, or push wax deeper into porous material. The good news is the process follows a logical order: mechanical removal first (freeze-and-scrape or heat-and-absorb), solvent cleanup second, and a poultice only if a stain remains after those steps. The table below maps common patio surfaces to the methods that work best and the ones to avoid.
| Surface | Best primary method | Residue removal | Avoid |
|---|---|---|---|
| Concrete slabs | Freeze-and-scrape or heat-and-absorb | Mineral spirits, citrus cleaner, or isopropyl alcohol | Metal scrapers on polished or painted concrete |
| Clay brick pavers | Freeze-and-scrape | Mineral spirits or citrus cleaner; poultice for deep stains | Acetone on unsealed brick (can bleach) |
| Natural stone (flagstone, bluestone) | Freeze-and-scrape; heat only with low setting and test patch | Mineral spirits poultice; hydrogen peroxide for dye stains | High-pressure washing; metal scraping; acetone on polished stone |
| Travertine / limestone | Freeze-and-scrape; very gentle heat | Mineral spirits poultice; no acids | Citrus cleaners (acidic); vinegar; acetone; pressure above 500 psi |
| Slate | Freeze-and-scrape preferred; low heat with caution | Mineral spirits; isopropyl alcohol rinse | High heat; metal scrapers; abrasive pads |
| Concrete pavers / porcelain pavers | Freeze-and-scrape or heat-and-absorb | Citrus cleaner, mineral spirits, or isopropyl | Acid-based cleaners on porcelain |
If your situation involves a specific surface, the related guides on removing candle wax from concrete patios, patio pavers, and stone patios go deeper on material-specific edge cases. For step-by-step instructions specifically for stone surfaces, see the guide on how to remove candle wax from stone patio. For step-by-step instructions specific to brick or concrete pavers, see the guide on how to remove candle wax from patio pavers. See our guide on how to remove candle wax from a concrete patio for step-by-step, concrete-specific instructions. This article covers the full process from start to finish so you can handle any slab type. For a concise, step-by-step guide on general patio situations, see how to remove wax from patio.
How to identify your patio surface and sealer status
Before you touch the wax, spend two minutes figuring out what you're working with. The method that's safe on concrete can damage travertine, and a sealed surface needs different handling than a bare one.
Identifying the surface material
- Concrete slabs: uniform grey or tinted surface, often with a slightly rough or broom-finished texture, no visible grain or fossils.
- Concrete or clay pavers: individual units with visible joints, typically uniform in color per unit; clay pavers have a slightly rougher, earthier texture than concrete ones.
- Natural stone (flagstone, bluestone, slate): irregular shapes or visible layering/cleavage lines; surface texture varies across the same piece; often has a natural sheen or grain.
- Travertine or limestone: creamy/beige tones, often with small natural pits or holes (travertine); relatively soft and will etch if you drip acid on it.
- Porcelain pavers: very hard, uniform surface, almost glass-like; often mimics stone or wood grain but feels denser and does not absorb water.
Checking sealer status
Sprinkle a few drops of water on the surface away from the wax. If the water beads up, a sealer is almost certainly present. If it absorbs immediately and darkens the surface, you're dealing with bare, unsealed material. This matters because solvents and heat can damage topical (film-forming) sealers, and you'll want to test any solvent in an inconspicuous corner before applying it to the wax area. Impregnating or penetrating sealers are generally more solvent-tolerant, but always check the sealer manufacturer's technical data sheet if you have it. If you don't know what sealer was applied, treat the surface as if it has a film-forming sealer and be conservative.
Identifying the wax type and whether it has stained the surface
Plain white or unscented paraffin wax is the easiest to deal with. It leaves little more than a greasy residue once the bulk is removed. Colored, dyed, or heavily scented waxes are harder because the dye or oil additives can penetrate porous surfaces and leave a stain that persists even after the wax itself is gone. Citronella candles are a particularly common culprit on patios, and the citronella oil can behave like any other oil-based stain, soaking into concrete, brick, or stone over time.
- Plain paraffin or soy wax (white or cream): leaves a light greasy film; usually handled with one round of solvent after scraping.
- Colored or dyed wax (red, black, deep blue): the pigment or dye can act like an organic stain; you may need hydrogen peroxide (12%) or acetone in a poultice after mechanical removal.
- Scented or citronella wax: the fragrance oils or citronella oil create an oil-based stain; mineral spirits or an acetone poultice is the correct chemistry match.
- Old or heat-melted wax (pooled by sun or an accidental tip): the longer wax sits, especially in heat, the more deeply it penetrates; expect to run two to five poultice cycles on porous stone or concrete.
To tell whether the stain has penetrated the surface, scratch gently at the edge of the wax deposit with a fingernail. If the wax layer lifts cleanly and there's no discoloration underneath, you're dealing with surface wax only and scraping plus a light solvent wipe will likely be enough. If there's a dark, oily, or tinted shadow in the stone or concrete after lifting the wax, the stain has penetrated and you'll need a poultice step. The guide on how to get citronella wax off patio stone covers oil-penetration scenarios in more detail if you're dealing specifically with that wax type.
Tools, supplies, and PPE you'll need
Most of this kit is inexpensive and available at hardware stores or online. I've grouped it by stage so you can pull together only what you need based on how far into the process you end up going.
Mechanical removal stage
- Plastic scraper or old credit card (not metal, which can scratch stone and concrete)
- Sealed bag of ice or a cold pack
- White paper towels or a brown paper bag (for the heat method)
- Clothes iron or low-wattage heat gun (heat method only)
Residue and stain removal stage
- Mineral spirits (Stoddard solvent): the most broadly safe solvent for wax residue on most surfaces
- Isopropyl alcohol (70–91%): lighter-duty option for surface film on non-porous surfaces
- Citrus-based degreaser: a gentler, less flammable alternative to mineral spirits; works well on concrete and pavers
- Acetone: fast-acting and effective but more aggressive; avoid on polished stone and around sealers unless tested
- 12% hydrogen peroxide: for dye or pigment stains on light-colored stone (not acid-sensitive stone like travertine)
- Absorbent poultice base: kaolin clay, diatomaceous earth, whiting powder, or baking soda (baking soda is the most accessible household option)
- Plastic wrap or cling film and tape (for covering poultice)
- Stiff nylon brush (not wire)
- Clean white cotton cloths or rags
- Spray bottle for water
PPE and safety gear
- Nitrile gloves (not latex, which solvents degrade quickly)
- Safety glasses or goggles
- Ventilation: work outdoors or ensure air movement; avoid enclosed patios with no airflow when using solvents
- Old clothes you don't mind staining
Safety precautions before you start
Solvents like mineral spirits and acetone are flammable, and acetone in particular evaporates quickly, so keep them away from any open flame, BBQ grills, or patio heaters. Never mix solvents with each other or with bleach. If you're working in a covered outdoor area, make sure there's genuine airflow; fumes from acetone or mineral spirits can cause dizziness at high concentrations and are a fire risk in enclosed spaces.
Protect adjacent plants and garden beds before applying any solvent or commercial cleaner. Lay damp newspaper or cloth over nearby vegetation and rinse it away after you're done. For joint sand and grout between pavers, avoid soaking the joints with solvent, which can wash out polymeric sand binders. Apply solvents to the wax area only and rinse promptly. If your patio is sealed, do a test patch with whatever solvent or cleaner you plan to use in a hidden corner and wait 10 minutes; if the sealer clouds, dulls, or lifts, switch to a milder option or consult the sealer manufacturer before proceeding.
Freeze-and-scrape: step-by-step
This is my first-choice method for most patio surfaces because it has the lowest risk of sealer damage or surface scratching. Cold makes wax brittle so it pops off in flakes rather than smearing. It works especially well on cooler days when the patio itself isn't sun-warmed.
- Fill a zip-lock bag with ice cubes or use a reusable cold pack. Lay it directly over the wax deposit and hold it there for 3 to 5 minutes. You want the wax completely firm and slightly frosty to the touch.
- Remove the ice and immediately work the edge of a plastic scraper or old credit card under the wax at a low angle (around 15–20 degrees). Avoid pushing straight down; instead, slide the scraper horizontally to shear the wax away from the surface.
- Lift and collect the wax flakes as you go so you don't spread them. Work from the outer edges of the deposit toward the center to avoid grinding wax into the surface.
- Reapply ice if the wax starts to soften before you've finished. On a hot day you may need two or three cooling cycles.
- Once the bulk is removed, look at what remains. A thin greasy film or slight discoloration means you need a solvent step (see the solvent section below). No visible residue means a rinse with warm water and a stiff nylon brush may be all that's left.
Surface-specific cautions for the freeze-and-scrape method
- Polished or honed stone: even a plastic scraper can leave fine scratches if you apply too much downward pressure. Use a credit card instead and keep the angle very low.
- Travertine with natural pits: wax may have filled the pits. Scrape what you can from the flat areas; address the pits with a poultice rather than forcing a scraper into them.
- Brick pavers: the relatively rough surface means some wax will remain in texture depressions after scraping; plan on a solvent follow-up.
- Historic or antique stone: US federal preservation guidance specifically prohibits metal scrapers on historic masonry; use only plastic tools and the gentlest possible pressure.
Expected result: After freeze-and-scrape, 70–90% of the solid wax mass should be gone. You'll almost always see a faint greasy residue or sheen, which is normal and addressed in the solvent step.
Heat-and-absorb: step-by-step
If freezing isn't practical (for example, on a very hot day when wax is already soft, or when wax has spread over a large area), the heat-and-absorb approach works well. You're essentially re-melting the wax slightly so it transfers into an absorbent material instead of sitting on the stone. I've found this works particularly well on textured concrete and rougher flagstone where ice scraping misses wax in the surface grain.
- Lay three to four layers of white paper towels or a section of a plain brown paper bag directly over the wax. Use white or unprinted material; colored ink can transfer to the surface when heated.
- Set your clothes iron to the lowest effective setting, typically the 'synthetic' or 'low' setting. If you're using a heat gun, keep it on the lowest heat level and hold it at least 6 inches from the surface.
- Place the iron flat on the paper and hold it still for 5–10 seconds. You should see a translucent wax stain spreading into the paper as the wax melts and wicks upward.
- Lift the iron, move the paper to a fresh section, and repeat. Do not rub the iron back and forth as this can spread wax across a wider area.
- Replace the paper layers as they become saturated. Continue until no more wax transfers to fresh paper.
- Allow the area to cool fully before assessing residue. Any remaining film gets treated with solvent in the next stage.
When to use heat-and-absorb and when to skip it
The heat method is the right call for larger wax spills, textured surfaces where scraping leaves wax in crevices, or situations where you want to avoid the physical pressure of scraping on a delicate stone finish. However, heat can damage film-forming sealers and alter the color of some natural stones, particularly those with heat-sensitive minerals like pyrite inclusions in slate. Always do a test patch in a hidden corner before using an iron on sealed or unfamiliar stone. Do not use a heat gun on travertine, limestone, or any polished marble; these stones can thermally shock or stain under direct heat.
Expected result: The heat-and-absorb method typically lifts 80–90% of the wax mass. Unlike scraping, it often removes more of the oily carrier components along with the solid wax, which can reduce the amount of solvent work needed afterward.
Solvent-based residue removal
Once the solid wax is gone, you're left with an oily film or, in worse cases, a stain that has penetrated below the surface. This is where solvent selection matters. Mineral spirits, citrus-based cleaners, and isopropyl alcohol each have a different strength and risk profile. Here's how to use them safely and effectively.
Choosing the right solvent
| Solvent | Best for | Strength | Key risks | Avoid on |
|---|---|---|---|---|
| Mineral spirits | Oil/wax residue on most surfaces; poultice base for deep stains | Moderate; slower evaporation allows deeper penetration | Flammable; skin absorption and inhalation risk with prolonged exposure | Polished marble without a test patch; around open flames |
| Citrus cleaner (d-limonene based) | Surface wax film on concrete and pavers; eco-friendlier option | Mild to moderate; biodegradable | Can be mildly acidic depending on brand; may affect acid-sensitive stone | Travertine, limestone, or marble without pH-neutral confirmation |
| Isopropyl alcohol (70–91%) | Light surface residue on non-porous or sealed surfaces | Light; evaporates quickly | Flammable; may affect some sealers; less effective on heavy wax penetration | Deep oil stains in porous stone (use mineral spirits instead) |
| Acetone | Heavy wax or dye stains; poultice base for colored wax | Strong; fast-evaporating | Highly flammable; can strip sealers and bleach some stone finishes | Polished stone; any sealed surface without a confirmed test patch |
Step-by-step: solvent surface wipe
This method handles the oily film left after mechanical removal on most surfaces. Put on nitrile gloves and safety glasses before opening any solvent container.
- Pour a small amount of mineral spirits (or your chosen solvent) onto a clean white cloth. You want the cloth damp, not dripping.
- Work the cloth over the residue area using small circular motions. The cloth will pick up the oily wax film; you'll see it discolor as it absorbs the residue.
- Flip to a clean section of cloth when the working section becomes greasy. Using a contaminated cloth just moves the residue around rather than removing it.
- Once the visible film is gone, apply a second clean cloth dampened with plain water to rinse the area. For mineral spirits, a second wipe with a barely-damp cloth of isopropyl alcohol helps lift any remaining solvent residue.
- Allow the area to dry completely (at least 30 minutes in sun; longer in shade or cool weather) before deciding whether a stain remains.
Step-by-step: solvent poultice for deep or stained wax
If after the solvent wipe there is still a dark, oily, or discolored shadow in the surface, you need a poultice. This is the method recommended by the Natural Stone Institute for oil-based stains that have penetrated stone pores, and it works equally well on porous concrete. The poultice draws the stain out through capillary action as it dries.
- Mix your poultice: combine mineral spirits (for oil/wax stains) or acetone (for dye/pigment stains) with an absorbent powder such as kaolin clay, diatomaceous earth, whiting, or plain baking soda. Stir to a smooth, peanut-butter-like consistency. It should hold its shape without slumping.
- Clean the stained area and make sure it is free of loose debris. If using a hydrogen peroxide poultice on stone, lightly mist the stain with distilled water first.
- Apply the poultice paste to the stain with a plastic spatula, spreading it to roughly 1/4 to 1/2 inch thick and extending it about 1 inch beyond the visible stain edge on all sides.
- Cover the poultice immediately with plastic wrap and tape the edges down tightly with painter's tape. The sealed environment slows drying, which gives the poultice time to draw the stain out rather than just drying on the surface.
- Leave it undisturbed for 24 to 48 hours. Resist the urge to check early.
- Remove the tape and plastic, then let the poultice continue to dry until it is fully hardened and powdery (a few more hours to half a day depending on humidity).
- Scrape the dried poultice away with a plastic scraper, then rinse the area with clean water and a nylon brush.
- Evaluate the stain. If it has lightened but not fully cleared, reapply the poultice. Deep or aged stains (especially old citronella oil stains on stone) may need two to five applications before the stain fully clears.
Expected result: A single poultice cycle typically reduces a moderate oil/wax stain by 50–70%. Repeated cycles continue to pull residual contamination from deeper in the stone. Colored-wax dye stains may also require switching to a hydrogen peroxide poultice (12% concentration) if the mineral spirits poultice has removed the oil component but the color remains.
Ventilation and PPE during solvent work
Even working outdoors, keep airflow moving by positioning yourself upwind. All three common solvents (mineral spirits, isopropyl alcohol, and acetone) are flammable, and acetone is especially volatile. Their safety data sheets document risks including eye and skin irritation, dizziness from high vapor concentrations, and ignition from nearby sparks. See Isopropanol / example SDS (illustrative SDS content showing flammability and PPE guidance) for specific SDS statements on flammability, eye/skin irritation, dizziness at high vapor concentrations, and recommended PPE. Wear nitrile gloves, close-fitting safety glasses, and avoid working near any ignition source including gas grills and outdoor heaters. Dispose of solvent-soaked cloths and poultice material according to your local hazardous waste guidance; do not put acetone-soaked rags in a sealed bin where fumes can accumulate.
Eco-friendly and renter-friendly alternatives
If you'd rather avoid solvents entirely, or if you're renting and want to stick to household products, a few gentler options are worth trying before reaching for mineral spirits. These work best on surface-level residue on concrete or pavers; they're less effective on deep stains or porous natural stone.
- Baking soda paste: mix baking soda with just enough water to form a thick paste, apply to the residue, let it sit for 15–20 minutes, then scrub with a nylon brush and rinse. It acts as a mild abrasive and can lift a light wax film from concrete.
- White vinegar: effective as a follow-up rinse on concrete to cut through the greasy residue after scraping. Do NOT use vinegar on travertine, limestone, marble, or any acid-sensitive stone; it will etch the surface.
- Dish soap and hot water: a few drops of grease-cutting dish soap in a bucket of hot water, applied with a stiff nylon brush, handles very light surface wax residue on sealed concrete or pavers.
- Citrus-based degreaser (pH-neutral formula): brands marketed as 'natural' degreasers based on d-limonene are reasonably effective and biodegradable; check the pH before using on stone.
Pressure-washing wax residue (and when not to)
Pressure washing alone won't remove solid wax, but it can be useful for rinsing away loosened residue after mechanical and solvent treatment, especially on large concrete slabs. For standard concrete patios, 1,000 to 1,500 psi with a 25–40 degree fan nozzle held 12 to 24 inches from the surface is a reasonable range. Keep pressures below 1,000 psi for concrete pavers and under 500 psi for natural stone, travertine, and slate. Always test a small, hidden area first and use the widest nozzle that still moves the residue. High-pressure washing can blow joint sand out from between pavers and can erode soft stone surfaces, so if you're uncertain, stick to hand rinsing with a garden hose.
Federal preservation guidance for historic masonry sets very conservative pressure limits (starting well under 100 psi for sensitive surfaces) and requires test patches before any pressurized cleaning. If you're working on old or antique stone, treat the GSA historic-masonry standards as your ceiling rather than your starting point.
Rinsing, drying, and resealing after wax removal
After any solvent or poultice treatment, rinse the area thoroughly with clean water and let it dry completely. 'Completely' means at least 24 hours in normal weather; longer in cool or humid conditions. If you plan to reseal the surface after cleaning, the slab must be fully free of wax, oil, and curing compounds before the sealer is applied. Many sealer manufacturers specifically note that wax residue and topical coatings must be fully stripped before an impregnating sealer will bond correctly to the substrate. Applying sealer over any remaining wax film will trap it underneath and prevent proper adhesion. If the existing sealer was damaged or stripped during wax removal, clean, dry, and reseal following the sealer manufacturer's technical data sheet.
Troubleshooting: when the stain won't budge
If you've run multiple poultice cycles and a stain shadow persists, consider whether the dye component (not just the oil) is the remaining issue. Switch the poultice active agent from mineral spirits to 12% hydrogen peroxide for organic dye stains on light stone, or to acetone for colored synthetic wax dyes, and run another one to two cycles. See Dynamic Stone Tools, Poultice chemistry and stain matching for guidance matching mineral spirits, acetone, or 12% hydrogen peroxide to oil-based, synthetic dye, and organic pigment stains respectively Dynamic Stone Tools — Poultice chemistry and stain matching. If the stain is deeply embedded, possibly from wax that sat through a full summer of heat cycles, the practical limit of DIY treatment is around five poultice applications. Beyond that, a professional stone restoration service has access to stronger drawing agents and can assess whether light grinding or honing is a more cost-effective path.
Preventing wax stains on future patio use
- Place candles inside a glass hurricane or on a metal tray to catch drips before they reach the patio surface.
- Avoid placing candles directly on stone, travertine, or unsealed concrete, where wax penetrates most easily.
- Reseal porous surfaces (concrete, natural stone, unsealed pavers) every one to two years; a good sealer dramatically reduces how deeply wax and oils penetrate.
- Keep a plastic scraper and a small bottle of mineral spirits in your outdoor storage so you can deal with wax drips immediately, before they cool and set or heat and soak in.
When to call a professional
Most wax removal is a DIY job, but there are situations where it makes sense to hand it off. If the wax has stained polished marble, antique or historically significant stone, or a large area of travertine and multiple poultice cycles haven't cleared the stain, a professional stone restoration contractor can hone, re-polish, or apply commercial-grade drawing compounds that aren't available in retail stores. Also consider a pro if the wax removal has exposed underlying sealer damage, efflorescence, or cracking that needs assessment before resealing. For similar wax-removal situations on pavers or general outdoor surfaces, the guides on removing wax from patio pavers and removing wax from stone patios cover material-specific professional thresholds in more detail.
FAQ
What is the safest first step to remove candle wax from patio slabs, concrete, pavers or natural stone?
Begin with the least aggressive methods: harden the wax with ice in a sealed plastic bag for 5–15 minutes, then lift or gently chip away softened wax with a plastic scraper, putty knife or old credit card. For adhered wax, place several layers of white paper towels or a brown paper bag over the wax and apply heat briefly with a clothes iron set to low/medium or use a handheld steamer to melt and blot the wax into the paper. Always test heat on an inconspicuous area first to check for sealer damage.
How do I identify my patio surface before choosing a removal method?
Inspect texture and joints: poured concrete is continuous with control joints; pavers are discrete units with sand or mortar joints; natural stone (slate, flagstone, travertine) often has irregular edges, color/vein variations, and may be softer/porous. If unsure, test a small hidden spot: press a coin — pavers may shift slightly, stone will vary in hardness, concrete is uniform. When in doubt, use the gentlest method (ice + plastic scraper) and avoid metal tools, high heat and strong solvents until you confirm surface tolerance.
Step-by-step: freeze-and-scrape method (best for renters and delicate finishes)
1) Gather ice in a sealed bag, plastic scraper, soft brush, mild dish soap, bucket of water and towels. 2) Place the ice bag directly on the wax for 5–15 minutes until wax hardens. 3) Use a plastic scraper or credit card at a low angle to chip/lift wax; avoid metal tools. 4) Brush away crumbs and wash area with mild dish soap and water, rinse thoroughly. 5) If residue remains, try blotting with isopropyl alcohol (70–91%) on a white cloth and rinse. Expected results: removes surface wax and most residues with minimal risk; may not remove deep/oily stains.
Step-by-step: heat + absorb (iron or steamer) method
1) Place several layers of white paper towels or a brown paper bag over the wax. 2) Set a clothes iron to low/medium (no steam) or use a steamer. 3) Briefly press the iron over the paper (a few seconds at a time), lifting to check if wax is transferring to the paper. Replace towels as they saturate. 4) When most wax is absorbed, clean the area with mild detergent and water. Cautions: test first — heat can damage topical sealers or change stone finishes. Not recommended for sealed surfaces where manufacturer warns against heat.
How do I remove waxy/oily residue that remains after scraping or blotting?
For light residues: rub gently with isopropyl alcohol on a white cloth, rinse and dry. For heavier oil/wax penetration: use mineral spirits (Stoddard solvent) applied sparingly to a cloth and blotted — rinse area well and ventilate. Always test in an inconspicuous area first. Use gloves, eye protection and avoid ignition sources. For natural stone with deep oil staining, consider a solvent-based poultice (see poultice Q) rather than repeated solvent scrubbing that may push oils deeper.
What is a poultice and how do I use one for wax/oil stains on stone or concrete?
A poultice is an absorbent paste that draws oils/pigments out of porous surfaces. Typical procedure: 1) Clean surface of loose debris and non-embedded wax. 2) Mix an absorbent (kaolin, diatomaceous earth, whiting or baking soda) with an appropriate solvent to a peanut-butter consistency — mineral spirits or acetone for oil/wax stains; hydrogen peroxide for some dyes. 3) Apply 1/4–1/2 inch thick, extend ~1 inch beyond the stain, cover with plastic and tape edges. 4) Leave 24–48 hours to dry, remove, rinse and evaluate; repeat as needed (2–5 cycles may be required for deep/aged stains). Follow safety guidance for solvents and test first on an inconspicuous area.
Next Articles
How to Remove Wax From Patio: Step-by-Step by Surface
Step-by-step guide to remove wax from patio safely on concrete, brick, stone, pavers, travertine, and flagstone.
How to Remove Candle Wax From a Concrete Patio
Step-by-step tips to remove candle wax and residue from concrete patio, using freeze-scrape and safe cleaners.
How to Remove Candle Wax from Patio Pavers Safely
Step-by-step methods to remove fresh and ground-in candle wax from patio pavers, including joint cleanup and safe afterc