Dry grouting a patio means sweeping a dry jointing compound into the gaps between your slabs, then activating it with a controlled mist of water so it binds and sets in place. Done right, it fills joints fully, locks slabs together, and shuts out weeds and insects without making a mess of your surface. The key things most people get wrong are starting with damp joints, applying too much water at once, or forgetting to clean residue off the surface before wetting anything down. Get those three things right and the rest is straightforward.
How to Dry Grout a Patio: Step-by-Step Guide

Dylan Hale
29 Apr 2026
What 'dry grout' actually means for patio slab joints
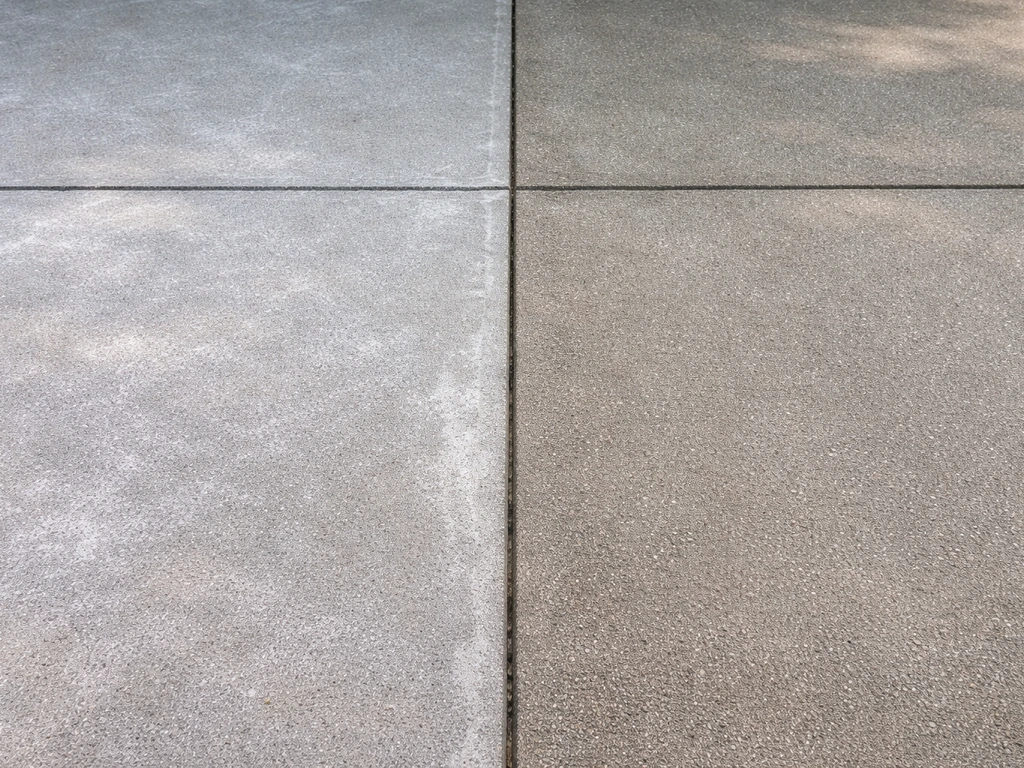
The term 'dry grouting' gets used loosely, so it helps to be clear about what it means in a patio context. Instead of mixing grout to a wet paste and pressing it in with a float, you're working with a dry or semi-dry jointing compound that gets swept or brushed into the gaps between slabs while it's still powder or granular. You then activate it with water afterward. The two most common materials for this are polymeric jointing sand and moisture-cure setting sand, and they work differently from the wet sanded grout (like Mapei Keracolor S) that tile setters use indoors.
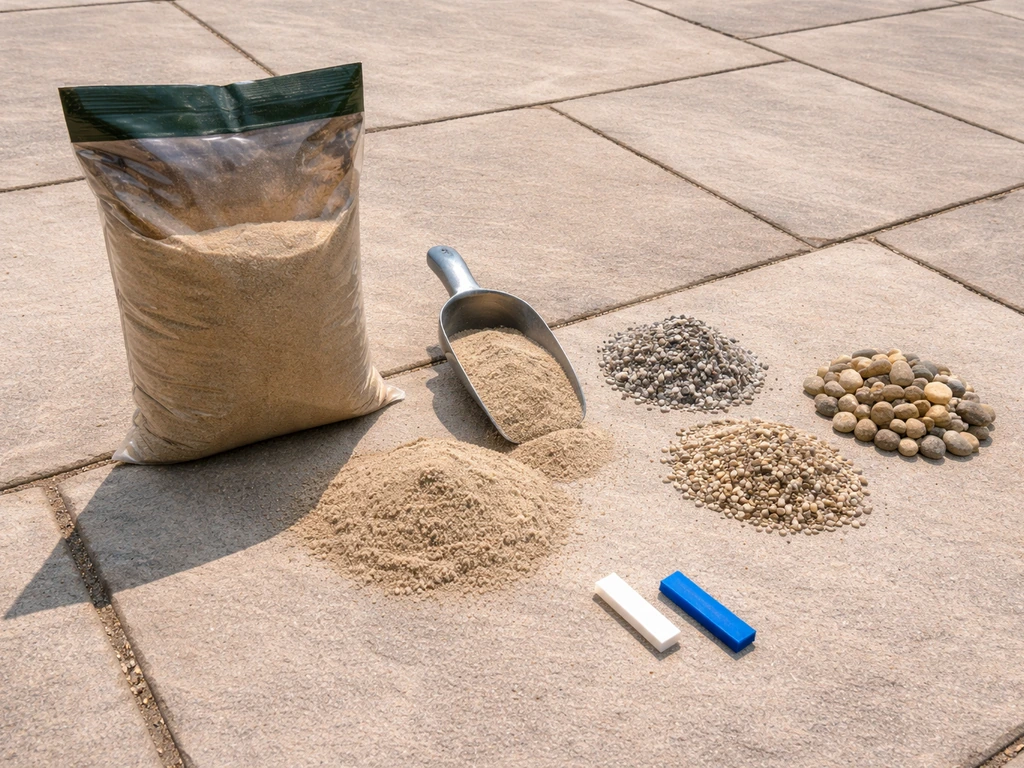
Polymeric jointing sand, such as QUIKRETE HardScapes Polymeric Jointing Sand or SEK Surebond PolySweep, uses polymer binders that are inert in dry form but activate and harden when you add water. Products like Sika Setting Sand are moisture-cure materials that set through exposure to ambient moisture and typically cure in one to two days depending on temperature. Sika’s guide for Setting Sand reports surface drying of 1, 2 days depending on weather and full cure up to 28 days depending on conditions cure in one to two days. Traditional wet sanded grout is also an option for tighter joints on tile-set stone or travertine patios, but it requires a completely different mixing and application process and is more suited to joints under about half an inch wide. For most outdoor paver and slab patios with joints between a quarter inch and two inches, a polymeric product swept in dry is the practical choice.
Supplies and materials: what you actually need
Choosing the right jointing material
| Material | Best for | Joint width | Key requirement |
|---|---|---|---|
| Polymeric jointing sand (e.g., QUIKRETE HardScapes, PolySweep) | Pavers, brick, natural stone, concrete slabs | Up to 2 inches (check product spec) | Surface and joints must be bone dry before application |
| Moisture-cure setting sand (e.g., Sika Setting Sand) | Narrow paving joints | 2–5 mm (roughly 1/8–3/16 inch) | Sets through ambient moisture; 1–2 day cure |
| Wet sanded grout (e.g., Mapei Keracolor S) | Tile-set stone, travertine, flagstone with tight joints | Up to about 1/2 inch | Requires mixing; smooth with sponge; haze management critical |
For most homeowners with a standard paver or concrete slab patio, polymeric jointing sand is the go-to. It's forgiving, widely available at hardware stores, and handles joint widths that wet grout can't. If your joints are very narrow (under 5 mm) or you have a tile-set natural stone patio, look at Sika Setting Sand or a sanded cement grout instead. Check your specific product for maximum recommended joint width before you buy.
Tools and safety gear
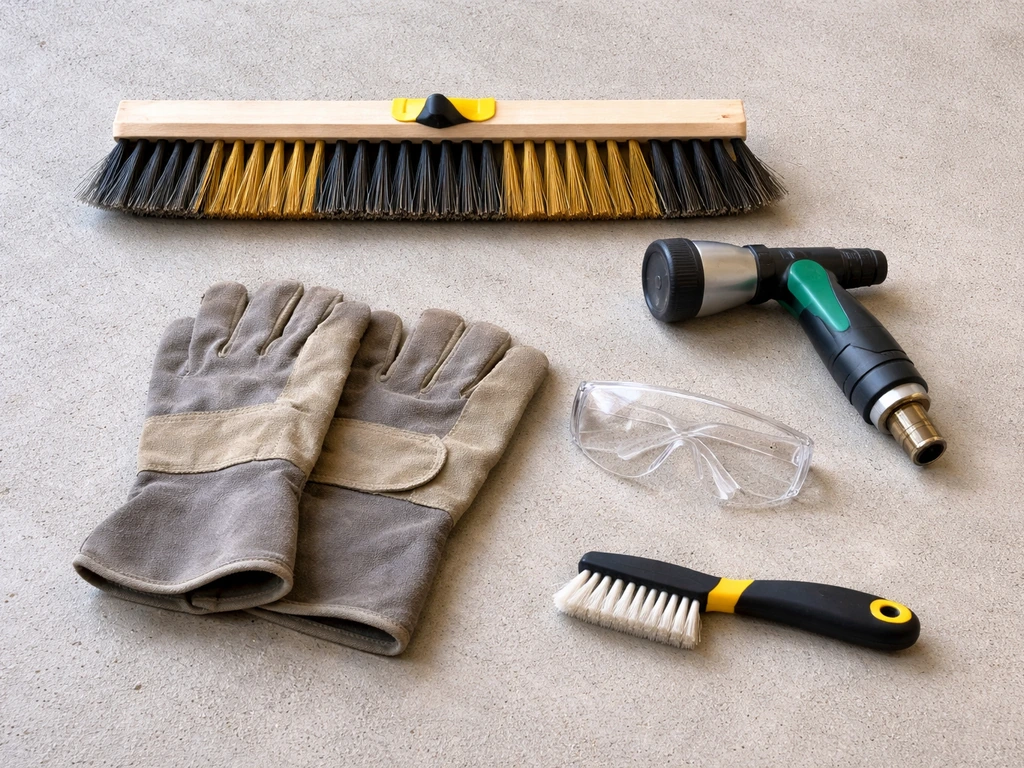
- Stiff-bristle brush or push broom (for sweeping compound into joints)
- Leaf blower or soft brush (for clearing residue off the surface before wetting)
- Garden hose with a fine mist or gentle spray attachment
- Grout float or rubber mallet-wrapped trowel (useful for pressing compound into deeper joints)
- Bucket and clean sponge (for wet grout cleanup if using cement grout)
- Knee pads (you will be on the ground for part of this)
- Dust mask (polymeric sand dust is an irritant; wear one while sweeping)
- Safety glasses and gloves
- Patio sealer appropriate to your surface (for the post-cure step)
You don't need a pressure washer for this job. In fact, during the grouting and activation stages, a pressure washer would almost certainly blow the compound back out of the joints. A simple garden hose with a mist setting is exactly right. If you're working on a small section or a tight budget, a watering can with a rose head works too.
Prep the patio first: clean joints are non-negotiable
The single biggest mistake I see is people trying to dry grout over dirty, clogged, or damp joints. Polymeric sand won't bind to debris, and residual moisture messes up the activation chemistry. Take your time with prep and the actual grouting goes quickly.
- Clear the surface: Remove all furniture, pots, and anything sitting on the patio. Sweep off loose dirt, leaves, and grit with a stiff broom.
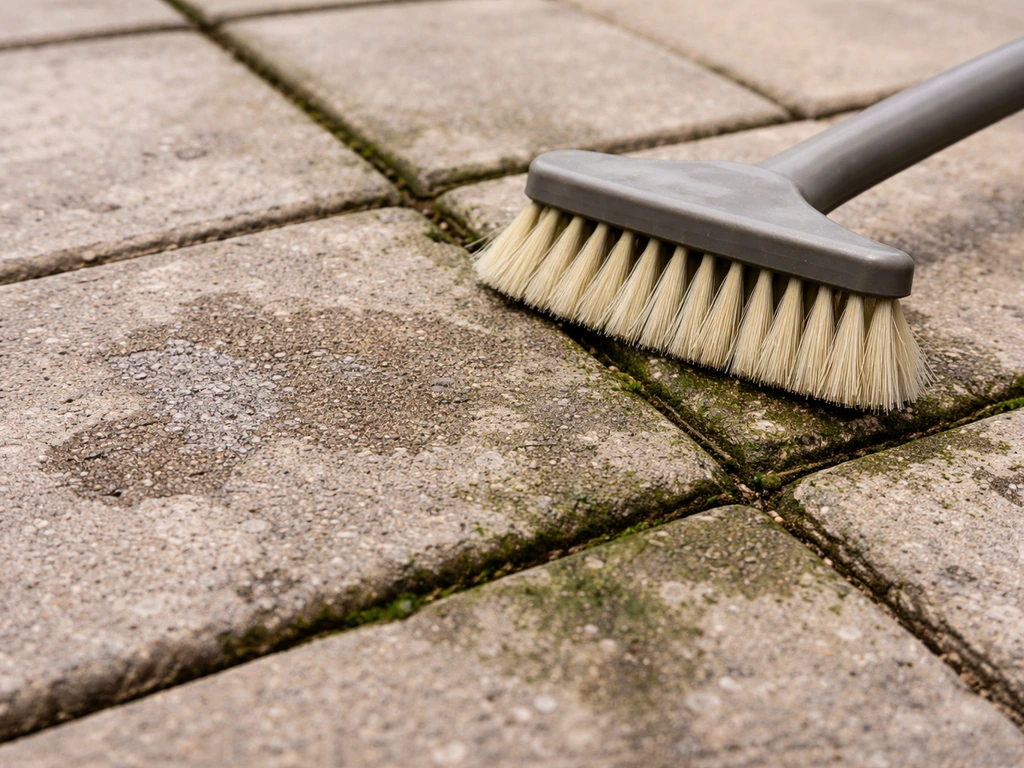
- Open the joints: Use a stiff narrow brush, an old screwdriver, or a specialised grout rake to dig out old crumbling grout, weed roots, moss, and compacted debris. You want joints open to at least two-thirds of the slab depth so new compound has room to bond.
- Clean the surface and joints: If you have moss, algae, or biological growth in the joints, treat it before grouting. A diluted white vinegar solution (1 part vinegar to 1 part water) is a safe starting point for stone, brick, and pavers and won't damage the surface chemistry. For concrete patios with stubborn black algae or heavy organic buildup, a diluted bleach solution (1 part bleach to 10 parts water) works faster, but rinse it thoroughly afterward and keep it away from natural stone. If you're dealing with significant moss or grout contamination, that process deserves its own attention before you proceed with fresh jointing.
- Rinse and dry completely: After cleaning, rinse the whole patio and allow it to dry fully. For polymeric sand especially, the surface and every joint must be completely dry before you open the bag. On a warm dry day this can take a few hours; on a cool or humid day, give it overnight.
- Check the forecast: Don't start if rain is expected within 12 hours of completing the job. Premature rain washes polymer binders to the surface and causes white haze that's difficult to remove.
A note on natural stone surfaces like travertine and flagstone: these can be sensitive to acidic cleaners. Stick to vinegar at maximum recommended dilution or a stone-safe pH-neutral cleaner during prep, and rinse well. Muriatic acid, which some guides recommend for concrete cleaning, is too aggressive for unprotected natural stone and will etch the surface.
How to apply dry grout between patio slabs: step by step
- Confirm everything is dry: Run your hand along the joints. They should feel completely dry, not cool or slightly damp. If you're unsure, wait another hour.
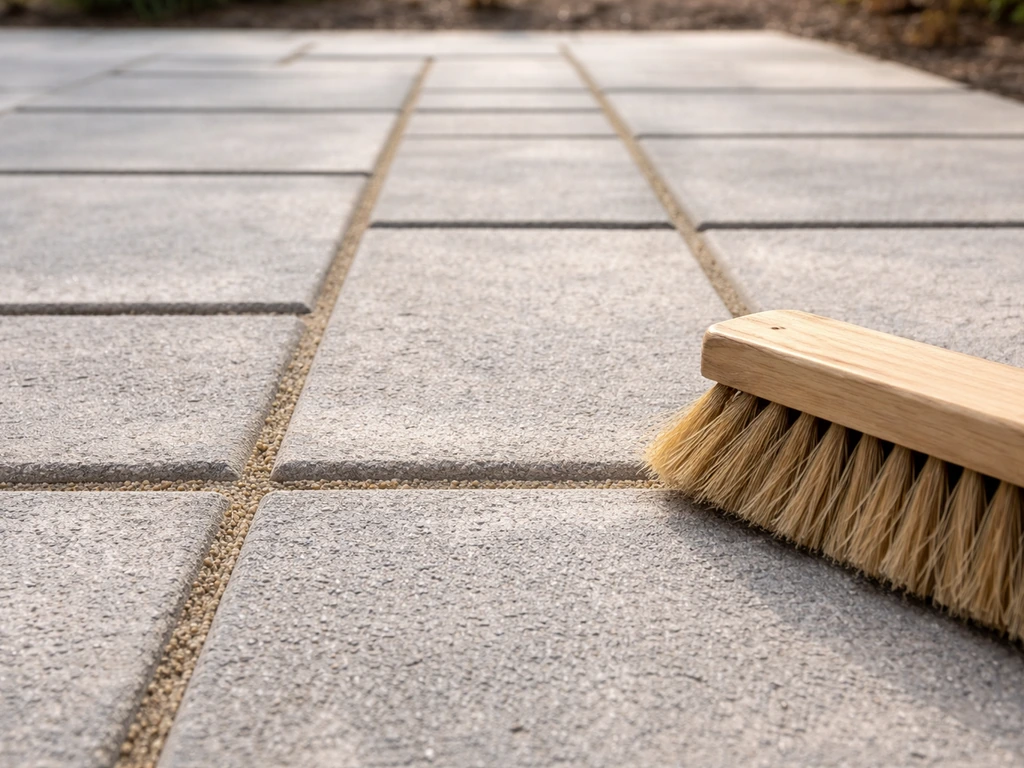
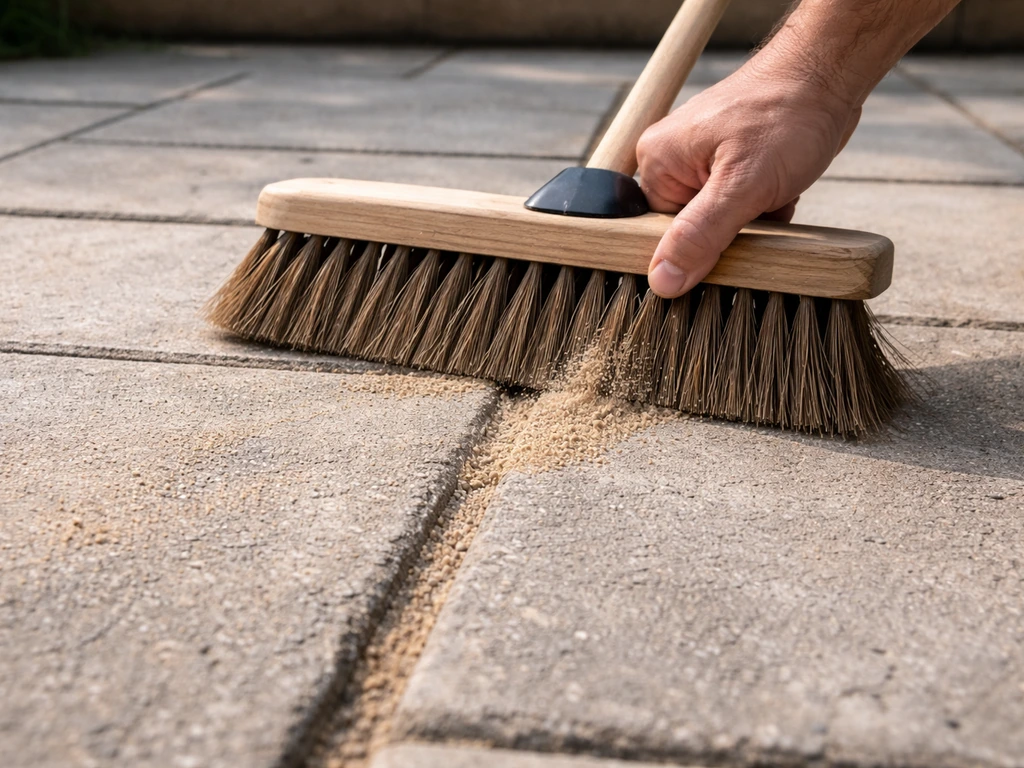
- Pour and spread the compound: Tip polymeric sand directly onto the patio and spread it across the surface with a stiff push broom, working it in multiple directions so it falls into the joints. Don't just sweep in one direction or you'll push it out of some joints and pile it into others.
- Pack the joints: For joints deeper than about an inch, press the sand down firmly with a gloved hand, a rubber mallet tapping on a board laid across the joints, or a compactor plate if you have one and your slabs are robust enough. Refill and compact until the compound sits level with or just slightly below the top of the slabs.
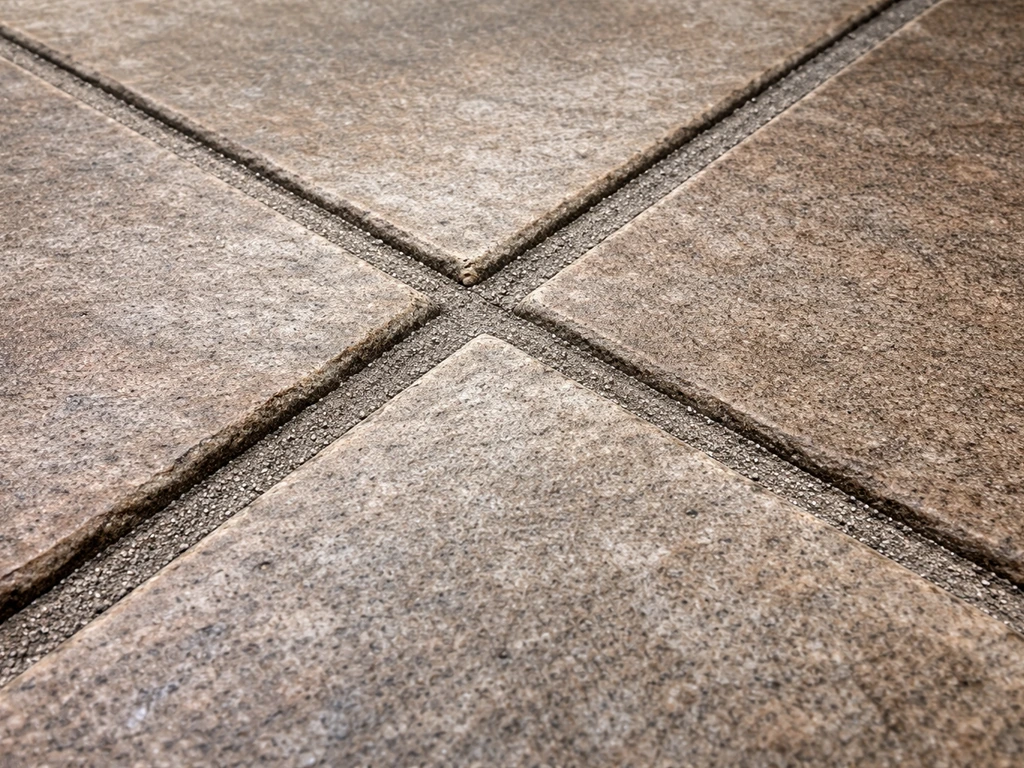
- Add a second pass: After the initial fill and pack, do another sweep of dry compound over the surface to top off any joints that settled. Joints should be filled to within about 3 to 5 mm of the surface top.
- Remove ALL residue from the surface before any water touches it: This step is critical. Use a leaf blower held nearly parallel to the surface (pointing away from the joints, not into them) to blow the excess sand and dust off the paver tops. If you don't have a blower, use a soft-bristle brush to carefully sweep excess away. Every granule left on the surface will bake into a white haze once you add water. Spend the time here, it saves you a cleanup headache later.
- Do a final visual check: Crouch down and look along the joints at a low angle. They should look uniformly filled with no obvious voids or gaps. Address any low spots now with more dry compound, then blow or brush the surface clean again.
If you're using wet sanded grout on a tile-set natural stone or flagstone patio rather than polymeric sand, the process is different: mix to a peanut butter consistency, press it in with a grout float at a diagonal to the joints, then wipe off excess with a barely damp sponge using circular motions. Change your rinse water frequently because dirty water smears haze back onto the surface. The principle of getting residue off the surface before it cures is the same regardless of which product you use.
How to set and dry it correctly: water activation and timing
This is where most people rush and ruin the job. The goal with water activation for polymeric sand is to introduce moisture gradually so it penetrates all the way down into the joint without overloading the surface or puddling in the gaps. Too much water at once floats the polymer binders up to the surface (causing haze) or physically displaces the sand (leaving voids).
- First misting pass: Using a fine mist setting on your hose, lightly wet the entire surface. You're wetting the top of the joints, not drenching them. Let this absorb for about 5 minutes.
- Second pass: Repeat the misting with slightly more water volume. Let it absorb for another 5 minutes.
- Third and fourth passes: Continue misting, gradually increasing water volume with each pass. By the third or fourth pass, you're giving the joints a more thorough soaking, but still not flooding them. Stop if you see standing water in the joints, that's a sign to pause and let it absorb.
- Check for full saturation: The compound should look uniformly dark and moist all the way to the bottom of the joint. If you can press a finger in and find dry sand below the surface, do another misting pass.
- Block access: Once activation is complete, block the patio from foot traffic and pets for at least 24 hours. Protect the area from rain for the same period. A tarp over the patio works if weather is unpredictable.
- Full cure: Most polymeric sand products reach their full structural hardness within 24 to 48 hours under normal conditions. Sika Setting Sand takes 1 to 2 days for its moisture-cure process. Avoid foot traffic for 24 hours minimum and hold off on heavy furniture or planters for 48 hours.
Temperature matters. Cold weather (below about 5°C or 40°F) slows or stalls the curing process for both polymer-based and cement-based products. If you're doing this in early spring or autumn and temperatures are going to drop overnight, check your product's minimum application temperature and cover the patio if needed. Hot direct sun speeds surface drying but can dry the surface before moisture has penetrated the full joint depth, so on very hot days, try to work in the morning or shade the surface during activation.
Common problems and how to fix them fast
White haze on the surface
This is the most common complaint after grouting a patio. With polymeric sand, haze is caused by polymer residue left on the slab surface before water was applied. With cement grout, it's efflorescence or cement film. For polymeric haze on pavers or concrete, catch it early (within the first day or two while it's still soft) by gently scrubbing with a stiff brush and clean water. Once it's fully cured, it becomes much harder to shift. A purpose-made grout haze remover, such as LATICRETE Heavy Duty Grout Haze Remover diluted at roughly 1 part cleaner to 8 parts water, is effective on cement grout haze. Apply it with a damp sponge, let it dwell briefly, scrub, and rinse thoroughly. Always test a small inconspicuous area first, especially on natural stone or brick where acidic cleaners can cause damage.
Gaps, pinholes, or low spots in the joints
If you see voids or sunken sections after the grout has set, the joints weren't fully packed before activation. The fix is to let the existing material cure completely, then top up with fresh dry compound, re-compact, clean the surface, and re-activate with water. Don't try to press new material into a joint that's still wet or partially set.
Grout washing out after rain
If rain hits within the first 12 hours (before the polymer has bound), or if you used too much water too quickly during activation and the binders floated to the surface rather than distributing through the joint, the sand can wash back out. If this happens, let the patio dry out completely, brush out whatever loose material remains, and start the application process again from the clean-and-fill step. Next time, check the weather forecast and don't activate during a period when rain is likely.
Cracking after curing
Fine surface cracks in the top of the joint can happen if the compound dried too fast (often from direct hot sun), if joints were packed too shallow, or if there's underlying slab movement. For minor surface cracking, you can brush in a small amount of fresh compound and re-activate. For cracking caused by ongoing slab movement, you need to address the root cause (usually a heaved or sunken slab base) before re-grouting will hold long-term.
Compound not setting or staying soft
If joints still feel soft or powdery after 48 hours, either not enough water reached the full depth of the joint, or the product was applied over damp or wet joints and the activation chemistry was disrupted. Scrape out the soft material, clean and dry the joints again, and reapply. This is frustrating but it's the only reliable fix.
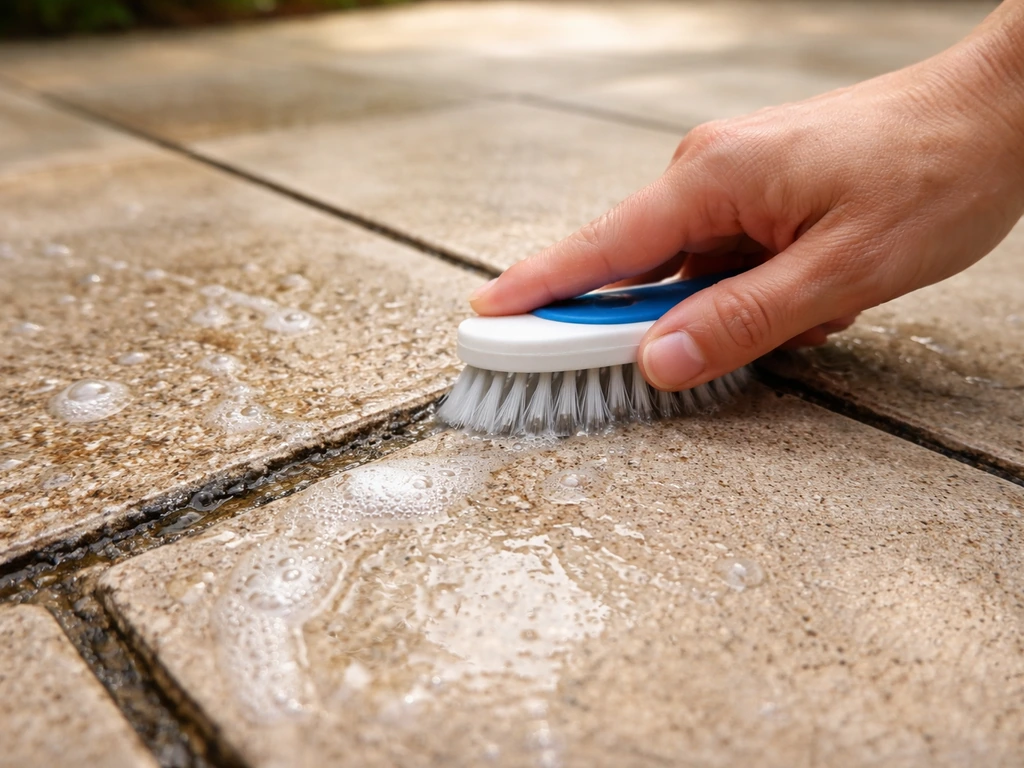
After the grout sets: rinsing, sealing, and protecting the patio
Once the jointing compound has fully cured (48 hours for most products), give the patio a gentle rinse with plain water and a soft brush to remove any last traces of dust or surface residue. To use a brush correctly, work the dry jointing compound into the gaps, then apply water gradually so the grout activates and sets without washing out. Don't use a pressure washer for at least a week after grouting, as the jet can chip out freshly set material before it's reached maximum hardness.
Sealing is worth doing, especially on natural stone, travertine, brick, and uncoated concrete. A good patio sealer does two things after grouting: it protects the slab surface from staining and moisture ingress, and it can also help stabilise the top layer of jointing sand in the joint, reducing erosion from future rain. Apply sealer only after the grout has fully cured (at least 48 to 72 hours, longer in cool conditions). MAPEI’s grout troubleshooting guide recommends applying sealer only after the grout has fully cured, including checking product-specific labeling or documentation for the correct waiting period blank" rel="noopener noreferrer">apply sealer only after the grout has fully cured (at least 48 to 72 hours, longer in cool conditions). Make sure the surface is completely dry before sealing. Use a sealer rated for your specific surface material because a concrete sealer applied to natural stone can discolour it, and some sealers aren't compatible with polymeric sand products, so check the product's data sheet.
For the first week after grouting, go easy on the new joints. Light foot traffic is fine after 24 hours, but hold off on heavy planters, furniture legs, and anything with sharp edges that could dig into the joints while they're still building final hardness. If you have pets, keep them off for 24 to 48 hours since claws can scratch and dislodge freshly set compound.
Ongoing maintenance is simple. Inspect the joints once a year and top up any sections that have eroded or cracked. Keep the surface clear of leaf buildup, which traps moisture and encourages moss and weed growth back into the joints. If you are dealing with moss on a patio, you can remove it thoroughly first so new jointing stays clean and bonds properly moss and weed growth. If you are dealing with moss growth in existing joints before regrouting, cleaning and treating that thoroughly first makes your new jointing bond better moss and weed growth. If you're dealing with moss growth in existing joints before regrouting, cleaning and treating that thoroughly before you apply new compound is the right order of operations. Similarly, if your joints are already compromised and you're planning a full regrout, it helps to understand how the old material comes out cleanly first so you're working with genuinely open, clean joints. That same principle is key to how to remove patio grout when you need to redo the joints completely how the old material comes out cleanly first.
FAQ
Can I dry grout a patio if the pavers or slabs are slightly damp from morning dew?
For polymeric jointing sand, plan on misting only after the joints are fully packed and the surface is swept clean. If your patio is already damp, postpone grouting until the slabs and the joint depth are dry to the touch, because extra moisture can prevent proper activation and leave joints soft.
What should I do if rain hits my newly grouted patio?
Do not activate in the rain or when rain is likely within the first 12 hours. If a brief shower happens, let everything dry out completely, brush out loose material, then repeat the clean-and-fill plus mist activation process. Spot repairs usually fail if polymer binders washed back out unevenly.
How do I prevent or fix haze on polymeric grout between pavers?
Polymeric haze is often residue that stayed on top. If haze appears, catch it early while the material is still soft (first day or two) and scrub gently with clean water. Once fully cured, mechanical removal and specialized haze remover are usually the only options.
If some joints look sunken or voidy, can I just add more sand and mist it?
Yes, you can regrout, but only after full cure and only after removing any loose or failed material. Let the patio dry completely, scrape out voids or soft sections, clean the joints, then top up with fresh dry compound, re-compact, and re-activate with water in small, controlled passes.
My joints are still soft or powdery after two days, what’s the right fix?
If joints feel powdery after 48 hours, it usually means activation did not reach the full depth or the joints were damp during install. The reliable fix is to scrape out the soft material, clean and fully dry the joints, repack tightly, and re-activate. Avoid trying to “second mist” over half-set material.
How much water should I use when activating polymeric jointing sand?
Use enough water to activate, not to soak. A practical approach is to mist lightly, wait for absorption, then mist again in short intervals so the joint stays evenly damp without puddling. If you can see water sitting on the paver faces, you used too much.
I think I overwatered during activation, can I salvage it?
If you used too much water too quickly and binders floated to the surface, allow the patio to dry out fully, brush out what is loose, and start again from clean-and-fill. Trying to rinse aggressively or “wash it in” typically makes voids worse because the sand has already shifted.
Why does my surface look worse after I tried cleaning, could pressure washing hurt the joints?
For polymeric sand, do not use a pressure washer, the jet can dislodge material before it reaches maximum hardness and can also create new joint erosion. Even after curing, start with the gentlest method (soft brush plus plain water) rather than a direct high-pressure stream.
When is it safe to seal a patio after dry grouting, and will all sealers work?
You can seal, but only after full cure (commonly 48 to 72 hours, longer when cool or damp) and only with a sealer rated for your surface type and compatible with polymeric jointing sand. If you seal too early, moisture can be trapped, which may promote staining, haze, or reduced joint stability.
What’s different about sealing natural stone versus concrete after grouting?
Not all patios should be sealed the same way. On uncoated concrete, sealing helps resist staining, but on natural stone, choose a sealer that will not discolor your stone and do a test spot first. Also avoid sealers that can interfere with how polymeric sand continues to harden.
What if my patio joints are very narrow, can I still use polymeric jointing sand?
Yes, but you need the right product. If your joints are extremely narrow, some polymeric sands may not perform as intended because they require enough joint depth for binders to lock the material. Check the product’s maximum and minimum joint width ratings before committing.
If I get cement film after grouting, how can I remove it without damaging the stone?
For efflorescence or cement film on cement-based grout, it usually comes from water and residue on the surface, not from the joint being too dry. Use a grout haze remover approach for cement haze and test on an inconspicuous patch, because natural stone and some finishes can be damaged by stronger cleaners.
My joints keep cracking, does that mean I used the wrong grout, or is there something else going on?
If you have slab movement, regrouting will often crack again because the joints are absorbing movement rather than just filling static gaps. Before regrouting, identify the unstable slab area, correct the base issue if needed, then regrout once movement is addressed.
How do I reduce re-growth and erosion in shaded or low-drain areas after dry grouting?
If the patio stays wet for long periods or has constant shade and poor drainage, the joints can erode faster and moss can return. Improve drainage if possible, keep leaf debris off the surface, and schedule joint inspections annually so you can top up small losses before they become bigger gaps.
Next Articles
How to Use a Brush in Patio Grout: Step-by-Step
Step-by-step guide to clean patio grout with the right brush, technique, solutions, and safe rinsing to remove mold, alg
How to Clean Patio Grout: Step-by-Step for Every Stain
Step-by-step patio grout cleaning for dirt, mildew, algae, rust and stains, with safe methods for each surface type.
How to Remove Moss From Patio Grout Safely and Effectively
Step-by-step ways to remove moss from patio grout, using safe brushing, vinegar or bleach, and prevention tips.