To remove patio grout, your best approach depends on whether you're dealing with old cement grout between pavers, crumbling sanded grout on stone tiles, or hardened grout haze on travertine. For most situations, a carbide-grit oscillating tool blade does the bulk of the work safely and quickly. For tight joints or delicate stone, a manual grout saw or carbide chisel with patient hand pressure is the smarter call. Once the grout is out, you vacuum up the debris, neutralize any chemical residues, and prep the joints for regrouting or sealing. That's the full loop. Here's exactly how to do it. If you want the full process from tools and prep to chemical haze removal, follow our complete guide on how to clean patio grout.
How to Remove Patio Grout Without Damaging Tiles

Dylan Hale
29 Apr 2026
Know what you're working with before you start
The single biggest mistake people make is grabbing a tool or chemical before knowing what their patio surface and grout actually are. The wrong move on travertine or natural stone can etch or crack the tile permanently. So take five minutes to identify your materials first.
Grout types on patios
Most patio tile grout is cement-based, either sanded or unsanded. Sanded grout contains fine aggregate (sand) blended into the cement mix and is used in wider joints, typically 1/8 inch or more. Unsanded grout skips the sand and is used for narrower joints. There's also a coarser sanded type for very wide joints. A third option you'll see on paver patios isn't really tile grout at all: it's polymeric sand, a resin-modified jointing material that fills the gaps between pavers and locks them together. Polymeric sand behaves differently from cement grout and needs a different removal approach.
Surface types and what they mean for removal
| Surface Type | Grout Typically Used | Key Risk to Watch For |
|---|---|---|
| Concrete pavers | Polymeric sand or sanded cement grout | High-pressure washing can blast out joint sand |
| Brick | Sanded cement grout or mortar | Brick faces can chip if tool pressure is too aggressive |
| Natural stone (flagstone, slate) | Sanded or unsanded cement grout | Acid cleaners and metal tools can scratch or stain stone faces |
| Travertine | Unsanded cement grout | Acid-based cleaners (including vinegar and muriatic acid) etch travertine quickly |
| Porcelain/ceramic tile | Sanded or unsanded cement grout | Generally durable; still watch blade depth to avoid chipping edges |
| Bluestone/sandstone | Sanded cement grout | Porous surface absorbs chemicals; rinse fast and avoid strong acids |
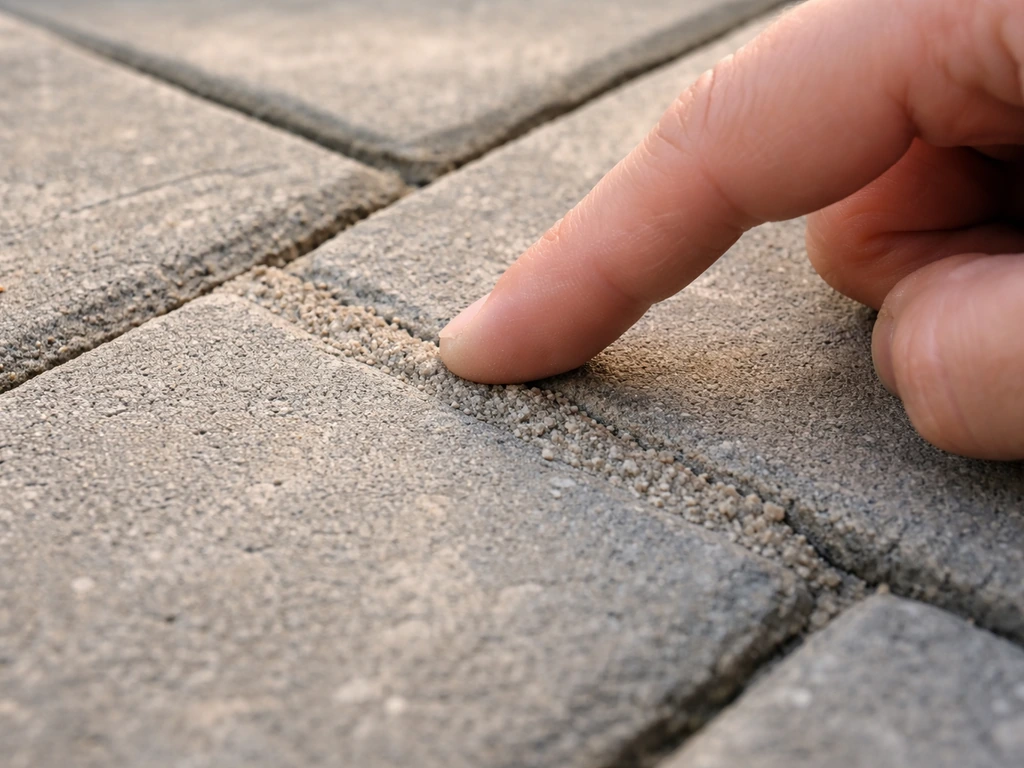
Run your finger along a grout joint. If it crumbles or powders easily, it's already failing. If it's rock solid and slightly darker than the surrounding tile, it's cured and you'll need some real tool effort. If it looks almost sandy and brushes out with your fingers, you're likely dealing with polymeric sand that has started to break down.
Tools and prep: get this right before anything else
Grout removal creates a surprising amount of fine dust, and that dust contains respirable crystalline silica, which can cause serious lung damage over time. NIOSH/CDC also notes that blank" rel="noopener noreferrer">cutting masonry materials without dust controls can create a cloud of respirable crystalline silica dust, and it recommends engineering controls to reduce exposure during cut-off saw use. OSHA classifies dry cutting and grinding of masonry products as a significant silica exposure risk, so this isn't a skip-the-safety-gear situation. OSHA’s construction guidance also points to tasks on Table 1 that generate respirable crystalline silica exposure during activities like cutting or grinding masonry materials blank" rel="noopener noreferrer">OSHA’s Table 1 tasks for cutting and grinding masonry. Suit up properly.
Safety gear you actually need

- N95 respirator at minimum (a P100 half-face respirator is better for extended work)
- Safety glasses or goggles (grout chips fly fast)
- Work gloves (cut-resistant if using a manual chisel)
- Knee pads if you're working at ground level
- Hearing protection if using power tools for more than 20 minutes
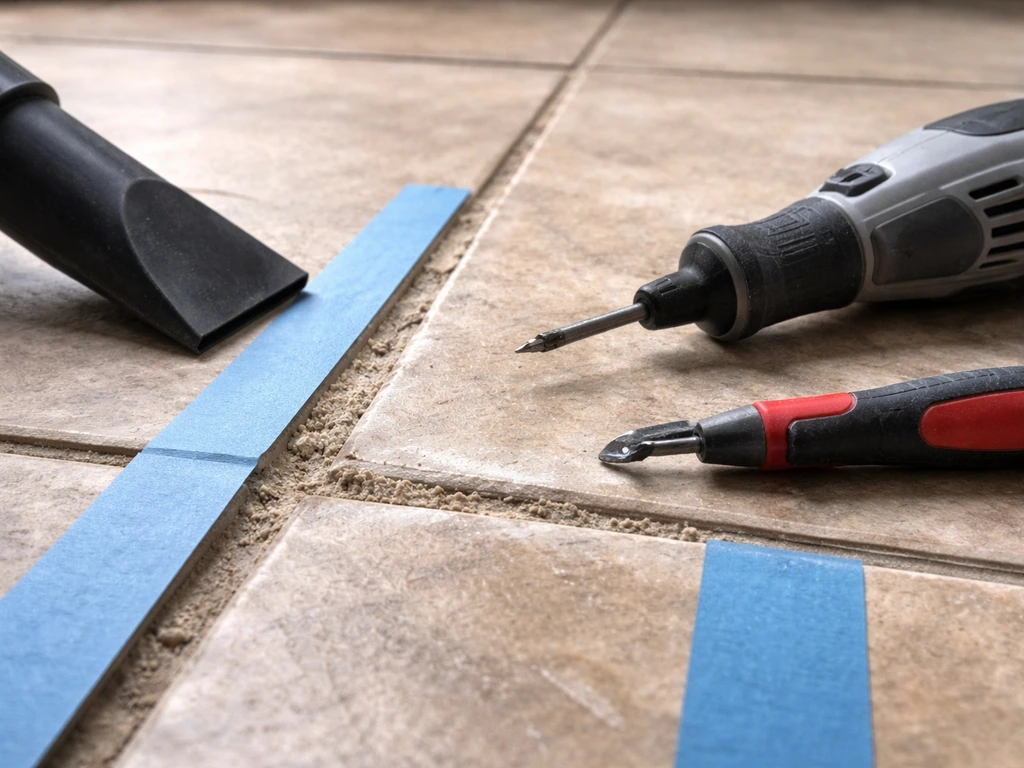
Tools to have ready
- Oscillating multi-tool with a carbide-grit grout removal blade (or diamond grit blade for harder grout)
- Manual grout saw with carbide blade (for tight joints and delicate tiles)
- Grout chisel and hammer (for thick joints or brick mortar)
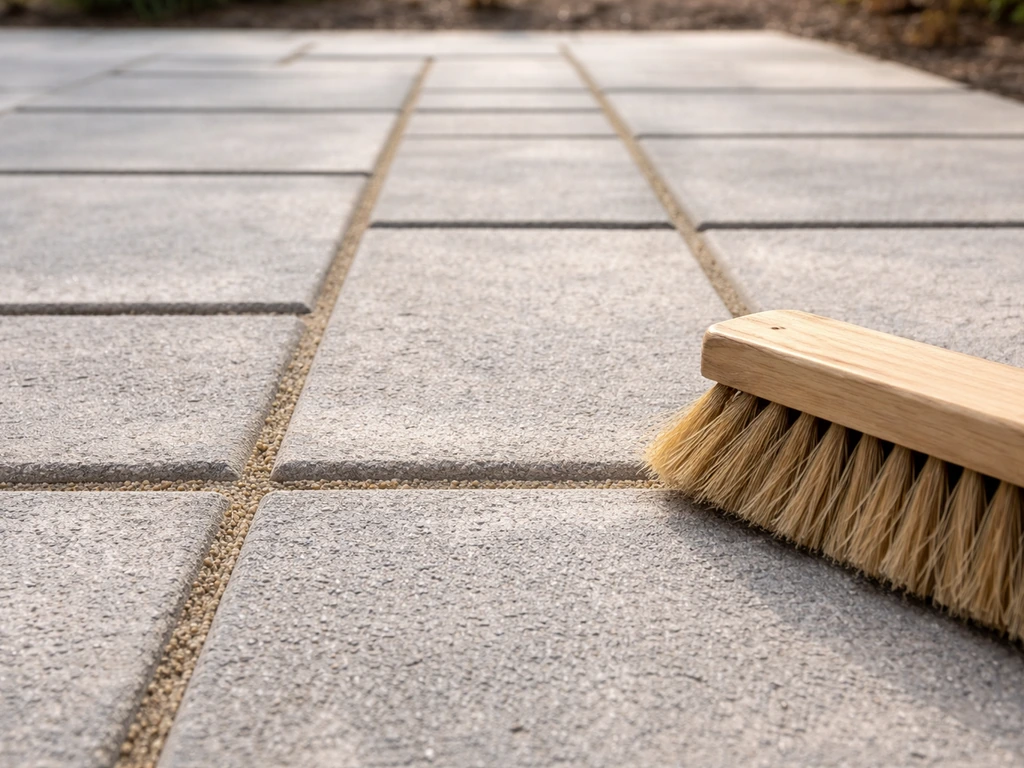
- Stiff nylon brush and a softer natural-bristle brush
- HEPA-filter shop vacuum (aim for 99.97% filtration to capture silica dust)
- Bucket, sponge, and clean water for rinsing
- Painter's tape and plastic sheeting
Protect surfaces before you start
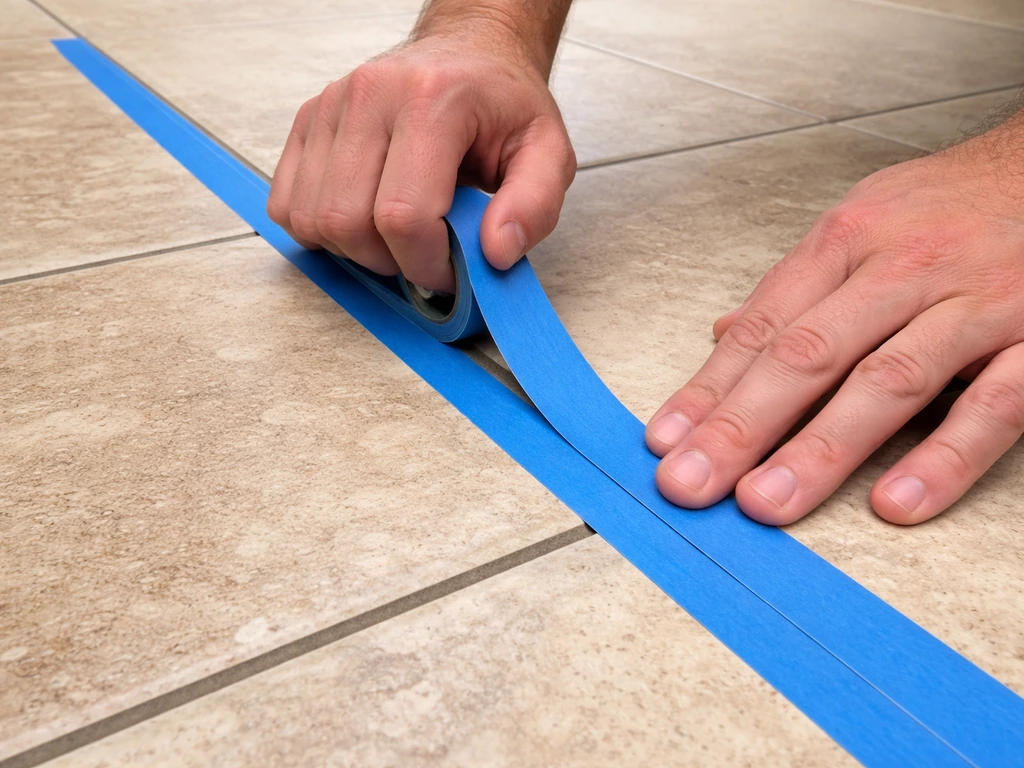
If any of your tiles are cracked, loose, or have a polished or honed finish (common on travertine and some limestone), lay painter's tape along the tile edges adjacent to the joint you're working. This won't stop a slipping power tool, but it gives you a visual guide and offers a thin buffer against light tool contact. Cover any nearby drains with a cloth or mesh screen so debris doesn't wash into them. If you're using chemical cleaners later, note where your plants and grass are so you can rinse runoff away from them.
Step-by-step grout removal methods
I'll walk you through each method from gentlest to most aggressive. Start with the approach matched to your grout hardness and your tile's fragility. You can always escalate to a more aggressive method; you can't un-chip a tile.
Method 1: Manual scraping and grout saw (best for delicate stone, travertine, narrow joints)
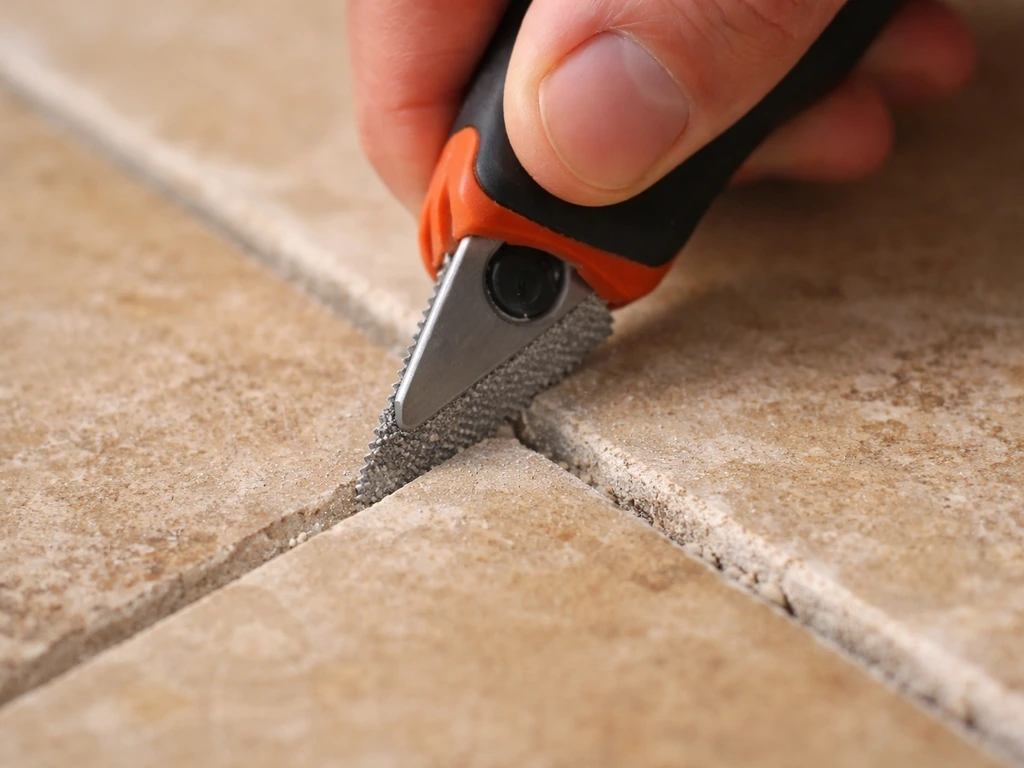
- Position your carbide grout saw blade flat in the joint, centered between the two tile edges. Apply firm, even downward pressure.
- Draw the saw toward you in short strokes (about 2 to 3 inches at a time). Let the carbide teeth do the cutting; don't force or twist the blade.
- Work along the full length of each joint before moving to cross joints. This keeps debris contained and gives you a clear view of depth.
- Once the bulk of the grout is out, use a steel grout chisel held at a low angle to knock out stubborn chunks from the joint bottom. Tap lightly with a hammer rather than striking hard.
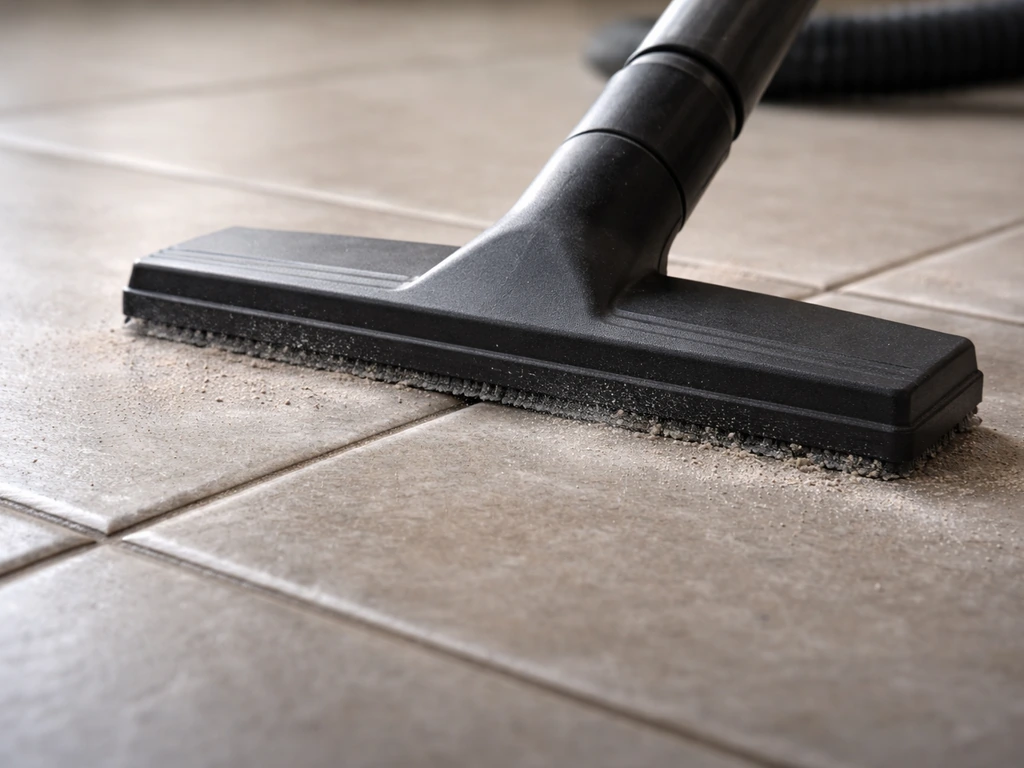
- Vacuum out the joint with your HEPA vacuum after every few feet. Don't let loose grout pile up; it obscures the joint depth and creates more dust.
- Aim to remove grout to about two-thirds of the tile thickness depth. Going deeper risks weakening the tile's bedding.
Method 2: Oscillating multi-tool (best for most cement grout on pavers, porcelain, brick, stone)
This is my go-to for most patio grout removal jobs. An oscillating tool with a carbide-grit blade chews through old sanded grout in a fraction of the time a manual saw takes. Diamond-grit blades last significantly longer than standard carbide blades on hard grout (some manufacturers claim up to 15 times longer life) and are worth the extra cost if you have more than a few square feet to tackle.
- Fit the grout removal blade onto your oscillating tool. Set the blade so it will plunge into the joint center, not ride up along a tile edge.
- Set a conservative plunge depth on the tool if adjustable, just enough to clear the grout without reaching the substrate beneath the tile.
- Hold the tool at a low angle and guide the blade straight down the joint. Move slowly, about 1 inch per second. Rushing causes the blade to skip sideways and nick tile edges.
- Keep the blade centered. Tools like the Dremel with a grout removal attachment have a guide that helps keep contact focused between tiles rather than on them.
- Work each joint in one direction, then make a second pass in the opposite direction to clean up the joint floor.
- Vacuum continuously. Run the HEPA vacuum hose as close to the work area as possible to capture dust at the source rather than letting it settle on surrounding tiles.
- For cross joints, approach from a different angle and slow down even further near the intersection corners, where tile edges are most exposed.
Method 3: Rotary tool (best for very thin joints or detail work)
A rotary tool (like a Dremel with a grout removal bit) is useful when joint widths are too narrow for an oscillating blade to fit cleanly. The bit spins at high speed and grinds the grout out. The tradeoff is that rotary tools are harder to control laterally, so they carry a higher risk of scratching tile faces. Use slow, deliberate passes and keep the guide attachment in contact with the tile face to maintain consistent spacing. This method generates a lot of fine dust, so have the vacuum running the whole time.
What about polymeric sand in paver joints?
If you're removing polymeric sand from paver joints rather than cement grout from tile, the approach shifts. You typically loosen polymeric sand by wetting it thoroughly, waiting 15 to 20 minutes for it to soften, then using a stiff brush or low-pressure water to sweep it out. Use a stiff brush to scrub and work the loosened material out of the grout line before you move on to regrouting or sealing. Avoid high-pressure washing at this stage, since that can displace the pavers themselves or erode the bedding layer beneath. Once the old sand is out, the joints can be cleaned and refilled with fresh polymeric sand.
Chemical options for loosening and cleaning grout
Chemicals don't replace mechanical removal of intact grout, but they help enormously when you're dealing with grout residue, haze, or grout that has softened from weather and age. Choosing the right chemical for your surface is critical, especially on natural stone.
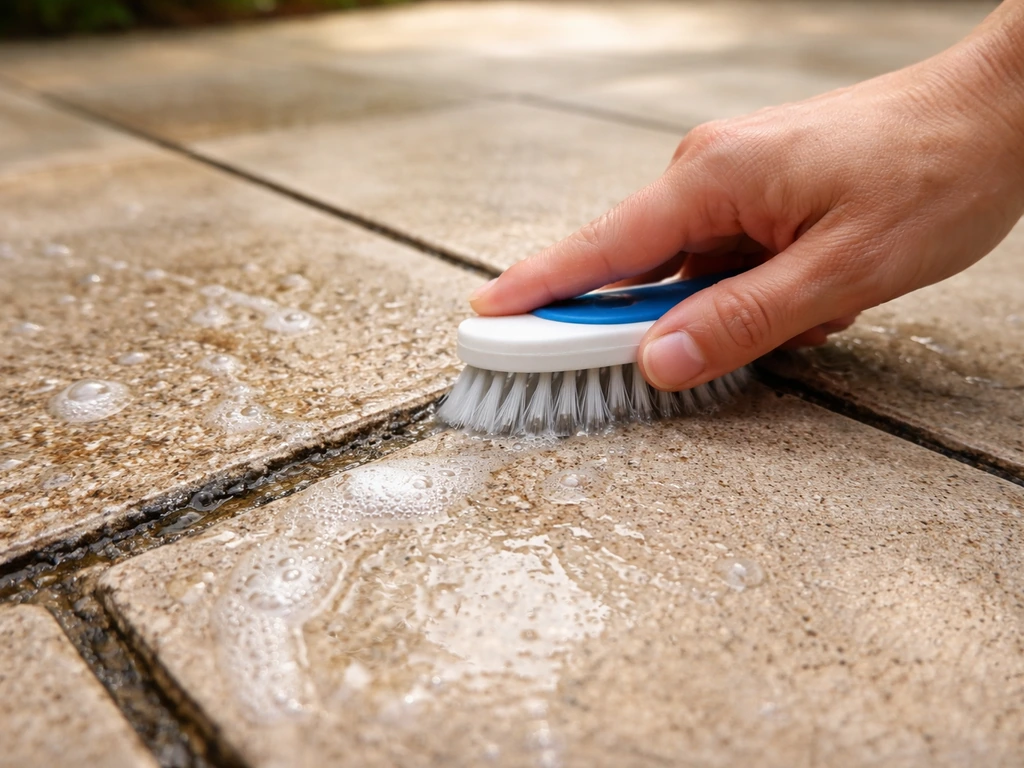
Gentler options: vinegar and mild cleaners
White vinegar (diluted to about 50/50 with water) can loosen light grout haze and surface residue on porcelain and ceramic patio tile. Apply it, let it sit for 5 to 10 minutes, then scrub with a stiff nylon brush and rinse thoroughly. I've found this works reasonably well on haze but does almost nothing on intact, cured grout joints. The important caveat: never use vinegar on travertine, marble, limestone, or any calcium-containing natural stone. The acid in vinegar etches these surfaces almost instantly, leaving dull, rough patches that can't be buffed out easily. Also avoid vinegar on any grout joint on a stone-tiled patio, as it degrades the grout sealer over time and can attack the cement binder in the grout itself.
Bleach and sodium hypochlorite
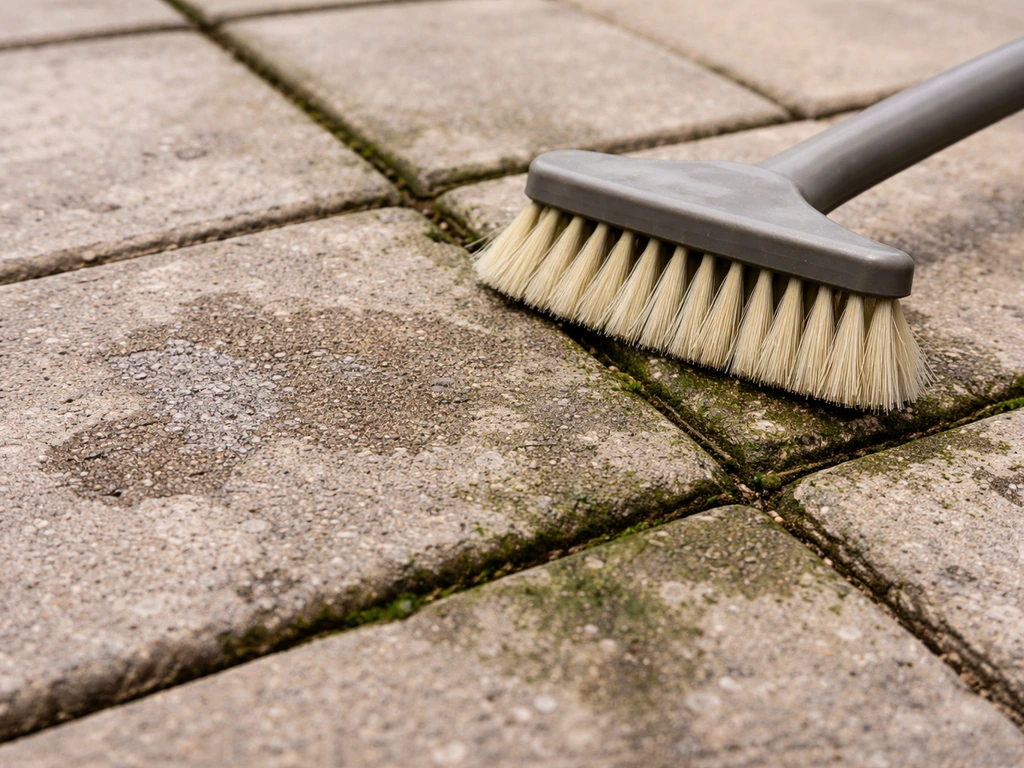
Bleach (sodium hypochlorite solution) is useful for killing mold, mildew, and biological growth in and around grout joints, particularly if you're dealing with darkened or green-stained grout. You can also use the same general approach to knock back moss on a patio surface, but stick to a product that is compatible with your paving material scrape moss off patio. A dilution of about 1 part bleach to 10 parts water applied to the joint area and left for 10 minutes kills most biological matter. Rinse thoroughly after. Bleach does not soften or dissolve cured cement grout, so it's a cleaning step, not a removal tool. Avoid bleach contact with metal hardware (it corrodes) and keep it off natural stone where possible, since repeated exposure can discolor some stone types.
Muriatic acid and stronger acid cleaners
Muriatic acid (hydrochloric acid) is the most aggressive option and genuinely effective at dissolving cement grout residue and haze from porcelain and concrete pavers. The standard dilution is 1 part muriatic acid to 10 parts water (always add acid to water, never water to acid). Apply with a plastic brush, let it react for 2 to 3 minutes, then scrub and rinse immediately with plenty of water. Wear acid-resistant gloves, eye protection, and your respirator. Work in a well-ventilated area.
Here's the firm warning: do not use muriatic acid, hydrochloric acid, or sulfamic acid on travertine, marble, limestone, or any natural stone tile. These acids will chemically attack the stone surface and cause irreversible etching. The same goes for vinegar and lemon juice on grout jointing any natural stone tile. For natural stone, use only a pH-neutral grout haze remover specifically formulated for stone, and follow the manufacturer's dilution and rinsing guidance carefully.
Commercial grout haze removers
Products like LATICRETE Heavy Duty Grout Haze Remover or similar commercial haze removers are formulated specifically for this job and often include guidance on dilution ratios, dwell time, and surface compatibility. These are a smarter choice than DIY acid mixes for homeowners who aren't experienced handling strong acids, and some formulations are safe for stone surfaces that pure muriatic acid would destroy. Always check the product label for compatibility with your specific tile and grout type before applying.
Pressure washing: when it helps and when it causes damage
Pressure washing is a great final rinse and cleanup tool after grout removal, but it's a poor primary removal method for intact grout and can cause real damage if you're not careful with pressure settings.
When pressure washing helps
- Flushing loose grout debris and dust out of joints after mechanical removal
- Rinsing off chemical cleaners or acid treatments (neutralizing rinse step)
- Removing softened polymeric sand residue from paver joints
- Cleaning biological growth (moss, algae) that has colonized grout joints before removal
When pressure washing causes damage
High-pressure washing on paver joints is a known cause of joint sand loss and paver surface damage. Multiple paver manufacturers explicitly warn against using a pressure washer on high power settings on paver installations, noting that it can blast out the jointing material, erode the paver surface, and undermine the stability of the whole installation. I've seen patios where aggressive pressure washing turned a regrouting job into a full paver reset. Don't do it.
Pressure washing technique tips
- Use a wide-angle nozzle (25-degree or 40-degree fan tip) rather than a zero-degree or rotary turbo nozzle
- Keep pressure at or below 1,200 PSI for most patio tile surfaces; go lower (800 PSI or less) on travertine and softer stone
- Hold the nozzle at least 12 inches from the surface and move it continuously; never hold it still over one spot
- Angle the spray along the joint, not directly into it at 90 degrees, to flush debris out rather than blasting the joint bed
- On pavers with polymeric sand joints, limit pressure washing to a surface cleaning role only and replenish jointing sand afterward
Common obstacles and how to fix them
Grout is rock-hard and nothing seems to work
Old, fully-cured sanded grout can be brutal, especially if it was installed 10 or more years ago and has never cracked. If your manual saw is barely scratching it, upgrade to an oscillating tool with a diamond-grit blade. If that's still slow going, score the center of the joint with a grout chisel and hammer first to crack the grout's continuous structure, then follow with the oscillating tool to clear the pieces. Work in short sessions to avoid overheating the tool.
Grout is crumbling and coming out in chunks
Crumbling grout is actually easier to remove but messier. Use a stiff brush and a vacuum to clear as much as possible before using any tools. If the grout is crumbling all the way to the tile base, be careful not to dislodge the tiles themselves. Check each tile for movement after clearing the joints; if tiles rock or shift, you have a bedding problem that needs addressing before you regrout.
Grout haze left on tile faces
Grout haze is the dried film of cement residue that settles on tile faces during grouting. Once it fully dries, it gets significantly harder to remove. A commercial grout haze remover applied at the manufacturer's recommended dilution, scrubbed with a nylon brush, then rinsed thoroughly is the most reliable approach. On porcelain and ceramic tile, a diluted muriatic acid solution can also cut through haze. On natural stone, stick strictly to pH-neutral, stone-safe haze removers. Test any haze remover on a small hidden area first since some chemistries can affect tile glaze or stone finish.
Stubborn spots in corners and intersections
Joint intersections are where most power tools leave grout behind, because the blade can't safely reach into the corner without contacting tile edges. Use a sharp grout chisel and light hammer taps here, working from multiple angles. A rotary tool with a pointed bit can also reach into corners that an oscillating blade can't. Take your time in these spots; they're small but visible.
Dust and mess control
Grout dust from dry mechanical removal is the most serious health risk in this whole job. Keep your HEPA vacuum running with the hose as close to the cutting point as possible throughout the work. After each section, do a damp wipe of the tile faces before the dust settles completely. If you're working in an enclosed patio or sunroom, open windows and doors and consider a box fan set to exhaust. Don't dry-sweep grout dust; it resuspends silica particles into the air. Damp mopping or vacuuming only.
After the grout is out: cleanup, neutralizing, and what comes next
Thorough cleanup first
- Vacuum all joints and tile faces with the HEPA shop vac. Get into every joint corner.
- Damp-wipe all tile faces with a clean sponge and fresh water. Wring the sponge often so you're not spreading grout slurry around.
- Inspect each joint. It should be clean, dry, and free of loose debris. If you see grout chunks still sitting in the bottom, remove them now before they dry.
- Rinse the entire area with clean water if you've used any chemical cleaner. Do this twice.
Neutralizing acid residues
If you used muriatic acid or a strong acid-based haze remover, neutralize the surface before regrouting or sealing. Mix about 1 cup of baking soda per gallon of water and apply it generously across the treated area. The baking soda solution will fizz slightly as it neutralizes any remaining acid. Let it sit for 5 minutes, scrub lightly with a brush, then rinse thoroughly with clean water. This step matters: residual acid in a joint will attack new grout as it cures and dramatically shorten its life.
Let everything dry completely
Joints need to be completely dry before you regrout or apply polymeric sand. Depending on your climate, this typically means 24 to 48 hours of dry weather. Rushing this step and grouting into a damp joint leads to poor adhesion, cracking, and color inconsistency. If you're in a humid climate, give it an extra day.
Regrouting, re-sanding, and sealing
Once joints are clean and dry, you're ready for the next phase. Once everything is dry, follow our step-by-step instructions for how to dry grout a patio so the joints cure evenly and hold up longer. For tile patios, select a sanded or unsanded cement grout matched to your joint width and mix it to a peanut-butter consistency before packing it into the joints. For paver patios, polymeric sand is typically the right jointing material; follow the manufacturer's installation instructions closely, as improper installation (especially incorrect moisture activation) is the most common reason polymeric sand fails. After regrouting, once the new grout has cured fully (typically 72 hours for cement grout), consider applying a grout sealer to protect the joints from future staining and moisture intrusion. If your tile itself is porous (travertine, sandstone, flagstone), seal the tile faces at the same time.
If your patio also has biological growth in the grout lines like moss or algae, deal with that as part of your cleanup before regrouting. Regrouting over active growth leads to rapid joint failure. Getting the joints genuinely clean first is what makes the new grout last. Removing moss from patio grout typically requires loosening the growth first, then cleaning and refreshing the joints so it does not come back quickly. If you also have moss or algae growing in the patio joints, you should remove it first so it does not keep coming back under the grout or sand.
FAQ
How do I tell if I’m dealing with intact grout versus just grout haze?
If the joint is still hard and you can’t scrape it out with a metal pick or the grout saw barely bites, it’s effectively intact cement grout, not just haze. In that case, plan for mechanical removal first, then use only haze remover chemicals afterward (if needed), rather than trying to dissolve the grout itself.
Can I use vinegar, bleach, and muriatic acid in the same cleanup cycle to save time?
Avoid mixing chemicals, especially acids with bleach or any cleaner that might contain ammonia. If you used an acid-based haze remover, neutralize with baking soda as described, rinse thoroughly, and wait until everything is dry before you apply any new chemical or start regrouting.
Is pressure washing okay to remove patio grout?
Yes, but expect different results and more control needs. For cement grout, a pressure washer is usually a poor way to remove intact lines because it can lift sand or bedding and undermine tile stability. For polymeric sand between pavers, high-pressure washing can blow out joint material, so stick to wetting, waiting 15 to 20 minutes, and low-pressure or brushing methods.
What should I do if my grout removal starts chipping tile edges?
If you see minor tile chipping from the first pass, stop and switch to a gentler method for the next section. For example, stay manual with a grout saw or chisel for delicate stone, or use an oscillating tool with a guide and slower passes. Once tiles chip or edges lift, you often have to address tile movement and re-bed before regrouting.
How can I confirm whether my patio joints are polymeric sand instead of cement grout?
Use water to test for polymeric sand. If you wet the joint and it softens and brushes out more easily after waiting, you likely have polymeric sand, not cement grout, and mechanical chipping approaches may damage paver edges or bedding. Then follow the wet-loosen-brush-out process and only regrout with fresh polymeric sand.
What if haze is still visible after I scrub and rinse the joints?
If the joint won’t accept water during the cleaning step or the haze remover won’t rinse clear, residue is likely still present. Re-scrub and rinse, then do a small “cure test” by letting a treated patch dry fully. If grout or sealer later beads up or sloughs, you need additional haze removal and neutralization before regrouting.
Can I regrout if some tiles are cracked or rocking after grout removal?
Yes. Cracked or loose tiles mean the issue is partly structural, not just grout. Clear all failing grout, check for rocking, and fix any bedding or tile movement before regrouting, otherwise the new grout will crack quickly even if the grout removal was perfect.
What’s the best alternative to vinegar for grout haze on stone patios?
If you want to avoid vinegar on stone, use a pH-neutral, stone-safe grout haze remover and verify compatibility with your tile finish. Test on a hidden spot first. For porcelain and ceramic tile you can use the diluted vinegar method for light haze, but for travertine and other calcium-based stones stick to neutral or stone-labeled products.
How long should I wait before regrouting after removing old grout?
For cement grout regrouting, don’t grout into damp joints. A practical rule is to wait 24 to 48 hours of dry weather, plus extra time in humidity, and only start when the joints look uniformly dry through the depth. If you’re unsure, check by feeling the joint edges at intervals and by re-checking the next morning.
Do I need to seal after regrouting, and when should I apply it?
Don’t assume sealer is optional. If you used aggressive acids, neutralized fully, and the patio is on the porous side (travertine, sandstone, flagstone), sealing both the joints and tile faces helps reduce future staining and makes future cleanups easier. Use the sealer after the new grout has cured fully, not immediately after application.
What’s the right order if I have moss or algae in the grout lines?
Yes, but handle growth before grout work. If moss or algae is active, it keeps reappearing and it can interfere with grout bonding, leading to rapid joint failure. Remove the biological growth as part of the joint cleanup, then let everything dry before you regrout.
What’s the safest way to manage grout dust while removing it?
The safest dust-control approach is continuous HEPA vacuuming at the cut point during dry removal, plus damp wiping of tile faces after each section. Never dry-sweep grout dust because it re-aerosolizes silica particles, which are the main long-term lung hazard in this job.
Next Articles
How to Dry Grout a Patio: Step-by-Step Guide
Step-by-step guide to dry grout patio joints: prep, grout choice, application, drying time, fixes for gaps, haze, and wa
How to Use a Brush in Patio Grout: Step-by-Step
Step-by-step guide to clean patio grout with the right brush, technique, solutions, and safe rinsing to remove mold, alg
How to Clean Patio Grout: Step-by-Step for Every Stain
Step-by-step patio grout cleaning for dirt, mildew, algae, rust and stains, with safe methods for each surface type.