
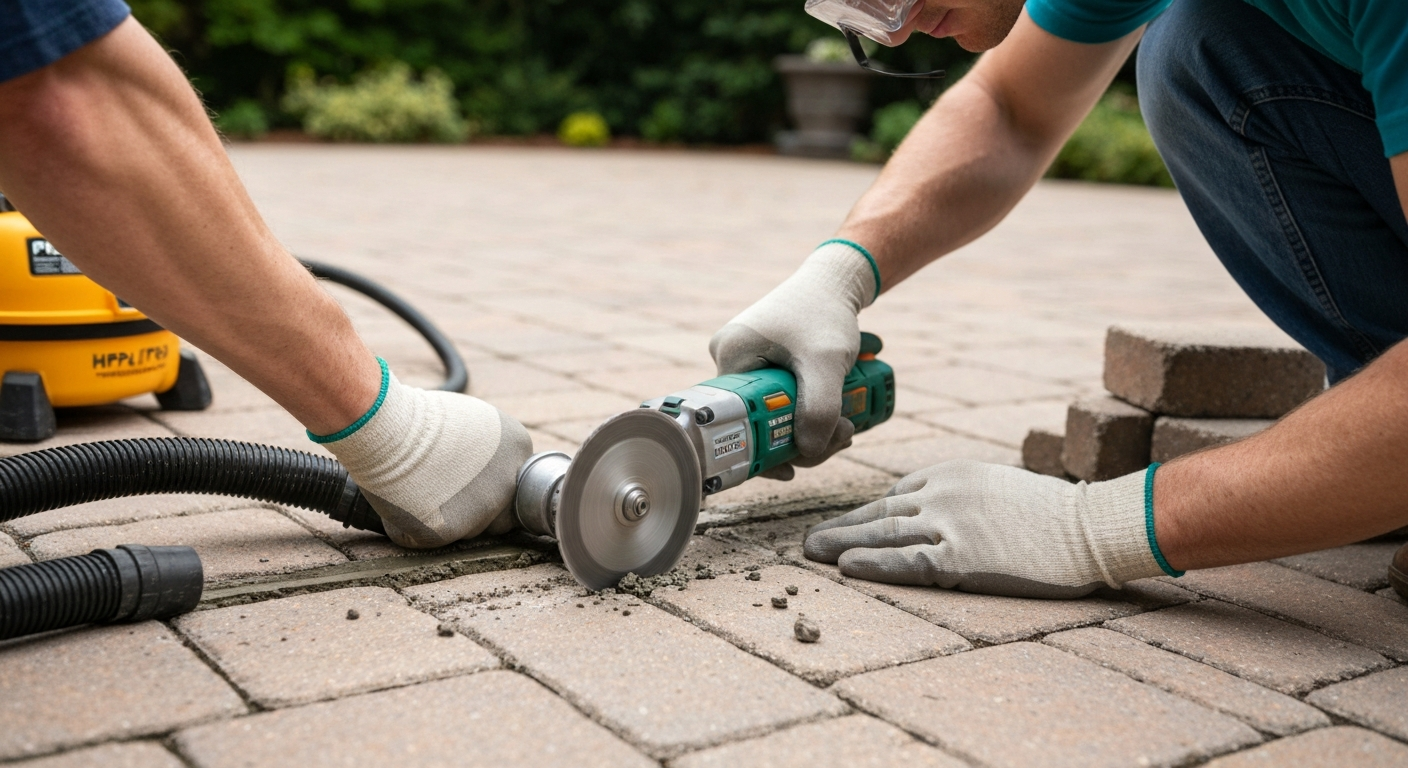
The best tool for removing patio pointing depends on your material and how fast you want to work, but for most homeowners I'd start with an oscillating multi-tool fitted with a carbide or diamond grout blade. It gives you control, fits tight joints, and is much less likely to chip brick or stone edges than an angle grinder. If you need to strip large areas quickly and you're confident around power tools, a handheld angle grinder with a diamond tuckpoint wheel gets the job done faster, but it demands a dust shroud, a HEPA-filtered vacuum, and a careful hand. For renters or anyone wanting the lowest-risk option, a manual plugging chisel and club hammer still works well for soft or degraded mortar.
Best Tool for Removing Patio Pointing: Top Picks & Tips and Methods

Dylan Hale
8 Aug 2026
What patio pointing is and when it actually needs removing
Pointing is the mortar, jointing compound, or polymeric sand that fills the gaps between your patio units, whether those are concrete pavers, brick, natural stone, travertine, or flagstone slabs. Over time it cracks, shrinks, crumbles, or gets stained, and once water gets in behind it the damage spreads fast. Loose pointing lets weeds take hold, allows pavers to shift, and can let moisture work its way under the slab.
You need to remove and replace pointing when: joints are cracking or crumbling more than a couple of millimetres deep, weeds or moss are growing out of the joints, the surface is lifting or pavers are rocking, you can drag mortar out with a key or fingernail, or you're repointing after a deep clean and the old compound is stained, discoloured, or the wrong type for your material. If only one or two joints are bad, spot repairs are fine. If more than a third of the joints are compromised, a full rework is usually a better long-term result.
The best tools to use: my prioritised picks
I've tried most of the options on the market, and here's how I honestly rank them for a typical domestic patio job.
| Tool | Best for | Speed | Edge damage risk | Dust level | Cost (approx.) |
|---|---|---|---|---|---|
| Oscillating multi-tool + carbide/diamond grout blade | Precision work, delicate stone, tight corners | Slow-moderate | Low | Moderate | £60–£150 buy / £15–£25/day rent |
| Angle grinder + diamond tuckpoint wheel | Large areas, hard mortar, concrete pavers | Fast | High without care | Very high (needs shroud + HEPA vac) | £40–£120 buy / £20–£35/day rent |
| Plugging chisel + club hammer | Small areas, soft mortar, budget option | Slow | Low-moderate | Low | £10–£25 buy |
| Electric raking tool (e.g. Arbortech Allsaw AS170) | Brick walls and patios, mortar joints | Moderate-fast | Low-moderate | Moderate-high (use extractor) | £200–£400 buy / £30–£50/day rent |
| Reciprocating saw + mortar removal blade | Thick mortar beds, demo work | Fast | High | High | £50–£150 buy / £20–£30/day rent |
| Cold chisel + hammer (manual) | Spot repairs, very tight budgets | Very slow | Low with care | Low | £5–£15 buy |
My top manual pick is the plugging chisel and club hammer combination. It costs almost nothing, gives you feel for the joint, and won't run away from you on a slippery surface. My top powered pick is the oscillating multi-tool for anything delicate, stone, travertine, or brick, and the angle grinder with a proper dust-control setup for concrete pavers or large areas where speed matters. If you're doing a whole patio over a weekend, hiring an angle grinder with a shroud attachment and a good HEPA shop vac is the most efficient route.
Renter-friendly and low-impact alternatives
Not everyone can buy or hire an angle grinder, and some rental properties won't allow power tool work without landlord permission. The good news is that most domestic patio pointing, especially older lime-based mortar or degraded polymeric sand, can be removed manually without any power tools at all.
- Plugging chisel and club hammer: drive the chisel along the joint at a shallow angle and the mortar pops out in chunks. A 250g club hammer is easier to control than a full lump hammer.
- Stiff-bristle grout brush or wire brush: useful for clearing crumbled or sandy pointing from shallow joints before you repoint.
- Flat-head screwdriver or old kitchen knife: genuinely effective on soft or polymeric sand pointing that has lost its binder. Slower but no dust, no noise.
- Oscillating multi-tool (corded or battery): widely available to rent for £15–£25/day and far quieter and safer than a grinder. Most tool hire shops stock them. A carbide grit blade (Dremel MM501 type or FEIN equivalent) removes mortar without cutting into the paver itself.
- Garden hose and stiff brush combo: for very old, weather-softened mortar, soaking the joint for 10–15 minutes and then brushing with a stiff nylon or wire brush can shift a surprising amount of material. This is the gentlest method and leaves almost no dust.
If you're renting and want to avoid complaints about noise or mess, the manual chisel method or the soak-and-brush method produces almost no dust and no vibration through the structure. For tips on removing winter ice safely before repointing, see our guide on how to melt ice on patio. Just bag your debris as you go and the job looks tidy throughout.
Step-by-step: how to remove patio pointing properly
Whatever tool you're using, the sequence matters. Rushing the early steps means you end up with loose grit contaminating the fresh pointing you put back in. For a broader guide on how to remove a whole patio, see our how to remove patio resource.
- Clear the surface: sweep all loose debris, moss, and dirt off the patio. If the joints have heavy biological growth, apply a patio cleaner or diluted bleach solution (1 part bleach to 5 parts water) and let it dwell for 15–20 minutes, then rinse thoroughly. Let the surface dry for at least 24 hours before you start mechanical removal.
- Mark the joints that need work: run a screwdriver along every joint. Any joint where the tip sinks more than 2–3 mm without resistance needs removal and repointing. Mark with chalk so you don't miss any.
- Set your depth: for most repointing work, you need to remove to a minimum depth of 15–20 mm (roughly 3/4 inch). For polymeric sand specifically, Techniseal and similar manufacturers typically require a minimum 38 mm (1.5 inch) joint depth for their product to perform correctly, so check your product's technical data sheet.
- Start at one end and work systematically: whether using a chisel or a powered tool, work along the joint in one direction. Don't jump between joints — you'll end up with grit falling into finished sections.
- Remove loose material as you go: every few metres, vacuum or brush out the loosened mortar before it gets trodden in or falls into adjacent joints. A small stiff brush and a dustpan or a wet/dry vacuum works well here.
- Check your depth with a probe or ruler: once you've run your tool down the joint, insert a small ruler or a nail to confirm you've hit the required depth before moving on.
- Final clean-out: once all joints are cleared, do a thorough vacuum of the entire surface, then either blow out or vacuum each individual joint to ensure no loose grit or dust remains. This step matters — any debris left in the joint will compromise the bond of your new pointing compound.
- Let the joints dry completely: even if the surface looks dry, moisture inside the joint will cause polymeric sand to set prematurely or prevent mortar from bonding. Give it at least 24–48 hours of dry weather, or use a heat gun on low on a cool day.
How deep to go and how to prep joints for repointing
Depth is the part most DIYers get wrong, and it's the reason fresh pointing fails within a year. You need to remove enough of the old material to give the new compound something to grip onto and enough mass to resist movement and frost.
For standard mortar repointing, aim to remove to at least 15–20 mm deep. For polymeric jointing sand, check the specific product TDS carefully: Techniseal's SmartSand and HP NextGel products, for example, specify a minimum joint depth of around 38 mm (1.5 inches) and a minimum joint width of around 1.5 mm. Going shallower than the product minimum means the sand won't compact and lock properly, and it'll wash out or blow away within a season.
Once you've cleared to depth, use a stiff brush or compressed air (carefully, away from your face) to blow out all fine dust. Then run a damp sponge along the joint to slightly moisten the sides, this stops dry masonry from sucking moisture out of your fresh mortar too fast and causing it to cure too quickly and crack. Don't saturate, just dampen. For polymeric sand, the joint sides should be dry, not damp, so reverse this advice if that's your chosen product.
Dust control, PPE, and the chemicals you need to know about
This is the section I want you to take seriously, especially if you're using a grinder. Mortar and concrete dust contains respirable crystalline silica, which causes silicosis, a permanent, progressive, and potentially fatal lung disease. OSHA's construction silica standard (29 C.F.R. §1926.1153) sets the permissible exposure limit at 50 µg/m3 as an 8-hour time-weighted average, and the NIOSH recommended exposure limit is the same figure. Dry grinding without controls can put you miles above that in minutes.
For any powered mortar removal, the OSHA Table 1 compliance method for handheld grinders requires a commercially available grinding shroud that fully encloses the wheel, connected to a vacuum with airflow meeting the tool manufacturer's minimum specification (check your grinder manual) and a filter rated at 99% efficiency or better, that means a HEPA-rated filter. OSHA’s task fact sheet “Handheld Grinders for Mortar Removal (Tuckpointing)” specifies using grinders with commercially‑available shrouds and vacuum dust‑collection systems, using HEPA vacuums indoors between passes, and identifies required respiratory protection (APF values) and controls to meet Table 1 compliance blank" rel="noopener noreferrer">OSHA’s task fact sheet “Handheld Grinders for Mortar Removal (Tuckpointing)” specifies using grinders with commercially‑available shrouds, vacuum dust‑collection systems, HEPA vacuums indoors between passes, and identifies required respiratory protection and controls to meet Table 1 compliance.. See blank" rel="noopener noreferrer">OSHA publications listing including 'Handheld Grinders for Mortar Removal' fact sheet (OSHA) for guidance on required shrouds and HEPA vacuums. Indoors, the rule also requires using a HEPA vacuum to clean up loose dust between passes before it becomes airborne again. If your vacuum is undersized or the shroud doesn't seal properly, capture efficiency drops dramatically. Don't use a standard shop vac without a HEPA filter.
- Minimum respiratory protection: an FFP2 (N95) half-face respirator for outdoor work; FFP3 (P100) if working in an enclosed space or for extended periods.
- Eye protection: safety glasses or goggles — mortar chips travel fast.
- Hearing protection: foam earplugs or ear defenders, especially with a grinder.
- Gloves: cut-resistant work gloves protect against chisel slips and abrasive blades.
- Knee pads: you'll be on your knees for a long time — cheap ones make a real difference.
- Old clothing: mortar dust and grinding sparks ruin fabric.
On the chemical side: if you're pre-treating stubborn mortar with diluted muriatic (hydrochloric) acid to soften it before removal, wear chemical-resistant gloves, eye protection, and work outdoors with good airflow. Always dilute acid into water, never water into acid. Rinse the area thoroughly with clean water before starting mechanical removal. I'd only recommend acid treatment on concrete or hard brick, never use it on travertine, limestone, or any calcium-based stone, as it will etch and permanently damage the surface. For those materials, a pH-neutral cleaner or plain water is the pre-treatment of choice.
Material-specific guidance: concrete pavers
Concrete pavers are the most forgiving material for powered tool work. The edges are machine-pressed and relatively hard, so an angle grinder is less likely to bite into the paver face than it would on soft brick. That said, grinder wheels wander if you lose concentration, and even a brief touch of the wheel against the paver edge will leave a visible gouge.
I'd recommend a diamond tuckpoint wheel (segmented, not continuous rim) set to cut no deeper than the joint width. Run the tool along the centre of the joint, not the edges. For very narrow joints under 8–10 mm wide, an oscillating tool is safer because the blade width is easier to keep contained. Always fit a dust shroud and connect your HEPA vacuum before switching on. After clearing joints on concrete pavers, check for any areas where the grinder has glazed or scratched the paver edge, light sanding with a coarse abrasive block will blend those in before repointing.
Material-specific guidance: brick patios
Brick is softer and more variable than concrete paver stock. Old handmade bricks in particular can be quite soft, and the arrises (edges) chip easily if your tool wanders even a few millimetres. I've seen grinder damage on brick that made a tidy patio look like it had been attacked with a pick.
For brick, my strong preference is the oscillating multi-tool or the plugging chisel for anything within 10 mm of the brick face. Use the grinder only in the centre of wide joints (15 mm or more), and keep your passes shallow, two or three light passes are safer than one deep cut. Specialist brick and mortar saws like the Arbortech Allsaw AS170 are worth considering for large brick patio jobs: they're designed for mortar joints specifically, include a vacuum extractor adaptor, and offer better depth control than a standard angle grinder. Never use an angle grinder on soft, reclaimed, or handmade bricks without testing on an inconspicuous area first.
Material-specific guidance: natural stone (granite, slate, and similar)
Natural stone varies enormously in hardness. Granite is tough and can handle a grinder with care; slate cleaves along natural planes and can shatter if a blade catches an edge at the wrong angle. As a rule, use an oscillating multi-tool or a manual chisel for all natural stone, and reserve the grinder for the middle of wide joints only.
Slate is particularly vulnerable to vibration, handheld grinders transmit a lot of vibration through the stone and can cause hidden micro-cracks that only show up later when the slab is walked on. Wet the joints lightly before working and keep your tool movements slow and deliberate. For granite, the surface is hard enough to resist most accidental tool contact, but the joints are often quite narrow, so a diamond-coated oscillating blade (like a Dremel MM501 or FEIN carbide equivalent) gives you the precision you need.
Material-specific guidance: travertine patios
Travertine is a calcium carbonate stone, which means it reacts badly with any acid, including the weak acids in some cleaning products. Never use muriatic acid or vinegar as a pre-treatment on travertine. Even diluted bleach should be used with caution and rinsed off quickly.
Travertine is also softer than granite or concrete and has a naturally pitted surface that can trap mortar dust. Use only an oscillating multi-tool or a plugging chisel on travertine joints, no grinders, no reciprocating saw. Work slowly, keep the blade in the centre of the joint, and stop and vacuum frequently. After clearing the joints, rinse the surface gently with clean water rather than pressure washing, as high-pressure water can dislodge the natural fills in travertine's characteristic holes. For repointing, use a product specifically formulated for travertine or a compatible unsanded grout, check the manufacturer's compatibility guidance before buying.
Material-specific guidance: flagstone patios
Flagstone (which includes sandstone, limestone, and quartzite varieties) often has irregular joint widths and irregular slab edges, which makes powered tools tricky. The uneven joint lines mean a grinder can easily jump off the joint and score the stone surface.
For flagstone, a plugging chisel and club hammer is genuinely the best tool in most cases, because the variable joint width means you're constantly adjusting your line of attack. An oscillating tool works well in the wider sections. Avoid grinders entirely on soft sandstone or limestone flagstone, those materials can be gouged by the edge of a grinding wheel before you've registered what's happening. If you need to chemically pre-treat stubborn mortar on limestone flagstone, use only a pH-neutral masonry cleaner, never acid. Sandstone is similarly acid-sensitive.
Material-specific guidance: solid concrete patios
Solid concrete patios sometimes have control joints (expansion joints) filled with mortar or a flexible compound that needs periodic replacement. The work here is more like cutting than chiselling, and an angle grinder with a diamond blade or tuckpoint wheel is the most efficient tool. The key difference from paver work is that the surrounding surface is the same material as the joint edges, so a slightly wandering tool does less cosmetic damage.
That said, dust is even more of a concern on solid concrete than on mortar joints, because you're cutting through a denser silica-containing material. Full dust control, shroud, HEPA vacuum, FFP2 minimum respirator, is non-negotiable. Wet cutting (using a grinder with a water feed or running water along the cut line) is an effective alternative to dry cutting with a vacuum system, but makes cleanup messier. For homeowners doing occasional maintenance, the oscillating tool with a diamond blade is a good compromise: slower, but much less dust and a cleaner cut.
Post-removal cleaning and repointing: what to use and why
Once your joints are clear, dry, and clean, you have three main options for repointing: polymeric jointing sand, ready-mixed mortar or resin mortar, and traditional lime-based mortar. For winter maintenance, see our short guide on how to remove ice from patio to protect joints and prevent freeze–thaw damage. Each has a real use case, and choosing the wrong one for your material is a common and expensive mistake.
| Product type | Best materials | Durability | DIY difficulty | Weed resistance | Flexibility | Notes |
|---|---|---|---|---|---|---|
| Polymeric jointing sand (e.g. Techniseal SmartSand) | Concrete pavers, regular-joint natural stone | Good (5–10 years) | Easy | Very good | Moderate | Needs minimum 38 mm joint depth; follow TDS watering instructions exactly or it sets on the surface |
| Ready-mixed mortar / resin mortar | Brick, concrete pavers, stone | Excellent | Moderate | Good | Low | More permanent; requires dry conditions and correct water-to-mix ratio |
| Lime mortar (NHL 2 or NHL 3.5) | Historic brick, soft stone, travertine, flagstone | Good but softer by design | Moderate-hard | Moderate | High | Preferred for soft/historic materials — it's sacrificial, so it cracks before the stone does. Cures slower, needs frost protection |
| Epoxy or polyurethane grout | Travertine, natural stone (indoor/outdoor) | Excellent | Hard | Excellent | Low-moderate | Expensive; very little working time; generally not recommended for large patio areas as a DIY job |
I've found polymeric sand is the right choice for most modern paver patios, it's the easiest to apply and looks clean. But I've seen it fail repeatedly when people don't read the depth requirement on the bag. If your joint is less than 38 mm deep, the sand can't compact and lock, and it washes or blows out within months. Lime mortar is the correct choice for anything old, soft, or historic, it's designed to be slightly weaker than the surrounding material so it absorbs movement and eventually cracks itself rather than cracking the stone. Using a hard Portland cement mortar on soft limestone or old brick is a very common mistake that leads to spalling and edge damage.
When pointing removal turns into a full patio or tile removal job
Sometimes what looks like a pointing problem is actually a structural problem, and trying to repoint over it will just delay a larger, more expensive job. Watch for these signs that you need to escalate from joint repair to full removal: For step-by-step guidance on lifting and disposing of an entire patio, see my guide on how to remove an old patio.
- Multiple pavers or slabs are rocking or loose — the pointing has failed because the bedding layer beneath has failed, not just the joint filler.
- Water is pooling on the surface or in the joints after rain — this suggests the base has subsided or the drainage gradient has been lost.
- You can see cracks running through the pavers or slabs themselves, not just through the joints — structural movement is causing this, and repointing won't fix the underlying issue.
- The mortar bed is hollow when tapped — a drum sound means delamination between the slab and the base, which repointing cannot address.
- More than 40–50% of the joints are failed or pavers are shifting — at this point, full removal and re-laying is usually more cost-effective and longer-lasting than piecemeal repointing.
- You find crumbling or wet sub-base material when you probe deep into a joint — the base needs rebuilding, which means full removal.
Demolition tools for full patio or tile removal: buy vs rent
If you're moving to a full patio lift, the tools change significantly. For step-by-step guidance on lifting and removing whole patio tiles, see our guide on how to remove patio tiles. You're now breaking out full slabs or tiles rather than clearing narrow joints, and the right equipment makes this a half-day job rather than a week-long ordeal.
| Tool | Use case | Buy cost (approx.) | Daily hire cost (approx.) | Buy or hire? |
|---|---|---|---|---|
| Electric or pneumatic breaker / rotary hammer with chisel bit | Breaking mortar beds, lifting bonded slabs, concrete | £150–£400 | £40–£70/day | Hire unless you have regular use |
| Flat pry bar (600–900 mm) | Levering up loose pavers and slabs | £15–£30 | N/A | Buy — cheap and endlessly useful |
| Bolster chisel + lump hammer | Breaking mortar bonds around individual pavers | £15–£30 | N/A | Buy |
| Angle grinder with diamond blade | Cutting through mortar around tiles or stubborn slabs | £40–£120 | £20–£35/day | Hire if you don't own one already |
| Wheelbarrow + rubble bags | Debris removal | £30–£60 | N/A | Buy or borrow |
| Skip or builders bags | Disposing of broken material | £150–£300 (skip hire) | N/A | Hire a skip for anything over 0.5 m³ |
For most single-patio removal jobs, I'd hire rather than buy a breaker. A full-size electric breaker weighs 10–15 kg and is fatiguing to use all day, tool hire shops often carry lighter SDS-plus rotary hammers that are easier to handle for domestic jobs and cost £30–£50 a day. If you're removing a small area (under 10 m²), a bolster chisel and lump hammer plus a pry bar is often enough and keeps the cost to under £50 total. For anything over 20 m² with a hard mortar bed, the electric breaker pays for its hire cost in saved time and effort within the first hour.
When to call a professional
There are four situations where I'd always recommend calling a professional rather than attempting the work yourself. First, if the patio is part of a listed or historic building, lime mortar mixes for heritage masonry need to be matched to the existing material to avoid damaging the fabric of the building, and getting this wrong can cause permanent damage and planning compliance issues. Second, if the patio is structurally connected to the house or retaining walls, subsidence or movement in those cases may have a cause that goes well beyond pointing, and a builder or structural engineer needs to assess before any removal. Third, if your area is very large (over 50–60 m²) or the mortar is hard-set Portland cement on dense stone, the volume of silica-generating cutting work required puts even well-equipped homeowners at meaningful health risk compared to a professional with full engineering controls. Fourth, if you've uncovered utilities, gas, water, or electric cables that weren't on the original plans, stop immediately and get a professional to assess. If you also need help with account or subscription issues, see our concise guide on how to delete patio account.
Common mistakes and quick troubleshooting
- Not going deep enough: if your fresh pointing washes out or cracks within a year, this is almost always the cause. Check your depth before repointing, not after.
- Using a grinder on soft or historic brick: the arrises chip in seconds. Use an oscillating tool or chisel instead.
- Applying polymeric sand to wet joints: the sand activates early and sets on the surface rather than in the joint. Always check and wait for full joint dryness.
- Skipping dust control because it's outdoors: outdoor air doesn't protect you from silica. Crystalline silica particles are too fine to see and too small to feel — you can inhale damaging quantities without any visible dust cloud. Always wear a respirator rated at least FFP2/N95.
- Using acid pre-treatment on calcium-based stone: muriatic acid will etch and permanently dull travertine, limestone, and marble. Test any cleaner on a hidden area first.
- Repointing in frost or rain: mortar and polymeric sand both need a temperature above 5°C and dry conditions to cure correctly. Check the forecast for 24–48 hours after application.
- Not cleaning joints before repointing: any loose grit, dust, or organic matter left in the joint prevents bonding. The vacuum step is not optional.
- Overworking an oscillating blade: carbide grit blades wear fast in hard mortar. Have a spare on hand — a blunt blade generates more heat and vibration and takes much longer.
Quick checklist before you start
- Tools ready: oscillating multi-tool or angle grinder with correct blade, plus plugging chisel as backup. Shroud and HEPA vacuum connected and tested if using a grinder.
- PPE on: FFP2 or FFP3 respirator, safety glasses, gloves, ear protection.
- Surface prepped: swept, treated for moss/weeds if needed, dried for 24 hours.
- Depth target confirmed: 15–20 mm for mortar repointing; check your specific polymeric sand TDS for its minimum (typically 38 mm).
- Material identified: know whether you have soft stone, calcium-based stone, or concrete — your tool choice and any chemical pre-treatment depends on this.
- Weather checked: at least 24–48 hours of dry, frost-free weather forecast after repointing.
- Repointing product chosen and in stock: polymeric sand for pavers; lime mortar for soft/historic stone; ready-mix or resin mortar for brick and hard stone.
- Joints clean and dry before repointing: vacuum out all debris, dampen sides for mortar (or keep dry for polymeric sand), and do a final check before applying your new compound.
FAQ
What are the top recommended tools for removing patio pointing (manual and powered)?
Prioritized recommendations: Manual (best for precision/delicate work): • Stiff mortar/rubber joint rakes and flat cold chisels (thin 1/4–1/2" tips) for shallow joints and touch‑ups. • Oscillating multi‑tool with carbide or diamond grout/mortar blades (FEIN, Dremel types) for careful, low‑chatter removal near edges. Powered (for speed on robust materials): • Angle grinder with a tuckpointing/diamond segmented wheel or cup wheel — fastest but highest dust and risk to edges (use only with dust control). • Dedicated brick/mortar saw or tuckpointing grinder with shroud (Arbortech/Allsaw types) where available — better depth control and dust extraction compatibility. Guidance sources: manufacturer accessory guidance (FEIN, Dremel), OSHA/NIOSH guidance on grinder use and dust controls.
What renter‑friendly alternatives avoid heavy powered tools?
Renter‑friendly options: • Oscillating multi‑tool with grout/mortar blades (compact, usually allowed in rentals). • Manual carbide grout saws, stiff joint rakes, and hammer + thin cold chisel for small jobs. • Handheld grout removal chisels/razor blade scrapers for polymeric sand or shallow joints. These methods are slower but produce far less dust and vibration and are suitable where tool rental or discharge restrictions exist. Manufacturer accessory pages (Dremel/FEIN) and tool rental policies support these choices.
Step‑by‑step safe technique for removing pointing on patios
Basic, material‑aware workflow: 1) Inspect joints: note depth, width, and surrounding edge condition. 2) Clear surface debris and vegetation. 3) Choose tool: manual/oscillating for delicate stone; grinder/tuckpoint wheel for robust concrete/brick with dust controls. 4) Set removal depth: remove pointing to the recommended depth for repointing (see below). 5) Use steady, shallow passes, keep tool perpendicular to joint, and protect edges with masking or guides on delicate stone. 6) Clean loose dust between passes using a HEPA vacuum or wet wiping where appropriate. 7) Final blowout/HEPA vacuum and damp sponge cleanup prior to repointing. Source guidance: OSHA/NIOSH task guidance for tuckpointing and manufacturer tool manuals.
How deep should I remove the pointing before repointing?
Target depth: remove pointing to at least twice the joint width or to the manufacturer’s minimum for the chosen re‑jointing material. Common practical targets: • Polymeric sand: follow product TDS, typically minimum joint depth ~1.5 in (4 cm) for proper locking (confirm product). • Mortar (cement/lime mixes): typical depth 1/2–1 in below the stone/paver surface for pavers and brick; deeper (~1 in or more) for thicker stone joints to allow proper compaction. Confirm with polymeric sand or mortar technical data sheets. Always leave enough depth for the bedding of the new joint material and a slightly recessed face for tooling.
What safety and dust‑control measures must homeowners follow?
Essential controls and PPE: • Engineering controls: use grinders with fitted shrouds and HEPA‑filtered vacuums sized per tool manufacturer recommendations, or use water suppression where compatible with the surface. • Respiratory protection: if controls don’t meet Table 1 or exposures are unknown, use an appropriate respirator (per OSHA/NIOSH guidance) with the correct Assigned Protection Factor. • Eye, hearing and hand protection: safety glasses or face shield, hearing protection, gloves. • Work practices: keep area wet or vacuumed between passes, avoid dry sweeping, and when working indoors or in enclosed spaces prioritize LEV + HEPA vac. Authoritative sources: OSHA crystalline silica construction standard (29 C.F.R. §1926.1153), OSHA tuckpointing fact sheet, NIOSH silica guidance and studies.
How do wet methods compare with vacuum/shroud controls? When are they appropriate?
Evidence‑based summary: • Both wet methods and local exhaust (shroud + HEPA vacuum) substantially reduce respirable silica; combining them gives the largest reduction. • Wet suppression works well for many masonry cuts but must provide ample sheet flow (not just a small spray) and may be impractical on polished/travertine/flagstone surfaces that could stain or etch. • Shroud + properly rated HEPA vacuum is required indoors or where water would damage finish, and effectiveness depends on correct shroud fit and vacuum airflow per tool manufacturer. Authorities: NIOSH/OSHA evaluations and peer‑reviewed studies on engineering controls for masonry/tuckpointing.
Next Articles

How to Delete Patio Account: Step-by-Step Closure Guide
Step-by-step guide to permanently delete your Patio account: backup data, cancel payments, request GDPR/CCPA removal.
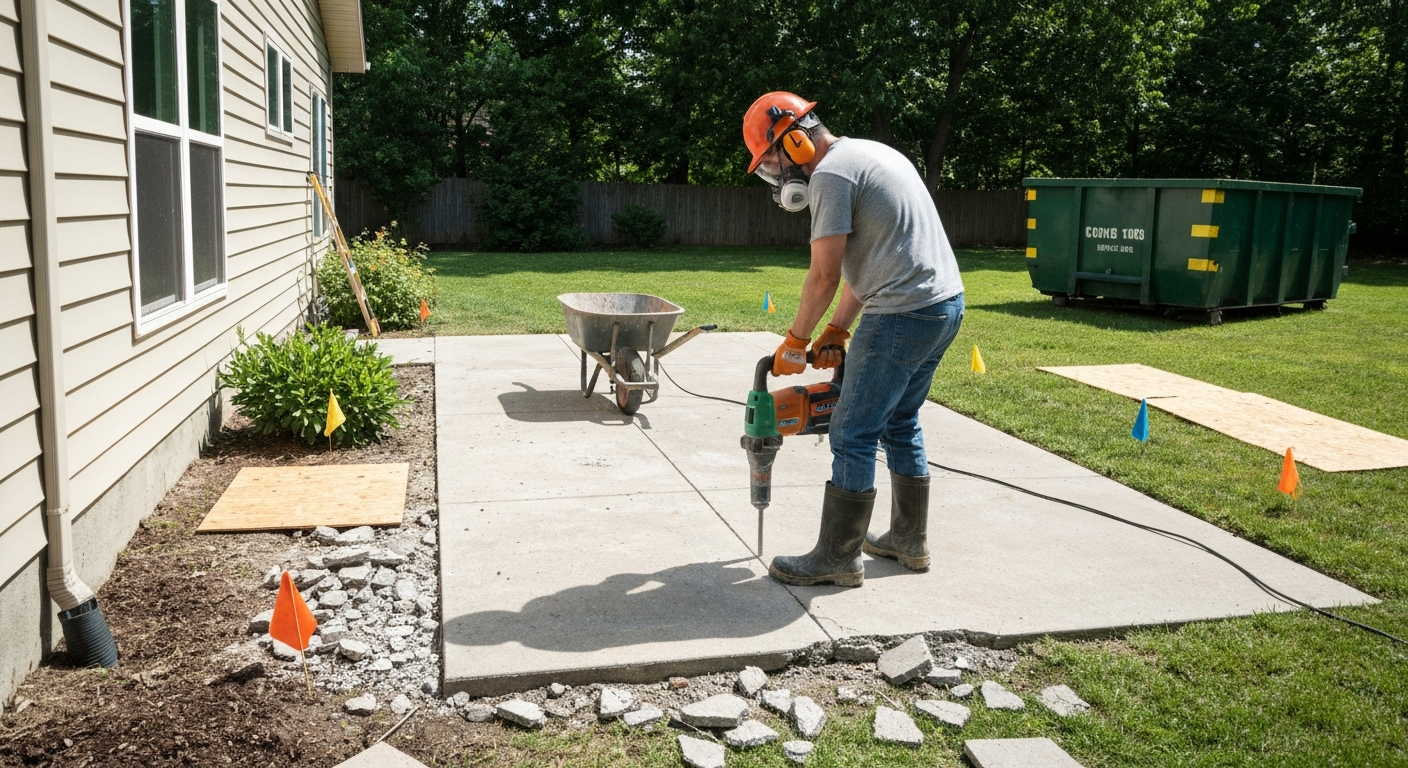
How to Remove Old Patio: Repair, Tear-Out Steps & Costs
How to remove an old patio, decide repair vs removal, step-by-step methods, tools, safety, costs and renter tips.
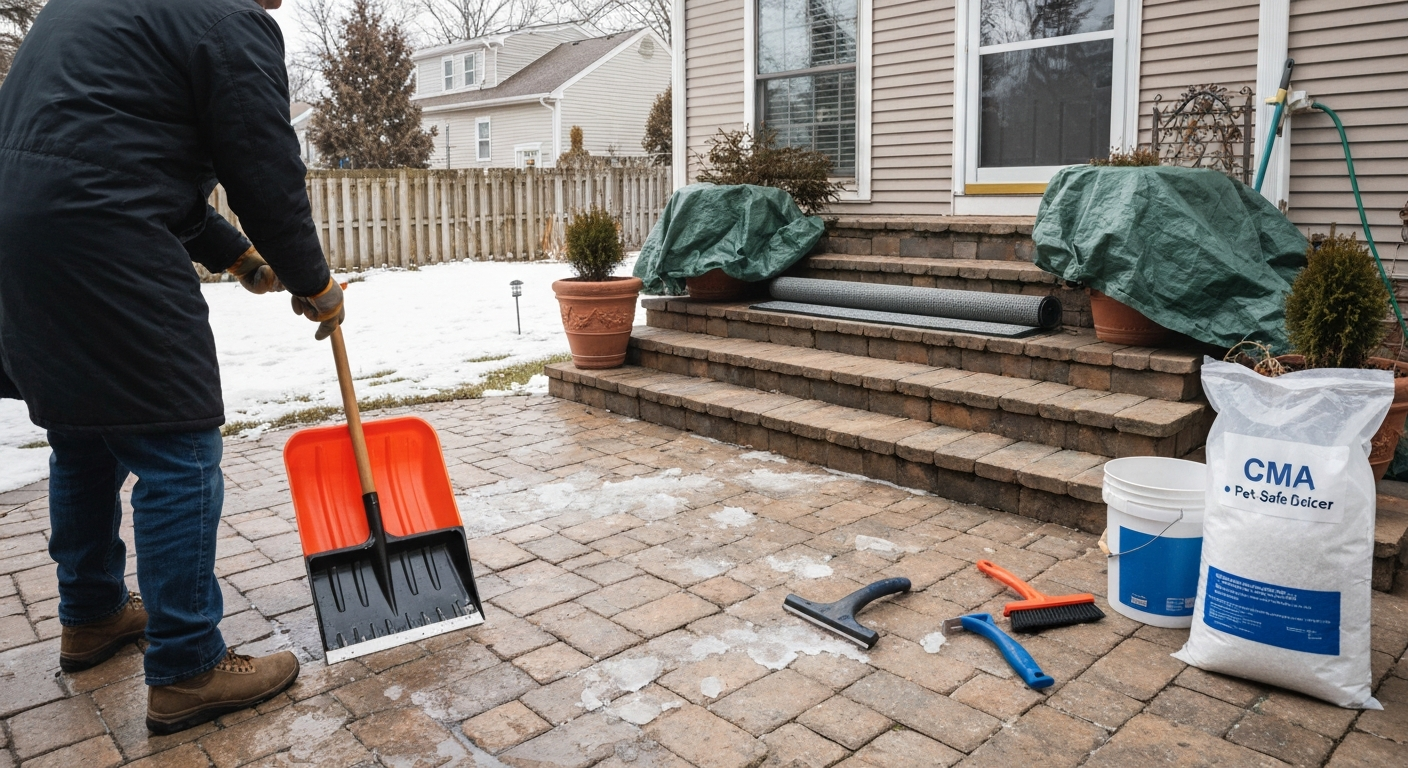
How to Melt Ice on Patio: Safe Surface-Specific Steps & Tips
How to melt ice on patio: safe, material‑specific methods, deicer chart, renter‑friendly tips.