To remove ice from a patio safely, start by spreading sand or traction grit for immediate grip, then apply the right ice-melt product for your specific surface (not all deicers work on all materials), and use a plastic or rubber-edged scraper to lift loosened ice rather than attacking it with a metal tool. If you are trying to close your patio account, you can usually do it from your account settings or by contacting support. The exact product and method depend heavily on what your patio is made of: rock salt is fine on dense concrete but can etch travertine within minutes, and magnesium chloride can damage pavers in ways that sneak up on you over a season. Read through the material-specific section below before you grab whatever's closest in the garage.
How to Remove Ice From Patio: Safe Methods by Surface

Quick safety steps before you start de-icing
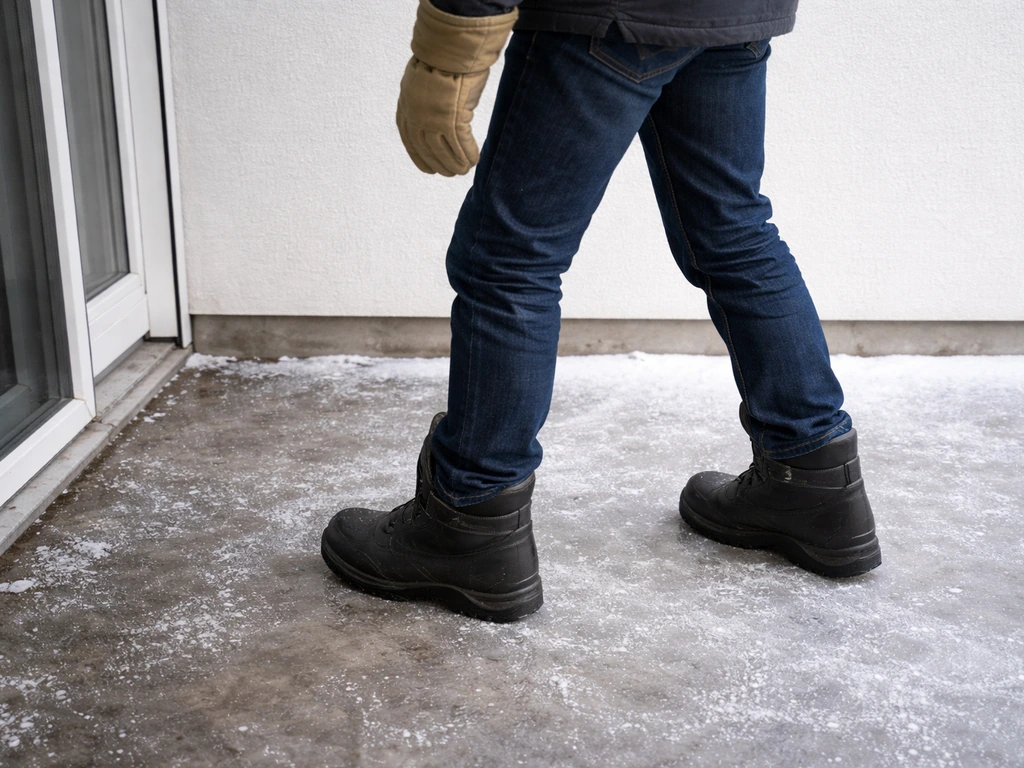
Before you do anything else, get yourself stable footing. Ice falls happen fast, and patios are often glossier and more slippery than a sidewalk. Pull on rubber-soled boots with grip, not sneakers. If the ice is thick, a pair of slip-on ice cleats (the kind that strap onto your existing shoes) will make a real difference while you're working.
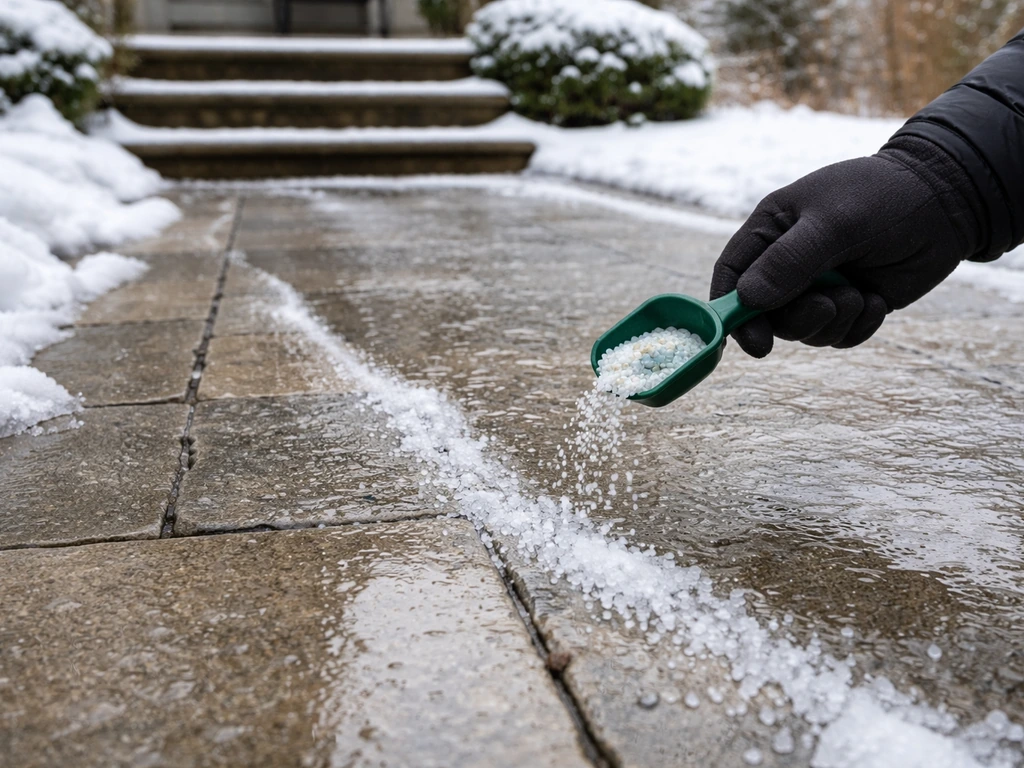
Spread a thin layer of sand or coarse grit across the worst areas before you even touch a bag of deicer. This gives you traction right now, without waiting for a chemical to work, which matters especially when temperatures are below 15°F and many ice-melt products barely function anyway. Sand won't melt anything, but it keeps you upright while you work.
A few more things to sort out before you start spreading chemicals:
- Move potted plants, outdoor furniture, and fabric cushions off the patio. Chloride runoff can burn plant roots and corrode metal legs.
- If you have pets, check that any product you use is labeled pet-safer (calcium magnesium acetate or urea-based products are less harmful than chloride salts), or keep animals off the surface until it's been rinsed.
- Protect nearby lawn edges and garden beds. Deicer runoff tends to flow toward planting beds, and salt accumulation in soil damages grass and perennials over time.
- Wear waterproof gloves. Calcium chloride and rock salt both cause skin irritation after prolonged contact, and you'll be handling this stuff repeatedly.
- Don't overapply. More product does not mean faster melting and it does mean more surface and soil damage. Use only what's needed.
Best ice-melt options by patio material
This is where a lot of homeowners go wrong. They grab rock salt because it's cheap and familiar, not realizing it can permanently etch certain stones or accelerate cracking in pavers with existing hairline damage. Here's what I'd recommend for each common patio surface.
Concrete patios
Good-quality, well-cured concrete can handle sodium chloride (rock salt) and calcium chloride in moderate amounts. The problem is that concrete patios with exposed aggregate, existing cracks, spalling, or older weathered surfaces are much more vulnerable. blank" rel="noopener noreferrer">Chloride-based deicers drive freeze-thaw cycles deeper into the slab and can cause the surface layer to pop off (spalling) or crack parallel to joints over time. According to PACA Web, deicer chemistry and exposure influence whether damage occurs, and some deicer types like sodium chloride or calcium chloride can be acceptable on good-quality dense concrete deicer chemistry and exposure matter for damage outcomes. If your concrete is in good shape, use a light application of calcium chloride pellets (around 2 to 4 ounces per square yard) rather than dumping on rock salt. Calcium chloride also works down to about -20°F versus rock salt's limit of around 15°F, which matters on genuinely cold days. If your slab is already pitted or cracked, skip the chloride products entirely and use a sand-based traction method or a chloride-free CMA (calcium magnesium acetate) product instead.
Brick patios
Brick itself handles light deicing reasonably well, but the mortar joints are the weak point. Chloride salts can work their way into joints and accelerate deterioration. Use rock salt or calcium chloride sparingly, in small amounts only on the ice itself, and avoid letting product sit in joint channels. Rinse thoroughly once temperatures allow. If your brick patio is older and mortar is already soft or crumbling, treat it like stone and reach for a chloride-free product.
Concrete pavers
Interlocking concrete pavers are durable but have specific vulnerabilities. Industry guidance specifically warns against magnesium chloride on pavers because it can break down the binder in the surface layer over multiple seasons. The joint sand between pavers is also susceptible to washout when you're aggressively rinsing deicer residue. Stick to calcium chloride or a CMA blend, apply only what's needed to penetrate the ice bond, and avoid fertilizer-style deicer blends. After treatment, sweep remaining grit and residue rather than hosing it hard into the joints.
Natural stone patios (sandstone, slate, quartzite)
Non-calcareous natural stones like sandstone, slate, and quartzite are more forgiving than limestone or travertine. Calcium chloride in moderate amounts is generally safe for these surfaces. Still, always test in an inconspicuous area first and rinse thoroughly afterward to prevent residue buildup. Avoid leaving any deicer product sitting on the stone for extended periods, especially if moisture can collect and refreeze in the surface texture.
Travertine and limestone patios
These are the most delicate surfaces to de-ice, and I'd be cautious with any chemical product here. Travertine and limestone are both calcium-carbonate-based stones, which means they react with acids and will etch (lose their finish and develop dull white marks) on contact. Many deicer products leave acidic residues, and even mild acids like vinegar, which you might use for cleaning, can damage these surfaces. Never use sodium chloride, vinegar-based solutions, or any acidic deicer blend on travertine or limestone. Your best options are calcium magnesium acetate (CMA) products, which are chloride-free and far less reactive, or skip chemicals entirely and use manual removal plus sand traction. If you're not sure what your stone is, treat it like travertine to be safe.
Flagstone patios
Flagstone varies widely in composition, so the right approach depends on the specific stone. If your flagstone is a calcareous type (like limestone flagging), follow the travertine guidance above. If it's a siliceous flagstone (bluestone, granite-based), you have more flexibility with calcium chloride. When in doubt, go with a CMA product or manual removal. The irregular surface of flagstone also means ice can collect in grouted or mortared gaps, so flush those areas well after treatment.
| Patio Material | Safest Chemical Option | Avoid | Notes |
|---|---|---|---|
| Concrete (sound) | Calcium chloride (light dose) | Heavy sodium chloride on cracked/old surfaces | Works to -20°F; causes spalling on weathered slabs |
| Brick | Rock salt or CaCl2 sparingly | Letting product sit in mortar joints | Rinse joints well after use |
| Concrete Pavers | Calcium chloride or CMA blend | Magnesium chloride | Avoid aggressive rinsing of joint sand |
| Natural Stone (non-calcareous) | Calcium chloride moderate dose | Acidic or urea-based products | Test inconspicuous area first |
| Travertine / Limestone | CMA (chloride-free) only | Rock salt, vinegar, acidic deicers | Highly vulnerable to etching from acid exposure |
| Flagstone | CMA or CaCl2 (check stone type) | Acidic products on calcareous flagstone | Identify stone type before applying any chemical |
Non-chemical and low-damage ice removal methods
When it's extremely cold (below 15°F), most chemical deicers slow down significantly or stop working altogether. And on delicate surfaces like travertine or old flagstone, you may want to avoid chemicals entirely. Manual removal is slower but it's the safest option for your surface and for the environment around it.
Scraping and chipping: tool choices matter
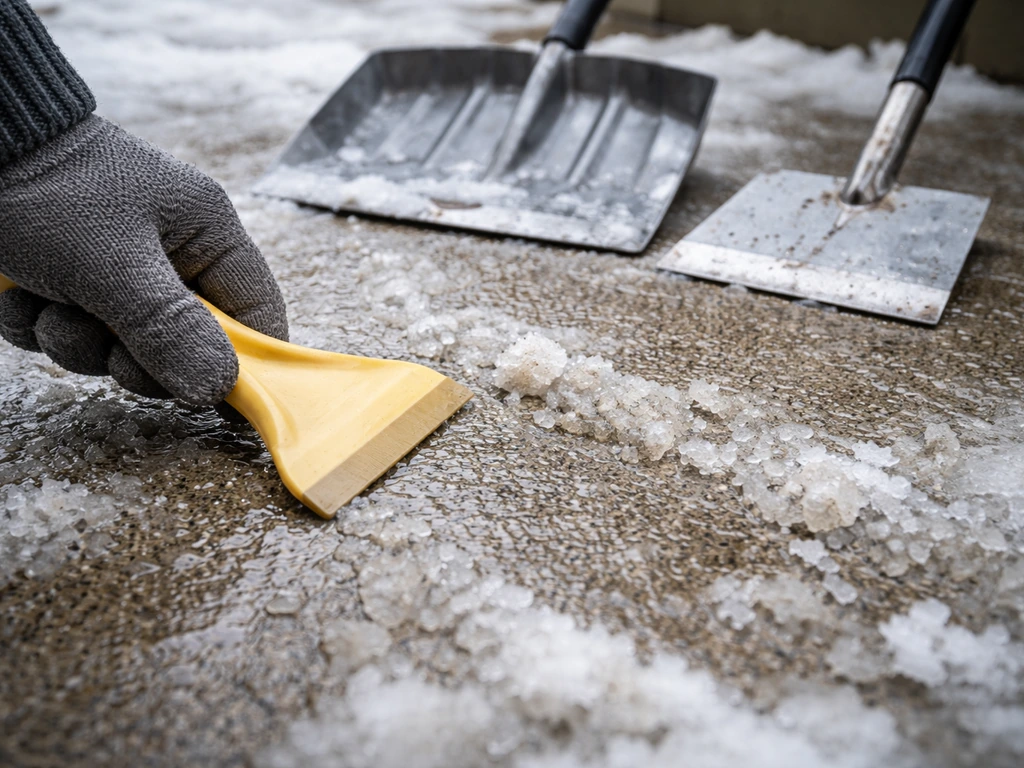
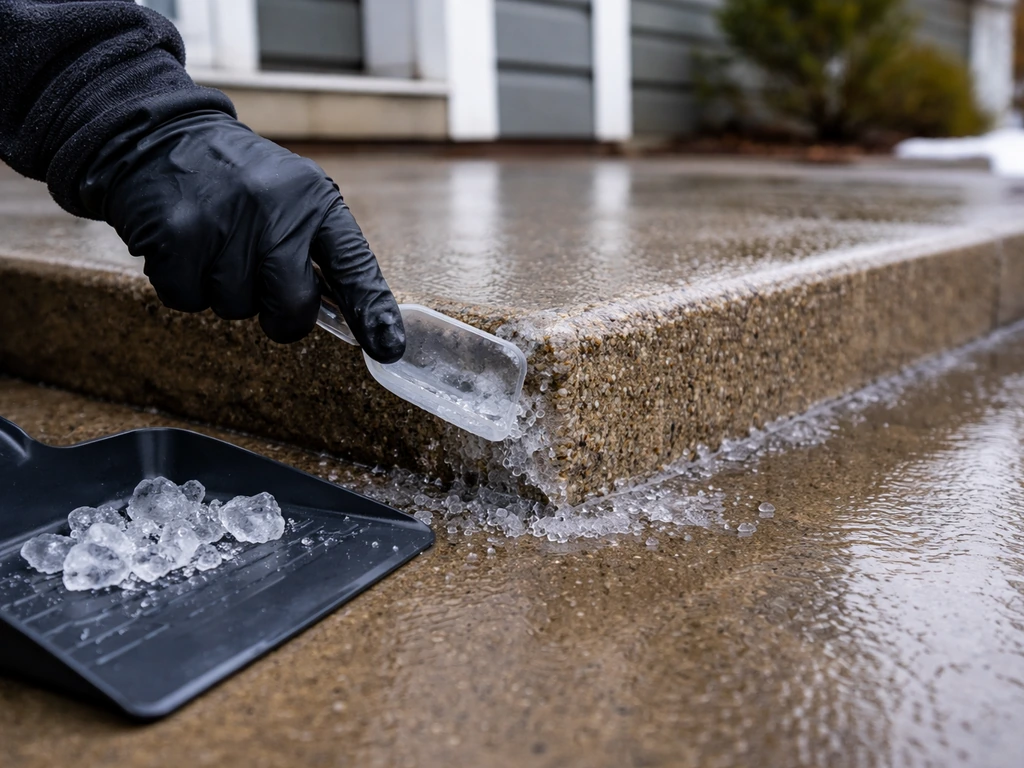
The single biggest mistake I see is people using a metal-edged snow shovel or a steel ice chipper on a patio. Metal tools can scratch concrete, deeply gouge natural stone, and chip the edges off pavers. Instead, use a plastic or polycarbonate scraper, or a rubber-edged pusher. These flex slightly and lift ice without biting into the surface below. Work at a low angle, pushing the tool under the ice rather than attacking it from above. If you're dealing with thick ice, scoring the surface with a plastic tool first and then applying a small amount of deicer to the scored lines is more effective than trying to chip through solid ice in one pass.
Sand and grit for traction
Coarse sand, kitty litter, or commercial traction grit won't melt anything, but they provide immediate slip resistance on any surface without any chemical risk. This is the right move when temperatures are too low for deicers to be effective, when you need the patio usable right now, or when you're working on travertine or limestone and want zero chemical contact. Sweep it up once the ice melts so it doesn't wash into drains or compact into crevices.
Warm water (use carefully)
Lukewarm water can help loosen thin ice from a patio surface, but this only works if temperatures are above freezing and rising. If temps are still dropping, you'll create a thicker, smoother sheet of ice within minutes. Only use this method mid-morning on a day where temperatures are trending above 32°F, and follow up immediately with a squeegee to move the water off the surface.
How to prevent surface damage and slip hazards
The best time to handle ice is before it fully bonds to the patio surface. If you know freezing rain or ice is coming, apply a thin preventive layer of CMA or calcium chloride to the dry surface beforehand. This anti-bonding effect means ice forms loosely instead of locking down, and you can remove it with far less product and effort afterward.
For ongoing surface protection during winter, here's what I'd do consistently:
- Apply only the minimum effective dose of any deicer. For calcium chloride pellets, 2 to 4 ounces per square yard is generally sufficient. For rock salt, about 1 to 2 tablespoons per square foot is the working range. More than that doesn't melt faster and just damages the surface.
- Remove snow physically before applying deicer. Snow acts as an insulating layer that prevents deicer from reaching the ice-to-surface bond. Brush or push off loose snow first, then treat the ice underneath.
- Never use deicers on precast, chipped, cracked, spalled, or weathered masonry. The existing damage creates pathways for chloride to penetrate deeper, making deterioration significantly worse.
- Check product labels before buying. The bag's active ingredient, effective temperature range, and coverage rate tell you everything. A product effective only to 15°F won't help you on a 5°F morning.
- Keep deicers away from metal fixtures, furniture legs, and railings. Chloride runoff accelerates corrosion on steel and iron rapidly.
How to handle refreezing and thick ice buildup
Thick ice, meaning anything more than about half an inch, needs a different approach than a light frost. Trying to scrape thick ice off in one pass usually fails and risks scratching the surface. The more effective sequence is to break the bond first with a small chemical application, wait for it to work into the ice-to-surface interface, then use a plastic scraper to lift sections of ice rather than shaving it down. For complete guidance on removing patio tiles safely, also follow the right tile-removal steps for your type of surface How to handle refreezing and thick ice buildup.
- Apply calcium chloride pellets at about 2 to 4 ounces per square yard directly to the ice surface. CaCl2 generates its own heat as it activates, which helps penetrate thick buildup faster than rock salt.
- Wait 10 to 20 minutes. You're not trying to melt all the ice, just loosen the bond at the bottom layer.
- Use a plastic or rubber-edged scraper at a low angle to wedge under sections of ice and pop them up. Work in sections and remove the chunks as you go.
- If ice refreezes before you finish, reapply a small dose and continue. Don't increase the total amount: just reapply the standard rate.
- Once the bulk is removed, spread sand for traction and let residual thin ice melt on its own during the warmer part of the day.
Refreezing is the most frustrating part of winter patio maintenance. It usually happens when meltwater from a de-icing treatment runs across the patio and pools in a low spot, then refreezes as temperatures drop again at night. The prevention is to improve drainage slightly: use a squeegee or broom to push meltwater off the patio edges during the afternoon warmth rather than letting it sit. If one area of your patio consistently collects water, that spot needs a drainage fix before next winter, not just more deicer.
Aftercare: cleaning, rinsing, and setting up for spring
Once the ice is gone and temperatures allow, rinse the patio thoroughly with clean water. If you meant removing patio ice rather than removing the patio itself, follow the material-specific de-icing and aftercare steps so you do not damage the surface remove patio ice. Deicer residue, especially chloride salts, leaves white powdery deposits on the surface and continues reacting with your patio material if you leave it there. For concrete and pavers, a good rinse with a garden hose is usually enough. For natural stone, travertine, and flagstone, rinse gently and avoid high-pressure streams that can force residue into hairline cracks or joints.
If you used sand or grit for traction, sweep it up before it rains. Wet sand that washes into drains or packs into paver joints is a hassle to remove later, and it can cause drainage issues. The material can often be collected and reused, so keep a bucket handy.
For travertine and limestone surfaces, after rinsing, inspect for any dull or discolored patches that might indicate etching. Light etching from accidental deicer contact can sometimes be addressed with a stone-specific polishing compound, but deeper etching may need professional resurfacing. This is why being cautious with chemical products on these stones in the first place saves you significant effort later.
Once winter is over, do a proper inspection before your first spring cleaning session. Look for new cracks, spalling on concrete edges, loose pavers, or mortar joint damage. If you decide the patio itself is too worn out or damaged, the next step is to plan how to remove old patio material safely before installing new surface material. Catching small issues early, before a second freeze-thaw cycle makes them worse, is how patios last for decades rather than needing full replacement. A light patio wash in early spring removes any lingering salt deposits and resets the surface before you start using it again.
If you're dealing with melt-related staining, residue hazing, or post-winter grime, regular patio cleaning approaches apply once temperatures are stable. The de-icing process is the winter chapter, but the spring rinse and inspection is where you confirm everything came through intact and make a plan for any repairs before summer.
FAQ
What should I do if it is so cold that de-icer seems to do nothing?
Check the temperature first. Below about 15°F, many common salts lose effectiveness, so you will often get better results by relying on sand or traction grit for immediate safety, then switching to manual removal or a product rated to work at lower temperatures (like calcium chloride-based) if your patio material allows it.
How long should I leave ice melt on the patio before rinsing?
It depends on what you used. If you applied chloride salts, do not wait for spring, aim to rinse as soon as temperatures stay above freezing. Chlorides can keep reacting and leave white residue, and on pavers you want to avoid pushing residue deeper into the joints with high-pressure water.
My patio refreezes every night in the same spot, what is the best fix?
If you have an area that repeatedly refreezes, treat it like a drainage problem, not an ice problem. Improve runoff with a small grade or edge drainage plan, then use a squeegee or broom to move meltwater off that low spot during the day.
Can I use warm water to melt ice even when it is getting colder outside?
For thin ice or a near-freeze situation, lukewarm water can help only when the outdoor temperature is rising and above freezing. If the temperature is flat or dropping, water will refreeze faster than you can remove it, creating a thicker, smoother sheet of ice.
Is it okay to leave sand or traction grit on the patio after the ice melts?
Use the type of traction you can remove. Sand and traction grit provide grip but should be swept up when the ice melts and before rain, so it does not wash into drains or pack into paver joints where it becomes hard to clear later.
What is the safest tool to remove ice from a patio if I do not have a plastic scraper?
Avoid metal scrapers and snow shovels on patios. Even if they seem to work, they commonly create micro-scratches in concrete and gouges in natural stone, and chipped edges on pavers later collect more ice.
Do I need to treat ice in paver joints or only the flat surface?
Yes, but only if it does not create a residue problem. For example, in grout or mortared gaps, focus on rinsing and removal after de-icing so salts and slurry do not remain trapped in the joints, since that is where deterioration often accelerates.
How much ice melt should I apply, and is more always better?
Many people use more product than needed, but that increases residue and potential surface damage. A better approach is small, targeted applications to penetrate the ice bond, then wait briefly, scrape with a plastic tool, and reapply only if needed.
I am not sure what stone my patio is, what de-icer should I use to be safe?
For travertine, limestone, and other calcareous stones, avoid sodium chloride, vinegar-based solutions, and acidic de-icers. If you are unsure, switch to a chloride-free CMA product or skip chemicals and use manual removal plus sand traction.
How can I tell if de-icer damaged my patio surface, and what should I do next?
Do a surface inspection after the first thaw. If you see dulling, whitening, or powdery marks on travertine or limestone, stop aggressive de-icing immediately and rinse gently. Light etching sometimes improves with stone-specific polishing, while deeper damage may require professional resurfacing.
Is there a way to prevent ice from sticking before it forms on my patio?
Do not rely on sprinkling salt after ice has bonded hard, especially on delicate surfaces. Instead, plan a preventive anti-bonding step on the dry surface when freezing conditions are expected, then use minimal product and plastic scraping when it forms.
Choose tear-out or stain removal and learn step-by-step cleaning for concrete, brick, pavers, stone, travertine, and fla

Step-by-step removal of Thompson’s patio sealer on concrete, brick, pavers, and stone, with safety, tests, and cleanup.
Learn if you can remove patio sealer and how to strip it safely by type, material, and method.