When people search 'how to remove patio,' they usually mean one of two very different things: physically tearing out an entire patio structure, or removing something unwanted from a patio surface like mold, rust, grease, stains, or old sealant. This guide covers both. If you meant an online account tied to a Patio product or service, the steps to delete your account will be different from physical patio removal delete patio account. If you need to demolish and pull up the patio itself, that's a physical tearout job. If your patio is staying put but looks terrible, you need the right cleaning chemistry and technique for your specific material. Either way, I'll walk you through it step by step.
How to Remove a Patio: Tear-Out or Clean and Stain Removal

Dylan Hale
5 May 2026
Tearout vs. cleaning: which one do you actually need?
It's worth pausing for a second here, because these are completely different projects with different tools, costs, and effort levels. A full patio tearout means breaking up or lifting the surface material, hauling the debris away, and prepping the ground underneath for whatever comes next. Cleaning or 'removing' surface problems means using the right products and techniques to strip away stains, mold, old sealant, rust, or grime without touching the structure itself.
Before you rent a jackhammer, ask yourself: is the patio structurally damaged, sunken, or cracked beyond repair? Or does it just look bad? A concrete slab that looks stained and grimy can often be transformed with the right cleaner and a pressure washer. Patio tiles that are loose or cracked may need individual replacement rather than a full tearout. If your issue is surface-level, skip to the cleaning sections below. If you genuinely need to pull the whole thing out, read on.
Safety gear and tools before you start anything
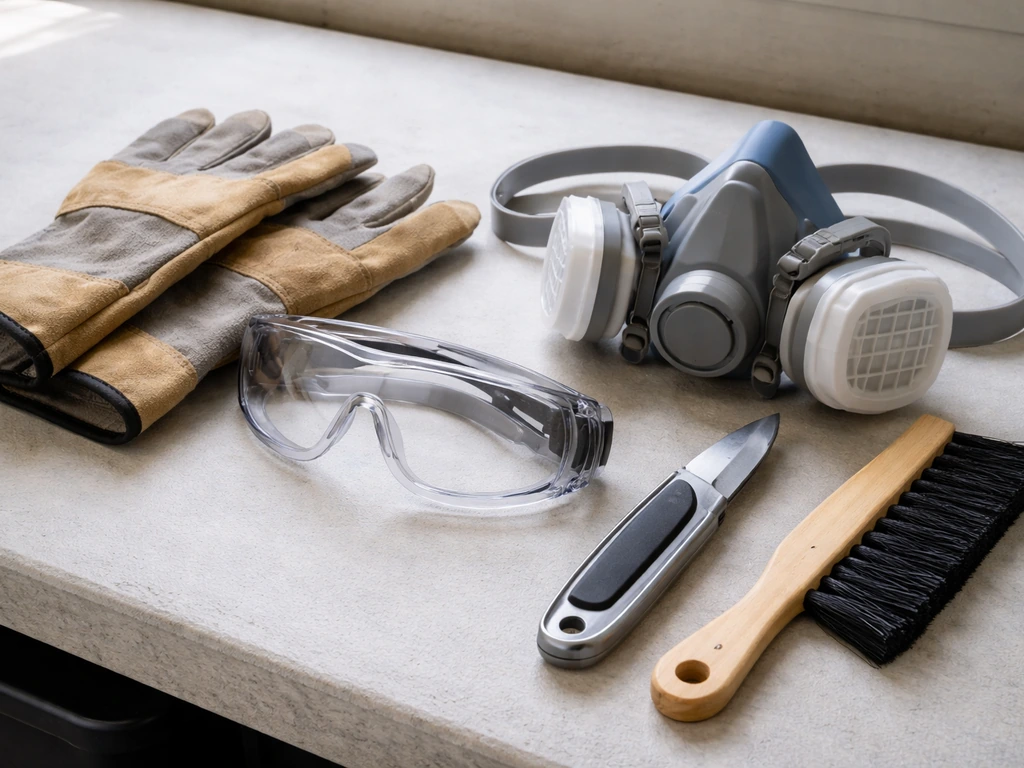
Whether you're swinging a sledgehammer or pouring muriatic acid, don't skip the safety setup. Cutting corners here is how people end up in the ER. For physical tearout, you need heavy work gloves, safety glasses or a face shield, steel-toed boots, and knee pads if you're breaking concrete on the ground. Ear protection matters too if you're using power tools.
For chemical cleaning, the stakes are different but just as real. Many patio cleaners involve acids or bleach, both of which can burn skin and eyes on contact. Always wear chemical-resistant gloves (nitrile or rubber, not thin latex), safety glasses, and old clothes you don't mind ruining. Work in a well-ventilated area and keep pets and kids off the surface until everything is rinsed and dry. One rule I can't stress enough: blank" rel="noopener noreferrer">never mix bleach with vinegar, ammonia, or any acid-based cleaner. blank" rel="noopener noreferrer">Mixing bleach with an acid releases chlorine gas, which is genuinely dangerous. Keep your chemicals separated and rinse your tools thoroughly between products.
- Chemical-resistant gloves (nitrile or rubber)
- Safety glasses or goggles
- Half-face respirator for extensive mold cleanup or acid use
- Old clothes and closed-toe shoes
- Garden hose or pressure washer for rinsing
- Stiff-bristle brush or deck brush for scrubbing
- Plastic sheeting to protect nearby plants from runoff
- For tearout: sledgehammer, pry bar, circular saw with masonry blade, wheelbarrow
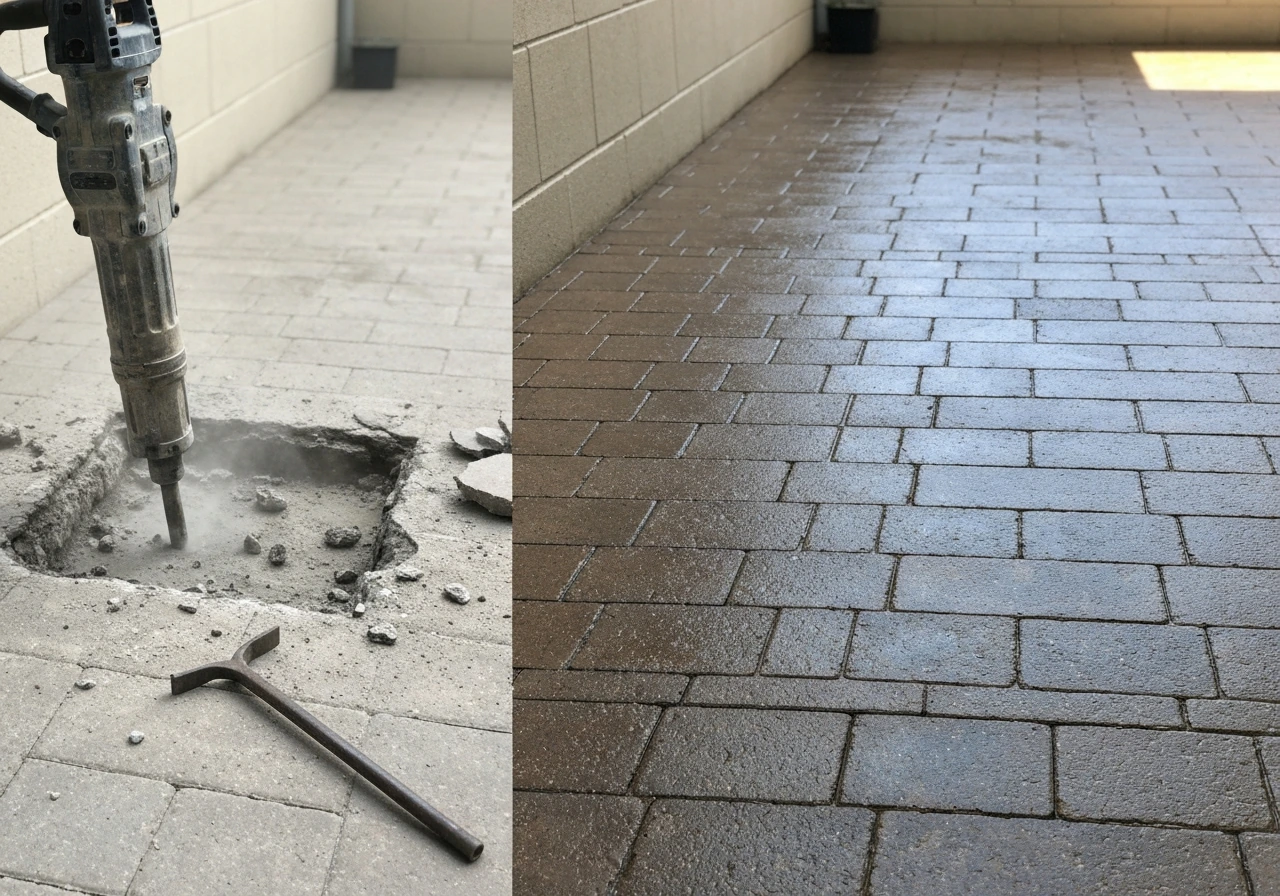
How to physically remove each type of patio
Physical removal looks different depending on what your patio is made of. Concrete slabs need to be broken up with a jackhammer or sledgehammer and hauled away. Pavers and bricks can often be pried up intact and reused. Natural stone and flagstone are similar: individual pieces can be lifted out with a pry bar. Here's how to handle each material.
Concrete
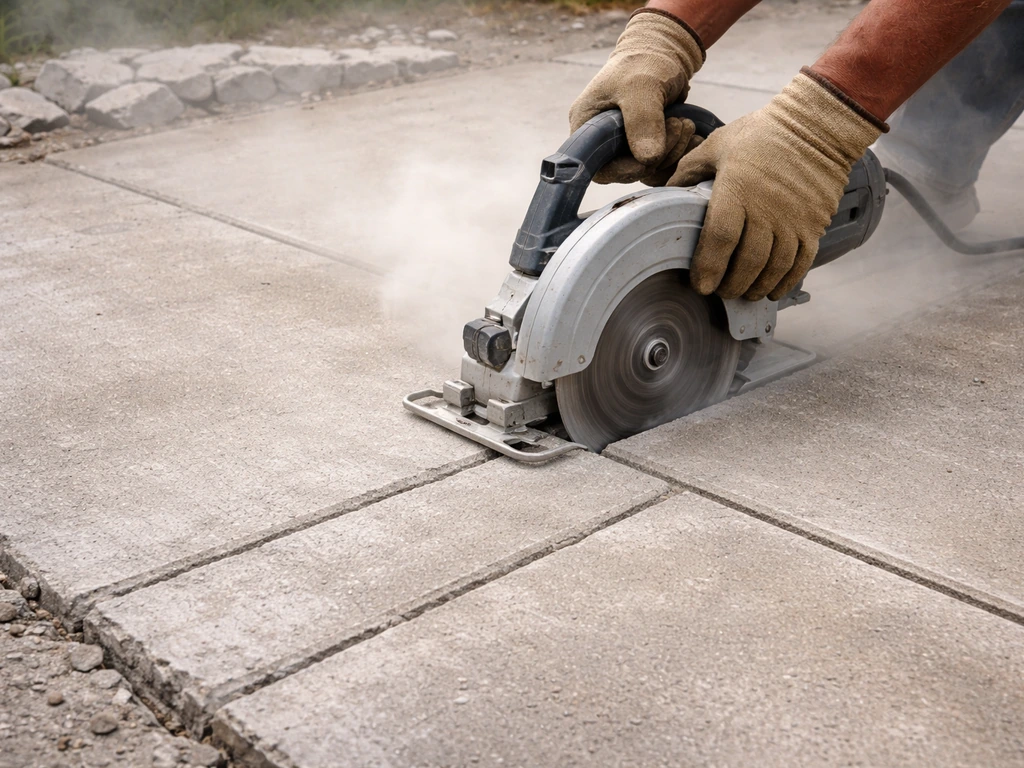
Concrete is the toughest tearout. Score the slab into manageable sections (roughly 12-18 inch squares) using a circular saw fitted with a diamond masonry blade, then break it apart with a sledgehammer or rented electric jackhammer. Work from the edges inward. Thick slabs (4 inches or more) usually need a jackhammer. Once broken, use a pry bar to lift chunks into a wheelbarrow. Concrete is extremely heavy, so rent a dumpster rather than trying to use your car. Check with your local waste facility about concrete disposal rules; many areas have specific drop-off sites or recycling programs for concrete rubble.
Brick
If bricks are mortared down, you'll need to chip the mortar away with a cold chisel and hammer before prying each brick up. Take your time here because cracked bricks have little resale or reuse value. If the bricks are dry-laid over sand (no mortar), removal is much simpler: just pry them up with a flat bar and stack them. Clean off any remaining mortar or sand before stacking so they're ready to reuse or donate.
Pavers

Concrete pavers are usually the easiest tearout of any patio type. Most are set in a sand base without mortar, so you can pry up the first paver with a flat bar, then pull the rest up by hand. If there's polymeric sand in the joints, use a pressure washer set to about 1,500-2,000 PSI to blast out the jointing material down to about 1.5 to 2 inches depth before lifting pavers, especially if you plan to reinstall them. Stack pavers carefully on a pallet to avoid chipping.
Natural stone and flagstone
Flagstone and other natural stone pieces are typically set in mortar or dry-laid in sand. For dry-laid stone, a flat pry bar under each piece is usually enough to lift it out. For mortared stone, chip away the mortar bond with a cold chisel first. Natural stone pieces can be irregular and very heavy, so have a helper and lift with your legs. Broken pieces aren't worth saving unless they're a rare or expensive stone type.
Travertine
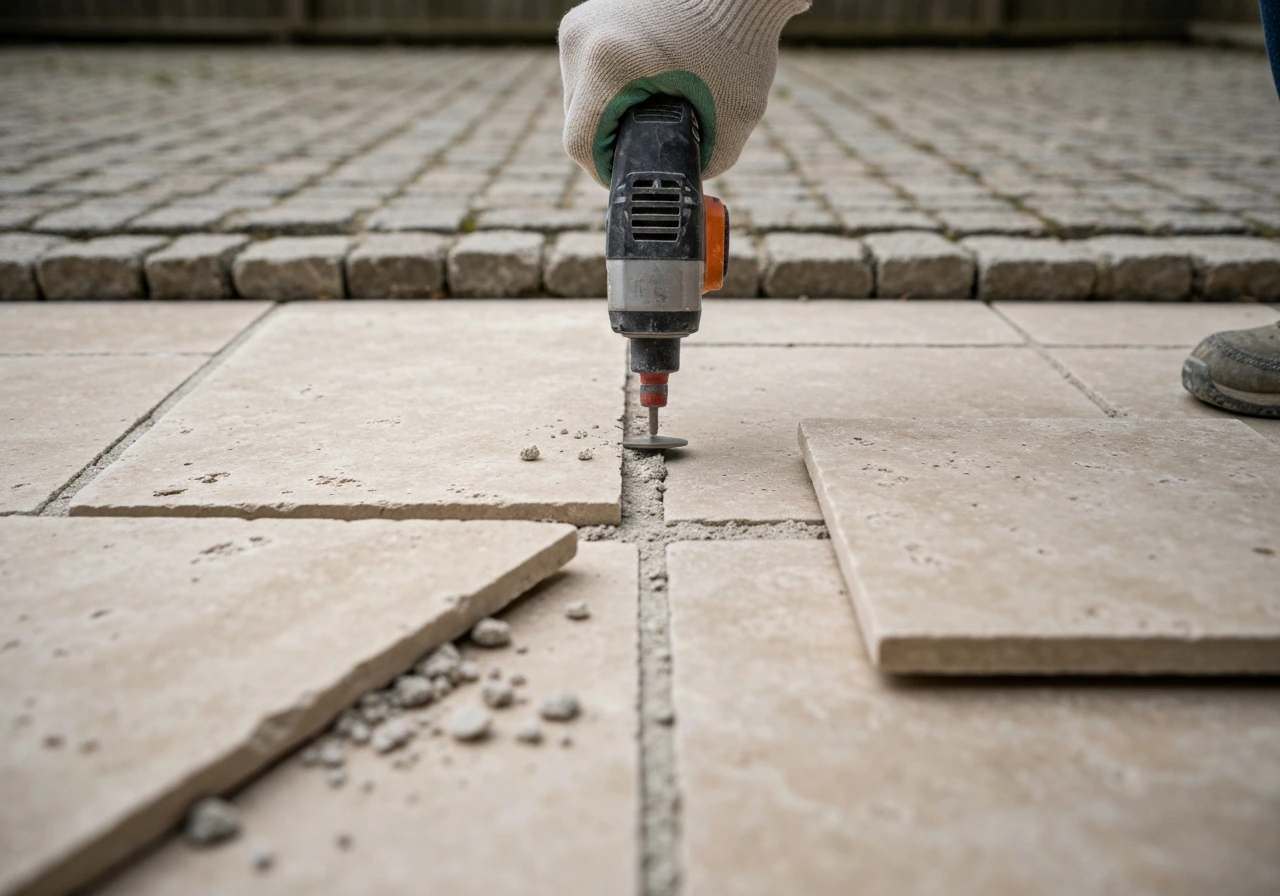
Travertine tiles set outdoors are usually adhered with tile mortar. Use a grout saw or oscillating tool to cut through the grout lines first, then carefully chisel under each tile with a floor scraper or wide chisel. Travertine is brittle and chips easily, so go slowly if you want to salvage pieces. Toss anything cracked, as cracked travertine is a tripping hazard and won't look right if reinstalled.
Removing the bad stuff: mold, rust, grease, stains, and old sealant
This is where most homeowners actually need help. Your patio is staying put, but something on the surface is making it look terrible or feel unsafe. Here's how to match the problem to the right product and technique, by material.
Mold and mildew
For concrete, brick, and pavers, a diluted bleach solution is the most effective mold killer available. Mix no more than 1 cup (8 ounces) of household bleach per gallon of room-temperature water. Apply it to the affected area, let it sit for 10-15 minutes, then scrub with a stiff brush and rinse thoroughly. Don't use more bleach than that, it won't kill mold faster and just creates unnecessary chemical runoff. If you have pets or prefer a gentler approach, undiluted white vinegar kills many mold species and is safe to use on concrete and brick, though it takes longer and may need two applications. For natural stone, travertine, and flagstone, skip the bleach entirely. Bleach and vinegar can both discolor and etch these surfaces over time. Use a pH-neutral stone cleaner instead and scrub gently.
Reminder: never mix bleach with vinegar, ammonia, or any other cleaner. Bleach plus acid (including acetic acid in vinegar) releases chlorine gas. Use one or the other, rinse completely between applications if you switch, and keep the area ventilated.
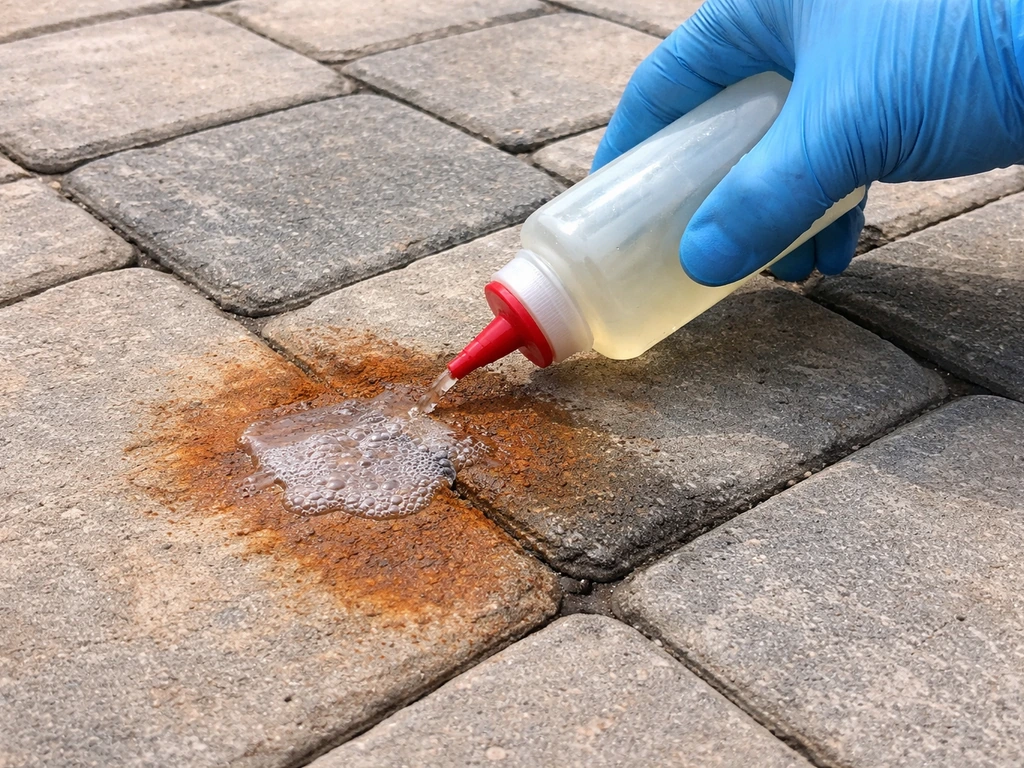
Rust stains
Rust stains bond into porous surfaces and need chemistry that breaks that iron bond, not just scrubbing. For light rust on concrete or pavers, white vinegar applied directly and left for 30-60 minutes will often lift the stain enough to scrub away. For medium stains, oxalic acid-based cleaners work well and are widely available at hardware stores. Apply, let dwell, scrub, rinse. For heavy or stubborn rust on concrete, muriatic acid is the most powerful option, but handle it with extreme care: wear goggles, respirator, and acid-resistant gloves, pre-wet the concrete before applying, and neutralize with baking soda and water afterward. For pavers specifically, I'd recommend a rust remover formulated without muriatic acid (several paver-care brands make these) since muriatic acid can damage the surface finish. For travertine and natural stone, do not use muriatic acid or any strong acid. Travertine is acid-sensitive and will etch permanently. Use only rust removers specifically labeled safe for natural stone.
Grease and oil stains
Fresh grease is much easier to remove than old, set-in grease. For concrete and pavers, apply dish soap or a degreaser, work it in with a stiff brush, let it sit for 5-10 minutes, and rinse. For older stains, sprinkle an absorbent powder (cat litter, baking soda, or commercial paver degreaser) on the stain, leave it for several hours or overnight to pull the oil up, then sweep and follow with a degreaser application and scrub. Specialized paver-care stain removers handle both organic and grease-related staining well. For natural stone and travertine, use a pH-neutral degreaser only, and test in an inconspicuous spot first.
Efflorescence (white chalky deposits)

Efflorescence is the white, powdery or crusty deposit that appears on masonry when water pulls soluble salts to the surface. Start by dry-brushing it off with a stiff wire brush or power brush, then rinsing well. For stubborn efflorescence on concrete, brick, and pavers, a diluted phosphoric acid or efflorescence-specific cleaner (like the type made by Techniseal) works effectively. Wet the surface first to reduce how deeply the acid penetrates, apply the cleaner, let it dwell briefly, scrub, and rinse thoroughly. Phosphoric acid burns skin and eyes, so PPE is non-negotiable. On travertine or other calcium-based stone, avoid phosphoric acid entirely and use a buffered, stone-safe descaling product at the most diluted concentration recommended.
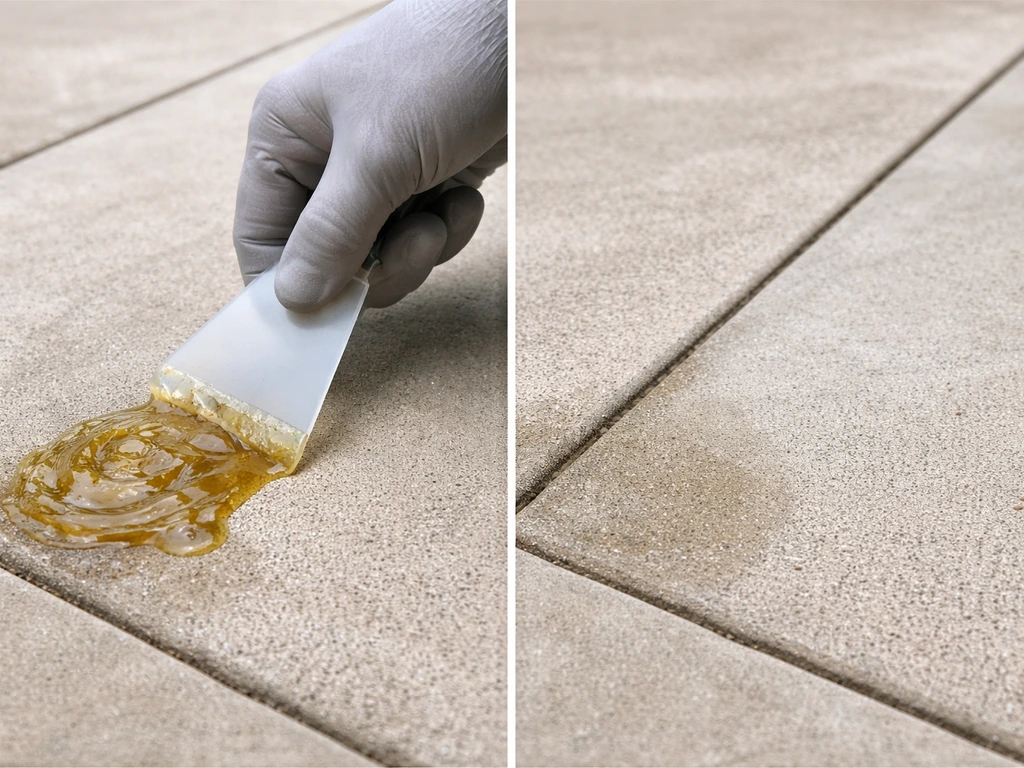
Old sealant
Removing old sealer is often necessary before applying a new coat, since new sealer won't bond properly over a degraded or incompatible old layer. If your goal is a full outdoor tearout, follow the material-specific steps in this guide on how to remove old patio. For concrete, solvent-based chemical strippers are the most reliable option. Apply the stripper, keep it wet so it doesn't evaporate before it can work (cover with plastic sheeting if needed), then scrub off the residue with a stiff brush, rinse with warm water, and follow up with a soap-and-water scrub and final rinse. For pavers, specialized paver sealer removers (PSR products) are available; these typically require a dwell time of at least 20-30 minutes before you scrub and rinse. For natural stone and travertine, use only strippers specifically formulated for stone, as harsh solvents can damage polished finishes.
Pressure washing vs. manual scrubbing: how to choose
A pressure washer makes the job faster, but it's not always the right tool. Used at the wrong pressure or angle, it can etch concrete, dislodge joint sand from pavers, and crack or damage softer natural stone. Manual scrubbing is slower but gives you more control, and it's a perfectly valid approach for any surface.
| Surface | Recommended PSI | Nozzle / Angle | Manual Alternative |
|---|---|---|---|
| Concrete | 2,000–3,000 PSI | 25-degree tip | Stiff deck brush + hose |
| Brick (mortared) | 1,500–2,000 PSI | 25–40-degree tip | Wire brush + hose |
| Pavers | 1,200–1,800 PSI | 25–40-degree tip, avoid joints | Stiff brush + hose |
| Natural stone / flagstone | 800–1,200 PSI | 40-degree tip, keep moving | Soft-bristle brush + hose |
| Travertine | 800–1,000 PSI max | 40-degree tip, test first | Soft cloth or sponge + hose |
A few things I've learned from pressure washing different surfaces: always keep the wand moving and maintain at least 12 inches of distance from the surface. Don't linger in one spot or you'll etch the material. For pavers, sweep parallel to the joint lines rather than directly into them to avoid blasting out the joint sand. For travertine and polished stone, manual cleaning is honestly safer and I'd recommend it unless you're very comfortable with pressure washer settings. If you're a renter without access to a pressure washer, a stiff deck brush, a good cleaner, and a strong garden hose will handle the vast majority of patio cleaning jobs.
After removal: cleanup, surface prep, sealing, and prevention
Cleanup and disposal
After a tearout, concrete rubble goes to a concrete recycling facility or construction debris dumpster. Call your local waste management service first, as many curbside programs won't accept it. Brick and paver pieces in good condition can often be donated to a habitat restore or sold locally. Chemical cleaning waste (rinse water with bleach or acid) should be heavily diluted with water before it enters drains, and check your local regulations for acid-based products specifically.
Surface prep before sealing
Whether you've done a major cleaning or are prepping a fresh surface, sealing is the smartest thing you can do to protect the patio going forward. But timing and prep matter. New concrete must cure for at least 28 days before you apply any sealer. For existing surfaces, make sure all stains are gone before sealing because sealing over rust stains or burn marks can make them permanent. Remove any remaining residue, let the surface dry completely (usually 24-48 hours after cleaning), and clean off all traces of grease, oil, dirt, efflorescence, and old sealant. For pavers, give the surface about 24 hours after final cleaning before applying sealer to ensure any residue is fully gone and joint sand has settled.
Preventing mold, stains, and buildup from coming back
The best way to avoid a major removal project in the future is a consistent maintenance routine. Seal concrete, brick, and pavers every 2-3 years (or per the sealer manufacturer's recommendation) to reduce how deeply stains and moisture penetrate. Sweep the patio regularly to prevent organic debris from sitting and feeding mold growth. Rinse off grease spills as soon as they happen. Trim back overhanging plants that keep the patio in shade and moisture. If you're in a climate with freezing winters, avoid using rock salt (calcium chloride or sodium chloride) directly on pavers or natural stone since it accelerates surface degradation. If ice removal is a recurring issue in your area, that's a whole separate topic worth diving into. If you need help with that, follow the steps for how to melt ice on patio safely without damaging the surface ice removal. If ice removal is what you deal with every winter, check out our guide on how to remove ice from patio surfaces safely.
If your project is more specific, like removing patio tiles rather than a full slab, or tackling old pointing between pavers, those are specialized enough jobs that the techniques vary considerably. If you are trying to remove patio tiles specifically, follow the tile removal steps for your surface type and adhesive so you do not damage the sublayer how to remove patio tiles. For removing patio pointing, the right tool and a careful technique help you lift out old filler without damaging surrounding pavers. The same goes for situations where you're working with an older, established patio versus a recently installed surface. Getting the right approach for your exact situation makes a significant difference in the outcome and how much effort you'll spend.
FAQ
How can I tell if I need to tear out the patio or just remove surface stains?
Start by testing the stain source, water behavior is the fastest clue. Sprinkle water on the spot, if it quickly darkens and doesn’t bead, the stain is likely penetrating and needs a chemistry treatment. If it beads and mostly sits on top, you can often remove it with a surface cleaner and scrub rather than acid-based products.
Why does my patio stain come back after cleaning or sealing?
Don’t chase discoloration by using stronger chemicals than the label, instead do a two-step approach, remove the cause first (mold/rust/grease) and only then do any sealing. If you seal after incomplete stain removal, the stain can bleed back, or the sealer can turn blotchy because salts and oils were not fully rinsed out.
What’s the most common way people damage a patio with a pressure washer?
For pressure washing, a common mistake is holding the nozzle at one spot or aiming too steeply into joints. Keep the wand moving, stay back (about 12 inches or more), and use a fan tip rather than a narrow jet. For pavers, avoid blasting directly into the joint lines, sweep parallel to joints so you don’t remove the joint sand.
Can I remove pavers and reuse them, and how do I avoid losing the joint sand?
If you’re planning to reinstall pavers after removal, protect the joint sand. Pressure-wash only the joints enough to free polymeric sand, then lift pavers gently and keep them flat. Store them on a pallet and cover them so rain doesn’t wash fine sand away before you reset.
If my concrete patio is cracked or sunken, can cleaning and sealing still work?
Yes, but only if the underlying base is sound. A patio that’s cracked can sometimes be cleaned and sealed if the concrete is stable, but if you notice rocking, drainage holes, or repeating settlement lines after light probing, tearout is usually the safer long-term fix. When in doubt, lift one section near a problem area to inspect the base and compaction before committing to cleaning.
Is it safe to alternate cleaners (like vinegar, bleach, and rust remover) on the same day?
Mixing products is the bigger risk than the chemical alone. Even if you don’t use bleach, acids plus other cleaners can still create hazardous fumes or ineffective neutralization. Stick to one category at a time, rinse thoroughly between steps, and if you switch from an acid-based cleaner to something else, let the surface fully dry before the next product.
What’s the right way to remove white powdery efflorescence so it doesn’t return?
For efflorescence, dry-brushing is only half the job. If you rinse without removing salts first, they can reappear quickly as water brings them back to the surface. Use a diluted phosphoric acid or an efflorescence product only after a good dry removal, and rinse longer than you think, until runoff water looks clear.
Can I use baking soda or cat litter to remove rust stains?
Yes, but only for specific scenarios. Cat litter and baking soda can help for grease, but they won’t remove deep rust-iron bonding or mineral stains. For rust, vinegar is often a starting point for light rust, while oxalic acid or a rust remover formulated for your patio material is typically needed for stronger staining.
How do I choose the right product for removing old sealer without damaging stone?
If you’re removing old sealers, don’t skip compatibility checks. Solvent strippers can work on concrete, but using the wrong stripper on stone or travertine can permanently dull or haze the finish. Always use a sealer-removal product labeled for that material, and do a small test patch because some sealers are harder to lift than others.
When is the best time to seal after cleaning, and how do I know the patio is dry enough?
When you’re done cleaning and want to reseal, timing is critical. Wait until the surface is fully dry (often 24 to 48 hours after cleaning), confirm there’s no remaining residue by doing a quick water test (no patchy darkening or slippery feel), and only then apply sealer. New concrete needs curing time, and sealing too early traps moisture that can cause peeling.
Next Articles

How to Remove Thompson’s Patio Sealer Step by Step
Step-by-step removal of Thompson’s patio sealer on concrete, brick, pavers, and stone, with safety, tests, and cleanup.
Can You Remove Patio Sealer? How to Strip It Safely
Learn if you can remove patio sealer and how to strip it safely by type, material, and method.
How to Remove Resin From Patio Safely by Surface Type
Step by step guide to remove resin from patio by surface type with safe scraping, softening and solvent methods.