
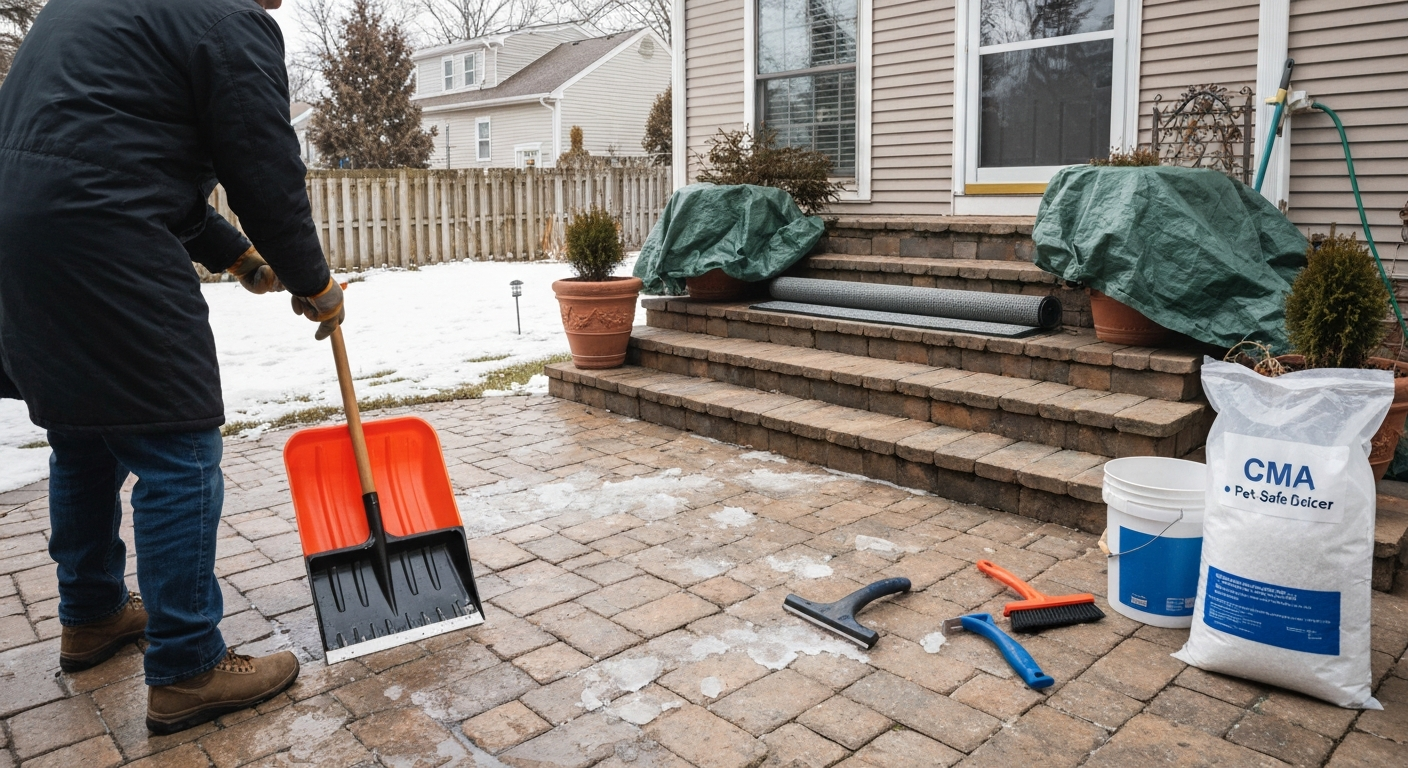
The safest and most effective approach to melting ice on a patio is to combine mechanical removal first (plastic shovel, stiff broom, or plastic scraper) with a compatible deicer matched to your patio material and the outside temperature. For a step-by-step guide on how to remove ice from a patio, see our detailed instructions. For concrete and brick, calcium chloride or magnesium chloride work fast even in bitter cold and cause far less surface damage than rock salt. For natural stone, travertine, and flagstone, calcium magnesium acetate (CMA) or plain sand for traction are better choices because chloride salts can accelerate spalling and erode mortar joints over time. Skip metal tools, gas torches, and boiling water entirely, I've seen each of those cause more damage than the ice ever did.
How to Melt Ice on Patio: Safe Surface-Specific Steps & Tips

Safety overview before you do anything
Ice on a patio creates four distinct hazards that are easy to underestimate when you're just trying to clear the deck quickly. Take 60 seconds to think through each one before you grab a shovel.
- Slip hazard: Icy patios are the leading cause of winter falls around the home. Work from the edges inward, keep one hand free, and lay down sand or cat litter on any section you've already cleared before moving to the next area.
- Cold exposure: Working in sub-freezing temperatures can cause frostbite on exposed fingers in under 30 minutes, especially when handling metal tools or cold deicer granules. Wear insulated waterproof gloves and take warm-up breaks.
- Electrical hazard: If you use electric heated mats or any extension cord outdoors in wet/icy conditions, the circuit must be protected by a GFCI (ground-fault circuit interrupter) outlet or breaker. The National Electrical Code (NFPA 70, Article 426) requires ground-fault protection for all fixed outdoor de-icing equipment. Never run standard indoor extension cords to outdoor mats in wet conditions.
- Chemical hazard: Deicers — especially calcium chloride — can irritate skin, eyes, and mucous membranes. Read the product label before opening any bag, keep bags sealed when not in use, and never mix deicer products.
PPE, pets, plants, and kids
Before you apply anything to the surface, suit up and clear the area. This sounds obvious but I've watched people shake deicer granules barefoot in flip-flops and then wonder why their lawn patch died in spring.
- Gloves: Waterproof insulated gloves for shoveling; chemical-resistant nitrile or rubber gloves if you're handling concentrated deicers or making a brine solution.
- Eye protection: Safety glasses or goggles when pouring granular deicers in wind or applying any liquid solution — calcium chloride granules can bounce and sting.
- Footwear: Ice-gripping boot cleats or footwear with deep-lug rubber soles. Regular rubber boots are surprisingly slippery on glare ice.
- Children: Keep kids off the patio until you've applied grit or abrasive for traction and the deicer has had time to work. Granules left on hands and then put in mouths can cause irritation.
- Pets: All chloride-based deicers irritate paw pads and can cause gastrointestinal upset if licked. Either use a pet-safe deicer (CMA-based products are widely labeled as such) or rinse your pet's paws after any contact. Keep dogs off freshly treated areas until granules have fully dissolved.
- Plants: Salt-based deicers that wash off the patio edge into soil or lawn grass will accumulate over a season and cause brown, burned-looking foliage. Try to direct meltwater away from planted beds; if runoff is unavoidable, CMA or sand is a much better choice than sodium chloride near garden borders.
Tools that won't trash your joints or surface
The right tool makes a real difference here, especially if your patio has polymeric sand joints, delicate travertine, or old mortar pointing that's already a bit soft. I keep a small dedicated winter kit by the back door so I'm not grabbing whatever's nearest.
- Plastic or polyethylene push shovel: The single most important upgrade you can make. A wide poly blade (24 inches is a good all-around size) glides over pavers and stone without catching on joints. Look for a shovel rated for light-duty commercial use — cheap thin plastic cracks in sub-zero temps.
- Stiff-bristled poly broom or deck brush: Great for sweeping away loose snow before it compacts, and for scrubbing in deicer solution once ice has started to loosen. Use on all surfaces.
- Plastic push-pull ice scraper (with foam or rubber edge): The kind sold for car windshields, but larger sidewalk versions exist. Useful for thin bonded ice on flat concrete or sealed pavers. The foam/rubber edge means you won't gouge grout lines.
- Plastic chisel or wooden mallet: For thicker, stubborn ice patches bonded to flagstone or textured concrete, a plastic chisel (available at masonry supply stores) lets you tap and wedge without cracking the stone underneath.
- Non-metallic hand scraper: Single-blade plastic scrapers (like putty-knife style but plastic) work well on smooth concrete or sealed patio tile where ice is less than half an inch thick.
- Electric heated mats (portable): Products like WarmlyYours or Heattrack mats are rubber-backed, lay flat over the patio surface, plug into a GFCI outlet, and melt ice passively. They're ideal for steps, entryways, or a section of patio you use daily. Make sure any mat you buy is rated for outdoor use and has built-in GFCI or is connected to a GFCI circuit.
- Heat cable or trace heating: For a more permanent solution under pavers or inside concrete, embedded low-voltage resistance cables can be installed during a patio build or a re-lay. This requires professional electrical installation and is sized in watts per square foot (typically 40–50 W/sq ft for cold climates).
What to avoid, and why it matters for your patio
I'll be direct here because these warnings are regularly ignored and the damage is real. Some of these mistakes are quick to make and very slow (or expensive) to fix.
- Metal shovels and steel-edge blades: The corner of a steel shovel blade will chip clay pavers, crack flagstone edges, score travertine, and can dislodge or crumble mortar pointing, especially if it's older. Metal snow-blower cutting bars cause the same damage. Swap to polymer cutting edges if you use a machine.
- Gas or propane torches: Open flame creates rapid thermal shock on cold masonry. Concrete, flagstone, and especially travertine can crack, delaminate, or spall under sudden heat. Beyond the damage risk, most municipalities and HOA agreements prohibit open-flame devices on patios and balconies without a permit — check your local fire code before even considering this.
- Rock salt (sodium chloride) on natural stone, travertine, or old/unsealed brick: NaCl is corrosive to porous stone and accelerates freeze-thaw spalling. It's also the worst offender for lawn and plant damage. Save it for sealed concrete driveways if you must use it, and keep the application rate low.
- Acid cleaners (muriatic acid, vinegar concentrate) in winter: Acidic cleaners etch mortar and grout even in normal conditions. Applying them to cold joints with ice present is a fast way to erode pointing. Vinegar in diluted form is sometimes used as a mild deicer for small patches (see the chart below), but straight acid on joints in winter is a bad idea.
- Boiling water: Hot/boiling water on a very cold stone or concrete surface creates thermal shock. This can cause microcracking and surface crazing, particularly on travertine and natural stone. Even worse, if the water doesn't drain immediately, it re-freezes and you've made the problem worse. Warm (not boiling) water is fine in controlled amounts — see the heat methods section below.
- High-pressure washing: Pressure washers on frozen or partially frozen masonry can force water into cracks, and that water re-freezes and expands overnight. NPS preservation guidance specifically warns against water cleaning on masonry when frost is possible.
- Fine sand or dusty abrasives in joints: Sand under about 2 mm particle size works into polymeric sand joints and degrades them over time. Use coarse grit or horticultural grit (3–5 mm) if you want a safe traction aid.
Step-by-step: mechanical ice removal (no power needed)
This is my go-to sequence for renters, apartment balconies, or anyone who wants to avoid chemicals entirely. It works on all patio surfaces when done patiently.
- Clear loose snow first. Before attacking ice, sweep or push any loose snow off the surface with a stiff broom or poly shovel. Don't let snow compact underfoot while you work — that just creates fresh ice.
- Scatter coarse sand or grit for footing. Lay a thin layer of coarse sand (3–5 mm grit) or non-clumping cat litter on areas you'll be standing on while you work. This gives you traction immediately without any chemicals.
- Identify ice thickness and type. Thin glaze ice (under 1/4 inch) responds well to scraping. Thick bonded ice (half an inch or more) is better tapped and pried. Knowing which you're dealing with saves a lot of effort.
- For thin glaze ice: use a plastic push-pull scraper held at a low angle (about 20–30 degrees) and push firmly in short strokes. Work with the slope of the patio where possible so broken ice slides toward the edge rather than back onto cleared areas.
- For thick bonded ice: use the brine-assisted loosening method. Mix 1 tablespoon of dish soap, 1 tablespoon of rubbing alcohol (isopropyl), and half a gallon of warm (not boiling) water. Pour this mixture along the edge of the thick ice patch. The alcohol lowers the freezing point and the soap reduces surface tension, allowing the solution to seep under the ice layer. Wait 5–10 minutes, then use a plastic chisel or flat-edged poly shovel to tap and pry up from the edges inward. This works surprisingly well on stubborn patches without any commercial deicer.
- Lift and remove ice chunks immediately. Don't let broken ice refreeze on cleared sections. Shovel chunks off the patio edge or into a bucket.
- Final sweep. Once the main ice is cleared, sweep residual slush and water off the surface with a stiff broom. The faster you remove standing water the less likely it is to refreeze.
- Apply grit to remaining damp surface. A light scatter of coarse sand over the cleared patio provides traction while any residual moisture evaporates or drains.
This whole process is renter-safe and requires no products you can't find at a dollar store or garden center. It's also the least risky method for delicate materials like flagstone and travertine where I'd be cautious about any chemical deicer.
Step-by-step: heat-based ice removal
Heat methods are underused by homeowners and very effective when applied correctly. The key is controlled, gentle heat, not blast-furnace intensity.
Portable electric heated mats
These are the most practical heat option for a defined area like a step, doormat zone, or small patio section. Lay the mat flat before a storm if possible (they prevent ice bonding rather than melting thick existing ice). For existing ice, place the mat over the icy area and allow 20–45 minutes for the heat to permeate and break the bond, then slide the mat forward and scrape. Always plug into a GFCI outlet. Do not use indoor-rated extension cords. Check that the mat is rated for your ambient temperature range, some lower-cost mats are rated only to 0°F and won't perform well in harder cold snaps.
Hot water technique
Fill a watering can or bucket with hot tap water (around 120–140°F, which is typical hot tap temperature). Do NOT use boiling water (212°F) on cold stone or concrete, thermal shock is a genuine risk on travertine, flagstone, and older concrete. Pour slowly and evenly over the icy patch. The warm water breaks the ice-surface bond quickly. Immediately squeegee or push the slush off the surface before it can re-cool and refreeze. This method works best when air temperatures are above 25°F (-4°C) and you can drain water off the patio edge within a couple of minutes. On a flat balcony with a drain, this is one of my favorite quick methods for small patches.
Hair dryers and heat guns
A hair dryer works on very small patches (a frozen door threshold, a small step) when used on a low setting and kept moving. The risk is tripping over a cord in icy conditions, and a standard household hair dryer is not waterproof, keep it dry and never set it down on a wet or icy surface. A heat gun is more powerful but produces higher temperatures that can crack tile grout or damage sealers. I'd use a hair dryer as a last resort for tiny areas only and keep it well away from water.
Open flame, just don't
Propane torches and open flame devices are not appropriate for patio ice removal. Rapid uneven heating causes thermal shock that can crack flagstone, tile, and concrete, and can delaminate the surface of travertine. Beyond the surface damage risk, many local fire codes and HOA rules prohibit open flames on patios and balconies. Check your local ordinance before ever considering this approach, in many jurisdictions it requires a permit.
Chemical deicers: how to apply them correctly
The most common mistake I see with deicers is using too much. More product does not mean faster melting above a certain point, it just means more runoff, more plant damage, and more residue to clean up in spring. Here's what actually works.
- Shovel or sweep first. Always remove as much snow and loose ice as possible before applying a deicer. You want the chemical to work on a thin bonded layer, not a deep pile. Using deicer as a substitute for shoveling wastes product and takes much longer.
- Check the temperature. Match your deicer to the conditions (see the chart below). Rock salt at 10°F (-12°C) will barely do anything. Calcium chloride at 25°F (-4°C) is overkill and more expensive than needed.
- Apply sparingly and evenly. A standard residential application rate for most granular deicers is roughly 2–4 ounces per square yard (about 60–120 grams per square meter). That's a light scatter, not a thick crust. A common spreader set to a low setting works well; if spreading by hand, wear gloves and aim for even coverage with no clumps.
- Give it time to work. Calcium chloride begins working within 5–10 minutes because it generates heat as it dissolves. Rock salt takes longer, especially in colder conditions. Don't add more product just because it's not instant.
- Brine pre-treatment (anti-icing): If you know ice is coming, a 23% sodium chloride brine solution applied before the storm prevents ice from bonding in the first place and uses less material than post-storm treatment. You can buy pre-mixed brine or make it by dissolving about 2.5 lbs of table salt per gallon of water. Apply with a garden sprayer at low pressure, covering the patio surface lightly.
- Sweep up excess after melting. Once ice has cleared, sweep up any undissolved granules with a broom. This prevents residue from washing into planted areas with the next rain.
- Re-apply timing: In ongoing freezing weather, reapply only after the first application has fully dissolved and meltwater has started to drain or evaporate. Over-applying on consecutive cycles is the main cause of joint erosion and lawn salt damage.
Deicer compatibility: which product works on which patio
This is the section I wish someone had handed me the first winter I had a travertine patio. Not all deicers are equal, and the wrong choice can cost you in repairs come spring. Use this chart as a quick reference, then read the notes beneath it.
| Deicer | Effective Down To | Concrete | Brick / Clay Pavers | Natural Stone / Travertine / Flagstone | Effect on Plants / Lawn | Environmental Impact | Application Notes |
|---|---|---|---|---|---|---|---|
| Rock Salt (Sodium Chloride / NaCl) | ~15–20°F (-9 to -6°C) | Moderate risk: accelerates freeze-thaw spalling over time, especially on newer or unsealed concrete | Moderate risk: can erode mortar joints with repeated use | High risk: accelerates spalling on porous stone; avoid on travertine and flagstone | High: kills grass and plants along runoff path; accumulates in soil | High: major source of chloride contamination in groundwater and waterways | Apply at 2–3 oz/sq yd max; sweep up excess; avoid near planted beds |
| Calcium Chloride (CaCl2) | ~-20 to -25°F (-29 to -32°C) | Low-moderate risk: exothermic action can stress surface at high concentrations; use sparingly | Low-moderate risk: faster action reduces contact time, but still corrosive | Moderate risk: less damaging than NaCl but still a chloride salt; use cautiously on travertine | Moderate: less harmful than NaCl but still causes damage at high doses | Moderate: chloride environmental impact, lower than NaCl at equivalent melting performance | Best for very cold days; apply at 1–2 oz/sq yd; works fastest of all granular options |
| Magnesium Chloride (MgCl2) | ~0 to -10°F (-18 to -23°C, product-dependent) | Low risk: generally considered gentler than NaCl on concrete surfaces | Low risk: good choice for clay pavers and brick | Low-moderate risk: gentler than NaCl; still a chloride — use with care on travertine | Moderate: some plant impact at high doses, less than NaCl | Moderate: lower aquatic toxicity than CaCl2 in some studies | Good all-around choice; apply at 2–3 oz/sq yd; popular for pavers and brick |
| Calcium Magnesium Acetate (CMA) | ~20°F (-7°C) practical lower limit | Very low risk: non-corrosive, recommended for new or sensitive concrete | Very low risk: safe for brick, mortar, and joints | Very low risk: best chemical deicer for natural stone, travertine, flagstone | Low: minimal plant impact; safe near gardens | Low: biodegradable, low chloride; can raise biological oxygen demand in waterways at high volumes | Best choice for sensitive surfaces and near plants; slower-acting; apply at 3–4 oz/sq yd |
| Sand / Coarse Grit / Abrasives | Works at any temperature (traction only, not melting) | Safe: no chemical reaction; inert | Safe: use 3–5 mm coarse grit to avoid joint clogging | Safe: the safest option for travertine and flagstone | None: no chemical harm | Low: runoff turbidity concern; sweep up in spring to prevent drain clogging | Use 3–5 mm coarse grit; avoid fine dusty sand in joints; must be swept up after thaw |
| Vinegar (diluted) / Isopropyl Alcohol mix | ~25°F (-4°C) for small patches only | Low risk: diluted vinegar is mild; avoid concentrations above 10% on concrete or mortar | Low risk for diluted use; do not use concentrated acetic acid near joints | Low risk when very diluted; avoid on polished or honed stone surfaces | Very low: mild organic acid, biodegradable | Very low: minimal environmental concern at household quantities | Good for small icy patches only; not practical for large areas; apply warm for better effect; the dish soap/isopropyl alcohol/warm water mix (see mechanical section) is more effective |
A quick rule of thumb: if you have natural stone, travertine, or flagstone, CMA or sand are your safest bets every time. If you have sealed concrete or brick pavers and need fast results in deep cold, calcium chloride is the most effective option, just use the minimum effective amount. Magnesium chloride is a solid middle-ground choice for most residential patios across the board. Colorado DOT, Clear Creek SCAP final report (summary of deicers including MgCl2) notes that magnesium chloride (MgCl2) acts faster than sodium chloride at lower temperatures and is generally less corrosive than calcium chloride, with some MgCl2 blends effective to single‑digit Fahrenheit temperatures depending on formulation Colorado DOT — Clear Creek SCAP final report (summary of deicers including MgCl2).
Post-thaw cleanup and checking for damage
Once temperatures rise and ice has fully cleared, do a walkover inspection before spring. This is also the right time to clean up deicer residue before it washes into soil with spring rain.
- Sweep up all residual deicer granules, grit, and sand with a stiff broom. Bag it or spread it on a gravel path where runoff won't reach lawn or planted beds.
- Rinse the patio surface with plain water once temperatures are consistently above freezing. A garden hose at normal pressure is fine — this removes salt residue and deicer minerals from the surface and joints.
- Inspect mortar joints and pointing for erosion or crumbling. Salt deicers and repeated freeze-thaw cycles are the main cause of eroded pointing. If you notice soft, sandy mortar in the joints or gaps where mortar has washed out, repoint those areas before next winter. For brick and stone patios, a pointing mortar matched to the original mix is important — using a mortar that's too hard can cause more cracking.
- Check for surface spalling on concrete. If you see small flakes or pits on the concrete surface (especially in areas where you applied rock salt), those are spall failures. Minor spalling can be patched with a polymer-modified concrete repair mortar for cosmetic fixes, but widespread spalling usually means the concrete surface needs to be sealed or, in severe cases, resurfaced.
- Reapply patio sealer if needed. If water no longer beads on your concrete or paver surface, the sealer has worn through. A fresh coat of penetrating sealer before next winter is one of the best things you can do — it reduces water absorption and makes the surface far more resistant to freeze-thaw damage and deicer corrosion.
Prevention: stop ice from bonding in the first place
The best ice-removal strategy is one that means you barely have to remove ice at all. A few habits and investments make the whole winter season much easier.
- Seal your patio every 2–3 years: A penetrating sealer (silane-siloxane for concrete and stone, acrylic for pavers) dramatically reduces water absorption. Less water in the surface means less freeze-thaw damage and ice that bonds less aggressively.
- Improve drainage: Standing water on a flat patio is next winter's ice sheet. If water pools after rain, consider adding a channel drain at the patio edge or adjusting the slope (minimum 1/8 inch per foot fall away from the house) before winter.
- Brine pre-treat before storms: A light spray of 23% NaCl brine (or a commercial anti-icer) before a forecast storm prevents the ice-bonding layer from forming. You'll use far less product than post-storm treatment and spend far less time clearing.
- Install heated mats at high-traffic zones: Electric snow-melt mats at the back door step, on stairs, or at the patio entry point eliminate the most dangerous slip zones passively. Permanently embedded heat cables in a concrete patio are a bigger investment but highly effective for the long term.
- Keep a thin layer of coarse sand ready: A bucket of 3–5 mm grit by the back door means you can lay down traction in 90 seconds whenever ice appears, without any chemicals at all.
When to call a professional
Most patio ice problems are completely DIY-able, but a few situations call for a professional. For detailed step-by-step instructions on removing a patio surface safely and when to call a pro, see our guide on how to remove patio. If you need to close or manage online patio service accounts, see how to delete patio account. If you have significant mortar joint erosion across a large patio area, a masonry contractor can repoint efficiently and match the original mortar specification, getting this wrong with the wrong mortar hardness causes more cracking. If you want to install embedded radiant heating cables under an existing patio, that's a project that involves lifting and relaying the surface and connecting to a dedicated electrical circuit with GFCI protection, both of which benefit from professional installation. If you need guidance on lifting and relaying surfaces, see our guide on how to remove patio tiles. If you're considering embedded heating or major repairs, see our guide on how to remove old patio for safe lifting and relaying techniques. And if your concrete or natural stone has extensive spalling, cracking, or surface delamination after a hard winter, a proper assessment before repair will save you from patching over a structural problem. For issues related to removing damaged pointing or re-laying affected sections, you might also find it useful to look at guidance on the best tool for removing patio pointing, which covers joint-specific repair methods in more detail.
FAQ
What are the top safety precautions before you start removing ice on a patio?
Assess footing and weather, wear PPE (insulated slip‑resistant boots, gloves, eye protection), keep pets and children away, check surface temperature (avoid pouring very hot water on frozen stone/concrete), and confirm you are allowed to use chosen tools/products if you rent (HOA or lease rules). Avoid open flames and high‑pressure hot water on masonry. If electrical heating mats or cables are used, follow electrical code requirements and use GFCI protection and a licensed electrician for permanent installs.
Which mechanical methods are safest for removing ice on different patio materials?
General best practice: remove loose snow first, then use plastic shovels, push brooms, stiff non‑metal scrapers, and rubber‑edged squeegees. Concrete/brick/pavers: plastic shovel or polymer‑edged snow pusher; avoid metal blades that chip pavers or joints. Natural stone/travertine/flagstone: broom and plastic scraper only; avoid striking or chiseling. For stubborn ice, use a plastic ice chisel with gentle tapping—never pry at joints. Powered machines: use snow blowers or plows with polymer edges and operate cautiously near edges. Do not use metal picks, hammers, or metal‑edged plows on delicate stone or thin pavers.
What heat methods can safely loosen ice without damaging patio surfaces?
Safe heat methods: electric heated snow‑melt mats or installed radiant heating (professionally designed and installed with GFCI protection); low‑pressure steam or warm water applied carefully can help loosen ice—use warm (not boiling) water in small amounts and immediately remove meltwater to prevent re‑freeze. Avoid propane torches, open flame, or pouring boiling water on very cold masonry (risk of thermal shock and cracking). High‑pressure hot‑water washing is also discouraged on frozen or recently mortared surfaces.
How do common chemical deicers compare for effectiveness, material safety, and environmental impact?
Rock salt (sodium chloride): effective down to ~15–20°F (‑9 to ‑6°C); inexpensive but corrosive to metal, can damage vegetation and some masonry joints with repeated use. Calcium chloride (CaCl2): most effective at low temps (works to ≈‑20 to ‑25°F), fast‑acting but more corrosive and can leave white residue; use sparingly and rinse when possible. Magnesium chloride (MgCl2): good low‑temp performance, generally less corrosive than CaCl2, still a chloride with potential plant/soil impacts. Calcium magnesium acetate (CMA) and acetate/formate liquids: lower corrosion and aquatic toxicity than chlorides, but less effective at very low temps and can increase biological oxygen demand in runoff. Sand/abrasives/non‑clumping cat litter: do not melt ice but improve traction; must be swept up later to avoid clogging joints and runoff issues. Vinegar/household acids: not recommended as a primary deicer—limited effectiveness and potential surface etching on sensitive stone; reserved for spot, renter‑safe use in very dilute amounts and with caution.
Is there a simple compatibility chart that shows which deicers are better for each patio material?
Yes—general guidance: Concrete: NaCl (sparingly), MgCl2 acceptable, CaCl2 effective but more corrosive—use limited quantities; rinsing after thaw helps. Brick/pavers (concrete clay): avoid heavy repeated rock salt use; MgCl2 or CMA preferred; avoid CaCl2 directly on salt‑sensitive finishes. Natural stone/travertine/flagstone/slate: avoid chloride salts when possible—use sand for traction or CMA/acetates if chemical melt is needed at low temps; test a small inconspicuous area first. Mortared joints: chlorides accelerate mortar deterioration—prefer CMA or mechanical/heat methods. Always follow product label and manufacturer/installer guidance; when in doubt, use non‑chloride alternatives or mechanical removal.
What are recommended application rates and dos and don’ts for deicers?
Application rates: follow product label—typical solid salt rates are 1–2 ounces per square foot for light coverage (adjust per product). Do: pre‑shovel snow, apply deicer sparingly to thin ice layers, pre‑wet solids or use brine to improve efficiency, distribute evenly, and sweep up excess granules after thaw. Don’t: pile deicer near plants, lawn, or storm drains; apply heavy doses expecting faster melting; use metal tools to chip deiced ice; mix different chemical deicers (unless product specifies), and avoid using deicers on very fresh mortar until cured (follow masonry curing times).
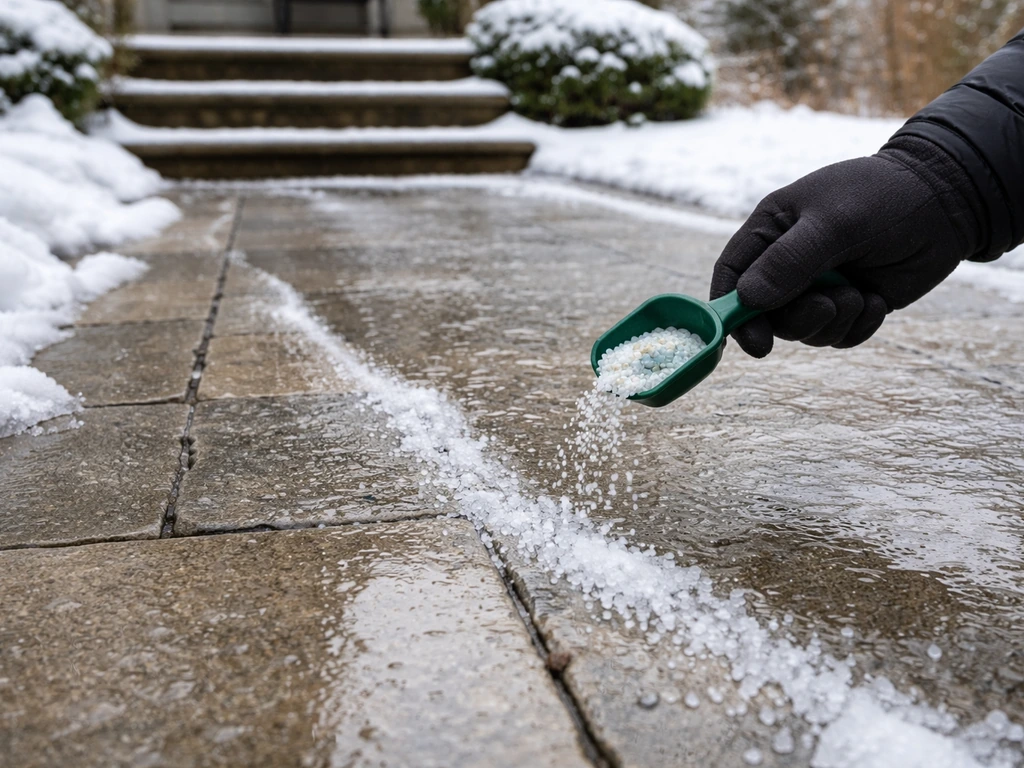
Safe, surface-specific ways to remove ice from a patio without damaging concrete, stone, pavers, or travertine.
Choose tear-out or stain removal and learn step-by-step cleaning for concrete, brick, pavers, stone, travertine, and fla
Step-by-step removal of Thompson’s patio sealer on concrete, brick, pavers, and stone, with safety, tests, and cleanup.