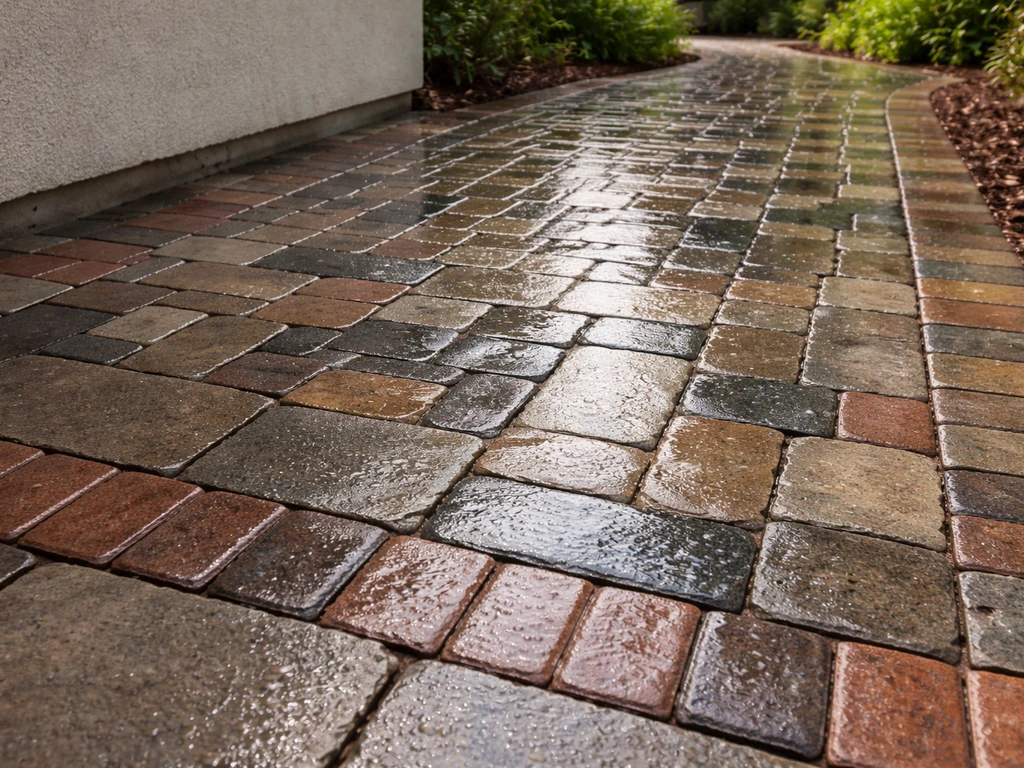
The fastest way to make your patio look wet is a thorough deep clean followed by a wet-look sealer or stone enhancer matched to your specific material. That two-step process, clean then seal, is what actually works long-term. If you just want the look right now with no products, wetting the surface with a hose gives you an instant preview of what a sealed finish will look like, which is also a handy trick for testing whether a sealer would even improve the color. If you want detailed, step-by-step guidance, see our guide on how to make patio stones look wet.
How to Make Your Patio Look Wet: Clear, Step by Step

Dylan Hale
6 Jun 2026
What "wet look" actually means (and which one you want)
There are two things people mean when they say they want their patio to look wet, and they need different solutions. The first is a clean, darkened look where the natural color of the stone, concrete, or brick is richer and deeper, similar to how it looks right after rain. The second is a glossy, shiny finish with actual reflective sheen, like a sealed showroom floor. Both are achievable, but they use different products and techniques.
A color-enhancing penetrating sealer (sometimes called a stone enhancer) gives you the deeper, richer, damp look without heavy gloss. A film-forming wet-look acrylic sealer gives you the shiny, almost lacquered finish. Some products do both. Knowing which look you want before you buy anything saves a lot of frustration, because stripping a film-forming sealer you hate is much harder than just not applying it in the first place.
Why your patio looks dull right now
Before you reach for any sealer, figure out what's actually causing the dullness. A sealer applied over a dirty or compromised surface will look worse than no sealer at all, and it will peel or streak within months. Here are the most common culprits by material:
| Material | Most Common Dullness Causes |
|---|---|
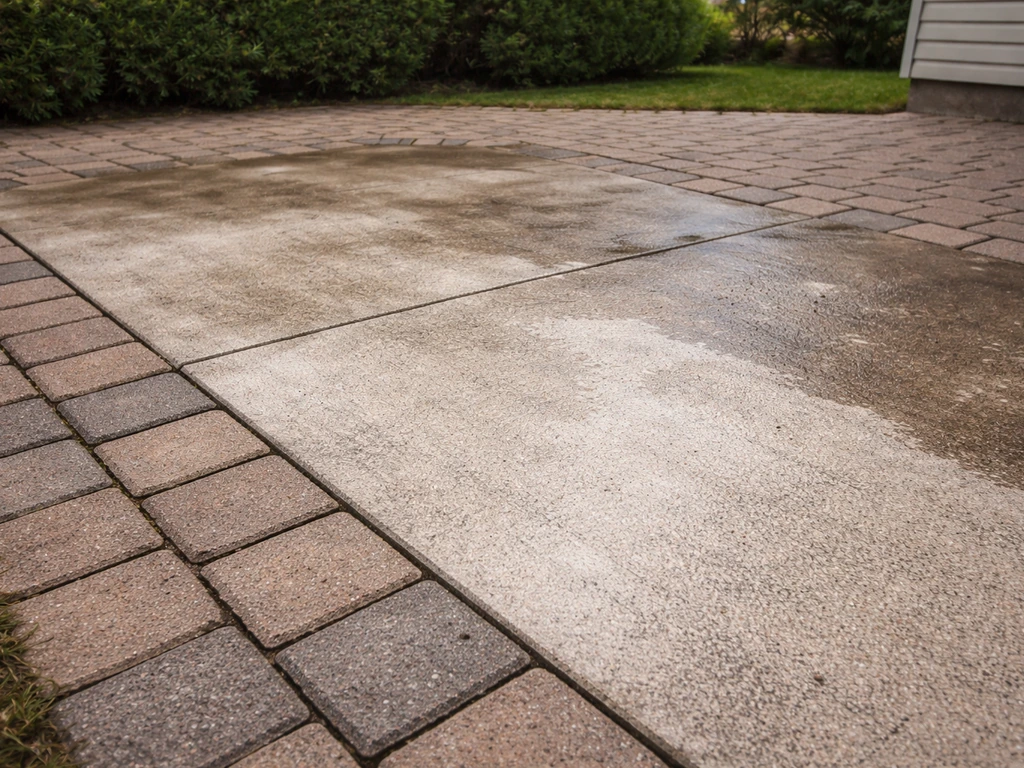
| Concrete | Grime buildup, efflorescence (white haze), oxidation, old failing sealer |
| Pavers (concrete or clay) | Efflorescence, mold/algae, dirt in joints, old sealer peeling |
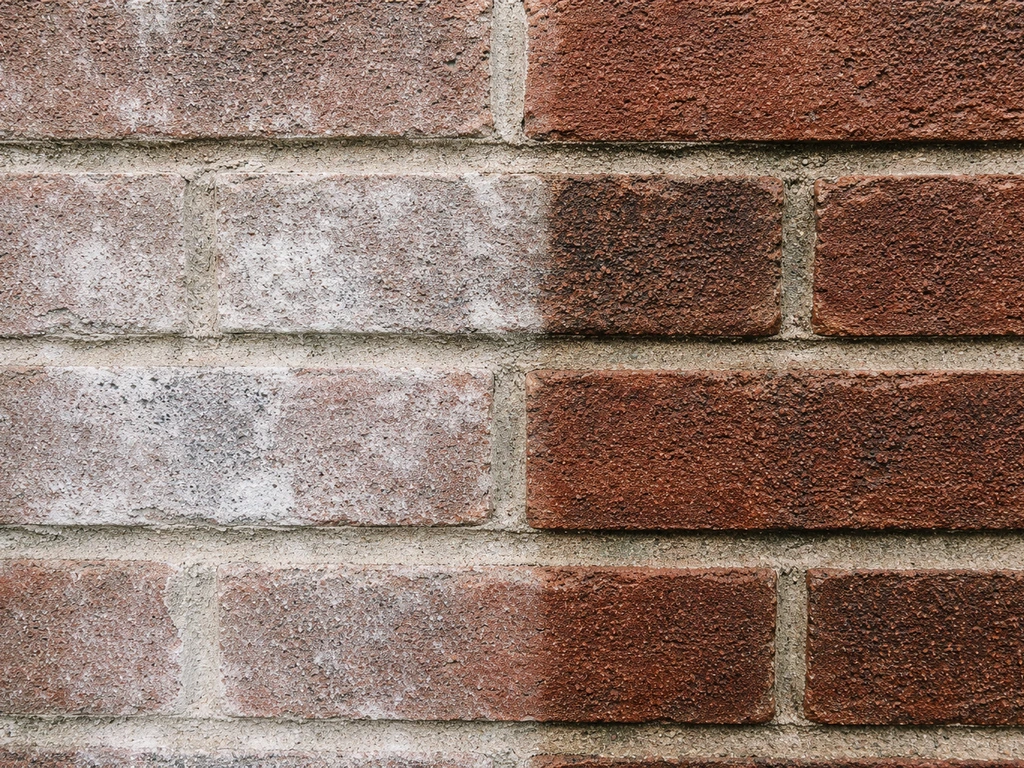
| Brick | Mortar haze, algae, salts, dirt absorbed into pores |
| Natural stone (flagstone, slate) | Algae, grime, no sealer at all, mineral deposits |
| Travertine | Etching from acidic cleaners, grime in pores, no sealer or old sealer |
Efflorescence deserves a special mention because it's one of the most misunderstood problems. It's the white, chalky residue that migrates up through pavers or concrete from salts in the base material. If you seal over efflorescence, you trap it and end up with a milky or hazy finish. On new pavers especially, Unilock recommends waiting 2 to 3 months, sometimes up to a year, for efflorescence to work itself out before sealing. If you have it now on older surfaces, you need to treat it before any wet-look product goes down.
Deep clean first: removing mold, grime, grease, and stains
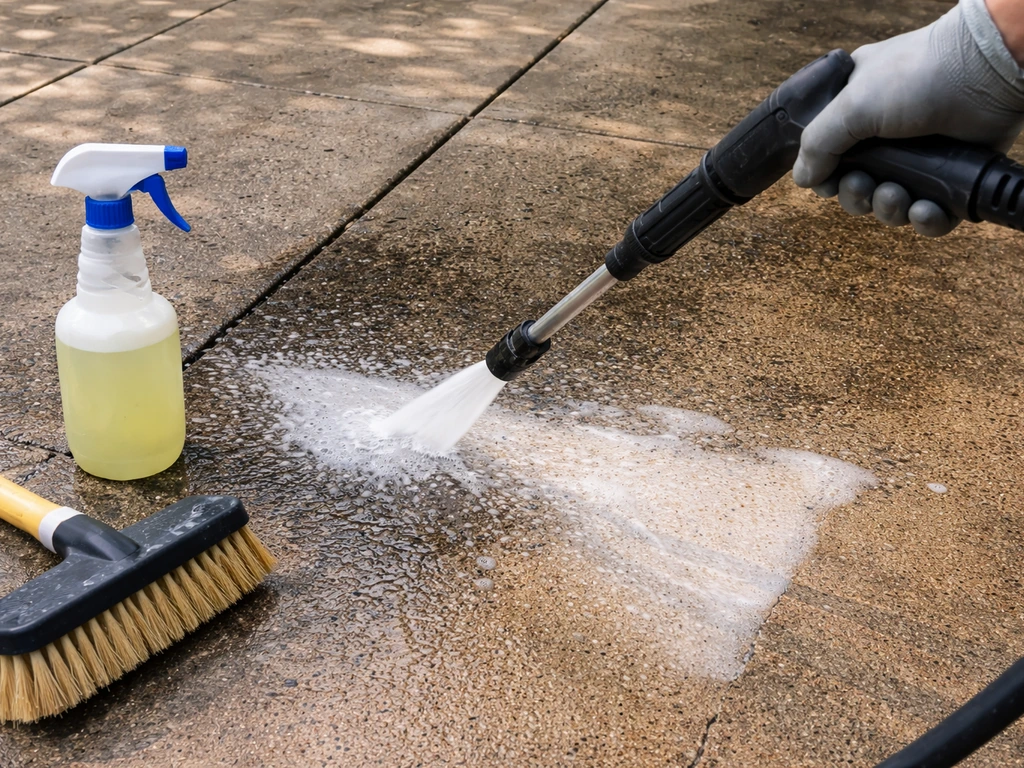
Every major sealer brand, including BEHR, H&C, and Rust-Oleum, specifies the same requirement: the surface must be clean, dry, and free of dirt, oil, and grease before any wet-look product is applied. This isn't fine print. It's the single most important thing you can do to get a good result. Here's how to get there based on what you're dealing with.
Mold, algae, and organic staining
For mold, algae, and green or black organic staining, sodium hypochlorite (diluted bleach) is the most effective solution. If your patio is turning black, that can also be a sign of mold or other organic growth that needs the deep-clean steps before any wet-look sealer why is my concrete patio turning black.
Mix 1 part household bleach with 3 parts water, apply it to the affected area, let it dwell for 10 to 15 minutes, then scrub with a stiff brush and rinse thoroughly. On concrete, brick, and pavers this works well. On natural stone like travertine or flagstone, I'd be more careful. Bleach can lighten or discolor some stones, so test a hidden area first or use a pH-neutral stone-safe cleaner instead.
If you want a gentler option that's safer around pets and plants, white vinegar diluted 50/50 with water will kill surface mold and algae, though it takes longer and you'll need more scrubbing. Do not use vinegar on travertine or limestone. It etches the surface.
Grease and oil stains
Grease is probably the trickiest stain to deal with because it blocks sealer penetration if you miss any of it. H&C specifically calls out using a cleaner/degreaser mixed to a 50/50 ratio with water as part of concrete prep. Rust-Oleum's wet-look sealer TDS lists a heavy-duty degreaser as a required prep step too. Apply your degreaser, let it sit for 5 to 10 minutes, scrub hard with a stiff brush, then rinse. For older, set-in grease on concrete, you may need a second pass. Dish soap is a usable backup if you don't have a proper degreaser, but rinse it extremely well because soap residue will cause adhesion problems.
Efflorescence and calcium deposits
For white chalky deposits, you need an efflorescence cleaner or a dilute acid wash. Efflorescence cleaners are typically dilute acid-based products sold specifically for masonry. LayorCare recommends a dedicated Pre-Treat Cleaner or Heavy Calcium Releaser for calcium deposits before applying any wet-look sealer on stone. For concrete and pavers, muriatic acid diluted heavily (typically 10:1 water to acid) works, but this is a last resort because it's harsh and requires full protective gear including gloves, goggles, and respiratory protection. Never use muriatic acid on natural stone. After any acid treatment, rinse the surface thoroughly because residual acid will interfere with the sealer.
Pressure washing vs. hand scrubbing
Pressure washing is faster and more effective for concrete, pavers, and brick. Use 1,500 to 3,000 PSI for concrete and pavers, and stay around 1,200 to 1,500 PSI for brick to avoid eroding mortar joints. Keep the nozzle moving, hold it at a consistent 6 to 12 inches from the surface, and use a fan tip rather than a zero-degree pinpoint tip.
For natural stone like travertine and flagstone, hand scrubbing is generally safer because high pressure can chip soft stone or widen grout joints. If you don't have a pressure washer, a stiff-bristle deck brush with a cleaning solution and a garden hose for rinsing gets the job done. It just takes longer.
After rinsing, StonehengeUS specifically recommends making sure all cleaner residue is off the surface before you move to sealing, because film residue left behind is a leading cause of streaking.
Drying time and surface prep before sealing
This step is boring but critical. The surface needs to be fully dry before any wet-look sealer goes down. After efflorescence cleaning, Alliance Gator recommends a 24 to 48 hour dry window before sealing. For general cleaning, 24 hours of dry weather is a safe minimum. If you're in a humid climate or the weather has been wet, give it more time. Lay your hand flat on the surface. If it feels cool or you can see moisture at all, wait.
While you're waiting, do a few prep tasks. Mask off any landscaping, grass edges, or adjacent surfaces you don't want sealer on. Wet-look acrylic sealers can stain or damage adjacent materials and are hard to remove once dry. Also do a small test patch with your chosen sealer in an inconspicuous area, ideally a 12-by-12-inch square.
This tells you whether the color enhancement looks the way you expect on your specific material, and it helps you spot any compatibility issues before you've committed the whole surface. Some older surfaces have a residual sealer that's incompatible with a new product. Just Seal It notes that certain topical wet-look coatings must be stripped before a penetrating sealer can be applied properly, so the test patch can save you from a very messy mistake.
Choosing the right wet-look product for your material
Not every product works on every surface. Here's how to match the product type to your patio material.
| Material | Recommended Product Type | Notes |
|---|---|---|
| Concrete (poured or stamped) | Film-forming acrylic wet-look sealer (solvent or water-based) | BEHR, H&C, and Rust-Oleum ROC-16 are well-tested options. Solvent-based gives higher gloss. |
| Concrete pavers | Penetrating paver enhancer OR acrylic wet-look sealer | PROSOCO Paver Enhancer for a natural wet look; acrylic sealers for high gloss with joint stabilization (e.g., SEK SUREBOND SB-8700) |
| Brick | Water-based or solvent-based acrylic wet-look sealer | BEHR lists brick as a compatible surface. Test for darkening because some brick absorbs sealer unevenly. |
| Natural stone (flagstone, slate) | Penetrating color-enhancing sealer (silane/siloxane-based) | PROSOCO-style chemistry penetrates and reacts. Avoid film-forming sealers on rough, porous stone. |
| Travertine | Penetrating enhancer sealer (pH-neutral, stone-safe) | STONETECH Enhancer Pro is a common choice. Never use acid-based cleaners or sealers not rated for stone. |
| Flagstone | Penetrating color enhancer | Film-forming sealers can peel on irregular surfaces. Enhancer Pro or siloxane-based products work better. |
The key distinction is penetrating vs. film-forming. A penetrating sealer soaks into the pores and enhances color from within, giving a natural wet look with no visible coating on top. A film-forming sealer sits on the surface and creates a shiny layer. Film-forming gives you more gloss but requires more maintenance, can peel if the surface wasn't fully prepped, and can become slippery when wet. If slip resistance is a concern for you, it's worth reading about how wet-look sealers affect traction before committing to a high-gloss film product, especially on steps and pool surrounds.
Solvent-based vs. water-based sealers
Solvent-based sealers generally give a deeper, richer wet look with higher gloss. They're better for dense surfaces and penetrate more aggressively. The downside is stronger fumes, flammability, and longer off-gassing time. Water-based sealers are easier to work with, have lower VOCs, and clean up with water. They typically produce slightly less gloss but are a perfectly good choice for most residential applications. If you're in an enclosed or semi-enclosed patio space, water-based is safer. SEK SUREBOND's SB-8700 is a solvent-based acrylic that's well-regarded for pavers and notes rain-safe performance at about 90 minutes after application, which matters if your weather is unpredictable.
How to apply a wet-look sealer for even, streak-free results
- Check the weather forecast. H&C specifies that air and surface temperature should be between 50°F and 90°F during application and for the first 24 hours afterward. Don't apply in direct intense sun on a hot day, which causes the sealer to dry too fast and flash, leaving lap marks.
- Stir (don't shake) the sealer if it's been sitting. Shaking introduces air bubbles that show up as a foamy, uneven finish.
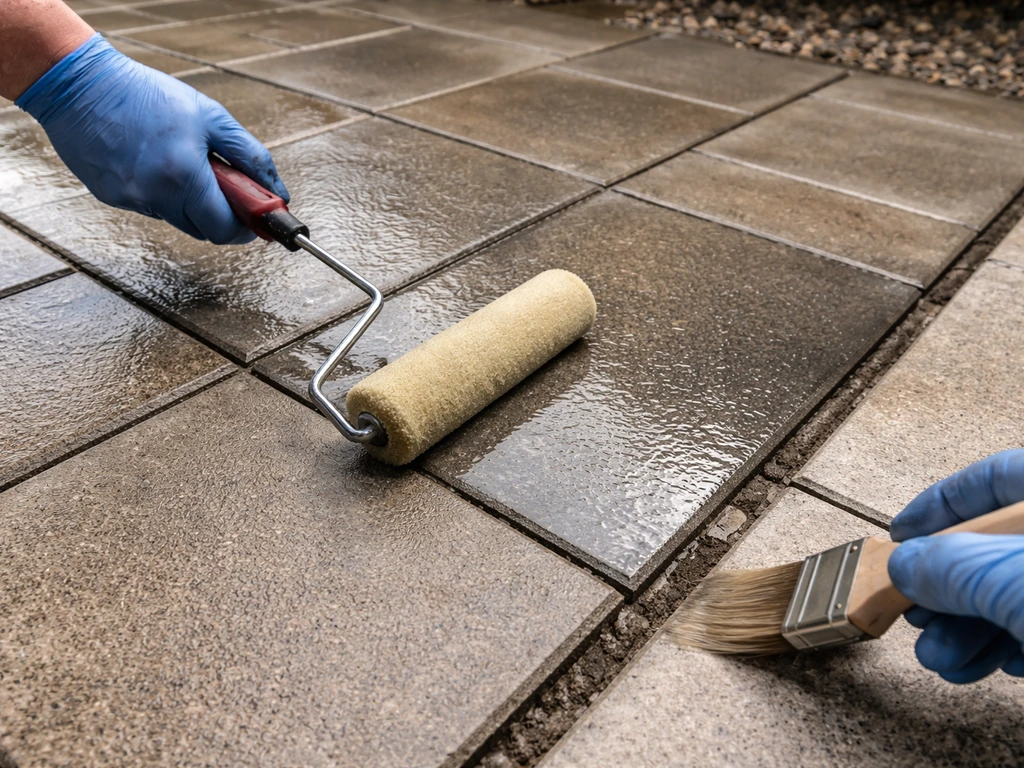
- Apply the first coat as a thin, even layer using a 1/4 to 3/8 inch nap roller for flat concrete and pavers, a paint pad or brush for irregular stone, or a pump sprayer for large areas. BEHR recommends this tool range for its wet-look sealer specifically.
- Watch for pooling. If sealer pools in low spots, spread it to drier areas immediately and back-roll or wipe up any excess with a clean cloth before it dries. BEHR specifically warns against letting puddles sit.
- For penetrating enhancers like STONETECH Enhancer Pro on travertine or stone: flood the surface, allow it to penetrate for the specified dwell time, then thoroughly wipe the entire surface dry with clean absorbent towels before it hazes over. STONETECH specifies the wipe-off window is within 30 to 40 minutes of initial application.
- Allow the first coat to dry to the touch (approximately 1 hour at normal temperatures, per both BEHR and H&C specs) before applying a second coat. H&C's recoat window is 4 hours. BEHR lists 4-hour recoat time. STONETECH recommends 30 to 45 minutes between coats for stone enhancers.
- Apply a second coat using the same thin, even technique. Two thin coats always beat one thick coat for both appearance and durability.
- Keep foot traffic off for at least 4 hours for light use, and 72 to 96 hours for heavy traffic based on H&C's cure data. Full cure, meaning you can move patio furniture back and resume normal use, is 7 to 14 days at 77°F and 50% relative humidity.
For pavers specifically, applying the sealer also helps stabilize joint sand, which prevents weeds and keeps the paver joints locked in place. Products like SEK SUREBOND SB-8700 are designed to do both, wet look and joint stabilization, in one application.
Troubleshooting: streaks, haze, peeling, and dull spots
Still looks dull after sealing
If the surface looks basically the same after sealing, either the sealer didn't penetrate because of residual grime or old sealer blocking it, or you applied too thin a coat on a very porous surface that absorbed everything without leaving any surface coverage. Check that you cleaned thoroughly and that any old incompatible sealer was removed. You may need a second coat, or a different product with better color enhancement for your specific material.
White haze or cloudy finish
A white or milky haze after sealing almost always means one of three things: moisture was trapped under the sealer (surface wasn't fully dry), efflorescence was present when you sealed, or the sealer was applied in cold or humid conditions. If your concrete patio is still wet, the most common cause is moisture being trapped under the sealer or in the surface before sealing why is my concrete patio wet.
If the haze is minor, sometimes it clears as the sealer fully cures over a week. H&C's drying information provides specific performance and traffic timeframes, including light traffic and recoat in about 4 hours and heavy traffic in about 72 to 96 hours (with full cure in 7 to 14 days at 77°F/50% RH) the product's drying info.
If it doesn't, you'll need to strip the sealer and start over, making sure the surface is completely dry and free of efflorescence first.
Streaks or lap marks
Streaks usually happen when the sealer dries too fast (application in direct sun or wind), when you apply too thick a coat, or when you let a wet edge dry before coming back to it. Work in manageable sections, maintain a wet edge, and apply in cooler parts of the day. Using a roller rather than a sprayer gives you better control on flat surfaces.
Peeling or flaking
Peeling is almost always a prep failure. The sealer bonded to dirt, old sealer, or a slightly damp surface instead of the actual patio material. Strip what you can with a sealer stripper or xylene (for solvent-based sealers), clean the surface again properly, let it dry fully, and reapply.
Uneven color (dark in spots, light in others)
Blotchy color usually means the surface had uneven porosity, with some areas absorbing more sealer than others. On natural stone and pavers this is common. A second coat evening out the coverage usually fixes it. On travertine in particular, make sure all the open pores and holes are filled or grouted before sealing, otherwise the sealer will wick unevenly into the unfilled voids.
Slippery surface after sealing
Film-forming wet-look sealers do increase slip risk, especially when wet. This is a real safety issue on patios that get rain or pool splash. If you've already sealed and are dealing with this, anti-slip additives (fine aggregate or polymer beads) can be mixed into the second coat or a maintenance coat. Some sealers come with an anti-slip additive option.
For surfaces where slip is a concern, consider a matte or satin penetrating sealer instead of a high-gloss film former. This is closely related to the broader challenge of managing patio traction, which is worth thinking through before you commit to a high-gloss product. For practical steps on how to make patio less slippery, focus on choosing the right sealer finish and adding slip resistance where needed.
Keeping the wet look long-term
Film-forming acrylic sealers typically need reapplication every 1 to 3 years depending on sun exposure, foot traffic, and climate. Penetrating sealers last longer, often 3 to 5 years, because they're protected inside the pores rather than sitting on the surface. To maintain the look between reapplications, clean the surface regularly with a pH-neutral cleaner and avoid using harsh chemicals like bleach directly on sealed surfaces, since they can break down the sealer over time. Before resealing, check whether the existing sealer is still intact by doing a water bead test: if water beads up, the sealer is still working. If it soaks in immediately, it's time for a fresh coat.
One last practical note: protect your landscaping during application. Wet-look sealers, especially solvent-based ones, can damage grass and plants if they get overspray. Wet the surrounding plants with water before you start, cover them with plastic sheeting if you're spraying, and rinse any overspray off immediately. The sealer is much easier to remove before it cures than after.
FAQ
Can I make my patio look wet temporarily without using any sealer?
If you want the “wet” look without sealers, the hose test is the right preview, but it fades quickly because water evaporates. For a longer-lasting effect, look for enhancers that are designed for your exact material (penetrating for a natural damp look, film-forming for gloss) and expect that even the best product needs periodic maintenance.
What’s the difference between a dark “rainy” look and a glossy wet look on a patio?
Yes, but you need to match the approach to the type of “wet” you want. If your goal is just deeper, darker color, choose a penetrating enhancer or stone enhancer. If you want a reflective, shiny sheen, you need a film-forming wet-look sealer, and you should plan on higher slip risk and more frequent reapplication.
How do I know my patio is actually dry enough before sealing?
Avoid sealing while the surface is still damp or cool. A simple check is a flat-hand test, if it feels cool or you see moisture, wait. Also give extra dry time after efflorescence treatments, because salts and residual moisture can push haze or streaks even if the surface seems dry.
My patio looks hazy or milky after sealing. What should I do next?
If the surface feels tacky, looks milky, or water no longer beads after curing, you likely have a failure due to trapped moisture, efflorescence, or poor prep. Start by stripping the affected coating if it is film-forming or not adhering, then deep-clean, correct efflorescence, and reseal only after a full dry window.
Can I fix blotchy or uneven wet-look results without stripping everything?
Yes, you can often “save it” with a second coat if the look is uneven, but only when the first coat cured properly and the surface was prepped well. If the first coat is causing peeling, do not recoat. Peeling usually means the sealer bonded to dirt, old coating, or moisture, so you need to strip and start over.
Why does my sealer look like it barely changed the color on some areas?
Old residue is a common reason a sealer does not enhance color. If you already had a topical coating, it can block penetration, leading to patchy or weak results. Do a small test patch first, and if enhancement is minimal, you may need stripping or a different sealer type rather than adding more product.
Will a wet-look sealer make my patio dangerously slippery?
For safety, test traction after sealing. High-gloss film-forming finishes can get slippery when wet. If you need grip, choose a matte or satin penetrating option, or add an anti-slip additive in a second coat or maintenance coat (and consider treating steps and pool-adjacent areas differently).
Can I use the same cleaning method on travertine or flagstone as I use on concrete pavers?
Yes, but take a different approach for natural stone. Natural stone can be etched by acids and some cleaners, and pressure washing can chip soft stone or widen grout joints. For travertine or limestone, use gentler pH-neutral stone cleaners, and prioritize hand scrubbing over high-pressure methods.
What if the white powder returns after I cleaned it, can I still seal?
If you keep seeing white chalky buildup even after cleaning, you may still be dealing with ongoing efflorescence migration. Wait longer before sealing when possible, and if it’s an active issue, treat with an efflorescence-specific product again before you apply any wet-look coating.
How can I tell whether I actually need to reseal to maintain the wet look?
Use the water bead test as a quick reality check. If water beads, the existing sealer is still providing barrier performance. If it soaks in immediately, the look will not be maintained and you should plan for a fresh coat, after cleaning and full dry time.
What’s the best way to protect plants and grass during wet-look sealing?
When sealing, overspray protection matters. Wet-look sealers can stain landscaping, and sprayers increase the chance of drift. Wet nearby plants, cover them with plastic when spraying, and rinse overspray immediately before the product cures.
Next Articles

How to Make Patio Less Slippery: Clean, Treat, Prevent
Step-by-step fixes for a slippery patio: clean mold and algae, choose safer treatments for concrete, brick, stone, paver

How to Remove Thompson’s Patio Sealer Step by Step
Step-by-step removal of Thompson’s patio sealer on concrete, brick, pavers, and stone, with safety, tests, and cleanup.
Can You Remove Patio Sealer? How to Strip It Safely
Learn if you can remove patio sealer and how to strip it safely by type, material, and method.