The fastest way to make patio stones look wet is to spray them down with water, but that lasts about five minutes. For a result that actually holds, you need two things: a properly cleaned surface and the right wet-look product applied correctly. Dirt, algae, and old residue are the main reasons patio stones look dull and uneven, and no sealer will fix that.
How to Make Patio Stones Look Wet: Step by Step

Dylan Hale
10 Jun 2026

Clean the stone first, let it dry completely, then apply a penetrating or topical wet-look sealer matched to your specific material. If you’re dealing with moisture right now, the same fix is why cleaning and sealing in the right order matters, which is a key part of why is my concrete patio wet. Done right, you get a deep, consistently darkened finish that can last one to three years depending on traffic and climate.
Quick ways to get a wet look right now
If you just want to see how your patio could look before committing to a sealer, or you need it looking good for an event today, a few temporary tricks actually work.
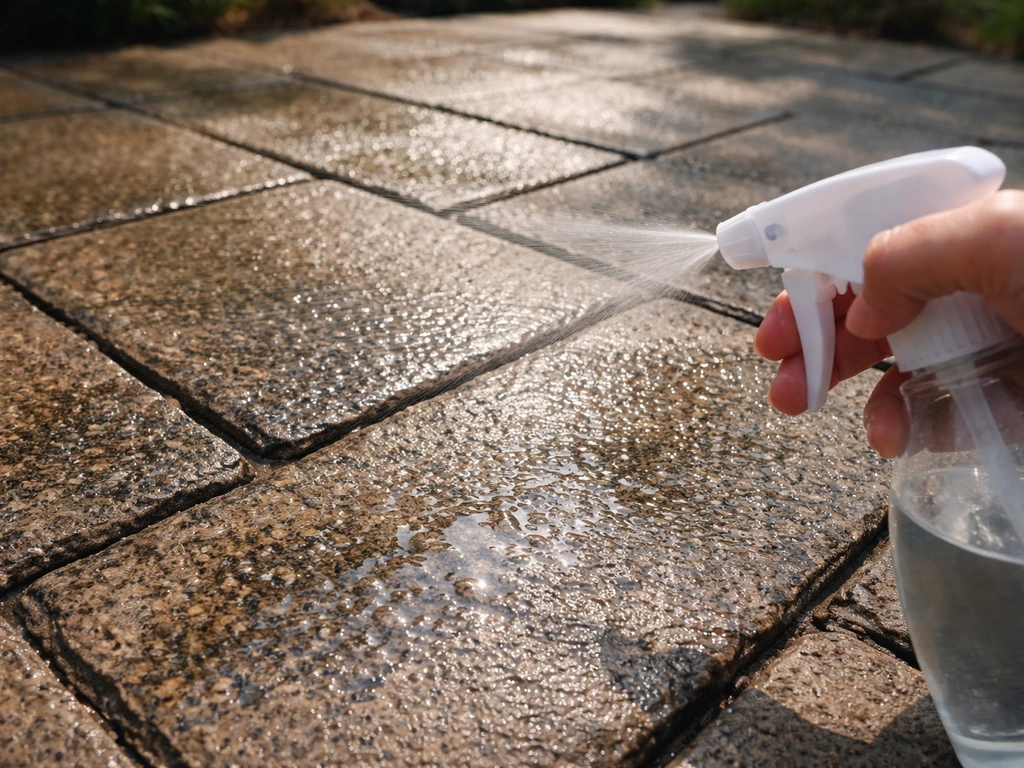
- Water misting: A garden hose on mist setting or a spray bottle gives you the wet look instantly. It evaporates in minutes, but it's useful for testing which areas need the most attention.
- Linseed oil (boiled): Rubbing a thin coat of boiled linseed oil onto clean, dry flagstone or concrete gives a temporary wet appearance that lasts a few weeks before fading. It's not a real sealer, but it's a decent short-term fix on natural stone.
- Baby oil or mineral oil: A very thin wipe works on concrete and natural stone for a quick photo or event. Wipe off the excess or it becomes a slip hazard and attracts dirt fast.
- Wet the surface right before guests arrive: Genuinely, just hosing down a clean patio looks great for outdoor gatherings and costs nothing.
None of these are permanent, and oily options in particular can cause problems if you later want to apply a proper sealer (oil residue prevents adhesion). If your goal is a lasting wet look, skip the oils and go straight to cleaning and sealing.
Clean first: this is the step most people skip
A wet-look sealer applied over a dirty surface will lock in that dirt and give you a patchy, streaky result that actually looks worse than before. The cleaning step is where the real transformation happens. I've seen stone that looked almost black from algae come back to its original color just from a proper wash, before any sealer touched it.
General cleaning approach for most patio materials
- Clear the patio completely: Remove furniture, pots, and any debris. Sweep or blow off loose dirt and leaves.
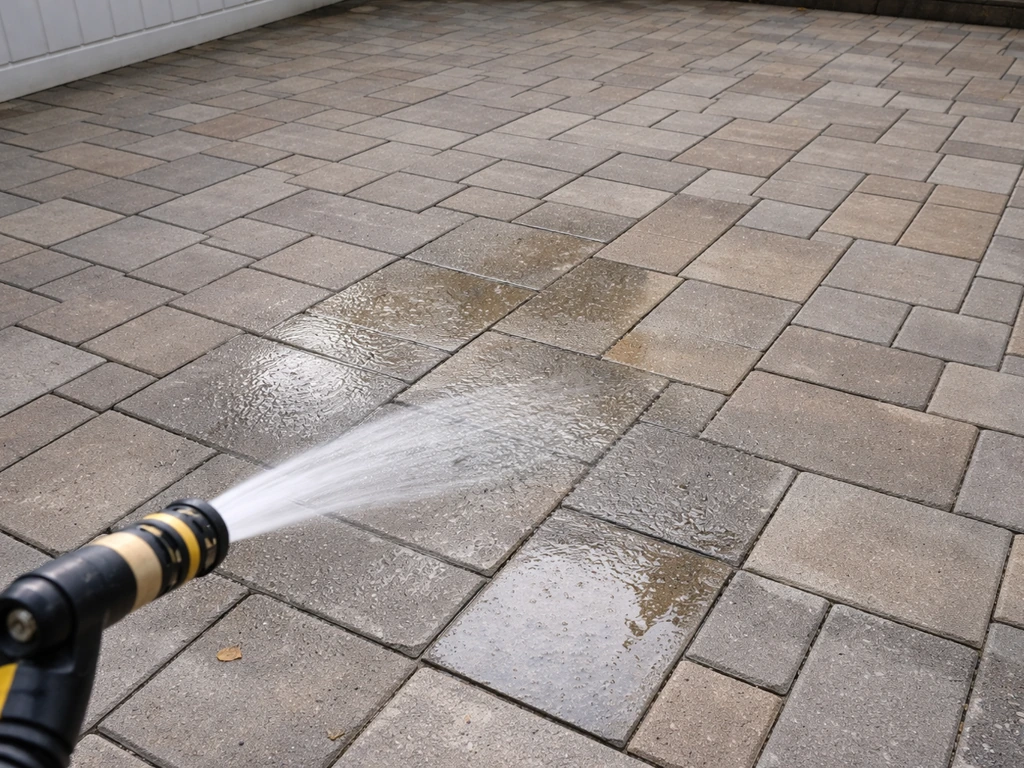
- Wet the surface: Pre-wet the stone with a hose before applying any cleaner. This stops dry stone from absorbing the cleaner too fast and helps it work evenly.
- Apply your cleaner: The right product depends on what you're dealing with (see below), but always work in sections so the cleaner doesn't dry before you rinse.
- Scrub or pressure wash: A stiff-bristle brush works for hand scrubbing. A pressure washer at 1,200 to 2,000 PSI handles most patio materials fine. Use a fan tip (25 or 40 degree), not a zero-degree tip, to avoid surface damage.
- Rinse thoroughly from high to low: Always rinse downhill across the patio to carry loosened debris away. Rinse twice if you used a chemical cleaner.
- Let the surface dry completely: This is non-negotiable before sealing. Depending on temperature and humidity, full drying can take 24 to 72 hours.
Algae, moss, and mold: sodium hypochlorite is your best option
For green, black, or slimy growth on concrete, brick, and pavers, sodium hypochlorite (the active ingredient in bleach) is the most effective cleaner I've used. Mix it at roughly 1:6 to 1:10 with water depending on how heavy the growth is. Apply it, let it dwell for 5 to 10 minutes, then scrub and rinse thoroughly. Never mix sodium hypochlorite with other chemicals, especially anything acidic. Rinse the area completely with clean water afterward. For a soft-wash approach without pressure washing, a 3% sodium hypochlorite solution applied with a pump sprayer, left to dwell, then rinsed works very well on algae and lichen.
This approach works well on concrete, brick, and most pavers. Do not use sodium hypochlorite on travertine, marble, or limestone without testing first, as it can affect the surface over repeated use. For those materials, stick with a pH-neutral stone cleaner.
Pavers and stamped concrete: use pH-neutral cleaners
For general dirt on pavers and stamped concrete, a pH-neutral cleaner diluted at around 1:32 with water is the safe choice. It cleans effectively without damaging the surface or mortar joints. After applying and scrubbing, lightly mist the patio with clean water to rinse residue off completely before it dries.
Travertine, marble, and natural limestone: no acids, ever
This is the big one. Travertine, marble, and limestone are calcium-carbonate stones, which means acids etch them chemically. That includes vinegar, lemon juice, citrus-based cleaners, and muriatic acid. Even a brief contact with vinegar can dull and pit the surface permanently. Use only a pH-neutral (around pH 7) stone cleaner on these materials. I know vinegar feels like a natural, safe option, but on these stones it causes real damage that can't be undone without professional honing.
Concrete brightening before sealing
If you have bare concrete that looks discolored and you want to brighten it before sealing, an acid-based concrete cleaner (not muriatic acid at full strength) can help. Dilute it per the manufacturer's instructions, let it dwell for 1 to 3 minutes only, then neutralize and rinse immediately with clean water. Do not let acid sit on mortar joints. This step is specifically for brightening concrete before sealing, not for removing biological growth.
Choosing the right wet-look product
There are two main categories of wet-look product: penetrating sealers and topical film-forming sealers. They work differently, last differently, and are not interchangeable depending on your material and goals.
| Feature | Penetrating Sealer | Topical/Film-Forming Sealer |
|---|---|---|
| How it works | Absorbs into the stone, repels water from within | Forms a protective film on the surface |
| Wet-look intensity | Subtle to moderate darkening, natural appearance | High gloss, strong wet look (especially high-solids formulas) |
| Slip risk | Does not change natural slip resistance | Can be dangerously slippery when wet if high-gloss |
| Longevity | Longer lasting, wears with the substrate | Shorter lifespan, wears off faster in high traffic |
| Best for | Natural stone, travertine, flagstone, brick | Concrete pavers, clay pavers, specific paver types per product |
| Compatibility note | Will not accept a topical membrane sealer on top | Cannot penetrate a surface already treated with a penetrating sealer |
High-gloss wet-look topical sealers with around 30% or higher solids content give the most dramatic effect, but they come with real trade-offs: they can peel, haze if applied in the wrong conditions, and become slippery. For most patios, I lean toward a penetrating sealer with a wet-look or enhanced finish because it's lower maintenance, safer underfoot, and more forgiving to apply.
One important compatibility note: if your patio has already been treated with a penetrating sealer, a water-based topical acrylic film sealer will not adhere properly. The same goes in reverse. Know what's already on your surface before you buy anything. If you're not sure, do a water-bead test. Drip water on the stone: if it beads up, there's an existing sealer. If it absorbs immediately, the stone is bare and ready for either type.
Wet-look options by patio material
Concrete
Concrete takes both penetrating and topical sealers well. For a strong wet look, a high-solids acrylic topical sealer works great, but you must add an anti-slip grit additive (more on that in the safety section). Water-based acrylics are easier to apply and more forgiving than solvent-based versions. Make sure the concrete is fully cured (28 days minimum for new concrete), clean, and bone dry before applying.
Brick
Brick is porous and responds well to penetrating sealers with a wet-look finish. Topical films can trap moisture behind the film on older brick, which causes spalling or efflorescence over time. A penetrating sealer gives a natural darkened look without the risks of a film coating.
Concrete pavers
This is where topical wet-look sealers shine most. Products like Techniseal's WLWR are designed specifically for concrete pavers and cover roughly 150 square feet per gallon per coat. Note that WLWR explicitly states it should not be applied to natural stone, stamped concrete, or poured concrete, so read the product label carefully before buying. For pavers with polymeric sand in the joints, check that the sealer is compatible with the binder.
Flagstone
Flagstone varies widely (sandstone, slate, quartzite, and more), so test in a hidden area first. Penetrating sealers work on most flagstone types and give a rich, darkened look. Avoid high-gloss topical films on irregular flagstone because the uneven surface makes streak-free application very difficult, and the gloss looks artificial on natural stone.
Travertine
Travertine needs a penetrating sealer specifically formulated for porous natural stone. It's prone to etching from acids (which affects how evenly it darkens), so your cleaning step must use only pH-neutral products. A penetrating impregnating sealer gives travertine a beautiful wet, darkened look without the risks of a surface film. Never use a topical acrylic film on travertine outdoors.
How to apply a wet-look sealer without streaks or haze
Most application failures come down to three things: surface wasn't clean, surface wasn't dry, or too much product was applied at once. Here's how to do it right.
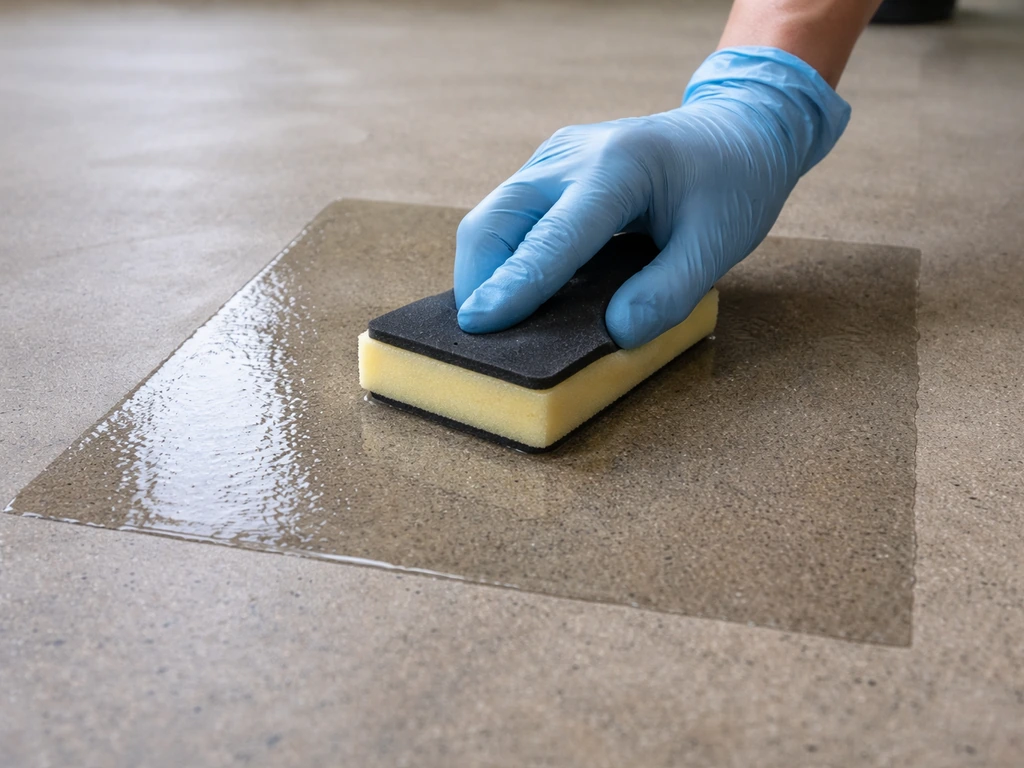
- Do a test patch first: Apply sealer to a 12-inch square in a low-visibility area. Check it after drying for color, sheen, and any haziness. This takes 24 hours but saves you from ruining the whole patio.
- Confirm the surface is bone dry: Surface must be dry to the touch and ideally warm. Morning application on a cloudy 65-80°F day is ideal. Avoid applying in direct sun (product dries too fast and streaks), below 50°F, or if rain is expected within 48 hours.
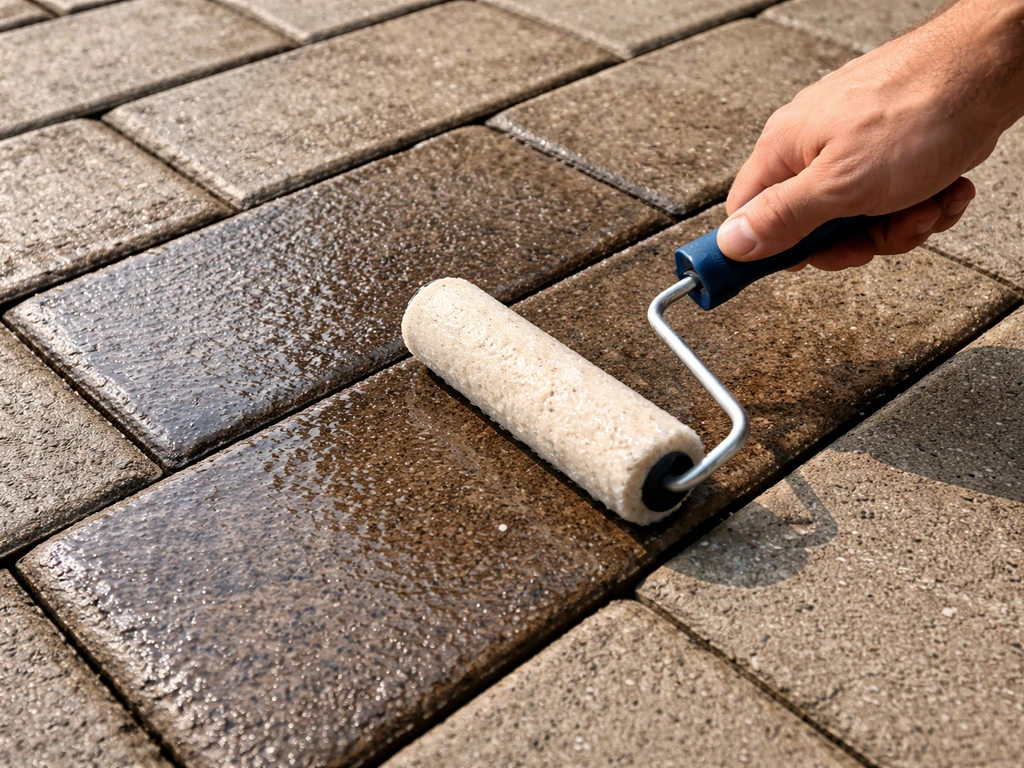
- Apply thin, even coats: Pour a small amount onto the surface and spread with a low-nap roller (3/8 inch works well for most pavers) or a pump sprayer set to low pressure. Thin coats are critical. Thick application is the number-one cause of haze and uneven sheen.
- Work in manageable sections: Do 4 to 6 square feet at a time, maintaining a wet edge so you don't get lap marks where sections overlap.
- Two thin coats beat one thick coat: Let the first coat dry completely (check the product TDS, but usually 2 to 4 hours between coats for topical products) before applying the second.
- Keep foot traffic off for 24 hours, vehicle traffic off for 48 hours: For products like WLWR, these are the manufacturer minimums. Walking on it too soon causes tracking and permanent marks.
- Coverage: Budget roughly 150 square feet per gallon per coat for typical pavers. More porous or textured surfaces will absorb more and require more product.
Avoiding streaks specifically
Streaks almost always happen because the product dried unevenly. To avoid them: never apply in full sun or wind, always maintain a wet edge, don't go back over an area that has started to tack up, and use the correct dilution if the product calls for thinning. If you do get streaks on a topical sealer, the fix is usually to apply another thin coat over the entire section while it's still within the recoat window, which re-wets and blends the surface.
Keeping the wet look over time
The wet look fades for two reasons: the sealer wears off, and grime builds up on top of or in the sealer. A simple maintenance routine keeps both under control.
- Rinse the patio monthly: A quick hose-down removes surface dust, pollen, and loose debris before it grinds into the sealer.
- Spot clean spills immediately: Cooking oil, grease, and wine stains are easier to remove fresh. Use a pH-neutral cleaner and a soft brush.
- Deep clean once or twice a year: Depending on your climate and amount of tree cover, do a thorough clean with a pH-neutral cleaner each spring and fall. This is especially important if algae or moss starts to come back.
- Reapply sealer every 1 to 3 years: Penetrating sealers last longer (closer to 3 to 5 years on lower-traffic areas) while topical acrylic films on high-traffic patios may need refreshing every 1 to 2 years. The easiest test is the water-bead test: if water no longer beads and the patio looks dull, it's time to reseal.
- Inspect for algae early: Catching algae or moss growth early means you can treat it with a diluted sodium hypochlorite spray and a rinse rather than a full scrub-and-reseal job.
If the wet look starts looking patchy rather than uniformly dull, that's usually a sign that part of the sealer has worn through. A spot application won't blend well with the rest of the surface, so plan to clean and reseal the whole patio in one go for a consistent result. This is closely related to understanding why your concrete might be turning uneven colors over time, which is often an algae or moisture issue worth addressing at the source. If your concrete patio is turning black, it’s usually an algae or moisture issue that needs to be cleaned and treated before sealing again why your concrete might be turning uneven colors over time.
Safety, chemical compatibility, and slip risk
Slip risk is real and needs to be planned for
This is not optional: high-gloss wet-look topical sealers can be dangerously slippery when wet. A shiny patio looks great in photos but can become a genuine hazard after rain or watering. Multiple sealer manufacturers, including Techniseal and MasonrySaver, address this directly by recommending an anti-slip additive mixed into or broadcast onto the final coat of sealer. blank" rel="noopener noreferrer">Products like Surefoot or OxiGrip are anti-slip grit particles that get suspended in the sealer film and add traction without changing the appearance much. If you're applying any high-gloss topical sealer, budget for this additive. It's not expensive and it matters.
Match the additive chemistry to the sealer chemistry: water-based additives go in water-based sealers, solvent-based in solvent-based. Mixing types causes incompatibility issues. Penetrating sealers, by contrast, do not change the natural slip resistance of the surface, which is one of the reasons I often recommend them for patios used by children, older adults, or anyone near a pool area.
Chemical safety during cleaning
- Wear gloves, eye protection, and old clothing when using sodium hypochlorite solutions. Work in ventilated conditions and avoid applying on windy days that blow the solution back toward you.
- Never mix bleach/sodium hypochlorite with any acid-based cleaner. The reaction produces toxic chlorine gas.
- Rinse plants and grass bordering the patio before and after using sodium hypochlorite to dilute any runoff. Wet soil absorbs bleach solution without killing roots as effectively as dry soil does.
- Muriatic acid (sometimes sold as hydrochloric acid) is effective for heavy concrete staining and efflorescence but is aggressive and should only be used by experienced DIYers. Always dilute it (never add water to acid, always add acid to water), wear full protection, and neutralize the surface with baking soda and water after use. Never use it on natural stone, brick, or mortar.
- Vinegar is safe and useful on concrete and some pavers but will permanently etch travertine, marble, and limestone. If you have mixed stone types on your patio, use pH-neutral cleaners for everything.
Sealer compatibility: know what's already there
Applying the wrong sealer type over an existing one is one of the most common mistakes. A water-based topical acrylic will not bond over a penetrating sealer, and a penetrating sealer won't perform correctly if a film-forming topical sealer is already in place. If you don't know what's on your patio, strip it first with a sealer stripper product before starting fresh. This is especially important if you're seeing peeling, flaking, or white haze, which are all signs that a previous sealer is failing and a new coat applied on top will fail too.
A properly cleaned, correctly sealed patio looks dramatically better than anything you can achieve with a quick spray of water. Take the extra time to clean thoroughly, pick the right product for your specific stone, apply it thin and even, and add anti-slip grit if you go with a high-gloss topical finish. The whole job typically takes a weekend: clean and dry on day one, seal on day two, walk on it day three. That's a result that holds up for years.
FAQ
Can I make patio stones look wet for an event today without a full weekend job?
Yes, but only if you give the stone time to dry and if you protect the wet look. Water will temporarily darken, then dirt and algae can become more visible as the surface dries. For the same-day look, clean first (even a quick rinse after removing loose debris), then apply a thin test spot of your chosen sealer product so you can see how it darkens and whether it gets streaks in your specific light and temperature.
Is it safe to use bleach (sodium hypochlorite) right before sealing?
Avoid bleach-washing unless you can rinse thoroughly and verify compatibility with your stone. Even on “safe” materials, sodium hypochlorite leaves active residue that can interfere with adhesion if it is not fully neutralized by rinsing and then allowed to dry completely. Also, do not reapply sealer the same day as hypochlorite cleaning, because residual moisture and chemicals increase the chance of haze and patchiness.
What if my patio already has a sealer, but I’m not sure whether it’s penetrating or topical?
If water beads, that typically indicates an existing penetrating or topical sealer, but it does not tell you which type. To reduce the risk, do both a water test and a visual clue check: look for peeling, flaking, white haze, or a surface sheen that suggests a film. If you see any of those signs, plan on stripping before you add a new product, otherwise you can get poor adhesion and a short-lived wet look.
Can I use vinegar to clean travertine before making it look wet?
Usually not. Vinegar, lemon juice, and other acidic cleaners can etch calcium-carbonate stones like travertine, marble, and limestone, which can permanently change the texture and how evenly the sealer darkens. The result can be uneven blotching even after sealing. If you need a cleanser on those stones, use a pH-neutral stone cleaner and do a small hidden test first.
If I get streaks, can I just mist the area with water to fix them?
Do not count on “re-wetting” the surface with water to even out streaks once the sealer has begun to tack up. Streaks usually come from uneven drying, sun or wind, or applying too much at once. The safer fix is what the body already notes: apply another thin coat over the affected section within the product’s recoat window so the new coat re-wets and blends.
How do I know when the patio is dry enough to seal, especially on porous pavers?
For porous stone, wait for “bone dry,” not just “dry to the touch.” Humidity trapped in the surface pores can turn the wet look blotchy or create dull haze. A practical check is to tape a small plastic square (or use a moisture test if you have one) and look for condensation or darkening under it after a few hours, then wait longer before sealing.
Why does spot sealing make my wet look worse instead of better?
If the wet look starts patchy, the cause is often sealer wear-through or a mismatch where you applied too little product in some areas. Spot sealing usually blends poorly because the film thickness and penetration depth differ. For a consistent finish, the reliable approach is to clean and reseal the entire patio section so the product application matches across the whole surface.
What’s the practical best way to keep a wet-look patio from becoming slippery?
If your patio is already slippery due to rain or watering, do not rely on a higher gloss alone. With high-gloss topical sealers, add anti-slip grit as directed and do not substitute household additives like sand, because grain size and suspension can be wrong and can settle unevenly. Penetrating sealers generally keep more of the stone’s natural traction, which is a safer default near pools.
Will sealing harm pavers that have polymeric sand in the joints?
Yes, and it can be a mistake to ignore joint materials. On pavers that use polymeric sand, only choose sealers that explicitly allow that binder, because some sealers can soften or weaken the joint system and lead to joint loss or haze. If the product label does not mention polymeric sand compatibility, test in a small area first and consider a sealer made specifically for those joint conditions.
Next Articles
How to Make Your Patio Look Wet: Clear, Step by Step
Step-by-step wet look patio guide for concrete, brick, stone, pavers and travertine with safe cleaning, sealers, and fix

How to Make Patio Less Slippery: Clean, Treat, Prevent
Step-by-step fixes for a slippery patio: clean mold and algae, choose safer treatments for concrete, brick, stone, paver

How to Remove Thompson’s Patio Sealer Step by Step
Step-by-step removal of Thompson’s patio sealer on concrete, brick, pavers, and stone, with safety, tests, and cleanup.