For most sealers, you should stay off the patio for at least 4 to 8 hours for light foot traffic, wait 24 to 48 hours before moving furniture back, and hold off on rain exposure or washing for at least 24 to 72 hours. If you are using Sika, follow the application steps carefully so the product bonds and cures as intended how to apply sika patio sealer. But those ranges vary a lot depending on what type of sealer you used, the weather on sealing day, and whether you applied one coat or two. Get those variables right and you'll avoid the most frustrating outcomes: scuff marks, white haze, or a finish that peels within a season.
How Long to Stay Off Patio After Sealing: Timelines

Dylan Hale
29 Apr 2026
How sealer type changes cure time
There are two broad categories of patio sealer, and they behave very differently during cure. Knowing which one you're using is the most important factor in deciding when the patio is safe to use.
Penetrating sealers (silane, siloxane, silane-siloxane blends)
Penetrating sealers soak into the surface rather than forming a layer on top. Because there's no surface film to damage, they generally reach a usable state faster. The Foundation Armor SX5000, one of the most popular solvent-based silane-siloxane products, lists a drying time of just 1 to 2 hours but still recommends waiting 8 to 12 hours before foot traffic.
Sika's Sikagard H 1001, a 100% silane reactive sealer, puts typical drying time at 4 to 6 hours at 70°F and 50% relative humidity. Rust-Oleum's SEAL-KRETE SS-10, a 10% silane-siloxane blend, recommends 12 hours before light foot traffic. The upshot: penetrating sealers are forgiving to walk on sooner, but you still need to let the chemistry finish reacting inside the material before putting real stress on the surface.
Film-forming sealers (acrylic, epoxy, polyurethane)
Film-forming sealers lay down a physical coating on top of the patio surface, which is why they offer better protection against staining and surface abrasion from foot and vehicle traffic. That protective film also takes longer to cure fully. Water-based acrylics are on the faster end, often touch-dry in 1 to 2 hours but requiring 24 hours before foot traffic and 72 hours before furniture.
Solvent-based acrylics, epoxies, and polyurethanes push that out further, sometimes to 48 hours for foot traffic and a full week before heavy loads or washing. If someone scuffs a film-forming sealer while it's still curing, you can see it immediately as a drag mark or uneven sheen. That's harder to fix than it sounds, which is exactly why I'd always rather wait an extra day than rush it.
Typical stay-off timelines by sealer and conditions
Here are realistic wait times across the most common sealer types under decent conditions (65 to 80°F, moderate humidity, no rain). These are practical minimums, not marketing claims.
| Sealer Type | Light Foot Traffic | Furniture Return | Rain / Washing Safe |
|---|---|---|---|
| Silane-siloxane penetrating (e.g., SX5000) | 8 to 12 hours | 24 hours | 24 to 48 hours |
| 10% silane-siloxane (e.g., SS-10) | 12 hours | 24 to 48 hours | 48 hours |
| Water-based acrylic film-forming | 4 to 8 hours | 24 to 48 hours | 48 to 72 hours |
| Solvent-based acrylic film-forming | 24 hours | 48 to 72 hours | 72 hours |
| Epoxy or polyurethane coating | 24 to 48 hours | 72 hours | 5 to 7 days |
These windows get longer in cold or humid weather. Below 50°F, most sealers cure very slowly or barely at all. High humidity (above 70 to 75%) slows water-based products significantly. If you sealed in late afternoon and overnight temps are dropping, add several hours to every estimate above. Rust-Oleum's SS-10 data sheet specifically warns not to apply if rain is expected within 12 hours of application. Sika's Sikagard H 1001 tightens that to 4 hours. Either way, rain within those windows can wash or dilute a freshly applied sealer before it's had time to react, which means you'll likely need to reapply.
How to tell when it's cured enough to walk on
Product data sheets give you a baseline, but you should always do a quick physical check before you or anyone else steps on the surface. Here's what I look for:
- Tackiness check: Press a clean fingertip lightly on an inconspicuous edge of the patio. If it feels tacky or sticky at all, do not walk on it. A cured surface should feel dry and solid.
- Tape test: Stick a piece of masking tape to a small area, press it down firmly, then peel it back slowly. If any sealer pulls up with the tape, it hasn't cured through yet.
- Visual uniformity: Look across the surface at a low angle with light behind you. If you can still see wet-looking patches or uneven sheen, those areas haven't dried.
- Smell test for solvent-based products: Strong solvent odor means active off-gassing is still happening. That's a sign the sealer is still curing. Once the smell drops to faint or neutral, the surface is closer to ready.
- Temperature check: If the surface feels cool and damp to the back of your hand, moisture is still present. This matters most for penetrating sealers on porous materials.
If you pass all five of those checks and you're past the manufacturer's minimum wait time, you can walk on it with clean, soft-soled shoes. I'd still hold off on hard-soled work boots, dragging chairs, or anything with concentrated weight until you hit the furniture-return window.
What to do if you must use the patio sooner
Sometimes the patio is the only path to the back door, or a gathering is happening before the sealer has fully cured. Here's how to minimize damage when you can't wait the full time.
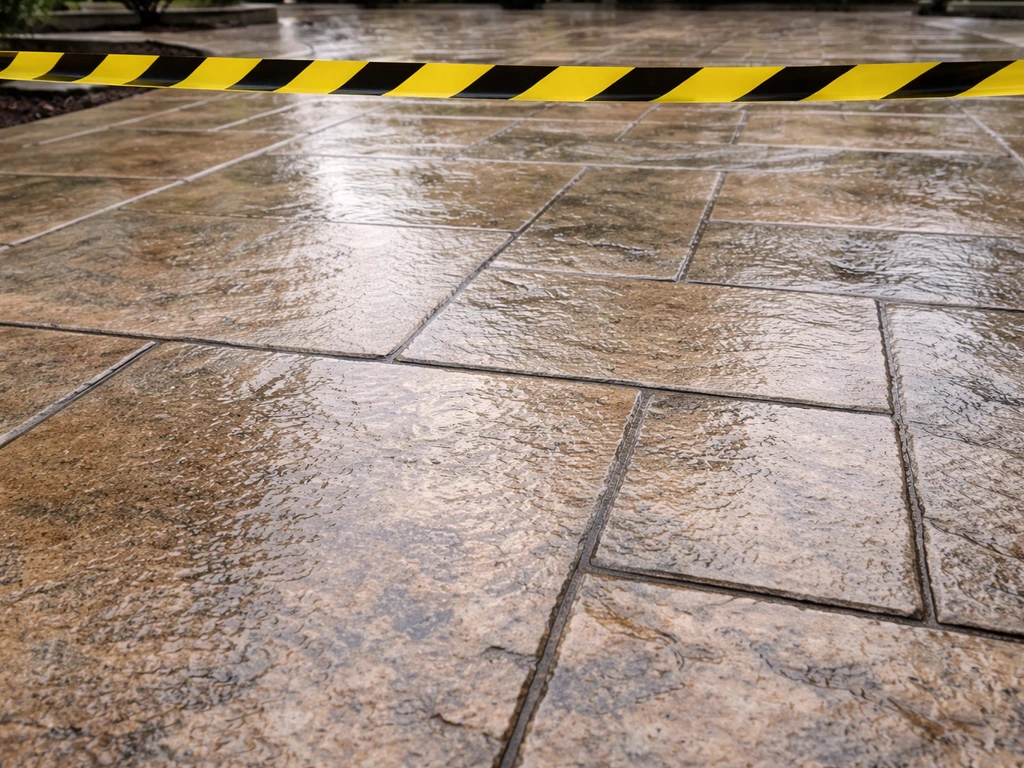
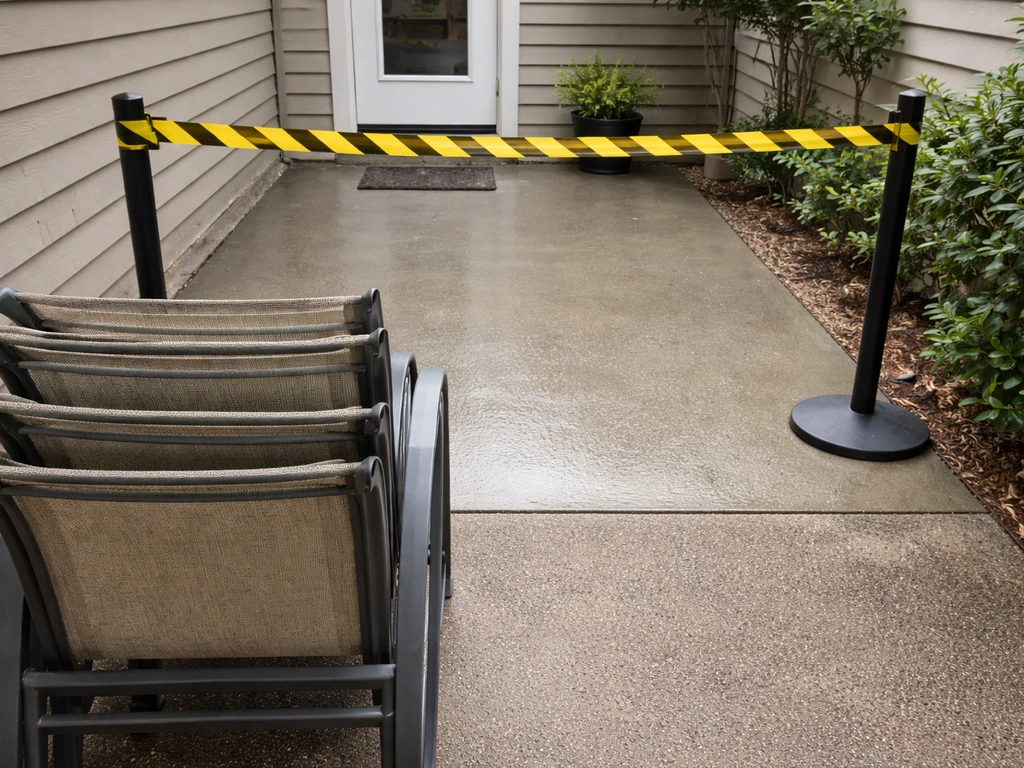
- Rope off or block the area: Lay caution tape across entry points or stack chairs as a visual barrier. Most people will respect it if they know sealing just happened.
- Use cardboard or plywood boards as a temporary walkway: Lay down a few large pieces and walk only on those. Distribute your weight and avoid dragging anything.
- Designate an alternate route: If there's any other way to get to the back of the house, use it. Even a side gate or indoor route through the house is worth it for 24 hours.
- Avoid bare feet and soft-soled shoes: Rubber soles and bare feet actually pick up and drag sealer more than firm soles do. Use firm, flat-soled footwear if you must cross.
- Never place furniture directly on a partially cured film-forming sealer: Chair and table legs create concentrated point loads that will leave permanent indentations in a sealer that hasn't hardened fully.
- If it rains before the minimum rain-safe window, inspect the surface once it dries: Look for white blush, uneven finish, or tacky patches. You may need to clean and reapply in affected areas.
Risks of walking on it too early
Early traffic on a curing sealer isn't just a cosmetic issue. The damage can be structural to the finish, and some of it is difficult or impossible to fix without stripping and reapplying. Here's what actually goes wrong:
- Scuff marks and drag lines: Film-forming sealers that aren't fully hardened scratch and smear easily. Footwear, chair legs, and even blown debris dragged across the surface leave visible marks.
- White haze or blushing: Moisture trapped under the sealer (from foot traffic pushing the film or from rain contact) can cause a milky discoloration. This is especially common on acrylic coatings.
- Bonding failure: Heavy traffic before the sealer has fully bonded to the substrate can cause delamination, where the coating lifts or peels in sheets. This is more common on smooth, dense surfaces like polished concrete.
- Uneven sheen: Partial curing followed by surface disturbance results in a patchy finish, with some areas appearing matte and others glossy. It looks bad and it's hard to blend.
- Tracking sealer indoors: Wet or semi-cured sealer can be picked up on shoes and carried inside onto flooring, which is a genuinely annoying cleanup problem.
Material-specific notes
The same sealer can behave differently depending on what surface it's going onto. Porosity, texture, and surface density all affect how quickly a sealer cures and how sensitive the surface is to early traffic.
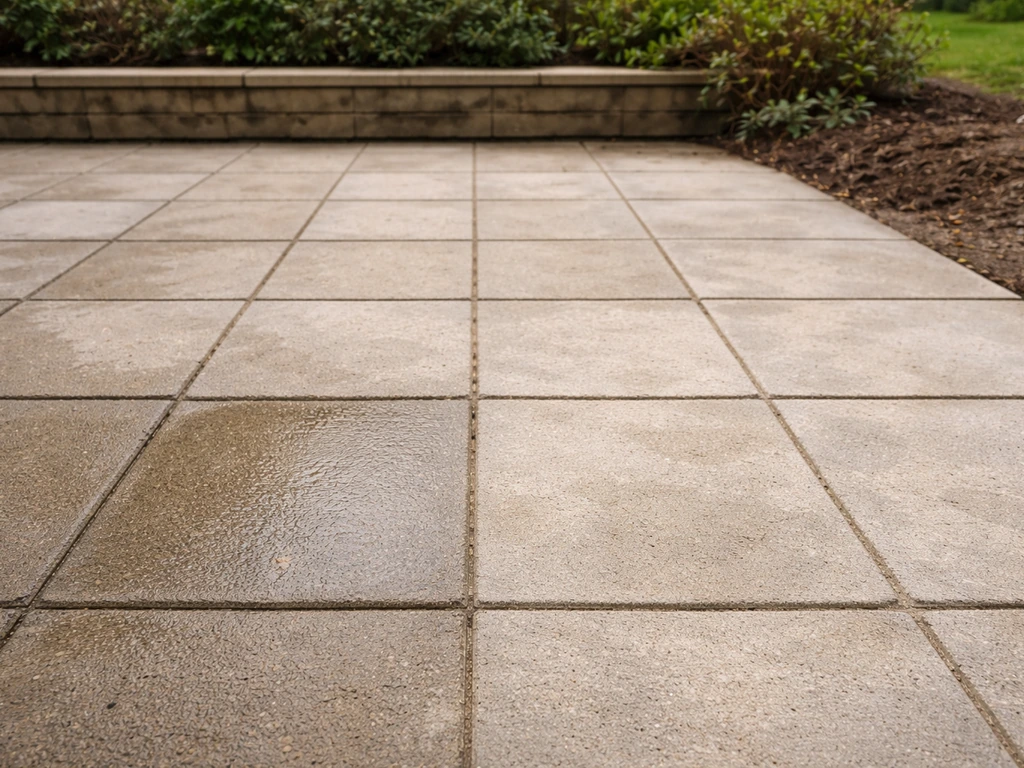
Concrete
Concrete is dense but porous, and it holds moisture longer than you might expect. If you sealed recently poured or freshly cleaned concrete, give it extra time on the front end. Smooth broom-finished concrete with a film-forming sealer is especially vulnerable to scuffing before full cure. Stamped or textured concrete with a solvent-based acrylic is one of the most common scenarios where people rush and regret it: the texture pattern collects partially cured sealer in recesses, and foot traffic smears it unevenly.
Pavers
Concrete pavers and clay pavers are highly porous, which means penetrating sealers absorb quickly and cure faster relative to the timeline. However, the joints between pavers are a weak point. If you've used a joint-stabilizing sealer, the sand in the joints needs more time to set than the paver faces. Wait the full 24 to 48 hours before foot traffic even if the surface itself passes the touch test.
Natural stone (bluestone, slate, limestone)
Natural stone varies enormously in porosity. Slate and limestone are more porous and absorb penetrating sealers readily, which can mean a faster initial dry. But dense bluestone and sandstone may not absorb as much, leaving more product on the surface and extending cure time. Always follow the longer end of the product's recommended range on natural stone.
Travertine
Travertine is particularly sensitive. It has a naturally pitted surface that holds both sealer and moisture, and it's prone to etching if the wrong product is used. For travertine, I'd stick firmly to the manufacturer's full cure window before foot traffic and avoid any film-forming sealer that isn't explicitly rated for travertine. Early traffic on a freshly sealed travertine patio can create white blotching in the pits that's very hard to reverse.
Brick
Brick is very porous and tends to absorb penetrating sealers deeply, which means the product reacts fast but the open surface can also show early traffic damage clearly. The mortar joints between bricks also need time to cure. Add a few hours to any timeline if you've sealed over old, repaired, or re-pointed mortar.
Flagstone
Flagstone behaves similarly to natural stone but the irregular surface and wide joints mean you often have a mix of absorption rates across a single patio. Some flags may feel dry while others are still curing. When in doubt, do the touch test on multiple spots across the full surface, not just one area.
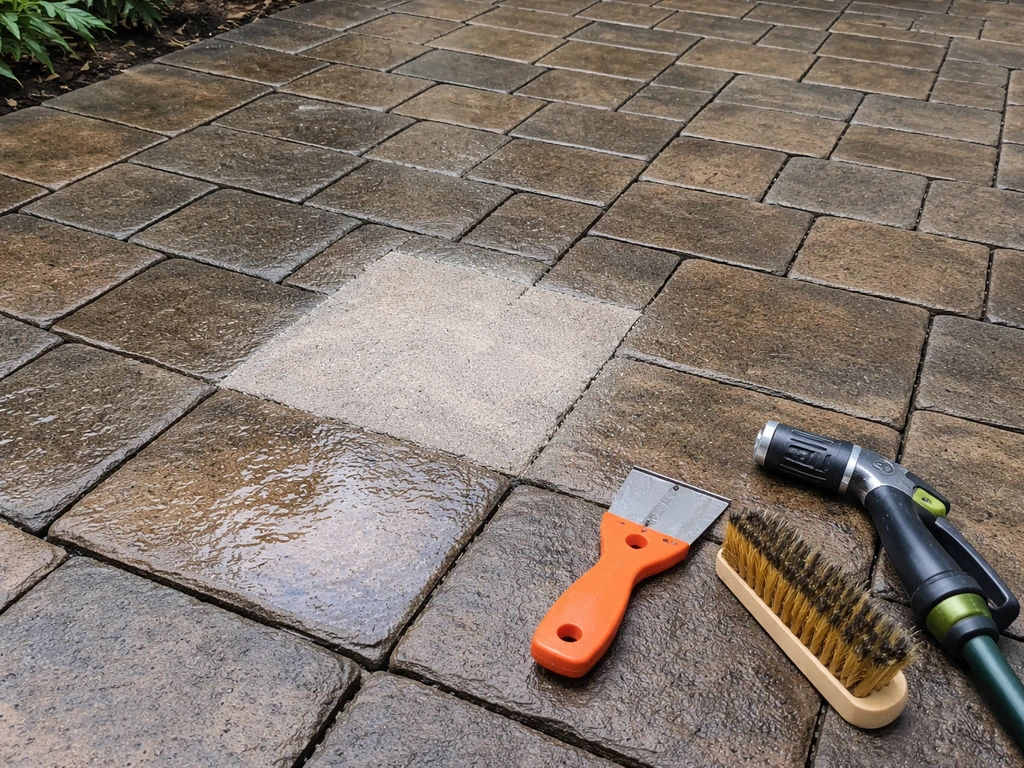
Why the cleaning and drying before sealing matters so much
This is the step people rush most, and it directly affects cure time and final quality. A sealer applied over a dirty, damp, or incompletely prepared surface will cure unevenly, bond poorly, or fail outright. The Armor SX5000 data sheet is explicit: the surface must be completely clean and dry, and after any water-based cleaning or pressure washing, you need to allow at least 24 hours of drying time before applying sealer. I've found that in humid climates or shaded patios, 48 hours is a safer bet.
If your patio had mold, algae, or organic staining before sealing, you likely cleaned it with a bleach-based solution or sodium hypochlorite. Both work well, but you need to rinse the surface thoroughly and then neutralize any residual acid if you used muriatic acid for efflorescence or mineral deposits. Residual acid left on the surface can react with some sealers and cause discoloration or adhesion problems.
Rinse with clean water, neutralize with a dilute baking soda solution (about 1 cup per gallon of water), rinse again, and then wait the full dry time before sealing. If you used a pressure washer, the surface may look dry within a few hours on a sunny day, but moisture is still present deeper in the material. Give it the full 24 hours.
One more thing worth noting: if you're thinking about resealing over an existing sealer, you may first need to deal with the old coating before the new one can bond properly. If you need help undoing an older treatment, focus on removing the patio stone sealer first so the new coat can bond correctly removing old patio stone sealer.
If you are trying to fix a bad reseal, you may need to remove patio sealer before applying a new coat. If the problem is resin buildup on your patio surface, you can use the same cleaning approach, but you’ll need specific steps to remove resin safely without damaging the finish remove resin from patio.
Related topics like removing old patio stone sealer or stripping Thompson's patio sealer are worth reading before you apply a fresh coat, because residual old sealer is one of the most common reasons a new application cures poorly or peels.
Related topics like removing old patio stone sealer or stripping Thompson's patio sealer are worth reading before you apply a fresh coat, because residual old sealer is one of the most common reasons a new application cures poorly or peels how to remove thompsons patio sealer.
Your action checklist for today
If you just sealed your patio or are about to, here's the practical sequence to follow right now:
- Check your product's data sheet for the specific foot traffic and rain-exposure windows (not just the label on the can).
- Note the current temperature and humidity. If it's below 55°F or above 75% humidity, add at least 30 to 50% to all listed wait times.
- Block off access to the patio immediately after application. Rope, tape, or stacked furniture all work.
- Wait the full minimum foot traffic window before doing anything other than a light visual check.
- Do the touch test (fingertip, tape, visual uniformity) before allowing anyone to walk on the surface.
- Wait 24 to 48 hours before bringing furniture back, regardless of how the surface feels.
- Hold off on hosing or rain exposure for at least 48 to 72 hours for film-forming sealers, 24 to 48 hours for penetrating types.
- If rain hits before the safe window, let it dry fully and inspect for haze, tackiness, or patchy finish before deciding whether to reapply.
FAQ
Can I open the door or walk through the patio briefly before the full cure time is up?
If the patio must be crossed, limit it to very light, quick foot movement with clean, soft-soled shoes, and avoid dragging. The risk is that film-forming sealers can get scuffed or develop uneven sheen even if the surface feels dry to the touch.
What’s the difference between “touch dry” and “safe for foot traffic” after sealing?
Touch dry means the surface no longer feels wet, but the chemistry may still be reacting inside the pores or the coating may still be soft. A patio can be touch dry and still mark under shoe scuffs, especially for film-formers and on smooth broom-finished concrete.
How long should I wait before washing the patio after sealing?
Use the product’s full washing or rinse window, not the light foot traffic time. For many sealers this is 72 hours or longer, and for slower cure chemistries it can be about a week, because washing can dilute a not-fully-cured top layer.
Is it safe to place potted plants, mats, or rugs on the patio before I can return furniture?
Usually no, not until full furniture-return timing, because trapped moisture and uneven pressure can create dark spots or imprint marks. Use the furniture wait window, and also keep planters from leaking water onto the fresh sealer.
What if it rains after the sealer goes on but before the first rain-protection window ends?
If rain hits within the product’s stated rain window, the sealer can be washed or diluted before bonding finishes, leading to patchy protection. In most cases you’ll need to let it dry fully and then reassess for missed spots, often resulting in reapplication rather than trying to “dry it out.”
Can I use a fan or run an HVAC unit to speed up drying and reduce the wait time?
You can improve airflow, which helps drying, but do not shorten the cure time based only on “dry to the touch.” Cure depends on temperature, humidity, and the sealer chemistry, so follow the manufacturer’s minimums and still extend timelines in cold or high humidity.
How can I tell early if my sealer is being damaged by foot traffic?
Look for drag marks, scuffed areas, and changes in sheen or appearance, not just wetness. If you notice scuffing while it is still curing, it is often difficult to correct without stripping and starting over.
Does the cure time change if I applied two coats instead of one?
Yes, two coats typically extend the time because the total film or the amount of active chemistry needs longer to set. If you’re near the minimum wait window, give extra time and do touch and visual checks across multiple spots before allowing any traffic or moving furniture back.
Should I avoid sealing if the patio surface is still slightly damp from cleaning?
Yes. Even if the surface looks dry on top, moisture can remain deeper in concrete, pavers, or stone and interfere with bonding and even cure. After water-based cleaning or pressure washing, wait the full dry time recommended, and in humid or shaded situations plan for longer.
What’s the best way to manage the furniture return if the wait time is inconvenient?
Use barriers instead of moving furniture directly onto the fresh surface, such as temporary floor protection or keeping chairs off the coated area by staging items off to the side. If you must move items, use light, non-dragging placement with clean contact points and aim for the furniture-return window.
Can I reseal right away if I’m doing touch-ups where coverage seems thin?
Not immediately. Patch touch-ups generally need the same cure and bonding readiness as the original coat, and the new layer may fail if the old one is still curing or if the surface is not clean and properly dry.
Do cure times differ between concrete, pavers, and natural stone enough to affect when I walk on it?
They can. Porosity and texture change absorption and cure behavior, and joints or mortar between pavers or bricks may require longer before loads. For pavers and mortar areas, wait the full joint-related timeline even if faces pass the touch test.
What should I do if I already walked on the patio too early?
Stop further traffic immediately and assess once the sealer reaches full cure. If you see scuffing or uneven sheen, correction may require sanding or stripping depending on the sealer type, and sometimes reapplication, so document the affected areas before attempting repairs.
Next Articles
How to Remove Patio Stone Sealer: Step-by-Step Guide
Step-by-step removal of patio stone sealer, with tests, safer methods, chemical options, and prep for resealing
How to Apply Sika Patio Sealer: Step-by-Step Guide
Step-by-step how to apply Sika Patio Sealer: prep, cleaning, coating method, curing times, coverage, and fixes for strea
How to Scrape Moss Off a Patio Step-by-Step Guide
Step-by-step on how to scrape moss off patio safely, choose cleaners for your surface, prevent regrowth, and troubleshoo