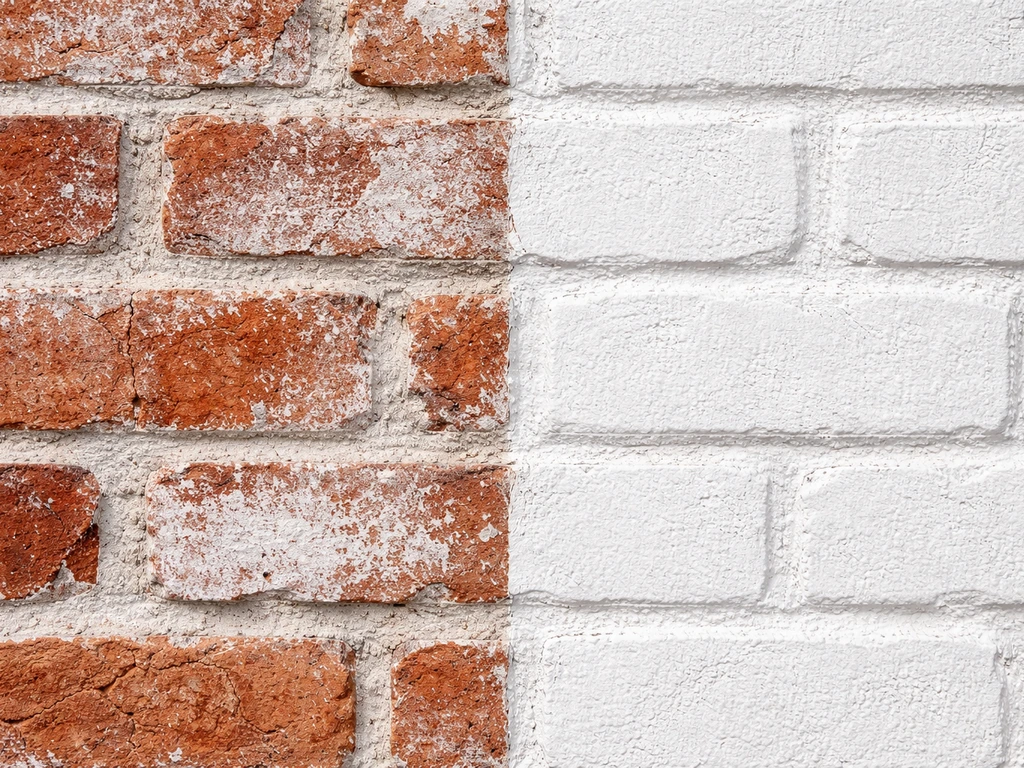
Whitewashing a brick patio gives you that soft, faded-white look that lets the brick texture show through, without covering it up the way paint does. Done right, it soaks into the brick rather than sitting on top as a film, which means it won't peel the way exterior paint can. The catch is that outdoor brick takes a beating from rain, sun, and moisture wicking up from below, so your prep work and product choice matter a lot more here than they would on an interior wall.
How to Whitewash Brick Patio: Step-by-Step Guide

Dylan Hale
30 Jun 2026
What whitewashing actually does to brick (and how it's different from painting)
Most people use the terms whitewash and limewash interchangeably, but there's a practical difference worth knowing. Traditional limewash is made from slaked lime (calcium hydroxide) that chemically bonds with the masonry surface, calcifies into it, and stays vapor-permeable. That means moisture can still move through the brick rather than getting trapped behind a sealed film. This breathability is exactly why limewash is the better choice for outdoor brick: trapped moisture is what causes paint to blister and peel. Whitewash in the DIY sense often means diluted white latex paint, roughly 50/50 with water, which sits more like a thin paint layer. It gives a similar look initially but doesn't bond the same way, tends to be shorter-lived outdoors, and may need refreshing every year or two. For a patio that actually holds up, a lime-based product is worth the small extra investment.
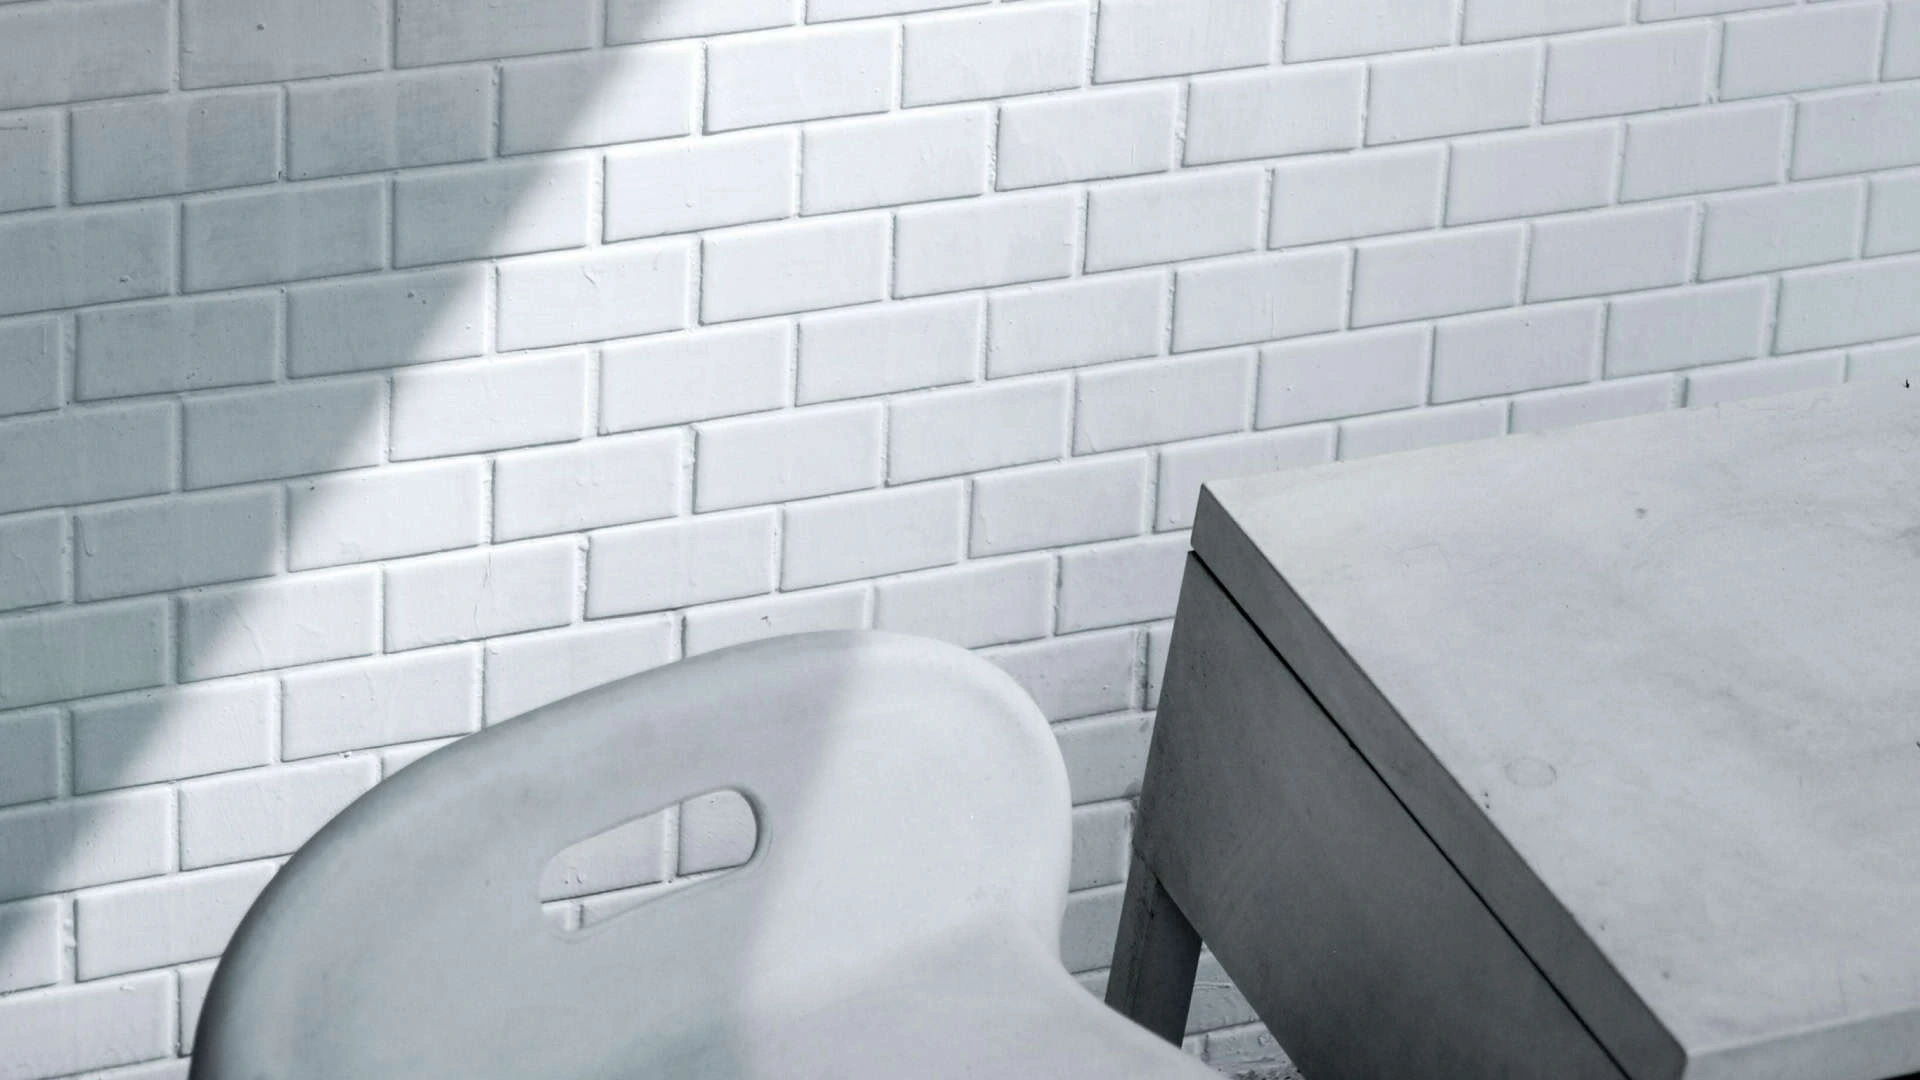
Either approach is categorically different from masonry paint or elastomeric coatings, which form an opaque film. Whitewash and limewash are intentionally translucent: you apply them, then wipe or work them back to control how much brick color shows through. The result looks lived-in, slightly aged, and bright without looking painted. On an outdoor patio, that mottled variation is a feature, not a flaw.
Clean and prep the brick before you do anything else
This is the step most people rush, and it's the one that determines whether your finish looks great for years or starts spotting and peeling within months. Limewash and whitewash need a clean, porous surface to absorb into. Grease, mold, algae, efflorescence, and old sealer all block that absorption. Deal with each one before you open any whitewash product. To fully remove algae from a brick patio, scrub the affected areas and use the right cleaner so you can prep the surface for whitewashing how to get rid of algae on brick patio.
Removing dirt, mold, and algae
Start with a thorough rinse. For a patio, a garden hose with a strong nozzle setting works for loose debris. If you have a pressure washer, use it on a wide fan tip (25 or 40 degree) at low to medium pressure, keeping the nozzle at least 12 inches from the surface. Mortar joints are softer than the brick faces and can erode under high-pressure direct blasting, so keep the stream moving and don't linger on joints. For mold and algae, a diluted bleach solution (about 1 cup bleach per gallon of water) applied with a stiff brush and left for 10 to 15 minutes before rinsing does the job well. Rinse thoroughly until the runoff runs clear.
Tackling efflorescence
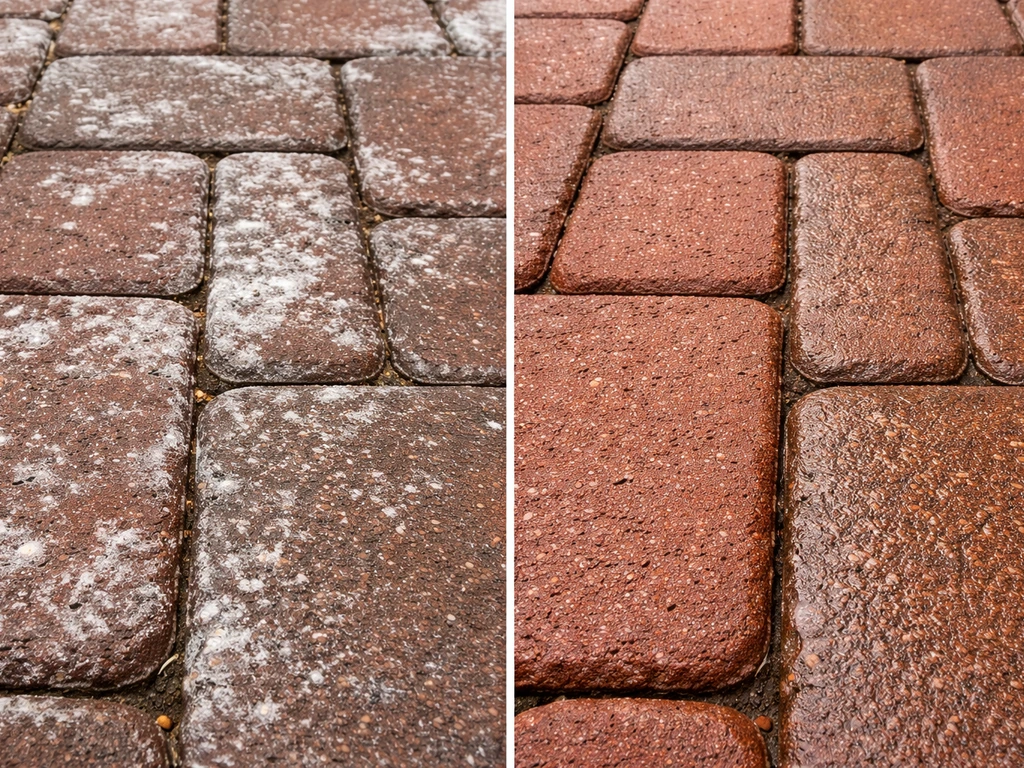
Efflorescence is those white, chalky salt deposits that appear on brick when moisture moves through and deposits minerals on the surface. You absolutely need to remove it before whitewashing, because it'll show through as blotchy bright patches and prevent the finish from adhering evenly. For light efflorescence, a 25 to 50 percent vinegar solution (one part white vinegar to one to three parts water) scrubbed in with a stiff brush and rinsed off handles it fine. If you are also dealing with salt deposits, a diluted vinegar solution can be a quick first step before more intensive cleaners. I've found a 50/50 mix works well on moderate deposits without risking damage to the brick. For heavier or stubborn efflorescence, a phosphoric acid-based cleaner is more effective: mix one part phosphoric acid to seven parts water, always adding acid to water rather than the reverse, apply, scrub, and rinse completely. Products like PROSOCO Sure Klean 101 are purpose-built for lime and mineral deposits on masonry if you want a ready-to-use commercial option. After cleaning, rinse with a garden hose or pressure washer and let the brick dry fully before moving on.
Removing old sealer or coatings
If your patio brick has been previously sealed, that sealer needs to come off. Limewash won't bond through a non-porous coating. A chemical sealer stripper or mechanical prep (wire brushing, light sanding on the brick face) is needed depending on the sealer type. If there's old whitewash or paint that's peeling, remove as much as you can before reapplying. If the old finish is stable and fully adhered, some commercial limewash products work over compatible surfaces, but check the product's instructions specifically. When in doubt, strip it.
Checking and repairing mortar
Walk the patio and look for crumbling, cracked, or missing mortar joints. Water sitting in damaged joints is the main reason efflorescence keeps coming back, and moisture moving through faulty mortar will push your whitewash off from the inside. If you're trying to clean mortar off a patio, damaged joints like these are where mortar residue and moisture problems usually start efflorescence keeps coming back. Repoint any damaged joints with a matching mortar and let it cure for at least a week before applying any finish. Spalled or flaking brick faces should be stabilized or replaced if possible, since soft or deteriorating surfaces won't hold any finish well.
Choosing your whitewash product and when vinegar is (and isn't) enough
For an outdoor patio that needs to hold up through seasons of rain and sun, I'd steer you toward a commercial lime-based product rather than a DIY diluted paint mix. Products like Romabio Classico Limewash are specifically formulated for exterior masonry, come with tested dilution guidance (typically 50 to 100 percent dilution with water depending on how washed-out you want the finish), and calcify into the brick surface rather than sitting on top. They're designed to be breathable so moisture doesn't get trapped. A DIY whitewash of diluted white latex paint (50/50 water and paint) is a valid, lower-cost option, but expect to reapply it more often outdoors and know that it sits more like a thin paint layer than a true lime coating.
| Option | Material | Durability outdoors | Breathability | Best for |
|---|---|---|---|---|
| Commercial limewash (e.g., Romabio Classico) | Slaked lime / mineral | 3–5+ years with maintenance | High (vapor-permeable) | Porous, uncoated brick patio; want authentic, lasting look |
| DIY lime putty mix | Hydrated lime + water | 2–4 years | High | Budget-conscious; comfortable mixing own batches |
| Diluted latex whitewash | Water-based paint + water | 1–2 years | Low to moderate | Quick refresh; low budget; interior-leaning patios |
| Mineral masonry paint (e.g., KEIM Colourwash) | Mineral binder | 5+ years | High | Previously painted or less porous brick; full coverage preferred |
On the cleaning side, vinegar is a practical and gentler option for light efflorescence and general mineral deposits, and it won't damage brick or mortar at the dilutions used. It's a good first step and fine for routine maintenance. But for heavy efflorescence, embedded grease, or old mineral buildup, you'll want phosphoric acid or a dedicated masonry cleaner. Muriatic acid is sometimes referenced for brick cleaning, but it's aggressive and can damage brick faces and mortar if not used carefully. Muriatic acid (hydrochloric acid) is described in a historical Bureau of Standards guidance note as harmful to the skin, which helps explain why it should be treated with heightened caution Muriatic acid is sometimes referenced for brick cleaning. If you are considering how to apply muriatic acid to a concrete patio, use it only as a last resort and follow safety precautions closely muriatic acid is sometimes referenced for brick cleaning. Start with vinegar, move up to phosphoric acid if needed, and treat muriatic acid as a last resort with full safety precautions.
How to apply whitewash to an outdoor brick patio
What you'll need
- Large masonry brush (4 to 6 inch natural bristle brush works well for working into brick texture)
- Sponge or old rags for wiping back
- Bucket for mixing
- Measuring cup or marked container for consistent dilution
- Painter's tape and plastic sheeting to protect edges
- Spray bottle for misting brick if it's very porous/dry
- Knee pads (patio work means a lot of time on the ground)
Preparing the mix
If you're using a commercial limewash, follow the product's dilution guide. Romabio Classico Limewash, for example, calls for diluting between 50 and 100 percent with water: a 50 percent dilution (1 part product to 1 part water) gives more coverage and opacity, while a higher dilution produces a lighter, more washed effect. Mix only what you'll use in a single work session. Inconsistent batches made at different times are one of the main causes of uneven coverage, so measure rather than eyeball. If you're going the DIY latex route, 1 part white exterior latex paint to 1 part water is the standard starting point. Test a small, inconspicuous area first, let it dry fully, and adjust ratio before committing to the whole patio.
Application steps
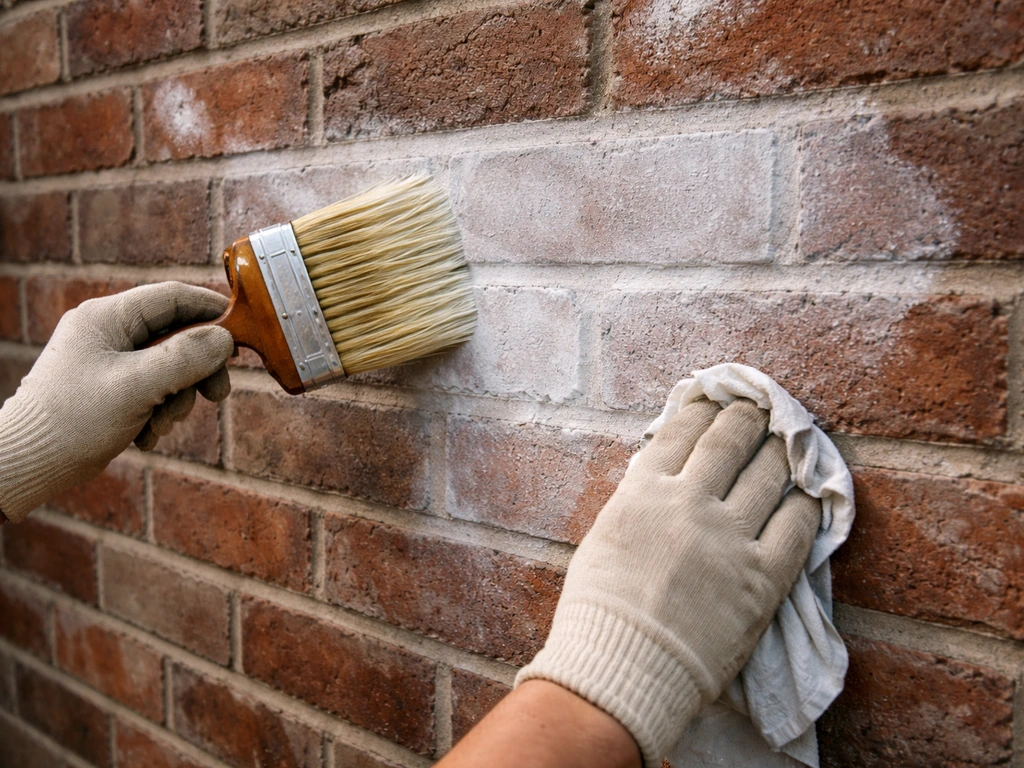
- Dampen the brick lightly with a spray bottle or hose mist. This slows absorption so you have more working time and helps the limewash penetrate more evenly rather than getting sucked in immediately at dry spots.
- Load your masonry brush generously and work in sections of about 4 to 6 square feet at a time. Use a scrubbing, stippling motion to push the limewash into the texture of the brick and mortar joints rather than just painting it on the surface.
- While the section is still wet (within 2 to 5 minutes), use a damp sponge or rag to wipe back across the surface. This is how you control transparency: more wiping means more brick color showing through. Wipe with irregular strokes rather than uniform sweeps to keep that natural, uneven look.
- Maintain a wet edge as you move to the next section. Overlapping into a section that's already begun to dry creates visible lines, so work at a pace that keeps the edges workable.
- Let the first coat dry fully. Romabio recommends at least the full intercoat window noted on their TDS before adding a second coat. In warm, dry conditions that may be a few hours; in humid or cool weather, wait longer.
- Assess coverage once dry. For a lighter, more translucent look one coat with aggressive wiping is often enough. For more brightness and opacity, apply a second coat using the same technique, wiping back less aggressively.
- Allow the final coat to cure undisturbed. Avoid foot traffic and rain during the first 12 hours minimum. Romabio specifically cautions against applying if heavy rain is expected within that window, as it can wash the limewash away before it bonds.
Drying and curing are different things with limewash. It may feel dry to the touch within a few hours, but the calcification process that bonds it to the masonry takes longer, typically a few days to a week. During that time it's more vulnerable to rain and abrasion, so try to time your project for a dry weather window.
Troubleshooting common problems
Uneven coverage and blotchy patches
Blotchiness is usually caused by one of three things: inconsistent dilution across batches, dry areas absorbing the limewash too fast before you can work it, or overlapping a partially dried section. If you see lap lines or darker patches after the first coat dries, don't panic. A second thin coat applied quickly and wiped back smoothly will even things out in most cases. Going forward, dampen the brick more before applying and work in smaller sections.
Stains bleeding through
If you're seeing dark stains, rust tones, or grease spots coming through the whitewash, the prep work wasn't complete. Limewash is translucent by design, so anything underneath it will show. You'll need to strip the limewash in those areas, treat the underlying stain directly (phosphoric acid for rust and mineral stains, a degreaser for oil and grease, bleach solution for biological stains), let it dry completely, and reapply. There's no product that will hide an untreated stain under a translucent finish.
Chalking, haze, and powdery residue
Limewash naturally produces some chalking as it weathers, especially outdoors. You may notice a white dusty residue on the surface or on nearby surfaces after rain. This is normal aging behavior, but if it's excessive or happening quickly, applying a compatible mineral topcoat (like Romabio Mineral Shield) helps. Wait 7 to 10 days after the final limewash coat before applying any topcoat so the limewash has fully cured first. The topcoat is designed to stay breathable while reducing chalking and improving water resistance.
Peeling or flaking finish
True limewash shouldn't peel the way paint does because it's not forming a brittle film. If you're seeing flaking, it's usually a sign that the brick was sealed (blocking absorption), wet when the product was applied, or that a diluted latex whitewash was used instead of a true limewash. For a latex whitewash that's peeling, scrape off the loose material, sand lightly, clean the surface again, and reapply. For limewash that's coming off in dusty chunks, check whether there's residual sealer or moisture intrusion driving it from behind.
Sealing and keeping the finish looking good long-term
Whether to seal after whitewashing depends on which product you used and the look you want. A breathable mineral topcoat like Romabio Mineral Shield is generally the right call for an outdoor patio: it controls chalking, improves water resistance, and keeps the finish looking brighter longer without turning the brick into a sealed, non-breathable surface. Apply it 7 to 10 days after the final limewash coat, once curing is complete. It dries in 4 to 8 hours and remains invisible. Avoid standard masonry sealers or clear coatings not formulated for limewash, as they can seal off the vapor permeability and cause moisture-related failures.
For routine maintenance, sweep the patio regularly to prevent organic debris from sitting on the surface and feeding mold or mildew. Rinse periodically with a garden hose. If mold or algae return (which can happen in shady or damp conditions), treat with a diluted bleach solution before it builds up. Limewash is a sacrificial, refreshable finish, meaning the expected maintenance approach is occasional touch-ups and reapplication over time rather than a one-and-done coating. Depending on your climate and how much sun and rain the patio gets, plan to assess the finish every 2 to 3 years and spot-refresh or recoat as needed. A well-maintained lime finish can last 5 or more years before a full reapplication is needed.
Safety for you, your plants, and the surrounding surfaces
Lime-based products are caustic. Wear gloves, safety glasses, and long sleeves when mixing or applying limewash. This is especially important if you're using dry hydrated lime to mix your own batch. Splashes in eyes or on skin need immediate water rinsing. If you're using acidic cleaners (phosphoric acid, muriatic acid) during prep, the same PPE applies with the added step of working in open air or good ventilation. Never mix acid cleaners with bleach or other cleaners.
Plants and landscaping right at the patio edge are at real risk from both cleaning chemicals and limewash runoff. Before you start cleaning, water any plants around the patio thoroughly so the soil is saturated and less likely to absorb runoff. Cover plants closest to the work area with plastic sheeting during acid cleaning steps and remove it promptly after rinsing to avoid heat buildup. After cleaning and after applying limewash, rinse any overspray on soil or plants with clean water. Lime raises soil pH, so repeated runoff onto the same area over several applications can affect plant health, particularly acid-loving plants.
Tape off and cover adjacent surfaces you don't want whitewashed: concrete borders, stone edging, metal furniture legs, and any trim surfaces. Limewash brushes on and splatters more than paint, so wider masking is better than narrower. For cleanup, limewash tools rinse out with water while the product is still wet, so clean your brush and bucket promptly at the end of each session.
If you're a renter or don't have a pressure washer, all the prep steps here work with a stiff scrub brush, a bucket, and a garden hose. Pressure washing speeds things up and does a more thorough job on heavy contamination, but it's not required. The hand-scrub approach just takes more elbow grease and a bit more dwell time with your cleaning solution. That said, if the brick is heavily soiled with mold, algae, or embedded grime, renting a pressure washer for an hour before the project makes the rest of the job noticeably easier.
FAQ
Can I whitewash a brick patio if it has a previous sealer or masonry coating on it?
Yes, but only if the product label says it is compatible with pre-existing coatings. If the old sealer film is non-porous, limewash will not absorb and can chalk off or peel unevenly. The safest approach is to test a small spot with water (it should darken and soak in within a minute) and, if it beads or stays unchanged, plan on stripping the coating rather than applying over it.
Why does my patio look blotchy or uneven after whitewashing, and how do I fix it?
A thin, translucent finish is normal, but a spot that looks much lighter or darker usually indicates uneven dilution, the brick was too dry, or the coat overlapped before it set. The fix is to re-wet the area lightly (not soaking), apply a second thin coat promptly, and wipe back to the same level of transparency you want. If lap lines persist after drying, a third very light coat often evens it out better than thickening the first area.
How long should I wait before it rains on my newly whitewashed patio?
For limewash, “dry to the touch” is not the same as cured. Wait the cure period the product specifies, commonly about a few days to a week, before exposing it to rain or heavy cleaning. If you get caught in a short dry window, tenting or light protective covering can help, but avoid sealing it in plastic for long periods because trapped moisture can disturb early calcification.
Should I apply a clear sealer after whitewashing brick for extra protection?
You usually should not seal with standard clear concrete or brick sealers after limewash because many of them block breathability, which can trap moisture and cause failure behind the finish. If you want extra protection, use a breathable mineral topcoat designed for lime finishes, and apply it only after the limewash has fully cured (often 7 to 10 days).
What should I do if rust, grease, or dark stains show through the whitewash?
If stains show through, prep was incomplete because whitewash is translucent by design. For rust or mineral stains, treat directly with an appropriate mineral remover (often phosphoric acid based), for oil and grease use a true degreaser, and for biological growth use a bleach solution. After treatment and full drying, reapply whitewash only to the corrected areas rather than trying to “hide” stains with extra coats.
Is it okay to use bleach and acid cleaners during patio prep?
Don’t use bleach and acid cleaners in the same prep session. Many problems come from mixing or sequentially using them without enough rinsing and drying, which can create hazardous reactions and reduce cleaning performance. Stick to one chemical approach at a time, rinse thoroughly, let it dry, then proceed to the next step.
Will limewash look different on mortar joints than on the brick faces?
You should assume limewash will alter the look of mortar differently than the brick face. Mortar is more porous and may absorb faster, creating a slightly stronger white effect in joints. To manage this, dampen the whole surface evenly before applying, and use consistent work timing in small sections so both brick and joints have similar absorption.
How do I choose the right dilution strength for the whitewashed look?
Mix small test batches and check the dried result in natural light. Limewash that is too strong can look chalky and overly opaque, while too much dilution can make it streaky or weak. Also avoid mixing larger batches over multiple days, because batch-to-batch variation is a common cause of uneven transparency across the patio.
Is chalky residue after it rains normal, and how do I control it?
If you notice dusty chalking on the surface after weathering, that can be normal for lime-based finishes. The practical decision is whether it’s excessive or accelerating. If chalking is more than a light residue, wait for full cure and then consider applying a breathable mineral topcoat, and improve maintenance by keeping debris off the surface and rinsing periodically.
My whitewash is peeling or flaking. Can I just apply another coat on top?
In most cases, scraping and re-prepping is better than just coating over failure. Flaking or peeling usually points to blocked absorption (residual sealer), application over wet masonry, or using diluted latex instead of a true lime product. Remove the loose material, address the underlying cause, clean again thoroughly, let dry, then reapply the correct product.
When is it safe to wash or pressure wash the patio again after whitewashing?
When limewash is applied correctly, it typically stays breathable, but it is still a fragile finish in the early phase. Don’t scrub aggressively during the first week, avoid pressure washing close to the surface right after application, and plan for gentle rinsing only. If you have to clean soon, use light water flow and mild brushing, then let it cure fully before more intense cleaning.
Can I whitewash my brick patio without a pressure washer?
Yes, you can do the project without a pressure washer, but expect longer dwell time and more scrubbing to remove mold, algae, and grime. For heavy contamination, renting for an hour can make a noticeable difference by getting into texture faster. The key is still thorough rinsing until runoff is clear, regardless of tool choice.
Next Articles

How to Get Rid of Algae on a Brick Patio Safely
Step-by-step safe ways to remove algae from a brick patio, from scrubbing and vinegar to bleach or oxygen and pressure w

How to Remove Thompson’s Patio Sealer Step by Step
Step-by-step removal of Thompson’s patio sealer on concrete, brick, pavers, and stone, with safety, tests, and cleanup.
Can You Remove Patio Sealer? How to Strip It Safely
Learn if you can remove patio sealer and how to strip it safely by type, material, and method.