You can remove paint from a concrete patio using a combination of mechanical scraping, a chemical paint stripper, and a pressure washer rinse. For most situations, the most effective sequence is: scrape off loose paint first, apply a gel-based paint stripper, let it dwell, scrub with a stiff brush or wire brush, then pressure wash clean. Spray paint and thin coats often come off with just a chemical stripper and pressure washing. Old, thick, or layered paint usually needs mechanical grinding first, followed by chemicals for the residue. I'll walk you through the whole process so you can match the method to what you're actually dealing with.
How to Remove Paint Off a Concrete Patio Step by Step

Dylan Hale
11 May 2026
Safety gear and prep you need to do first
Before you touch a scraper or open a can of stripper, spend 15 minutes on prep. It will save you a ruined plant bed, a chemical burn, or a paint-dust mess you can't clean up. Concrete paint removal kicks up dust, splashes caustic chemicals, and can release fumes, so treat it seriously even for a small area.
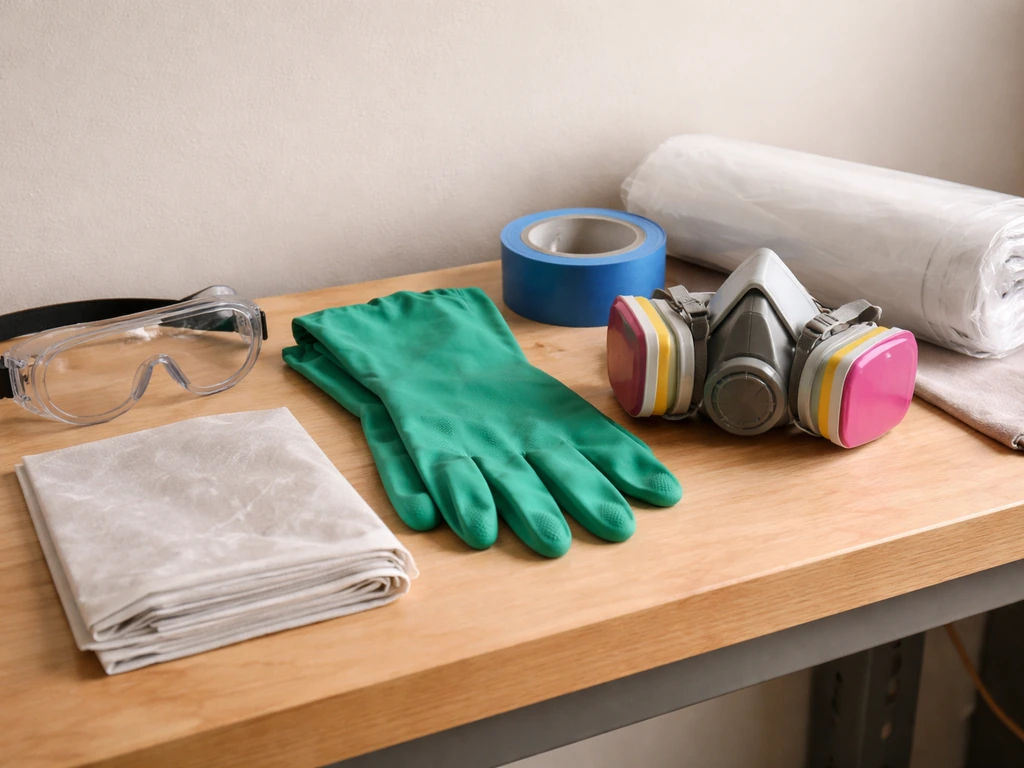
For personal protection, wear safety goggles (not just glasses) and chemical-resistant gloves. Green nitrile or black butyl rubber gloves are the right call when using chemical strippers, since standard latex gloves won't cut it with solvent-based products. If you're grinding or wire-brushing, OSHA specifies eye protection like goggles or a face shield for power tool work. Add a respirator if you're doing any mechanical grinding, sanding, or using strong solvents indoors or in a confined patio space. A basic N95 handles dust; you need an organic vapor respirator cartridge for solvent fumes.
For containment, lay plastic sheeting around the work area. The EPA recommends extending it at least 10 feet past the edges of your work zone to catch debris, paint chips, and chemical runoff. This is especially important if your patio borders a lawn, garden beds, or a storm drain. Wet paint remover and paint sludge should not run off into soil or gutters. Tape the sheeting down if it's windy. Cover any nearby plants with plastic or burlap to protect them from chemical splash.
- Chemical-resistant gloves (nitrile or butyl rubber, not latex)
- Safety goggles or face shield
- Respirator (N95 for dust; organic vapor cartridge for solvents)
- Plastic sheeting, at least 10 feet past work area edges
- Old clothes and closed-toe shoes
- Garden hose or bucket of clean water nearby for emergency rinse
- Stiff-bristle scrub brush, wire brush, or floor scraper
One more thing: if your patio is in an older home (pre-1978), there is a chance the paint contains lead. Don't grind or sand aggressively until you've done a quick lead test (kits are under $10 at hardware stores). The EPA has specific guidance for lead-safe DIY work, including using protective sheeting and containing all dust and debris carefully. If the test is positive, consider calling a professional or following full lead-safe renovation protocols.
Figure out what type of paint you're dealing with
The removal method you pick depends heavily on what kind of paint is on your concrete. Getting this wrong means wasting time on the wrong approach. Here's how to read what you've got:
Fresh or recent paint spills
If the paint is still wet or was spilled recently (within 24 to 48 hours), you're in luck. Latex or water-based paint can be scrubbed off with warm soapy water and a stiff brush before it fully cures. Oil-based paint needs a solvent like mineral spirits or paint thinner while it's fresh. Act fast and you may not need heavy chemicals or power tools at all.
Spray paint
Spray paint (aerosol graffiti or overspray) is typically thin and sits on top of the concrete rather than soaking deep into it. A chemical stripper or acetone often handles it without mechanical work. The challenge is that spray paint covers irregularly, and rough concrete texture traps it in tiny pores. You may need a second round of stripper and a stiff brush to get into those pores fully.
Old or layered paint
Old paint that's been on the concrete for years, or multiple layers of patio deck paint, is the hardest to remove. It's usually oil-based or an elastomeric coating, and it bonds hard to the concrete surface. You'll almost always need mechanical removal first (grinding or floor sander), then chemicals for the residue. Peeling old paint that's already lifting is easier to deal with than intact old paint that's still stuck solid.
General patio paint or deck coating
Standard patio paint, concrete stain, or masonry paint falls in the middle. A good gel stripper will tackle it, but you'll likely need more dwell time (30 to 60 minutes or longer) and some scrubbing. The thickness and condition of the coating determines whether one round is enough or you need two applications.
Mechanical removal: scraping, grinding, and abrasive methods
Mechanical methods are your starting point for any thick or old paint. They won't leave chemical residue on the concrete, and for heavy coatings they're often the fastest way to remove bulk material before you clean up the rest chemically.
Hand scraping
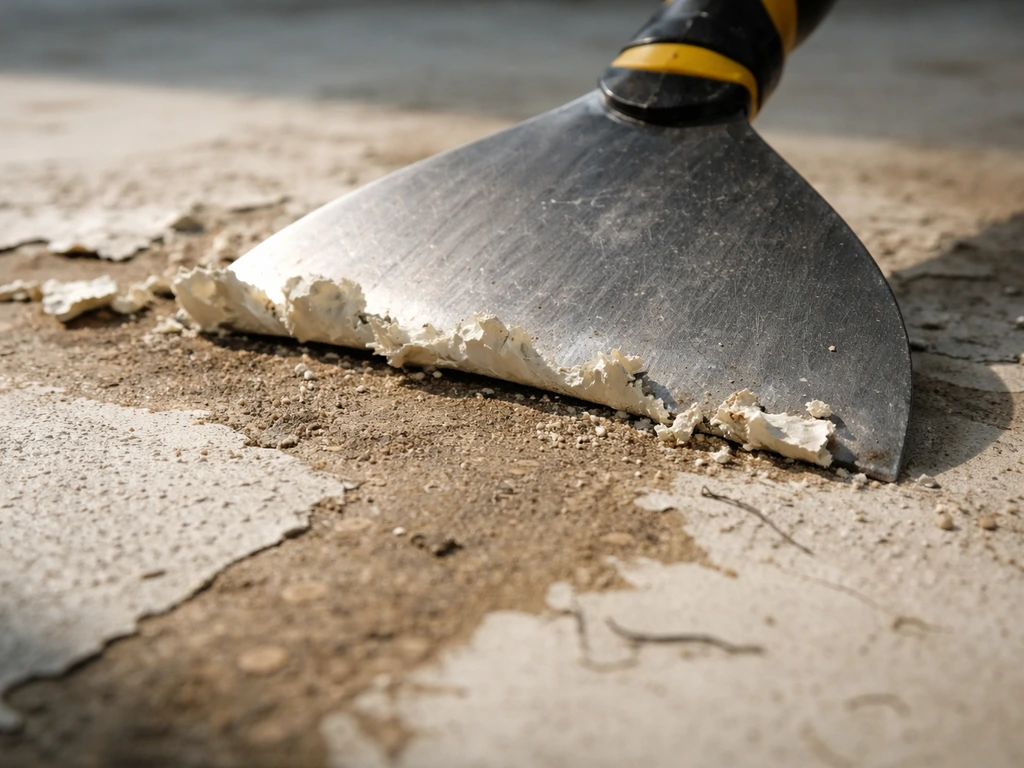
For paint that's already peeling, bubbling, or lifting, a stiff floor scraper (the kind with a wide blade on a long handle) is your first tool. Work at a low angle to the concrete surface, pushing under loose edges. This doesn't require any products and removes a huge amount of material quickly. Follow up on the stubborn areas with a wire brush to break up the remaining flakes. Always wear goggles here, since chips fly.
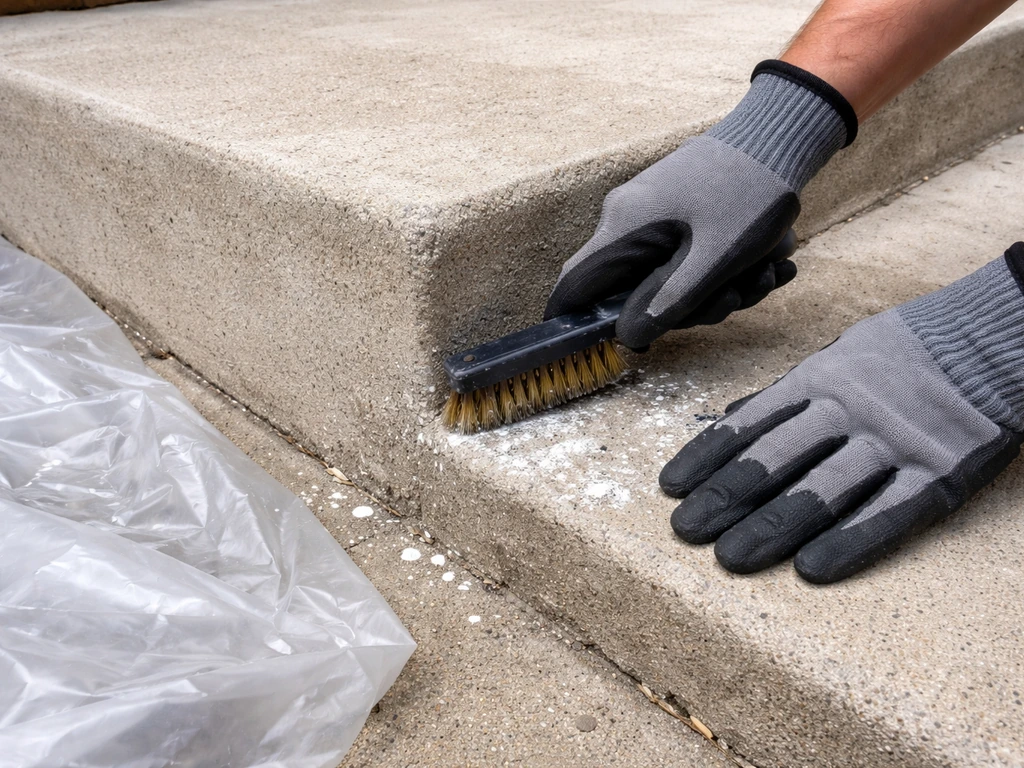
Wire brush and handheld scrubbing
A wire brush, either handheld or attached to a drill as a cup brush, works well on smaller patches or in corners where a scraper won't fit. On large areas it's tiring, but it's effective for breaking up paint after a chemical stripper has softened it. Eye protection is required, as wire bristles occasionally break off from the brush.
Angle grinder or floor grinder
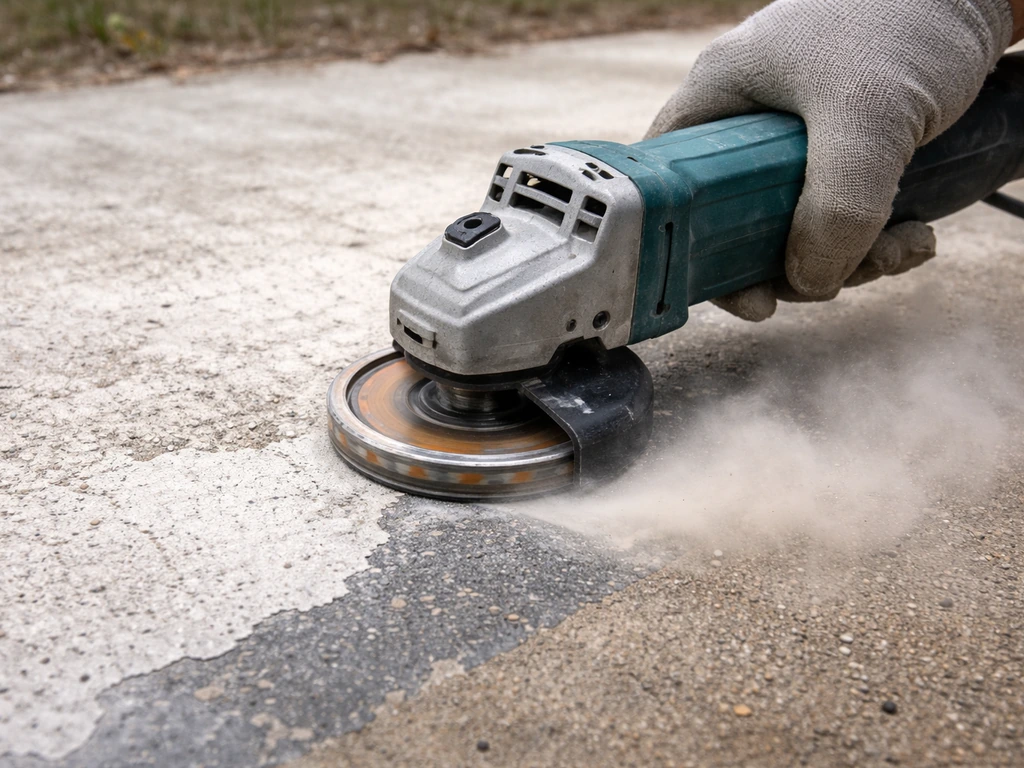
For thick, intact, fully bonded coatings over a large area, an angle grinder with a diamond cup wheel or a rented floor grinder is the most powerful mechanical option. This Old House recommends using a dust-collection attachment with the angle grinder to keep concrete dust from spreading. This approach removes paint fast but also removes a very thin layer of concrete surface, so use it carefully and only where needed. Wear a respirator, face shield, and ear protection. Rent a floor grinder for areas over 50 to 100 square feet as it's much faster than a handheld angle grinder.
Sanding
Orbital or belt sanders with coarse-grit sandpaper (40 to 60 grit) can work on flat, smooth concrete slabs. They're slower than grinding but less aggressive. Useful for thin coatings or residue after most of the paint is already scraped away. Generates a lot of fine dust, so a respirator and dust containment are non-negotiable.
Chemical stripping: which products work and how to use them safely
Chemical strippers are often the most practical option for homeowners because they don't require renting power tools and work well on most paint types. The key is picking the right product for the job and using it correctly.
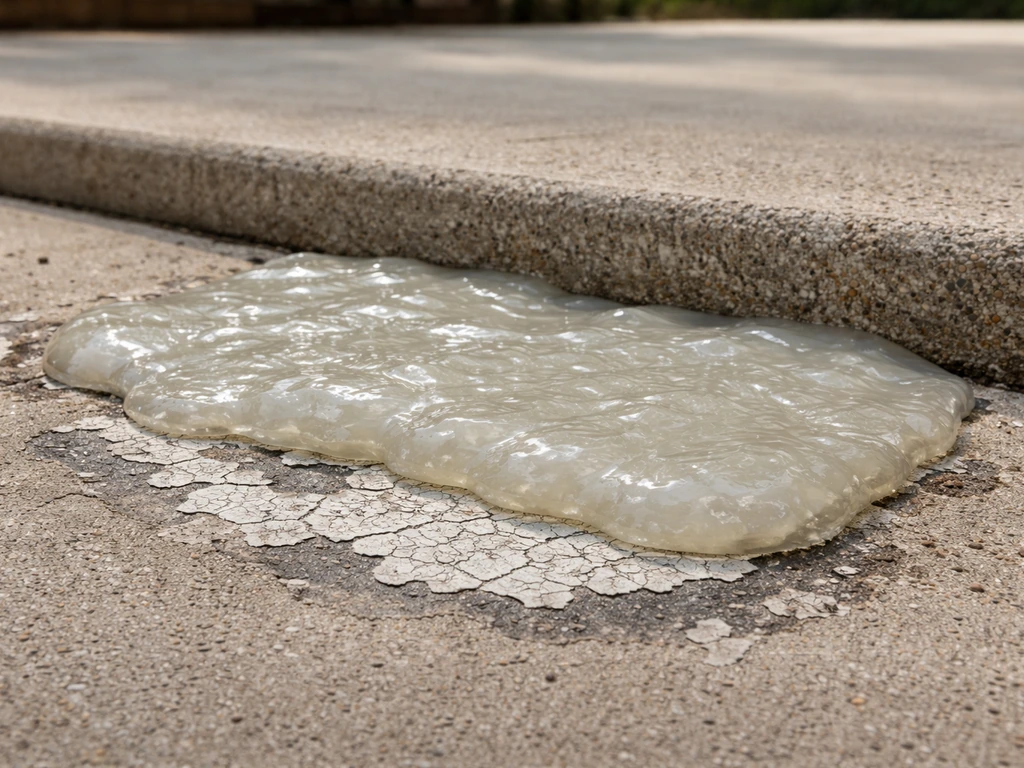
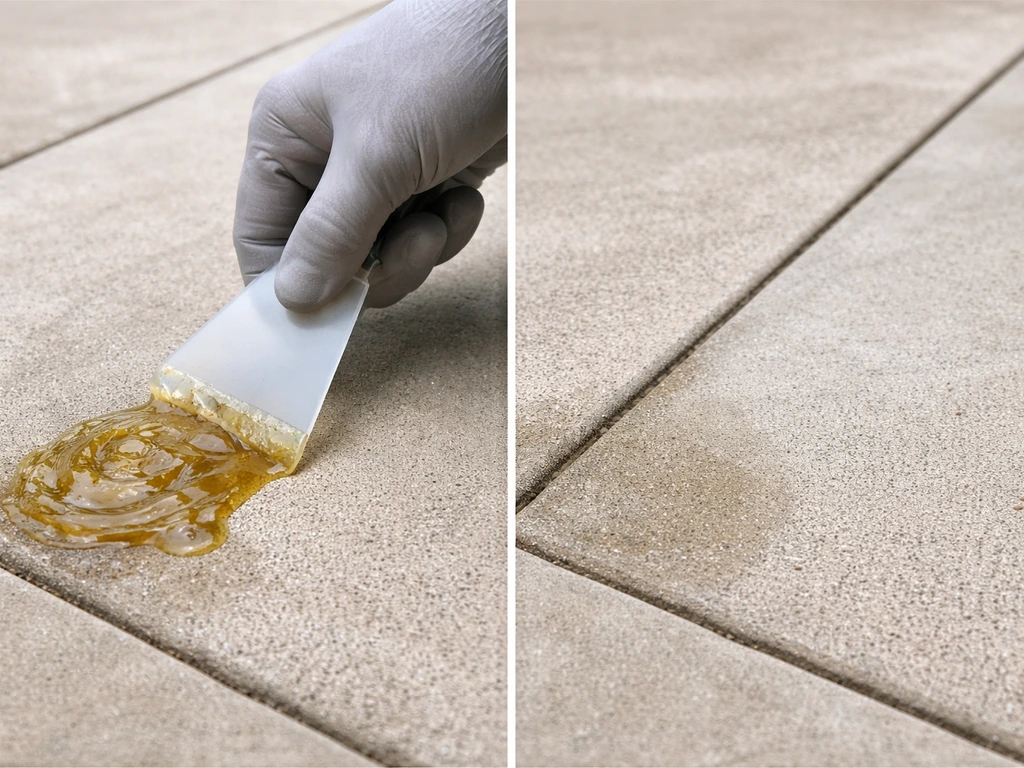
Gel-based paint strippers (recommended for most patios)
Gel strippers like Citristrip are my go-to recommendation for most concrete patio situations. They're safer than solvent-based strippers, have lower fumes, and the gel consistency keeps the product wet and active longer on a flat outdoor surface. Apply a thick, even layer, at least 1/8 inch, using an old brush or roller. Citristrip's own guidance notes that if the product dries or gets gummy before it works, you haven't applied it thickly enough. Cover with plastic sheeting to slow evaporation and let it dwell for 30 minutes to a few hours depending on paint thickness. Thicker coatings need longer. Then scrub with a stiff brush and scrape off the paint sludge onto your plastic sheeting for disposal.
Solvent-based and stronger strippers
For very stubborn oil-based paint or heavy coatings that a gel stripper doesn't fully remove, a stronger solvent-based stripper may be needed. Some of these contain [methylene chloride (dichloromethane)](https://wwwn. cdc. gov/TSP/MMG/MMGDetails.
aspx? mmgid=230&toxid=42), which is highly effective but comes with serious safety concerns. OSHA warns that standard cartridge respirators may not protect against methylene chloride because it can pass through available cartridges. Health Canada notes it is harmful to human health and requires immediate skin or eye decontamination if contact occurs.
The CPSC has issued specific consumer safety warnings about methylene chloride strippers, emphasizing that you must follow the product label exactly and not use it in poorly ventilated spaces. If you choose a methylene chloride product: work outdoors only, do not lean over the treated area, and keep wet paint sludge in sealed containers for disposal.
I'd strongly recommend trying a safer gel stripper first and only moving to methylene chloride products as a last resort.
Acetone and paint thinner for spray paint
For spray paint specifically, acetone (nail polish remover works in a pinch) or lacquer thinner applied to a cloth and rubbed directly on the paint often lifts it without needing a full stripper application. Pour a small amount on a rag, press it onto the paint for 30 to 60 seconds, then scrub. Work in sections and rinse as you go. This is best for small patches, not large painted areas.
| Method | Best for | Safety level | Dwell time | Equipment needed |
|---|---|---|---|---|
| Gel stripper (e.g. Citristrip) | Most patio paints, spray paint, thin to medium coatings | Moderate (wear gloves and goggles) | 30 min to 4 hours | Brush/roller, stiff scrub brush, scraper |
| Methylene chloride stripper | Heavy oil-based or multi-layer paint (last resort) | High risk (follow label strictly, outdoors only) | 15 to 30 min | Chemical-resistant gloves, face shield, sealed disposal containers |
| Acetone / lacquer thinner | Fresh or thin spray paint, small areas | Moderate (flammable, ventilate) | 1 to 5 min | Rags, stiff brush |
| Muriatic acid | Etching/cleaning after paint removal, not paint removal itself | High risk (dilute carefully, neutralize after) | 5 to 10 min max | Acid-resistant gloves, goggles, baking soda for neutralization |
One note on muriatic acid: it's commonly used for cleaning and etching concrete, but it does not strip paint. It can help clean up residue and open the pores of the concrete after most paint is already removed, but it should not replace a proper stripper. If you're dealing with brick rather than concrete, the approach and chemical choices differ somewhat from what's covered here. Brick patio paint removal is a different process, so use the right approach for masonry surfaces.
Pressure washing and rinsing after stripping
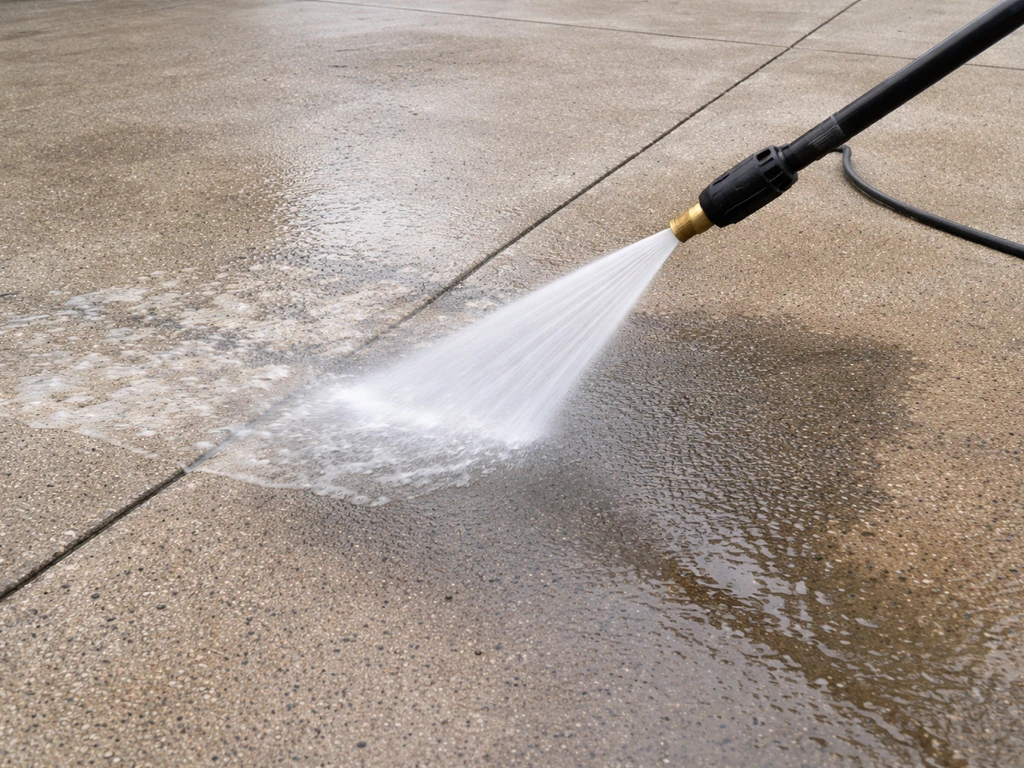
Once you've scraped off the paint sludge from your stripper application, a pressure washer is the best tool to flush out remaining residue from the concrete pores. Use at least 2,000 to 3,000 PSI with a 25-degree or 15-degree nozzle. Hold it about 6 to 8 inches from the surface and work in overlapping passes. For spray paint in textured concrete, a rotating turbo nozzle helps get into surface pores more effectively than a standard flat fan nozzle.
If you don't have a pressure washer, a garden hose with a jet nozzle combined with vigorous scrubbing using a stiff deck brush is a workable alternative. It takes more effort and may not clear every trace from porous concrete, but it works for smaller areas or lighter applications.
After pressure washing, neutralize any chemical stripper residue before you're done. Mix a solution of 1 cup of baking soda per gallon of water and scrub it across the entire treated area with a stiff brush. Let it sit for 5 minutes, then rinse thoroughly with clean water. This is especially important if you used an acid-based product, but it's good practice after any chemical stripper to ensure nothing active remains in the concrete that could interfere with sealing or repainting later. Collect all rinse water that has contacted chemicals on your plastic sheeting and dispose of it according to your local regulations, not down a storm drain.
When the paint won't budge: troubleshooting stubborn spots
Sometimes you do everything right and a patch of paint just sits there. Here's how I work through it:
- Reapply stripper thicker and keep it wet longer. Cover with plastic wrap and leave it for several hours or overnight. If the stripper dried out, it stopped working, and you need a thicker application.
- Switch from a brush scrub to a wire brush or drill cup brush to physically break up what the chemicals softened.
- Layer your methods: apply gel stripper, let it dwell, then use an angle grinder or wire wheel attachment to work the softened material off. The combination is more powerful than either alone.
- Step up to a stronger stripper if the gel product isn't working after two applications. This is when solvent-based strippers earn their place, used outdoors with proper PPE.
- For truly immovable old paint over a large area, rent a floor grinder. It will remove the paint and a thin layer of the concrete surface, which you can address afterward with a concrete resurfacer.
- Check that you've correctly identified the paint type. Epoxy floor coatings, for example, are extremely resistant and may need grinding followed by epoxy-specific stripper products.
If you're dealing with paint that splashed onto your patio from a nearby surface, like fence paint that dripped down onto your slabs, the approach is the same but the paint type matters. Fence paints are often oil-based or exterior wood paints, which may need a longer stripper dwell time than standard latex patio paints.
Final cleanup, fixing the concrete, and preventing future problems
Do a final wash and inspection
After stripping and rinsing, let the concrete dry completely, at least 24 hours in dry weather, then inspect it in good light. Look for remaining paint haze, discoloration, or etching. Remaining paint haze usually responds to one more scrub with a stiff brush and clean water. If you used aggressive chemicals and the concrete surface looks rougher or more open-pored than before, that's normal etching and it will accept a sealer or paint more readily because of it.
Patch damage if needed
Grinding and aggressive stripping can occasionally reveal or create pitting, shallow cracks, or surface damage. Fill small pits and cracks with a concrete patching compound or hydraulic cement. Let it cure according to product directions, usually 24 to 48 hours minimum, before applying any sealer.
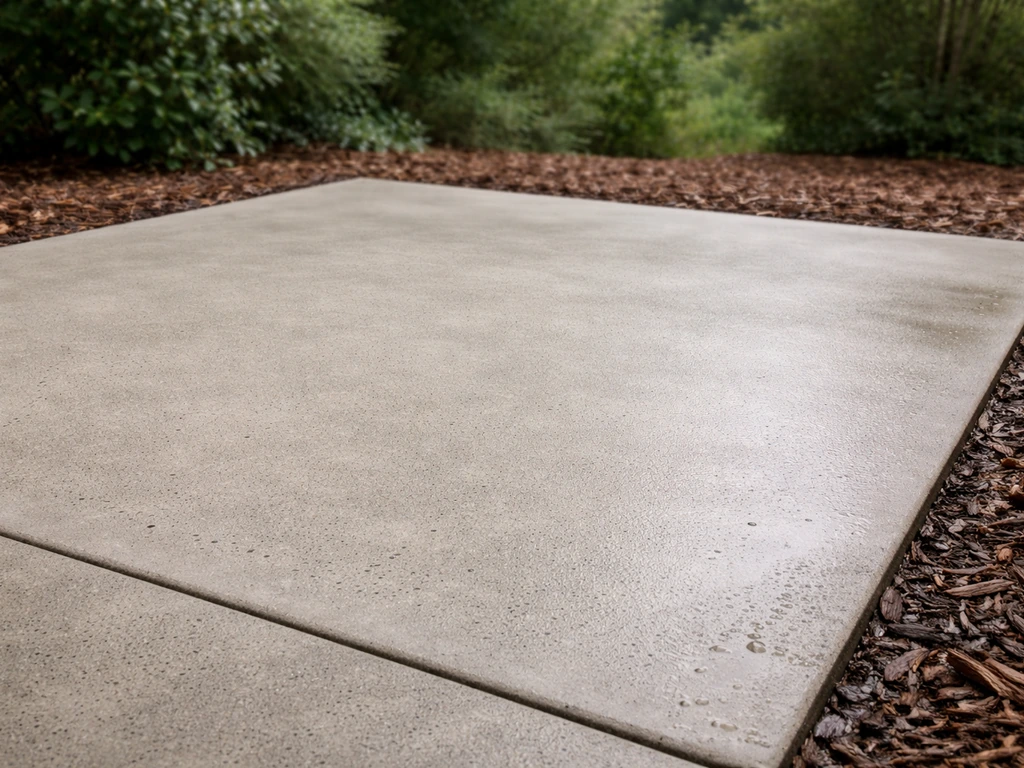
Seal the concrete to protect it going forward
A concrete sealer is one of the best things you can do after paint removal. It closes the pores of the concrete, which makes future spills and stains much easier to clean up. For a patio, a penetrating silane or siloxane sealer is a good low-maintenance choice since it doesn't change the look of the concrete. An acrylic sealer gives a slight sheen and adds a surface layer that's easy to pressure wash. Apply sealer to clean, fully dry concrete using a roller or pump sprayer, following the product's coverage rates and cure times.
Prevention: stop the next paint problem before it starts
- Lay down canvas drop cloths or plastic sheeting over the patio any time you're painting nearby structures, walls, or furniture
- Use painter's tape and sheeting around patio edges when painting fence posts or walls adjacent to the patio
- Wipe up paint drips immediately with a damp rag while wet, before they cure into a concrete-cleaning project
- Keep a sealed concrete surface, as sealed concrete resists paint absorption and makes accidental drips far easier to remove
- Store spray paint cans and open paint containers away from the patio area to prevent accidental spills
With the right sequence of prep, mechanical work, chemical stripping, and a proper rinse, even old or multi-layer paint comes off a concrete patio without permanent damage. The surface may actually look better afterward than before, especially once you get a coat of sealer on it.
FAQ
Can I remove paint off a concrete patio without a pressure washer?
Yes. Use a hose with a strong jet nozzle and scrub with a stiff deck brush, then repeat until the rinse water runs mostly clean. Expect more residue in porous areas, so plan on a longer dry time and consider a sealer test spot before sealing the whole patio.
What should I do if the paint stripper turns into a gummy mess instead of a sludge?
That usually means it dried out or was applied too thin. Scrape back what you loosen, reapply stripper in a thicker, even layer, and cover with plastic sheeting to slow evaporation. Keep the dwell time within the product label range and re-strip only the affected section.
How long should I wait before sealing after paint removal?
Let the concrete dry fully, typically at least 24 hours in dry weather, then do a quick moisture test by taping down a small plastic square for several hours. If condensation forms under the plastic, delay sealing and keep airflow moving until the surface is truly dry.
Will grinding remove all the paint, or is chemical stripping still needed?
Grinding removes bulk coating quickly but it can leave a thin film in pores. If you still see color haze after vacuuming and rinsing, use gel stripper for a short second pass rather than grinding more aggressively, because repeated grinding can widen pores and create uneven texture.
What’s the safest way to dispose of paint sludge and rinse water?
Keep stripper sludge and rinse runoff contained on the plastic sheeting. Collect solids and sealed-liquid waste in dedicated containers and dispose according to your local hazardous waste rules, not in a storm drain. If you used an acid-based cleaner at any point, rinse water may also need special handling.
Does muriatic acid help remove paint from concrete?
Not directly. It can clean and etch concrete residue, but it will not replace a real paint removal step. Use it only after the paint is already removed, and if you do, neutralize thoroughly before sealing to avoid locking in active residue.
How do I tell if the paint is oil-based versus latex before choosing chemicals?
If it’s a recent spill or the surface feels like it’s not fully cured, latex may be scrubbed with warm soapy water. For older coatings, assume oil-based or multiple layers unless you have product info, and start with a gel stripper in a small test patch before switching to stronger solvents.
Can I use a wire brush or cup brush on all concrete patios?
You can, but avoid using it aggressively on decorative finishes that you want to keep, and it can still etch or roughen soft concrete surfaces. If the patio has coatings or unknown treatments, do a small test area first, then switch to scraper or stripper if the damage is greater than expected.
What if my patio has cracks after removing the paint?
Small pits and shallow cracks can be filled after the surface is clean and dry. Use a concrete patching compound or hydraulic cement and follow its cure window, usually 24 to 48 hours, then inspect again before sealing so you do not trap moisture under the patch or sealer.
How can I prevent paint chips and dust from spreading during removal?
Use plastic sheeting that extends beyond the work zone, tape it down if windy, and keep children and pets away. For grinding or sanding, use dust containment if available and wear a respirator appropriate for dust and solvents, not just an N95 if you’re working with strong fumes.
Do I need a respirator when working outdoors?
Often yes, especially if you’re grinding or using solvent-heavy products. Outdoor air helps, but mechanical work still creates high dust, and some fumes can concentrate near low areas. If you smell strong solvent, treat it as a sign ventilation is insufficient and follow the product label for respirator type.
What should I test before doing the full paint removal job?
Do a 1 to 2 square foot test patch with your chosen method, including a short stripper dwell and a scrub. Check whether paint sloughs off cleanly, whether the concrete surface becomes overly rough, and whether any haze remains after rinsing, then adjust dwell time or switch methods before committing to the whole patio.
Next Articles

How to Remove Thompson’s Patio Sealer Step by Step
Step-by-step removal of Thompson’s patio sealer on concrete, brick, pavers, and stone, with safety, tests, and cleanup.
Can You Remove Patio Sealer? How to Strip It Safely
Learn if you can remove patio sealer and how to strip it safely by type, material, and method.
How to Remove Resin From Patio Safely by Surface Type
Step by step guide to remove resin from patio by surface type with safe scraping, softening and solvent methods.