The safest way to remove an oil stain from a sandstone patio is to act quickly, blot up as much excess oil as you can, then draw out the rest using an absorbent poultice mixed with a solvent like mineral spirits or acetone. Let it sit under plastic wrap for 24 to 48 hours, scrub with a stiff brush and a pH-neutral degreaser, then flush thoroughly with plain water. That sequence works without etching or discoloring the stone, which is the main thing you have to protect against with sandstone.
How to Remove Oil Stains From a Sandstone Patio

Dylan Hale
7 May 2026
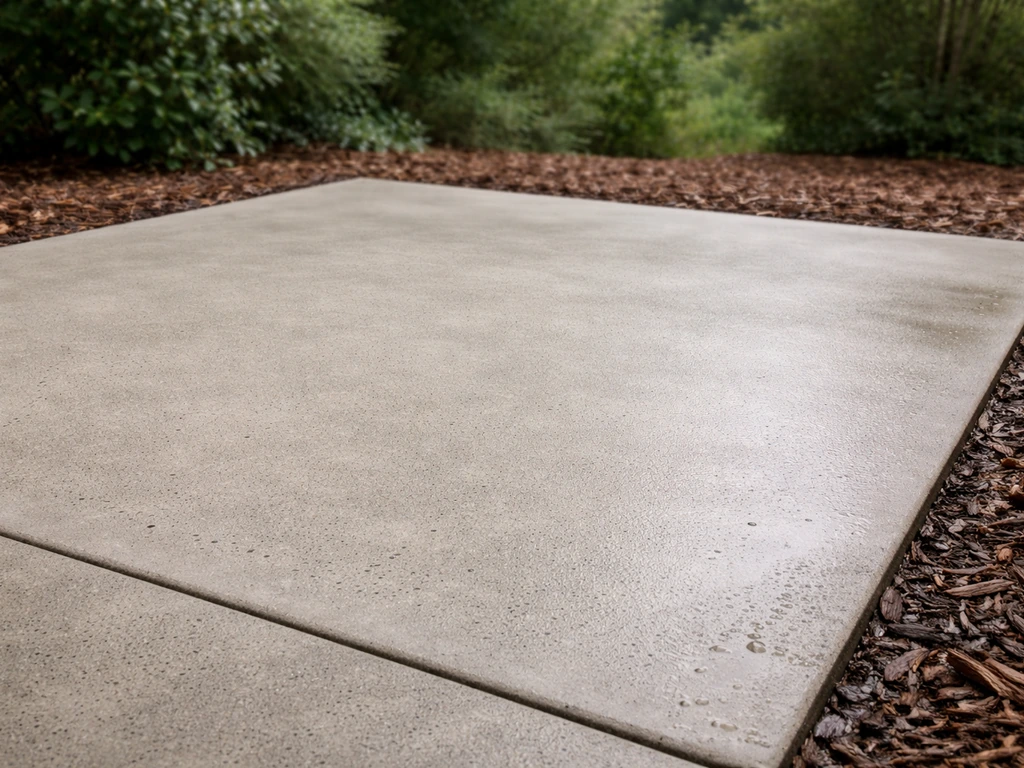
Sandstone is one of the more forgiving natural stones to work with outdoors, but it's also genuinely porous, which means stains sink in fast and strong chemicals can cause permanent discoloration or etching. The steps below will get you through oil stains, rust stains, and unknown marks safely, whether you're working with basic household supplies or a pressure washer.
Figure out what you're actually dealing with first
Before you pour anything on your patio, spend two minutes identifying the stain type. The cleaning method that works on oil can make a rust stain worse, and the acid-based approach you'd use on rust can etch sandstone if you're not careful. Getting this right upfront saves a lot of trouble.
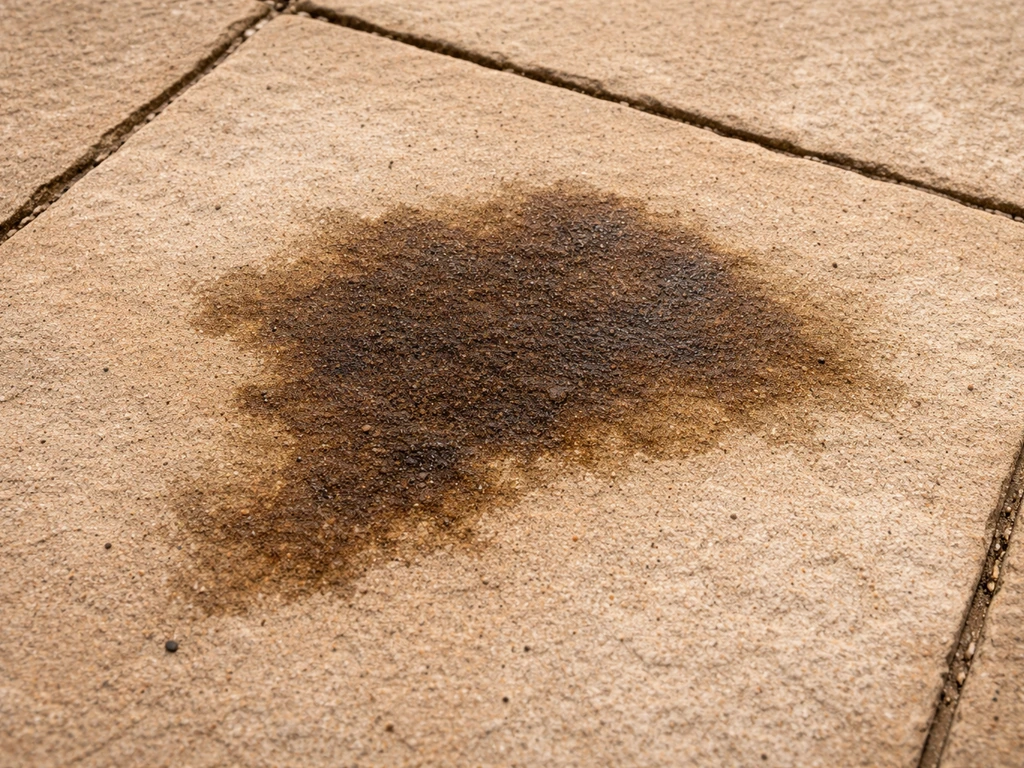
Oil and grease stains typically look dark (often darker than the surrounding stone), have a slightly wet or greasy sheen when fresh, and attract dirt over time. They don't follow a clean outline. You'll see them under BBQ grills, along outdoor dining areas, or anywhere cooking oil, motor oil, or sunscreen has dripped.
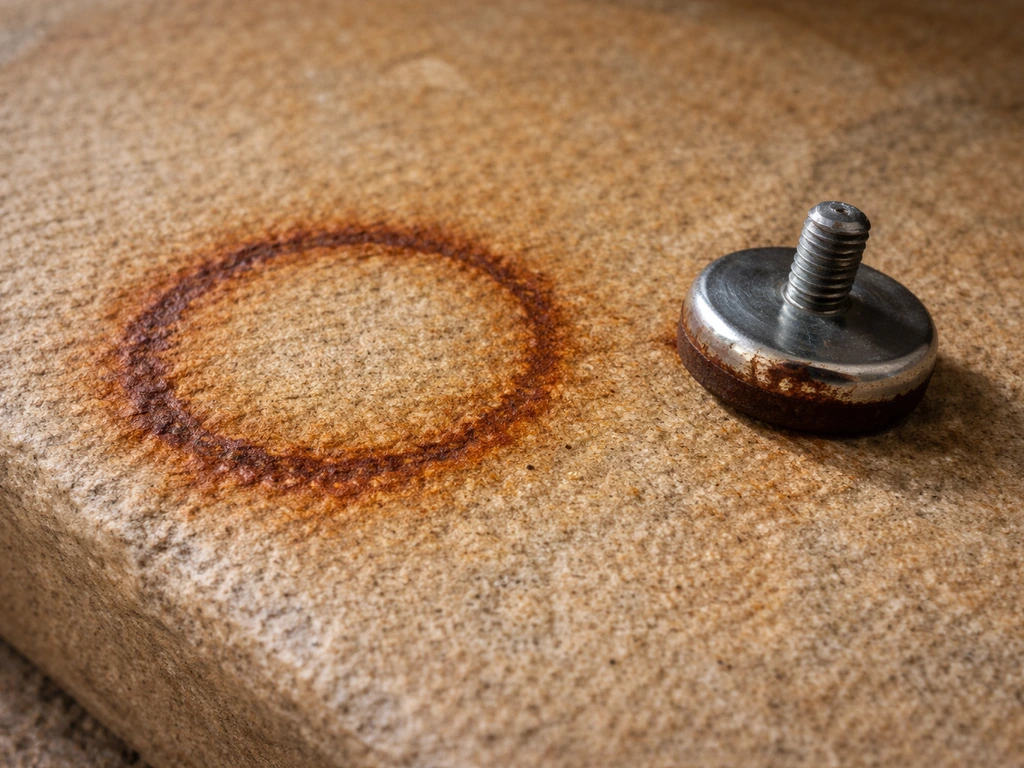
Rust stains are orange to reddish-brown and almost always mirror the shape of whatever caused them: a circular ring from a metal flower pot, a bolt-shaped streak, a shadow from metal furniture legs. That shape clue is the giveaway. If your stain is reddish and has a defined outline matching a metal object, it's rust, not oil.
General or unknown stains are everything else: bird droppings, leaf tannins, algae, general grime, or mystery discoloration that could be a mix. These get their own gentler fallback process below, which is useful when you genuinely can't tell what you're looking at.
Set yourself up before you start cleaning
Even if you're in a hurry (and with oil stains, speed does matter), a few minutes of prep will protect both your stone and your garden.
- Do a test patch first. Pick a small, low-visibility corner of the patio, apply your chosen cleaner, and wait the full dwell time. This is non-negotiable with sandstone because chemical reactions can cause uneven discoloration, especially on iron-rich stone varieties.
- Protect your plants and landscaping. Wet down any nearby grass, shrubs, or garden beds before you apply any cleaner, and rinse them again afterward. This dilutes any runoff so it doesn't cause damage.
- For fresh oil spills, keep the area dry. Do not wet the stone before treating a fresh oil stain. Dry absorbents and solvents work better on dry stone. However, for older or set-in stains where you're using a scrubbing degreaser rather than a poultice, pre-wetting the stone first helps prevent the cleaner from soaking too deep too fast.
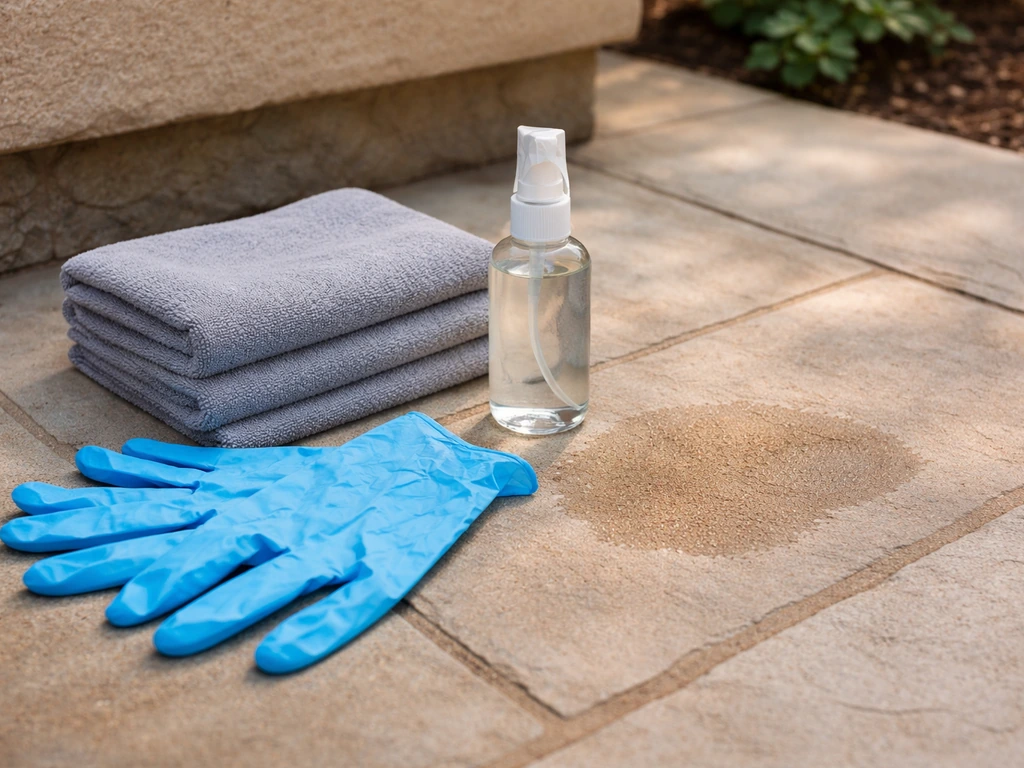
- Gather your materials before you start: protective gloves, a stiff-bristled nylon brush (not wire, which can leave metal fragments that rust), your chosen cleaner, plastic sheeting or cling wrap for poultice work, and a bucket of clean water.
How to remove oil and grease stains from sandstone
Oil removal on sandstone is really a two-phase job: get the surface oil off, then pull the absorbed oil out from inside the stone. how to remove oil stains from patio slabs Oil removal on sandstone is really a two-phase job. Skipping phase two is why people re-clean the same stain three times and wonder why it keeps coming back.
Phase 1: Remove surface oil immediately
- Blot (don't wipe or rub) as much fresh oil as possible using paper towels or an absorbent cloth. Rubbing spreads the stain laterally into unaffected stone.
- Cover the wet stain area with a generous layer of dry absorbent material: cat litter, baking soda, cornstarch, or powdered chalk all work. Leave it for at least 15 to 30 minutes, or longer on a fresh heavy spill.
- Sweep up the absorbent material and dispose of it. Don't hose this into your garden bed.
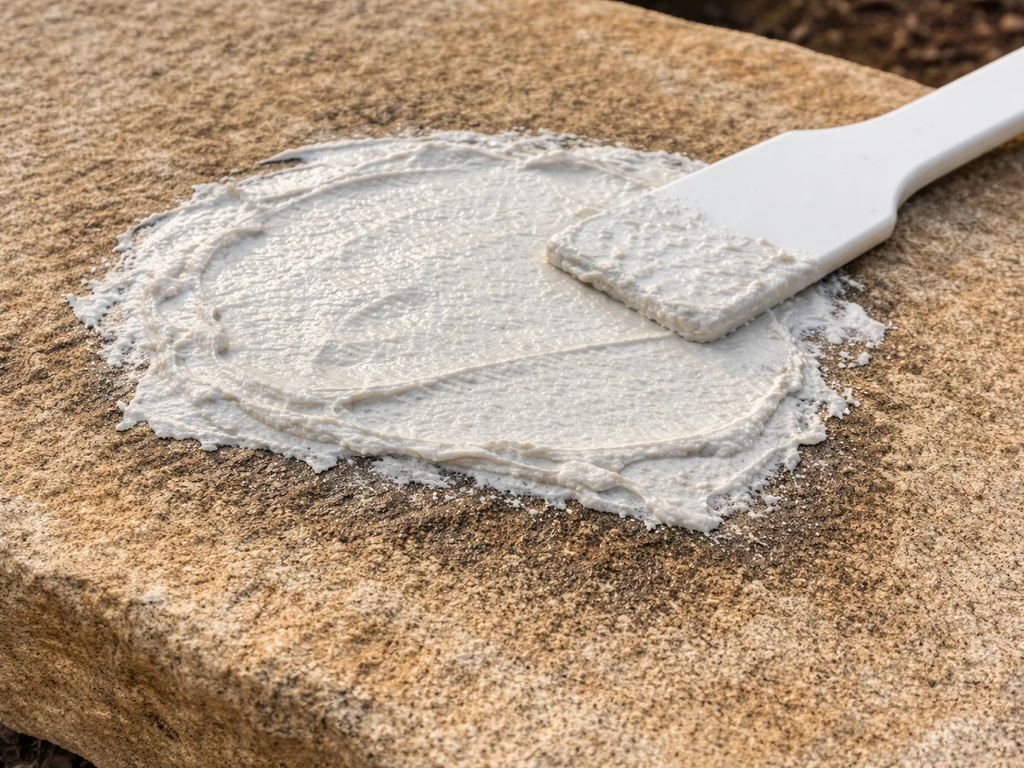
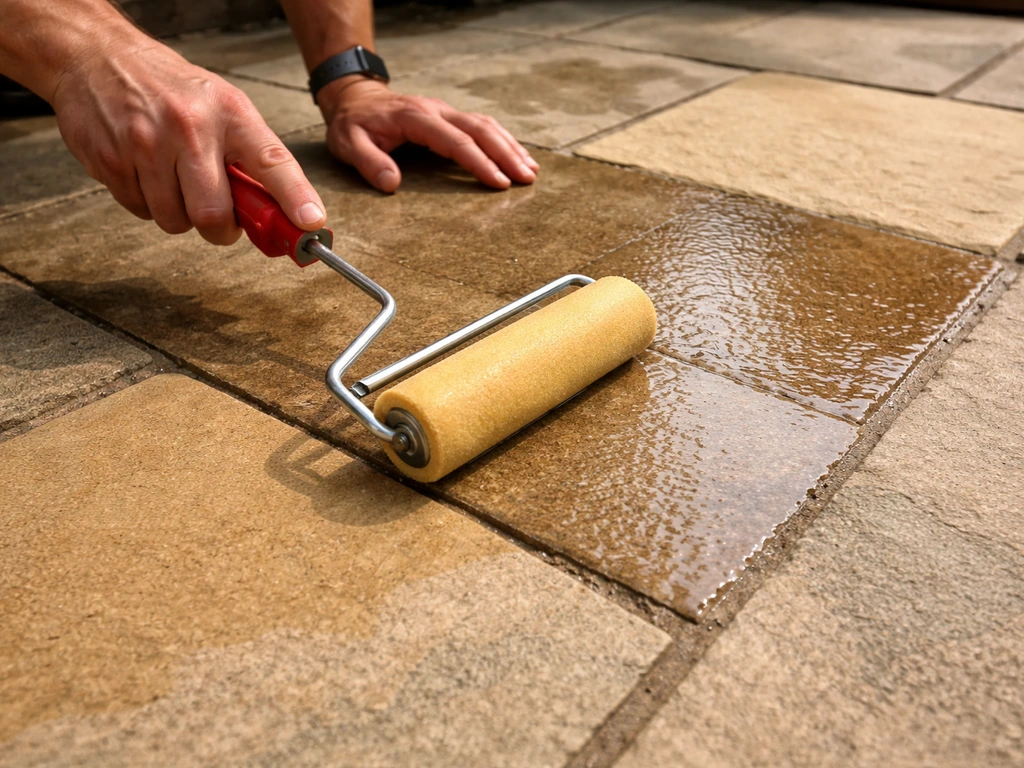
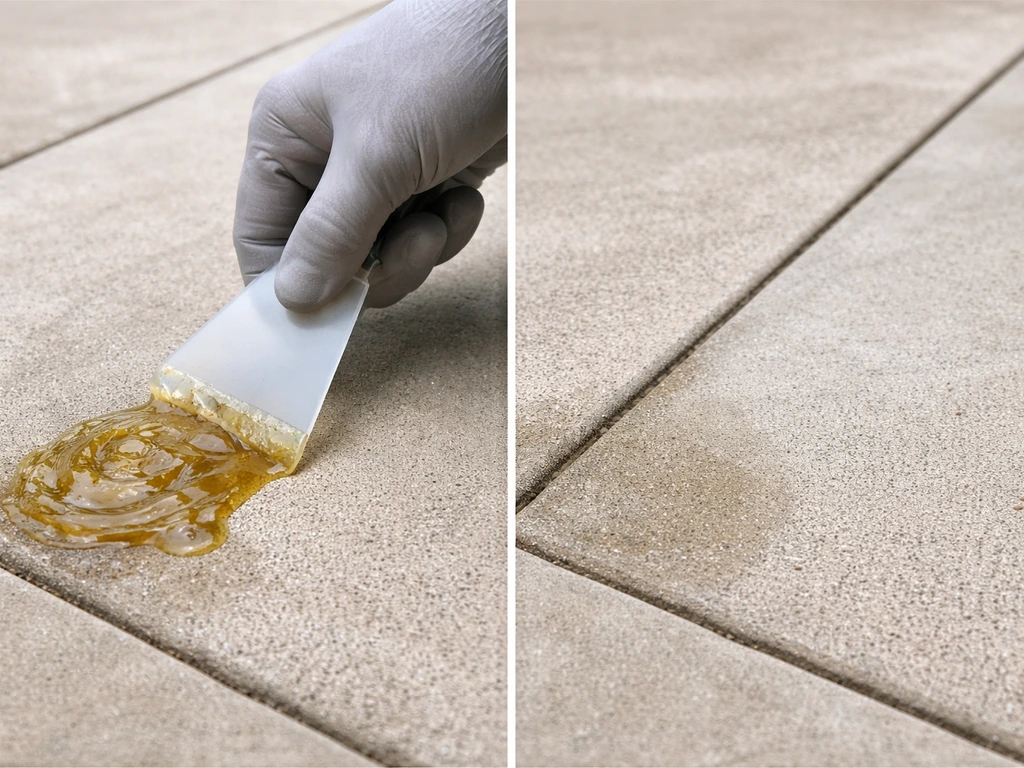
Phase 2: Pull out the absorbed oil with a poultice
A poultice is the most effective tool for oil stains that have soaked into porous sandstone. HMK R152 (Stone Poultice & Stain Remover) is marketed as suitable for deep-set grease and oil stains on outdoor, porous stone such as patios and high-traffic stone HMK R152 (Stone Poultice & Stain Remover) is marketed as suitable for deep-set grease/oil stains. It works by combining an absorbent material with a solvent that dissolves the oil, drawing it out of the stone and into the poultice as it dries. I've found this genuinely outperforms just scrubbing with a degreaser on set-in stains.
- Mix your poultice: combine an absorbent powder (kaolin clay, diatomaceous earth, or powdered chalk work well) with a chemical agent. For oil and grease, mineral spirits or acetone are your best options. Mix to a thick peanut-butter consistency.
- Apply the poultice about 1/4 to 1/2 inch thick over the stained area, extending slightly beyond the stain edges.
- Cover it completely with plastic wrap or cling film and tape down the edges to slow drying. This keeps the solvent active longer so it draws more oil out.
- Leave it for 24 to 48 hours. Resist the urge to check it early.
- Remove the plastic, let the poultice dry out fully, then scrape it off gently with a plastic scraper. Don't use metal tools.
- Scrub the area with a stiff nylon brush and a pH-neutral degreaser diluted according to its label. Rinse thoroughly with clean water.
- Repeat the process if a shadow remains. Deeply set stains sometimes need two applications.
If you'd rather use a ready-made product, Rust-Oleum's Miracle Sealants Liquid Poultice is formulated specifically for porous stone including sandstone and flagstone, and it handles the mixing step for you. Apply it the same way as above.
One important note on degreasers: avoid strongly alkaline cleaners on sandstone if your stone contains iron minerals (reddish or brownish veining in the stone is a clue). Alkaline products can react with those iron components and leave new staining that's actually harder to remove than the original oil mark. Stick to pH-neutral or mildly alkaline products and always test first.
How to remove rust stains from sandstone
Rust stains need a different approach entirely. You need something that can chemically break down iron oxide without etching your stone. That means careful use of either a chelating agent (which binds to iron) or a very dilute oxalic acid product, with strict attention to dwell time and rinsing. HMK R179 rust remover for soft stone specifies a 10, 15 minute dwell time and instructs not to let the product dry on the surface 10–15 minute dwell time and not letting it dry.
- Move or remove the source of rust first (the metal pot, furniture leg, or fastener) so you don't re-stain right after cleaning.
- Pre-wet the stone lightly with clean water before applying any acid-based rust remover. This slows absorption and reduces the risk of etching.
- Apply a rust remover formulated for soft or natural stone. Products like HMK R179 Rust Remover (designed specifically for soft stone) or an oxalic-acid-based cleaner are good options. Do not use strong hydrochloric (muriatic) acid on sandstone as it can etch and permanently damage the surface.
- Keep dwell time short: follow the product label closely, but as a general rule, oxalic-acid products should not sit for more than a few minutes on sandstone. Watch the stain actively rather than walking away.
- Scrub gently with a nylon brush while the product is still active.
- Rinse thoroughly and immediately with large amounts of clean water. Don't let acid residue sit on the stone.
- For HMK-type products, follow up by washing the area with an acid-free intensive cleaner (diluted about 1:10) and rinsing again with plain water. This neutralizes any remaining acid chemistry.
- Inspect the area once dry. If a faint stain remains, repeat the process rather than increasing acid concentration or dwell time.
A quick note on poultice compatibility: if you're using a poultice method for rust (with an oxalic acid solution as the chemical agent), avoid using fuller's earth or whiting as your absorbent base. These can react badly with acid. Stick to kaolin or diatomaceous earth instead.
When you're not sure what the stain is
If the stain doesn't clearly fit either description above, start with the gentlest approach and work up from there. This protects the stone while you figure out what you're dealing with.
- Mix a small amount of pH-neutral stone cleaner with warm water according to the label. If you don't have a dedicated stone cleaner, a tiny drop of dish soap in warm water is a reasonable starting point.
- Apply to the stain and scrub gently with a nylon brush in a circular motion.
- Rinse the area well with plain water and let it dry completely before assessing. Some stains look worse when wet.
- If the stain is still clearly visible, look at it more carefully once dry. Has any color lifted? Is the stain reddish (lean toward rust treatment) or still dark and oily-looking (lean toward degreaser and poultice)?
- Try a dedicated pH-neutral multi-purpose stone stain remover next. These are formulated to be safe on sandstone without risking the acid or strong-alkaline reactions.
- Only escalate to acid treatments (rust) or solvent poultices (oil) once you've identified the stain type more confidently.
Bird droppings and leaf tannin stains often respond well to just the neutral cleaner step. Animal droppings in particular can cause permanent dark staining if left too long, so flush those as soon as you notice them, even with plain water.
Rinsing and finishing without leaving residue behind
How you rinse matters as much as the cleaning itself. Leftover chemical residue, whether alkaline or acidic, can continue reacting with the stone and cause secondary staining or an uneven appearance over time. Here's what I'd recommend for the final clean-and-rinse step regardless of which method you used.
- After removing the poultice or finishing any chemical treatment, flush the entire treated area with plain clean water. Don't just splash a little water on it.
- Then scrub with a mild soap solution (a few drops of dish soap in a bucket of water), using your nylon brush.
- Rinse again with clean water, at least two or three thorough passes.
- Let the stone dry fully and inspect. If you see a whitish hazy residue, that's likely chemical residue and needs another rinse cycle.
Pressure washing sandstone: safe or risky?
You can pressure wash sandstone, but the margin for error is smaller than with concrete or brick. Sandstone is a soft stone and high-pressure, concentrated spray will erode the surface, opening the pores further and making future staining worse. If you do use a pressure washer, keep it in the range of 1,000 to 1,500 PSI, always use a wide fan tip (40-degree or wider), and hold the nozzle at least 300mm (about 12 inches) from the surface. Never use a pinpoint or zero-degree nozzle on sandstone.
For the cleaning steps in this guide, hand scrubbing with a stiff nylon brush and a bucket of water is actually preferred over pressure washing, especially for stain treatment. Pressure washing is most useful for a final rinse after the stain has been lifted, or for general maintenance cleaning between deep treatments.
| Method | Best for | Risk on sandstone | Notes |
|---|---|---|---|
| Hand scrubbing with nylon brush | Stain treatment, applying cleaners | Low | Preferred for chemical cleaning steps |
| Pressure washing (1000-1500 PSI, wide fan) | Final rinse, general maintenance | Medium if done wrong | Stay 300mm+ from surface, no pinpoint nozzles |
| High-PSI pressure washing (2000+ PSI) | Concrete, hard stone | High | Do not use on sandstone |
| Garden hose rinse | Flushing chemical residue | Very low | Good fallback if no pressure washer available |
How to stop this happening again
Sandstone is highly porous, which is exactly why stains sink in so fast and why prevention is worth a bit of effort. The two biggest things you can do are sealing the stone and managing spills faster.
Seal your sandstone patio
A penetrating (impregnating) sealer is the right choice for sandstone. These absorb into the stone rather than sitting on top, so there's no film to peel or wear through unevenly. Penetrating sealers create an invisible barrier that resists water and oil penetration. Miracle Sealants 511 Porous Plus is a commonly used option that's designed for porous surfaces like sandstone.
Apply at least two coats to horizontal surfaces (patios take more wear than walls). Because sandstone is so porous, it absorbs sealer quickly and tends to need resealing more often than less-porous stones. Check it annually by dripping water on the surface: if water beads up, the sealer is still working. If it soaks in immediately, it's time to reseal. You can usually reapply over an existing sealer in good condition without stripping first.
One honest caveat: sealers reduce stain penetration but don't make your patio stain-proof. Oil in particular can still leave marks, especially if it sits for a while. The sealer just gives you more time to act before the stain becomes a deep cleaning job.
Day-to-day habits that make a big difference
- Blot spills immediately rather than wiping. Speed is everything with porous stone.
- Use rubber or plastic feet on metal furniture to prevent rust rings forming on the patio surface.
- Place saucers or trays under terracotta and metal planters to stop rust and tannin stains.
- Clean the patio regularly with a pH-neutral stone cleaner rather than letting grime build up into something harder to shift.
- Avoid using generic household cleaners, vinegar, or bleach as regular cleaning products on sandstone. Vinegar is acidic and will etch the stone over time; bleach can cause discoloration, especially on iron-bearing sandstone.
- If you're BBQing or doing anything oily near the patio, lay down an old mat or sheet underneath to catch drips.
Oil stain removal on sandstone is very similar in approach to removing oil from other patio stone types, but the softness and iron content of sandstone means you have to be more careful with chemical strength and acid contact than you would with, say, concrete pavers. For more specifics on oil stains on pavers, see the step-by-step guide on how to get oil out of patio pavers oil stain removal on sandstone. Following the steps for oil stains on patios will help you remove the mark without damaging the stone oil stain removal on sandstone. The poultice method is your best friend here: slow, gentle, and genuinely effective on a material that punishes shortcuts. For a broader rundown of removing oil from patios in general, see our guide on how to get oil off a patio.
FAQ
Can I seal the sandstone patio right after removing an oil stain?
Yes, but only after you’ve done the poultice step (phase two). If you oil-stain treated sandstone and then immediately apply a sealer, you can trap any remaining oil inside the pores. Let the poultice cure completely, rinse well, and confirm the spot is fully dry before sealing.
Will mineral spirits or acetone always be safe on sandstone, or can they cause discoloration?
Usually not. Full strength mineral spirits or acetone-based poultices can lighten or spot sandstone if they spread beyond the stained area. To avoid a patchy look, use tape to contain the area, keep the poultice thick enough to remain in place, and rinse thoroughly when it’s done.
What should I do if the stain comes back as a lighter halo after the first cleaning?
If there’s still a dark halo after the poultice, it often means oil remains deeper in the pores, not that the surface was missed. Re-apply poultice, but first dry the area fully, then do a second treatment rather than repeatedly scrubbing with degreaser (scrubbing can just spread oils and residue).
I can’t identify whether my stain is oil or rust, what’s the safest order of operations?
Don’t treat unknown stains as oil. Start with neutral pH cleaning and water rinse, then do a small, hidden test before using any solvent or poultice. A quick ID check matters because rust chemicals can etch sandstone, while oil solvents can set unknown iron-rich marks into deeper discoloration.
How can I tell if my sandstone has iron minerals, and why does it change which cleaner to use?
Test for iron content by checking the stone for reddish or brown veining, and if possible test a cleaner on a small inconspicuous patch. If iron-rich, avoid strongly alkaline degreasers because they can react and create new staining. Use pH-neutral products first, then only move toward stronger options if the test patch shows no change.
Does acting fast with fresh oil prevent the need for a poultice?
Yes, and timing affects how well it works. If the spill is fresh, blotting plus a quick absorbent step helps, but once oil soaks in, poultice is the tool that pulls oil back out as it dries. For older stains, expect one full poultice cycle, sometimes two, instead of relying on a single scrub.
How do I prevent chemical residue from causing a secondary stain after treatment?
Stop and neutralize only if the product directions say so, otherwise stick to thorough plain water rinsing. The key is removing residue so it doesn’t continue reacting in the pores. For rust approaches, follow the label dwell time precisely, then rinse until runoff is clear, because leftover chemical can darken the area over time.
If I used poultice once, can I use the same absorbent material again for a different stain type?
It depends on the poultice base and the product you used. If your goal is oil removal, the standard oil poultice approach is compatible with common absorbents used for oil poultices, but if you used an acid-based solution for rust you should avoid bases that react with acid. When in doubt, stick to kaolin or diatomaceous earth for acid-based rust chemistry, and keep absorbents separate by stain type.
My stain looks lighter but still discolored, how long should I wait before deciding it’s not fully removed?
Yes, color differences can persist even after the oil is removed, because sandstone can take on a darker appearance where pores were saturated. The best bet is to let it dry fully after rinsing and, if needed, do a second gentle poultice cycle rather than switching to stronger chemicals. In some cases, resealing later will help even out the appearance.
Can I use a pressure washer to remove the oil faster, and when is it actually helpful?
If the pressure washer seems tempting for set-in oil, use it only as a final rinse after the poultice lifts the stain, not as the main extraction. High pressure can erode sandstone and widen pores, which makes future oil pickup worse. Keep pressure moderate, use a wide fan, and hold the nozzle well back.
Next Articles

How to Remove Thompson’s Patio Sealer Step by Step
Step-by-step removal of Thompson’s patio sealer on concrete, brick, pavers, and stone, with safety, tests, and cleanup.
Can You Remove Patio Sealer? How to Strip It Safely
Learn if you can remove patio sealer and how to strip it safely by type, material, and method.
How to Remove Resin From Patio Safely by Surface Type
Step by step guide to remove resin from patio by surface type with safe scraping, softening and solvent methods.