You can polish a concrete patio by grinding through a sequence of diamond grits, starting as coarse as #50 or #100 to remove the surface skin, then stepping up through #200, #400, #800, and beyond until you hit the sheen level you want. Apply a silica densifier around the #400 stage to harden the surface, then finish with a concrete polish or penetrating sealer to lock in the shine and protect against stains. The whole process takes a weekend for most patios, a bit longer if you have significant staining or old sealers to strip first.
How to Polish Concrete Patio: Step-by-Step Guide

Dylan Hale
4 Jun 2026
Decide what you actually want: smooth finish or high gloss?
"Polishing" means different things to different people, and it's worth being clear before you buy or rent anything. There are two realistic outcomes for an outdoor patio.
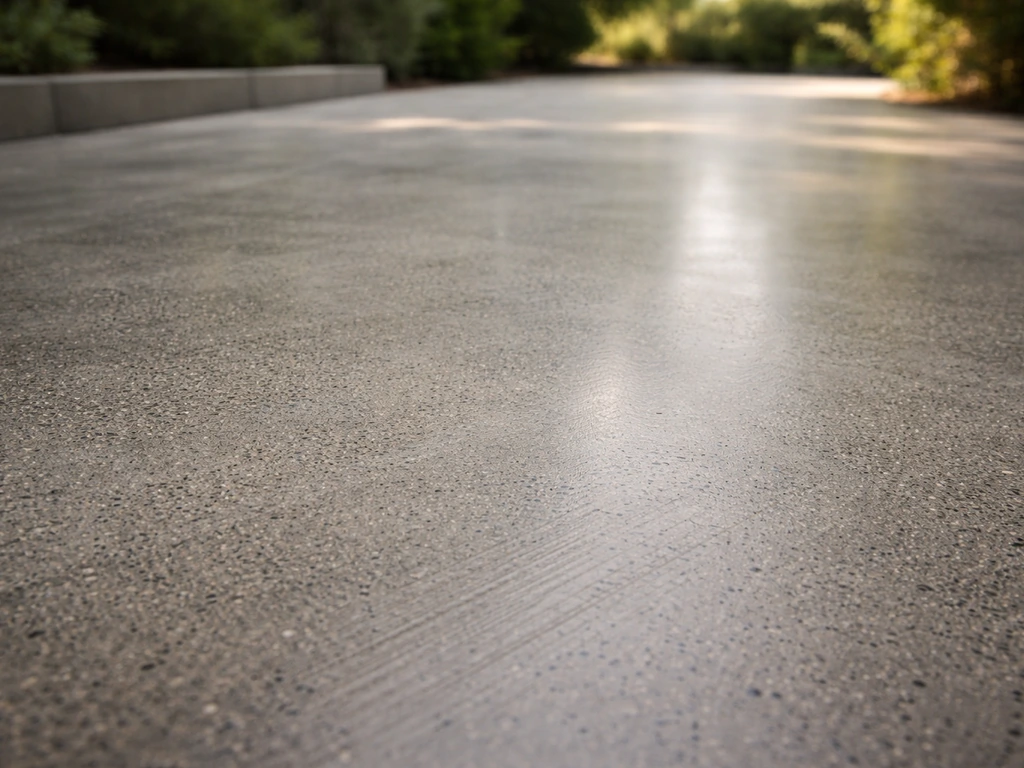
- Smooth, natural finish: You grind off the rough surface skin, level out minor bumps and texture, and end up with a clean, satin-like look. You'd typically stop around #400 grit. It won't be mirror-bright, but it'll look intentional and refined, resist staining better than raw concrete, and feel good underfoot.
- High-gloss finish: You continue through #800, #1500, and even #3000 grit pads, using a densifier and finishing with a gloss-enhancing topical sealer or concrete polish product. You get a reflective shine similar to polished interior floors.
Here's the honest outdoor caveat: high gloss is harder to maintain outside. Sun, rain, leaf tannins, and foot traffic all work against a mirror finish faster than they would indoors. I've found that most homeowners are happiest with a mid-range finish, something in the #400 to #800 range with a good penetrating or semi-gloss sealer on top. It looks great, holds up, and doesn't turn into a slip hazard when wet. If you want full gloss, plan to re-seal every one to two years.
Assess the surface before you do anything else
Polishing refines what's already there. It cannot fix deep spalls, structural cracks, or widespread crumbling. Walk the patio and be honest about what you're working with. Minor surface pitting, light scaling, and small hairline cracks are fine. Anything with chunks missing, rebar showing, or cracks wider than a quarter inch needs concrete repair first, not polishing.
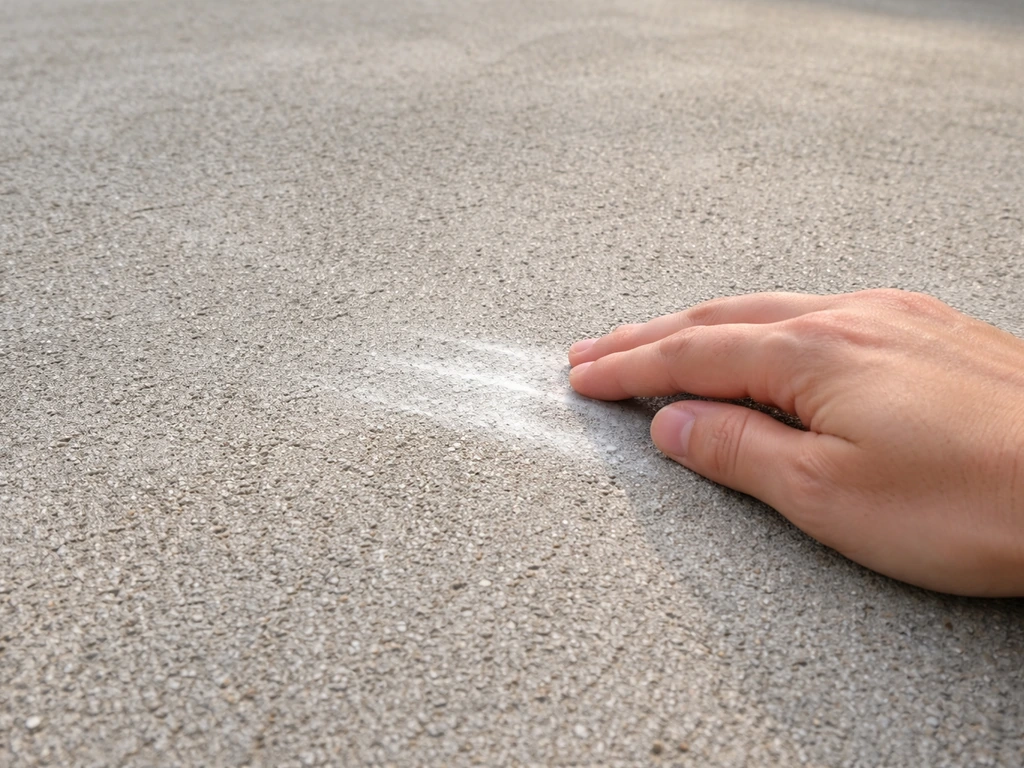
Run your hand across the surface. If you get a powdery residue, that's laitance, a weak cement paste layer that sits on top of sound concrete. Pressure washing alone won't remove it because it doesn't mechanically break down the weak layer. You need to grind through it. This is actually one of the best reasons to polish a patio: laitance makes concrete porous and stain-prone, and grinding it off gives you a much stronger, denser surface to work with.
Check for existing sealers or paint
If your patio was previously sealed or painted, you need to remove that coating before polishing. Sprinkle a few drops of water on the surface. If the water beads up, there's a sealer present. Coatings will clog your diamond pads immediately and give you an uneven result. Use a chemical paint or sealer stripper rated for concrete, scrub it in, let it dwell for the time listed on the label (usually 20 to 30 minutes), and scrape off the residue. Follow up with a thorough rinse. If you have a particularly heavy or old epoxy coating, you may need a coarse #30 or #50 metal-bond diamond pad just to cut through it before you start your normal grinding sequence.
Fill cracks and holes
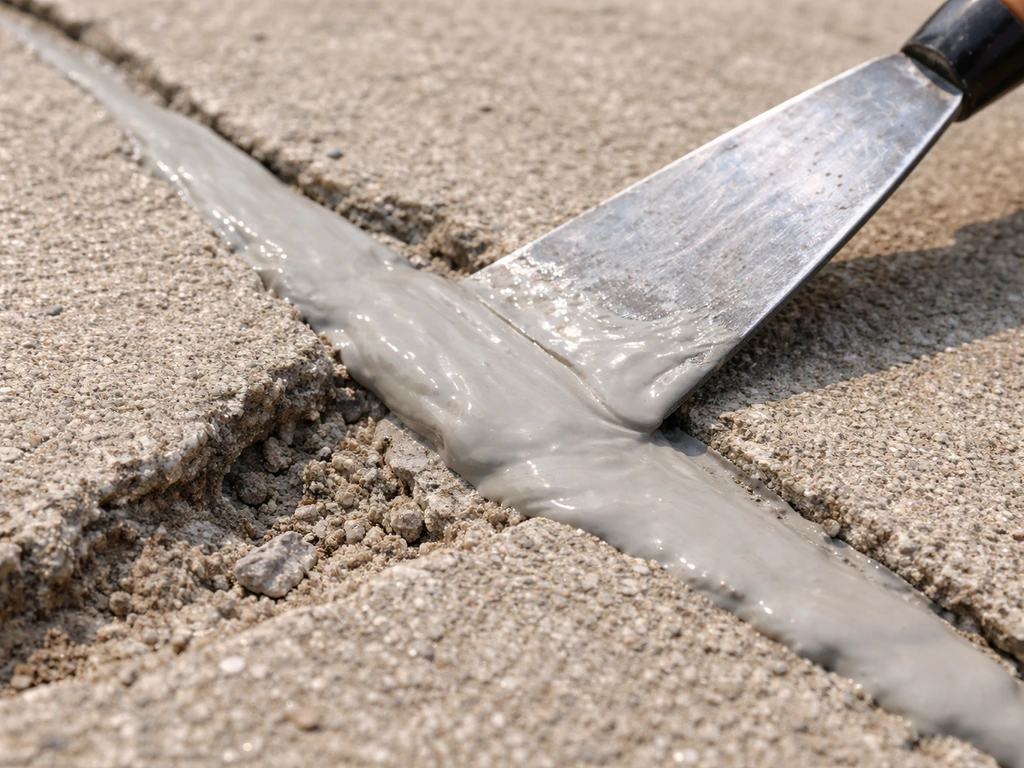
Use a polyurethane or epoxy concrete crack filler for anything wider than a hairline. For surface pitting, a skim coat of concrete resurfacer works well. Let repairs cure fully before you grind, check the product label but 24 to 48 hours is typical. Grinding over uncured repairs tears them out and you're back to square one.
Remove stains and organic growth before you grind
This step trips people up. You might think grinding will just take care of surface stains, and sometimes it does for very shallow discoloration. But deep oil stains, rust, or biological growth left under diamond pads can smear further into the opened pores of fresh concrete. Clean first, grind second.
Mold, mildew, and algae
For mold and algae, I use a sodium hypochlorite solution: mix one part household bleach (5 to 6% sodium hypochlorite) with three parts water. Apply it to the affected area, let it sit for 10 to 15 minutes, then scrub with a stiff-bristle brush and rinse thoroughly. This is effective and fast. If you have pets or nearby plants you're worried about, a white vinegar solution (undiluted, applied and left for 20 to 30 minutes) works as a gentler alternative, though it takes longer and may need a second application on heavy growth. Either way, let the surface dry completely before grinding. Wet diamond pads on a wet surface can still move biological residue around rather than cutting cleanly.
Oil and grease stains
Degrease with a concentrated concrete degreaser or a heavy-duty dish soap like Dawn mixed into warm water. Pour it directly on the stain, work it in with a brush, and let it sit for 15 minutes. For old, set-in oil stains, applying an absorbent paste of baking soda and dish soap, leaving it overnight, and then scrubbing and rinsing often pulls up what a quick scrub won't. Rinse well.
If an oil shadow still shows after drying, a diluted muriatic acid wash (1 part acid to 10 parts water) can help break down the remaining residue, but use it only as a last resort before grinding, wear nitrile gloves and eye protection, and neutralize with a baking soda and water solution before rinsing.
Rust stains
Rust needs an oxalic acid-based cleaner or a dedicated concrete rust remover. Apply, let it dwell for five to ten minutes (you'll often see it start to fizz and lift), scrub, and rinse. Don't leave acid-based products sitting longer than directed; they can etch the surface unevenly. Neutralize with a baking soda solution and rinse thoroughly before moving on.
Mineral deposits and hard water stains
White crusty deposits from hard water or efflorescence respond well to a diluted muriatic acid solution (1 part acid to 10 parts water). Wet the surface first with plain water, apply the acid solution with a nylon brush (never metal), let it sit for two to three minutes, scrub, then neutralize immediately with a baking soda and water solution and rinse fully. Always work with ventilation, keep the acid away from metal fixtures, and wear gloves, eye protection, and old clothes. Muriatic acid is effective but you need to respect it.
The polishing workflow: tools, grits, and technique
Now that the surface is clean, dry, and repaired, you're ready to grind and polish. Here's how the tool choices break down for a DIY patio project.
Tool options
| Tool | Best for | Limitations |
|---|---|---|
| Angle grinder with diamond cup wheel or polishing pads | Small patios, edges, spot work, tight areas | Slow on large areas, requires steady hand pressure for even results |
| Variable-speed angle grinder (4.5" to 7") | Medium patios up to about 200 sq ft | Still labor-intensive; arm fatigue is real on a full patio |
| Rental floor grinder / polisher (walk-behind) | Patios 200 sq ft and up | Costs $80 to $150/day to rent but covers ground fast and evenly |
| Random orbital concrete polisher | Finishing passes at higher grits (#400+) | Not ideal for initial coarse grinding or sealer removal |
For most standard patios, I'd recommend renting a walk-behind grinder for at least the coarse grinding passes and using an angle grinder for edges and corners. It's a meaningful cost difference from doing it all by hand, but the result will be noticeably more even.
The grit sequence
The most important rule in concrete polishing is this: don't skip grits. Each grit removes the scratch pattern left by the previous one. If you jump from #100 to #400, the #400 pads cannot fully erase the deep #100 scratches, and you'll be left with a hazy, uneven surface that you'll have to re-grind at the missed step anyway. It's tempting to rush, but follow the sequence.
- Start with #50 or #100 metal-bond diamond pad: This removes laitance, old sealers, and surface imperfections. Move the grinder in overlapping passes at a consistent pace. The surface will look dull and scratched at this stage. That's correct.
- Step to #200 grit: This is the transition between grinding and polishing. Scratches from the coarse pass become finer. The surface starts to look more uniform.
- Step to #400 grit: At this point the patio begins to look noticeably smoother. If you want a natural satin finish, this is a reasonable stopping point for an outdoor space.
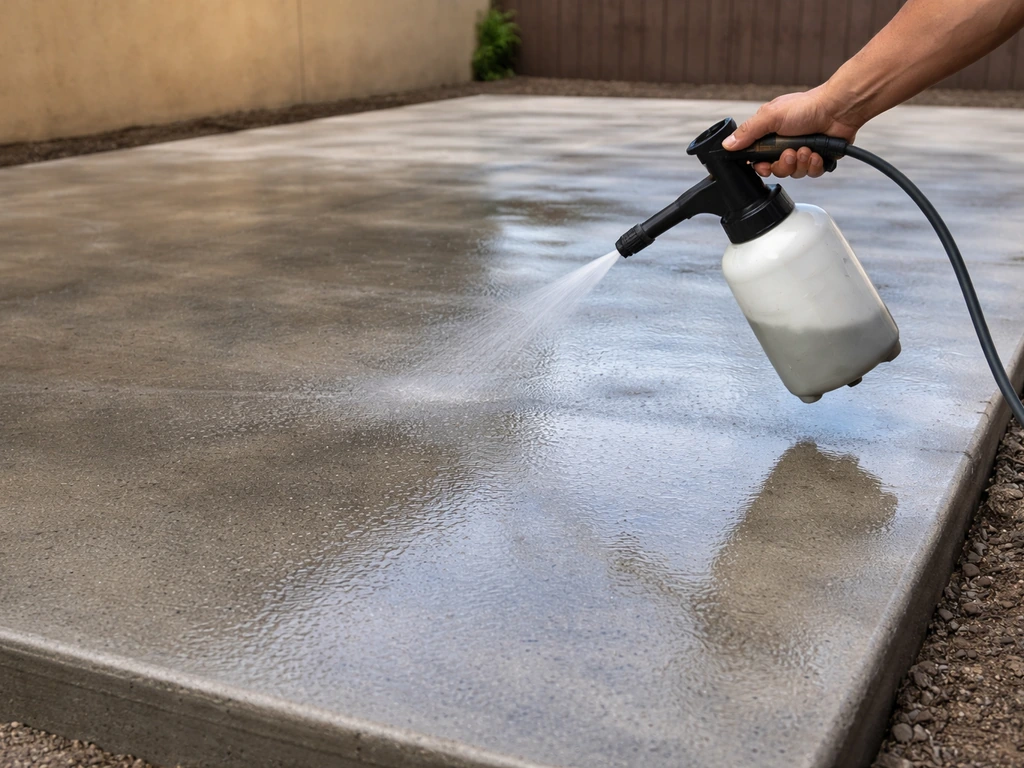
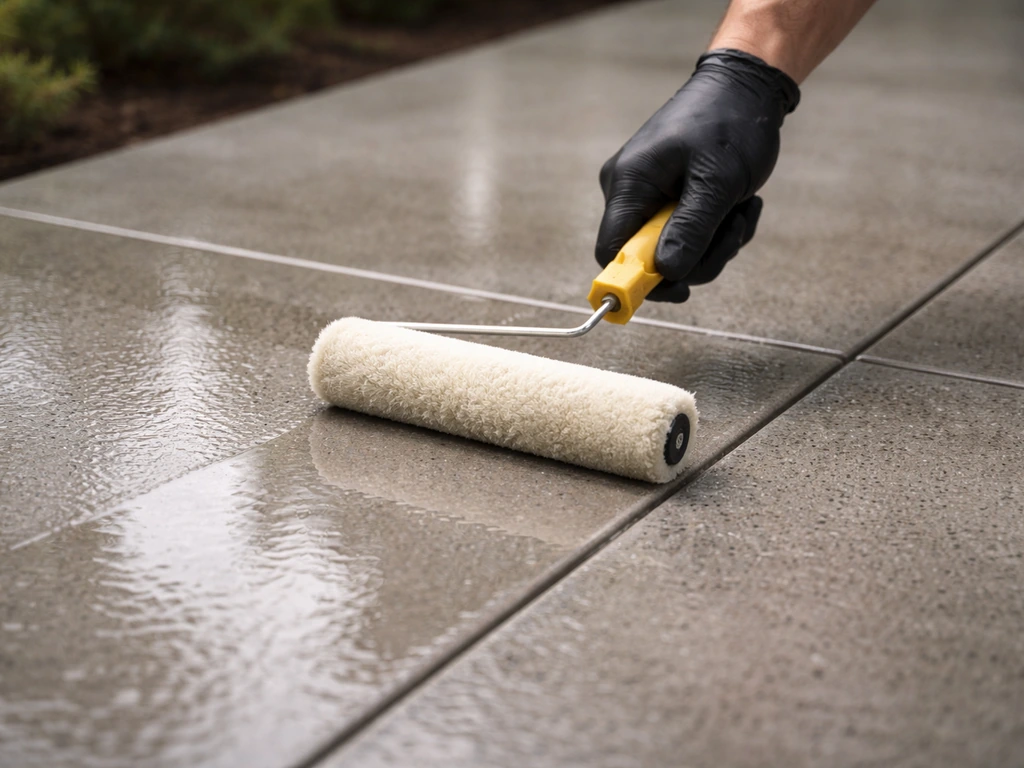
- Apply densifier: After the #400 pass and before moving to finer grits, apply a silica-based concrete densifier. Spray or roll it on, work it into the surface with a microfiber pad or mop, and let it penetrate and dry (usually 30 to 60 minutes, check the label). Densifier reacts with the concrete to harden and tighten the surface, which is what allows higher grits to actually build gloss.
- Step to #800 grit: After densifier has fully dried, continue with #800. You'll see real reflectivity starting to develop.
- Step to #1500 and #3000 grit (for high gloss only): These ultra-fine passes build the mirror-like shine. Skip these if you're going for a natural outdoor finish.
Work in consistent overlapping passes, keeping the pad flat and moving at a steady pace. Rushing any single pass means you'll leave high spots that later grits can't fix without re-doing that stage. Vacuum or mop up slurry between grit changes so you can see the surface clearly and check your progress.
Densifiers, sealers, and products that protect your finish
Densifier and sealer are not the same thing, and both matter for an outdoor patio.
Silica densifier
Applied mid-process (after #400 grit), a lithium or sodium silicate densifier soaks into the concrete and chemically reacts with calcium hydroxide in the mix to form calcium silicate hydrate, which is essentially harder concrete. It doesn't leave a coating on top. It makes the surface denser, which helps finer diamond pads cut and refine rather than just scratching. For outdoor use, a densifier is not optional if you want real shine; without it, your #800 and #1500 passes will underperform.
Sealer options for outdoor patios
| Sealer Type | Finish Level | Outdoor Durability | Reapplication Frequency |
|---|---|---|---|
| Penetrating/impregnating sealer (silane-siloxane) | Low to natural sheen | Excellent; won't peel or flake | Every 3 to 5 years |
| Acrylic topical sealer | Satin to medium gloss | Good but can wear and yellow in UV | Every 1 to 3 years |
| Polyurethane topical sealer | Medium to high gloss | Very good UV resistance | Every 2 to 3 years |
| Epoxy coating | High gloss | Good abrasion resistance but can delaminate outdoors over time | Every 3 to 5 years or as needed |
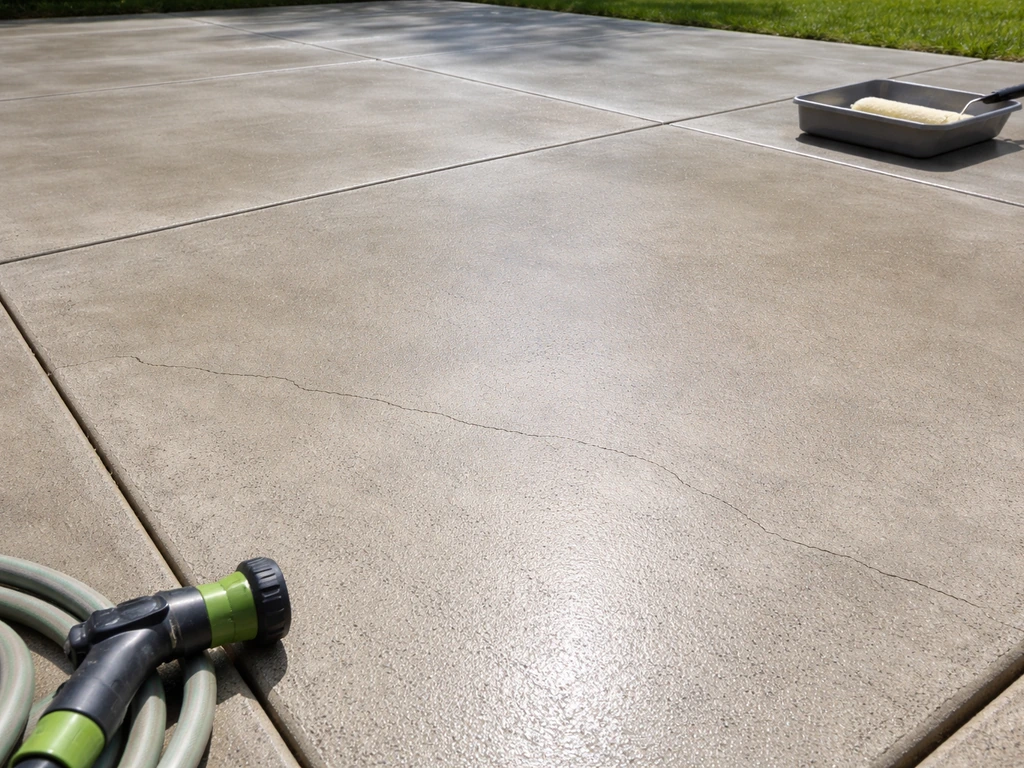
For most outdoor patios, I'd point you toward a penetrating sealer as the baseline because it doesn't sit on top as a film that can peel, chip, or turn slippery when wet. If you want more visible sheen, a UV-stable polyurethane topical sealer applied in two thin coats is a solid choice and holds up better outdoors than a standard acrylic. Apply sealer only to a fully dry surface (48 hours minimum after final polish pass), use a microfiber roller or applicator pad, and follow the manufacturer's coverage rates. Thin even coats always beat one thick coat.
Outdoor-specific finishing and keeping it slip-safe
This is the part most polishing guides skip because they're written for interior floors. Outdoor patios get wet. A highly polished concrete surface without the right finish can become dangerously slippery in rain, morning dew, or near a pool. This is especially true with gloss-level topical sealers.
- Add anti-slip aggregate to your sealer: Most sealer manufacturers sell a fine aluminum oxide or polymer grit additive that you mix into the final coat. It creates microscopic texture that improves traction without visibly dulling the finish.
- Consider stopping at #400 to #800 grit outdoors: A mid-range finish is naturally less slippery than a #3000 mirror polish and holds up better to outdoor conditions.
- Choose a penetrating sealer if traction is a primary concern: Because it doesn't form a surface film, it doesn't create the smooth, wet-slick effect that topical sealers can.
- Check the wet coefficient of friction: Some sealer products list a wet COF rating. Look for 0.60 or higher for outdoor pedestrian surfaces.
- Avoid gloss topical sealers near pool decks or in shaded areas: Shaded spots stay damp longer and build algae faster, which makes any smooth surface slippery quickly.
One practical test: once your sealer is fully cured (follow the label, typically 24 to 72 hours), wet a small area and walk across it in smooth-soled shoes. If you feel any sliding, add another coat of sealer with anti-slip additive mixed in before calling the project done.
Troubleshooting common problems, plus cleanup and aftercare
Surface looks hazy after polishing
Haze usually means one of three things: residual slurry or dust wasn't fully cleaned between grit changes, you applied densifier too heavily and didn't work it in completely, or you skipped a grit step. If cleaning with a damp mop and a pH-neutral cleaner doesn't clear the haze, you likely need to go back one grit step and re-do that pass more carefully. This is frustrating but it's the only real fix.
Uneven color or blotchy areas
Uneven color after polishing usually traces back to uneven grinding. Areas where you moved faster or applied less pressure will be slightly higher and less refined than surrounding areas, and they'll catch light differently. You also sometimes uncover aggregate pockets or old repairs that look different from the surrounding concrete. Light blotchiness often evens out after sealing because the sealer unifies the surface appearance. Persistent patches may require re-grinding that area to match depth and then re-doing the full polish sequence on that zone.
Still rough or scratchy after polishing
If the surface still feels rough after what you thought was a complete sequence, the most common cause is worn-out diamond pads. Diamond pads have a finite lifespan and worn pads stop cutting efficiently before they look obviously damaged. If you're getting diminishing results on a given grit, swap in a fresh pad and re-do that pass. The difference is immediately obvious.
Surface won't hold gloss
If you're not getting the gloss level you expect even after fine-grit passes, check whether you applied densifier. Without it, the surface is too porous for fine grits to build a real reflective surface. Apply densifier, let it cure fully, then re-do your #400 pass and work back up through the grit sequence.
Final cleanup and curing
After your final polish pass and before sealing, vacuum or dry-mop all dust, then damp-mop with a pH-neutral cleaner and let the surface dry completely. Any remaining dust or grit under a sealer will show. Give the polished surface at least 24 hours to fully dry before applying sealer. After sealing, keep the patio dry and off-limits to foot traffic for the full cure time listed on the sealer label, which is typically 24 to 72 hours. Avoid washing or placing furniture on it during that window.
Ongoing maintenance after polishing
A polished and sealed patio is meaningfully easier to clean than raw concrete because stains can't soak in as easily. Sweep regularly to prevent grit from acting as an abrasive underfoot, clean spills quickly, and use a pH-neutral cleaner for routine washing (avoid bleach directly on topical sealers as it can degrade them over time). For mold or algae that eventually returns, the diluted bleach or vinegar methods described earlier work fine on sealed concrete, but rinse thoroughly.
Re-seal on the schedule for whatever product you chose. If you want to refresh the look without stripping everything, use a concrete polish maintenance product to restore some sheen between full re-sealing cycles Re-seal on the schedule. If you want to refresh the look between full re-sealing cycles, a concrete polish maintenance product (sometimes called a guard or maintainer) can be buffed in to restore some sheen without stripping and redoing the whole surface.
If you want a quick way to refresh your patio without redoing the whole polish job, use a concrete polish maintenance product to restore some sheen between full re-sealing cycles. The deep cleaning and acid-washing steps covered elsewhere on this site are also useful tools for keeping a polished patio in good shape year to year.
FAQ
Can I polish over hairline cracks and small pitting without doing repairs first?
If the cracks are truly hairline and the surrounding concrete is stable, you can often grind and polish over them, but you should still spot-check by scratching at the crack with a coin or key. If edges crumble or you see lifting, repair first with an appropriate filler or resurfacer, then let it cure fully before the first coarse grit pass.
What should I do if my patio has old paint or epoxy, and water still beads after stripping?
Water beading after stripping usually means coating residue remains in pores or seams. Repeat the concrete-rated stripper and rinse thoroughly, then do a dry test by sprinkling a few drops of water again. If it still beads, keep stripping until water no longer beads, because any leftover film can clog diamond pads and cause patchy polishing.
How do I prevent leaving visible swirl marks or high spots from grinding passes?
Use a steady pace, keep the pad flat, and overlap every pass consistently (think “wetting the area” with controlled coverage). If you pause in one spot, you can create a shallow low area that later grits cannot correct cleanly, so plan your approach to avoid stopping mid-pattern and check with a flashlight obliquely after each grit change.
Is densifier supposed to make the concrete look darker or blotchy right away?
It can. Densifier may temporarily darken wet-looking areas and sometimes streak if it is applied too heavily or not worked in. Apply at the recommended rate, spread evenly, and allow proper dwell or cure time before moving to the next grit. If you see obvious blotches, you may need to re-grind that area before finishing.
Do I need densifier if I am only aiming for a satin or semi-gloss finish?
For outdoor patios, skipping densifier often still causes underperformance of the finer grits, even when the target finish is modest. You can sometimes get acceptable results without densifier on newer, very hard concrete, but it is the most common reason for dull look, rough feel, and haze at the #800 and finer stages.
Can I use the same approach and sealers for both shaded patios and patios in full sun?
You can, but full-sun exposure accelerates wear of topical finishes. In bright areas, prioritize UV-stable products and thinner even coats, then re-check the anti-slip wet test after the final cure. If your sheen is changing unevenly over time, a refresh maintenance product may help, but heavily worn areas usually require re-sealing.
What’s the safest way to avoid making the patio dangerously slippery after polishing?
Target a mid-range sheen and use a sealer designed for outdoor traction, especially if you want a glossy look. Before declaring the job done, perform the wet walk test in smooth-soled shoes after full cure. If you feel sliding, incorporate an anti-slip additive into the next thin coat rather than trying to sand or grind after sealing.
How long should I wait between polishing and sealing to make sure it actually bonds?
Plan for more than “dry to the touch.” Let the patio dry at least the minimum time stated for the final polish pass, then verify by staying dust-free during setup. Many failures come from sealing while microscopic dust remains, so vacuum and then damp-mop with a pH-neutral cleaner before the final dry window.
My sealer looks streaky or uneven, how can I troubleshoot it?
Streaking often comes from uneven surface prep, leftover grit, or applying too much product in one area. Make sure you have removed all slurry residue, applied sealer in thin even coats using consistent coverage, and avoided puddles. If streaks appear after cure and cleaning will not resolve them, you may need light re-grinding of the affected zone and re-sealing that area to match sheen.
Why does my polished patio haze, and what should I try first before re-grinding?
Haze is commonly from incomplete grit sequence, residual slurry between steps, or excess densifier that was not fully worked in. First, clean thoroughly with a pH-neutral cleaner and allow full drying. If it still looks hazy, the fix is usually to go back one grit stage and re-do that pass carefully, since haze from skipped grits usually cannot be “buffed out” reliably.
My oil stain is still visible after cleaning and polishing, does that mean the stain is permanent?
Not always. Some staining is caused by residue that was not fully removed before grinding, or it is deeply embedded. If it persists after grinding, try a focused degrease or absorbent poultice technique first, then grind again once fully dry. If the stain is structural or mineral-based, you may need a targeted acid or rust-cleaning step suited to the stain type before returning to polishing.
What grit sequence should I expect for typical outdoor patios with minor discoloration?
A common approach is starting coarse enough to remove the top skin, then stepping through successively finer grits without skipping. If you find you need to re-do a grit because you can still see scratch shadows from earlier grits, that is a sign you are either missing an intended grit step, using worn pads, or not keeping a steady overlapping pattern.
How do I know my diamond pads are worn out before the result looks bad?
If cutting performance drops, you will feel it as you move the grinder (it stops refining and starts glazing), and you will see diminishing change from one pass to the next on the same grit. If you notice you are taking longer than expected to achieve the same scratch removal, swap pads and re-run that grit rather than continuing forward.
Is it okay to pressure wash instead of grinding laitance off?
Usually no. Laitance is a weak cement layer that can look clean after pressure washing, but it remains mechanically weak and can still make the surface porous and stain-prone. The practical fix is grinding through the layer using the correct first grit pass, then proceeding with densifier and final sealing.
Next Articles
How to Refresh Concrete Patio: Step by Step Guide
Step-by-step how to refresh a concrete patio: assess damage, clean stains, repair cracks, then seal for protection.
How to Acid Wash Concrete Patio Step by Step Safely
Step-by-step guide to acid wash concrete safely: choose acid, dilute, scrub, rinse neutralize, and seal for better bondi

How to Remove Thompson’s Patio Sealer Step by Step
Step-by-step removal of Thompson’s patio sealer on concrete, brick, pavers, and stone, with safety, tests, and cleanup.